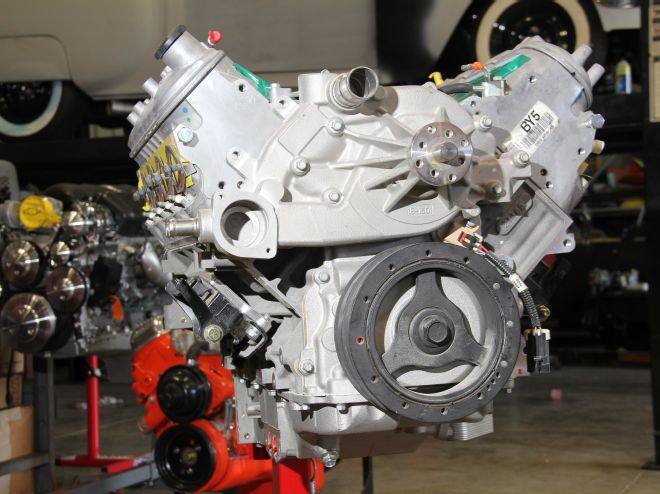
It has been a while since we did an installment of the March Performance ’57 convertible build, but I can assure you it is undergoing some rather time-consuming metalwork prior to paint at this point. In the meantime, we decided to start turning our attention to the mechanical aspects of the build, including the Chevrolet Performance LS7 crate engine. As a showpiece for March Performance products, rather than a hard-core track car, the factory dry-sump lubrication system was a very unnecessary complication. It would require careful placement of a tank and the routing of lines in such a way that did not take away from the great lengths North Port Auto Body had already gone to to improve the engine bay’s appearance. After much thought, it made sense with the overall build goals to simply replace the oil pan, pump, pickup, windage tray, and balancer. And thankfully when we called Scoggin-Dickey Parts Center, they have done so many of these that the crew hooked us up with every part we needed, including a spacer for the balancer (made in-house) and a slick Tech AFX guide to drill a hole for the dipstick.
For those ready to cry foul at such blasphemy, let’s keep a few things in mind. The factory LS7 oiling system uses just a single pressure and suction stage as well as an oil pickup at the bottom of the pan, unlike an aftermarket system with crank scrapers and three or more stages. By having three or more stages, the necessary suction is created for vacuum in the crankcase sufficient for better ring sealing and windage. This is where the power gains come from dry-sump oiling systems. The factory LS7 system, on the other hand, does not have that benefit. What it does accomplish, though, is to keep the engine in constant supply of oil in sustained, high-g cornering—like the long sweeping turns of Sebring Raceway—thanks to the vertical, external oil tank. With a set of sticky tires, the wet-sump pickup could be gulping air at the bottom of the pan instead of oil. But, again, that was not a concern on this build. This Tri-Five will see street and show time mostly, wearing regular street tires. If you’d like the cubes, power, and prestige of an LS7, but don’t plan on doing that much road racing, a wet-sump conversion is a wise plan.
1. The shallow oil pan with the inlet/outlet on the passenger side is the dead giveaway for the LS7’s OEM dry-sump system. Finding room to vertically mount an oil tank as well as the lines can be difficult in some applications, and is frankly unnecessary. This was definitely the case with the March ’57 convertible, which had already gone through great lengths to clean up the engine bay.
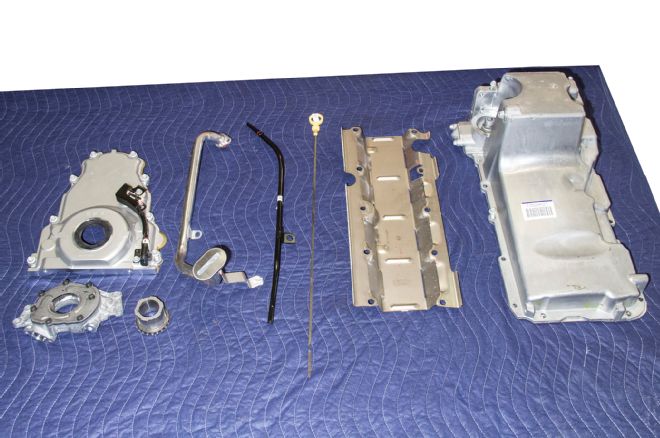
2. To convert the Chevrolet Performance LS7 crate engine to wet-sump, Scoggin-Dickey Parts Center sent us the Muscle Car Oil Pan kit with a dipstick tube, windage tray, pickup, hardware, and gasket (PN 19212593) as well as an LS3 oil pump (PN 17801830) and crank sprocket (PN 12556582). In addition, they informed us that we would need an LS3 timing cover (PN 12600325), gasket, balancer, LS7/LS3 crank bolt (PN 11570163), and spacer.
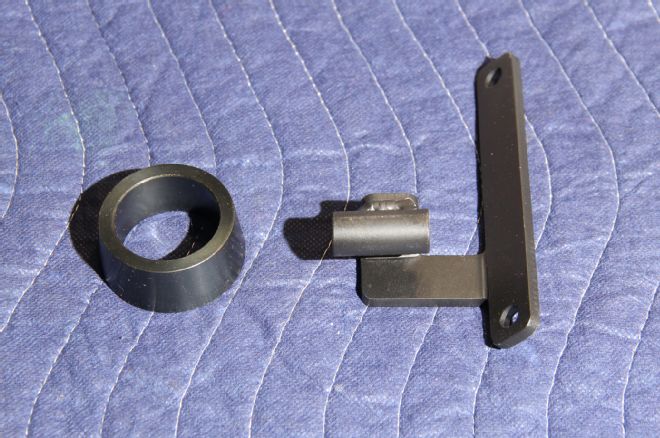
3. Scoggin-Dickey’s crank spacer (left) accounts for the LS7’s longer crank snout. The dipstick tube guide (right) from Tech AFX will allow you to drill through the block and create the necessary hole. Since the block was cast and machined to be dry-sump, there is no hole for the dipstick tube from the factory.
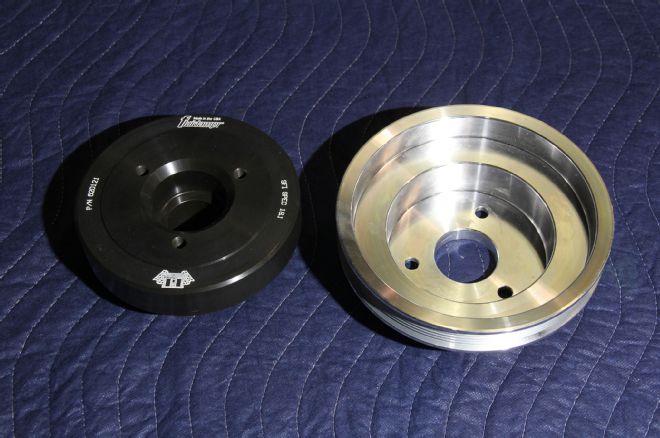
4. We will be using a March Performance serpentine pulley system so we opted not to order the LS3 balancer. Instead, we’ll be using a Fluidampr balancer as part of the kit. The March crank pulley will bolt to the front of the balancer. Fluidampr uses a silicone fluid (internally) to control harmonic vibrations and protect the crankshaft, main bearings, and other components.
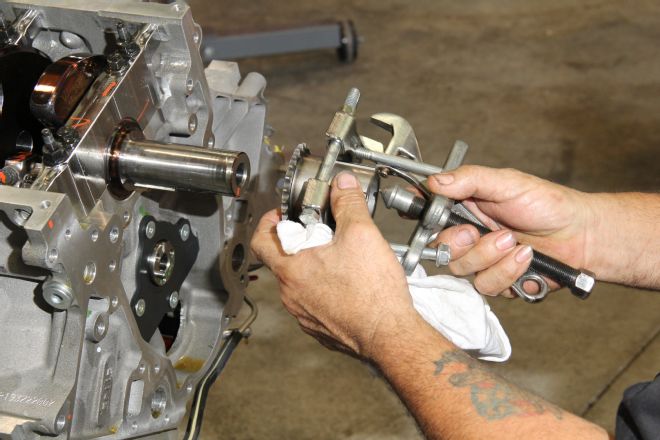
5. To start the install, Mike Morgenthaler at Saints & Sinners uses a three-jaw puller to remove the factory balancer.
6. The water pump is also removed, with a 10mm socket.
7. The engine is turned on an angle to access the oil pan and oil cooler bolts. Even after draining the pan, the engine still retains a lot of oil.
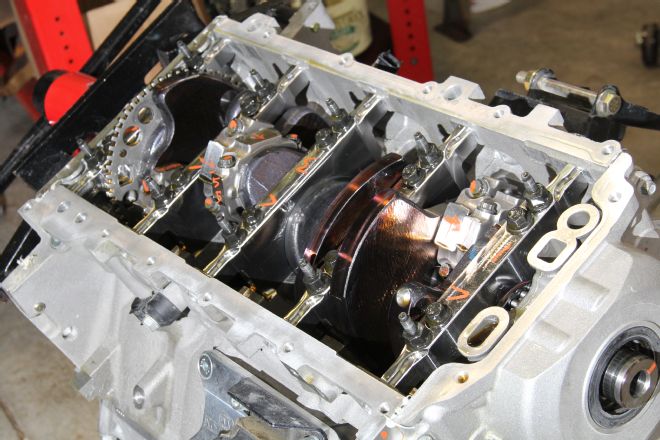
8. Mike unbolted the windage tray to reveal the glorious six-bolt mains, forged crankshaft, and titanium rods. Notice all the writing? LS7s are hand-built in the Performance Build Center.
9. The timing cover unbolts from the front of the engine to expose the front as well.
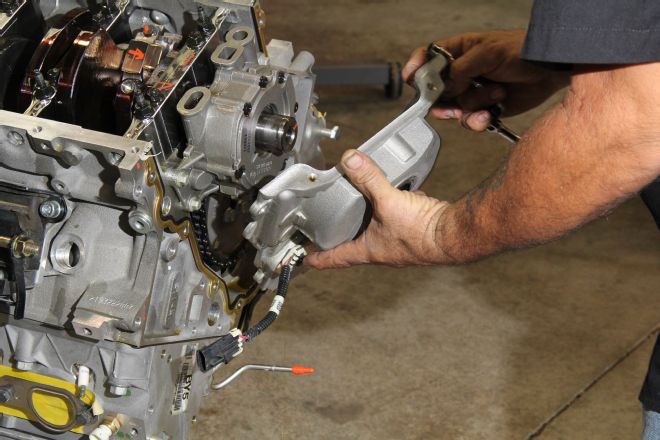
10. You’ll notice the bulky dry-sump pump is located in the same position as a standard wet-sump LS oil pump, but there is no pickup tube.
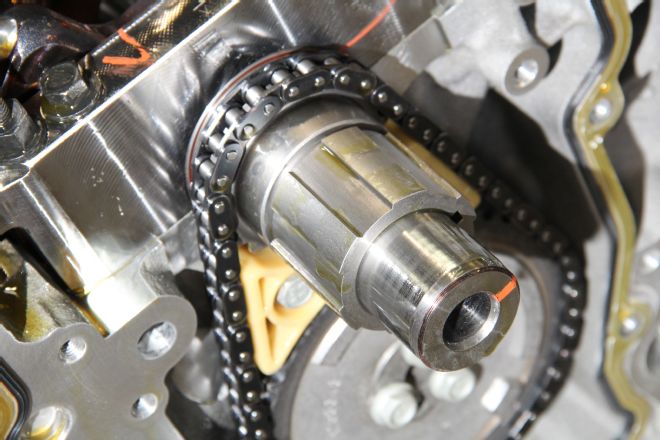
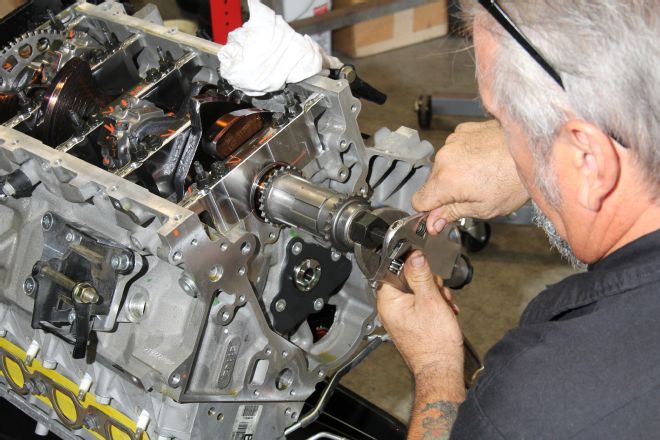
11. The LS7 oil pump uses a completely different drive gear and a longer crank snout than regular LS engines.
12. After removing the timing chain, damper, and cam gear, Mike used a bearing splitter to pull off the oil pump gear.
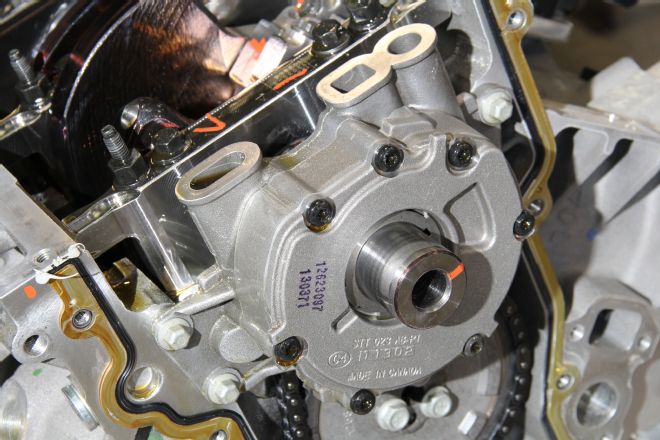
13. The old oil pump gear was then used to press on the new LS3 piece.
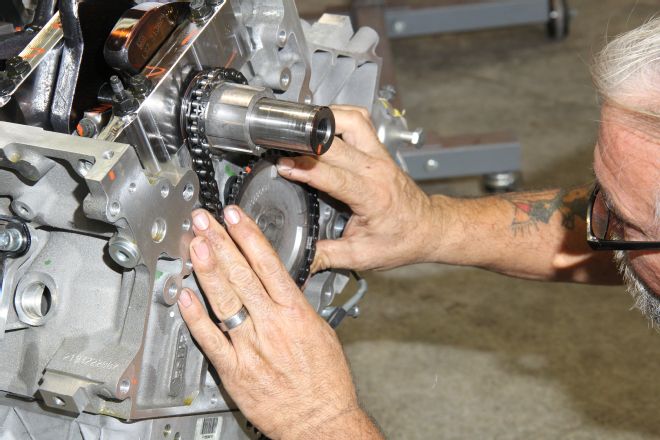
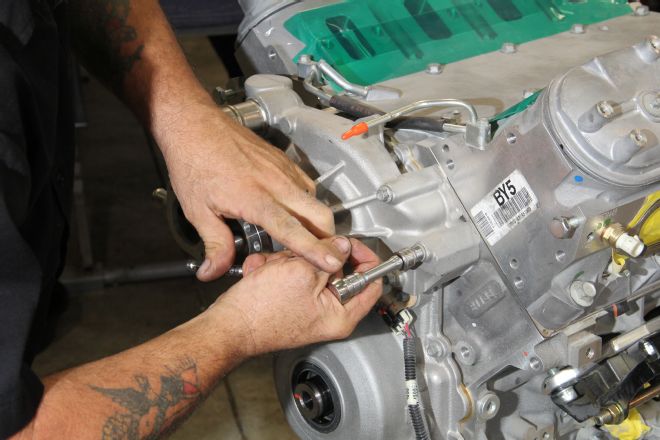
14. Once fully seated, Mike put the timing chain and cam sprocket in place. Using some Loctite, the sprocket was fastened to the cam with 104 in-lb.
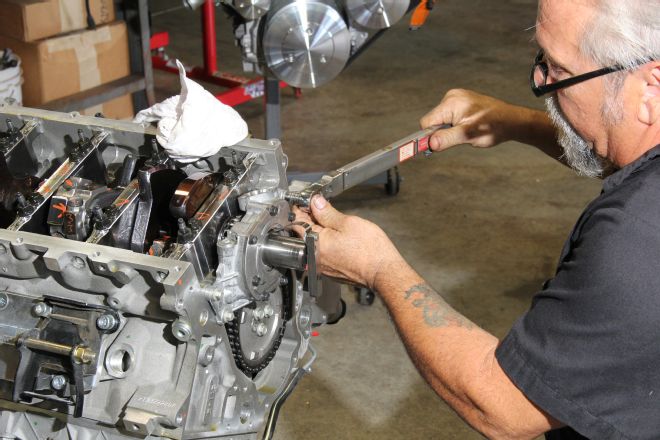
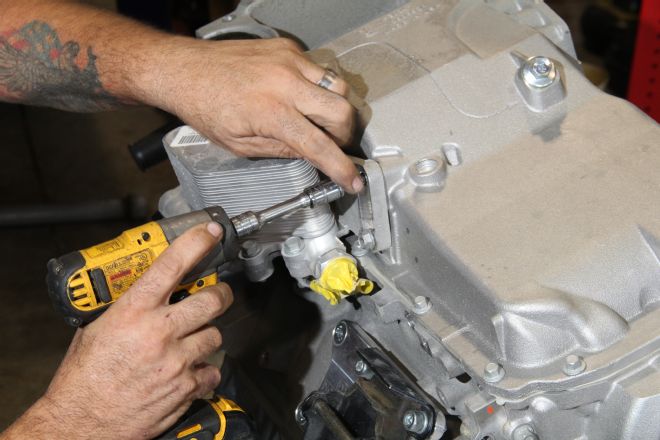
15. The oil pump bolts requires a little more torque (18 ft-lb) along with 0.0002-inch clearance around the snout–hence the feeler gauge.
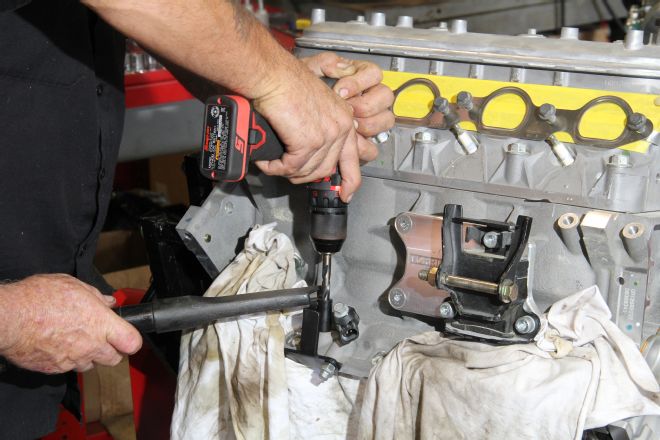
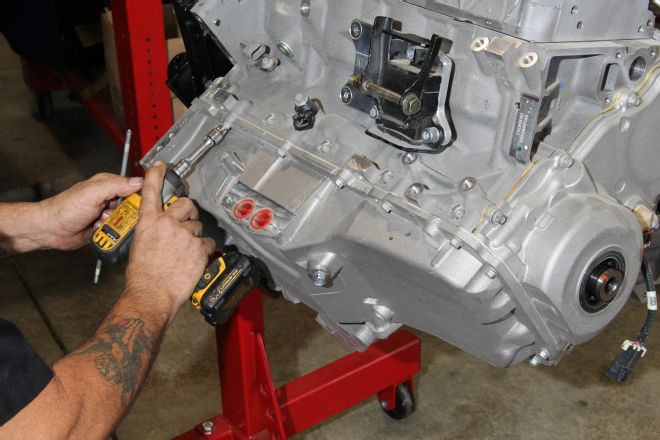
16. The Tech AFX guide plate simply bolts into the oil pan boltholes so that Mike can use a 3/8-inch drill bit to create the dipstick tube hole. A vacuum and copious amounts of shop rags were used to catch all the metal shavings so that they didn’t go into the engine. The hole needs to be countersunk to finish it off.
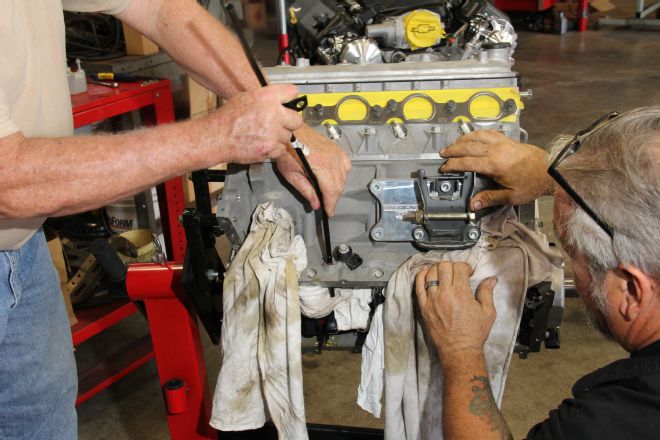
17. Once completed, Mike and owner Steve Ehrie test-fit the dipstick tube and check for debris.
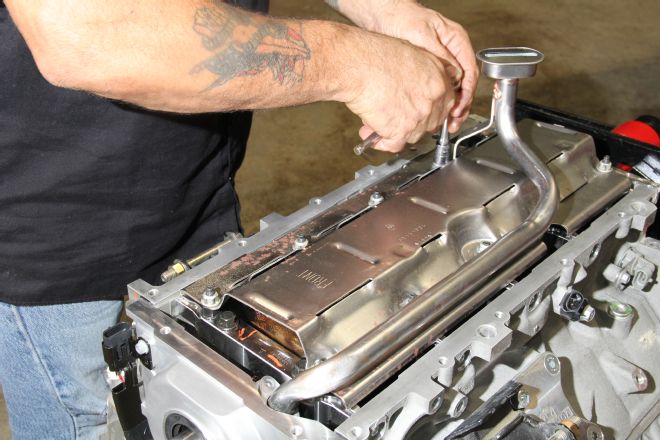
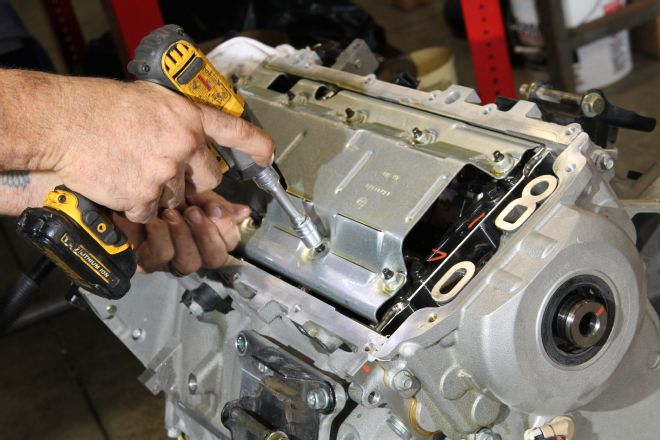
18. After the front cover is installed with an LS front cover alignment tool, the windage tray is bolted in place with washers to space it away from the crank. The LS3 tray was never intended for a 4-inch stroke, so you definitely want to turn the engine over a few times before buttoning it up.
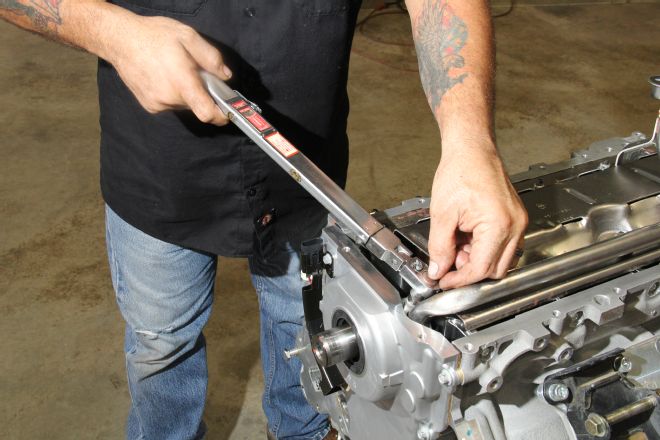
19. The pickup tube is secured with the nuts that hold the windage tray on the one side, and just one bolt to the oil pump itself (no, you didn’t lose a bolt).

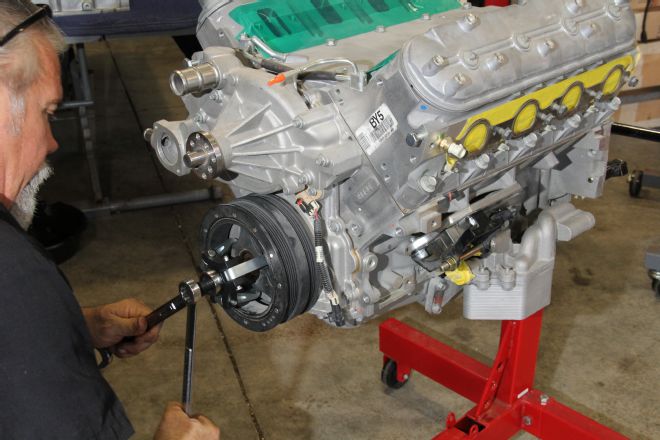
20. Mike presses on the balancer using some serious elbow grease and your standard installation kit.
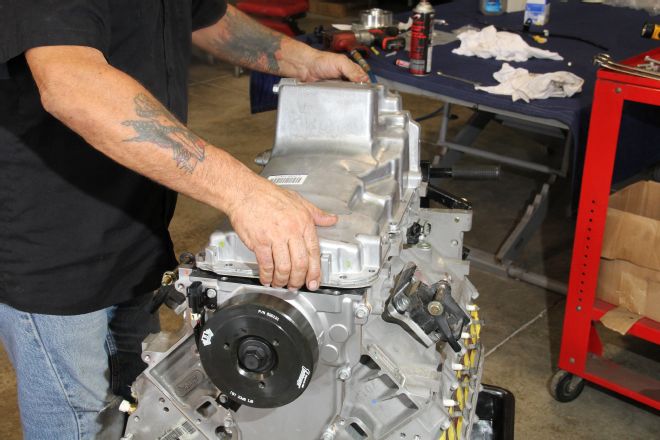
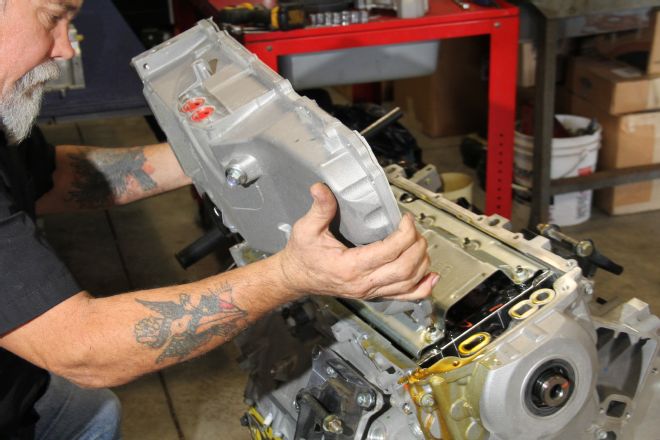
21. The Chevrolet Performance Muscle Car Oil Pan is set into place with the gasket and a dollop of sealant at all four corners, then bolted down.
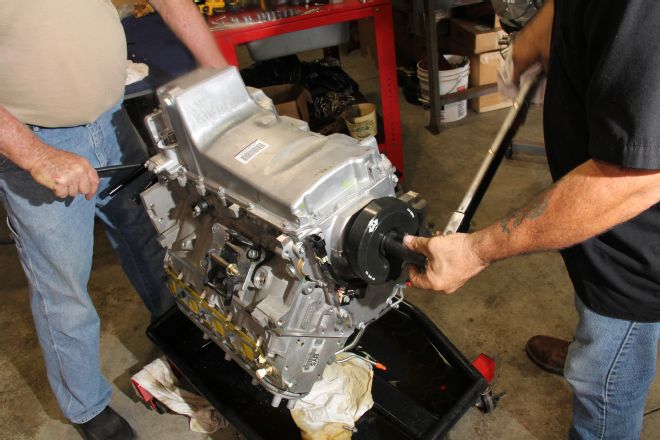
22. While Steve holds the flexplate, Mike torques the LS7/LS3 crank bolt to 140 ft-lb with the crank spacer in place. The spacer goes on after the balancer but before the bolt. In fact, it is best to have it in place when you press on the balancer. You’ll want to check the inside diameter and apply a little oil first.
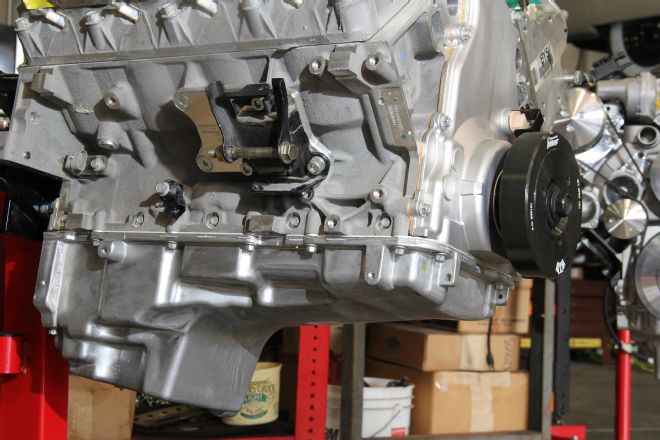
23. With the install complete, you can see that the Muscle Car Oil Pan is a deep rear-sump setup designed to fit most popular applications. In case you are wondering, you will need to pick up a new LS3 oil filter.
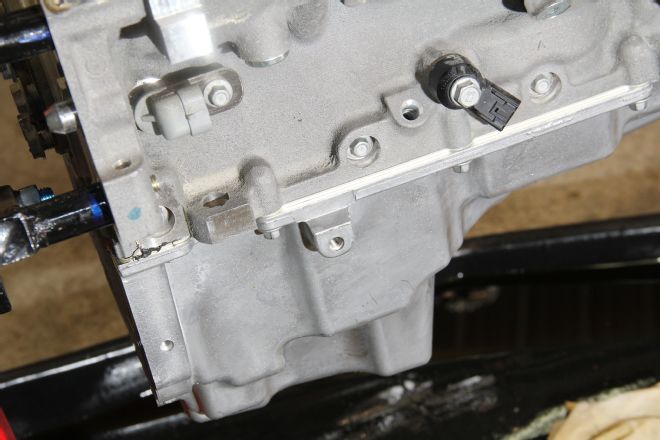
24. Even up close, the dipstick hole looks factory.
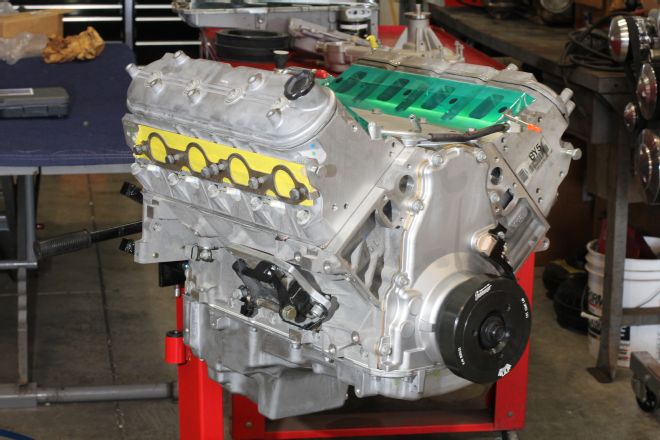
25. Alas, the wet-sump conversion is complete, and this thing is nearly ready to bolt into the ’57 convertible.
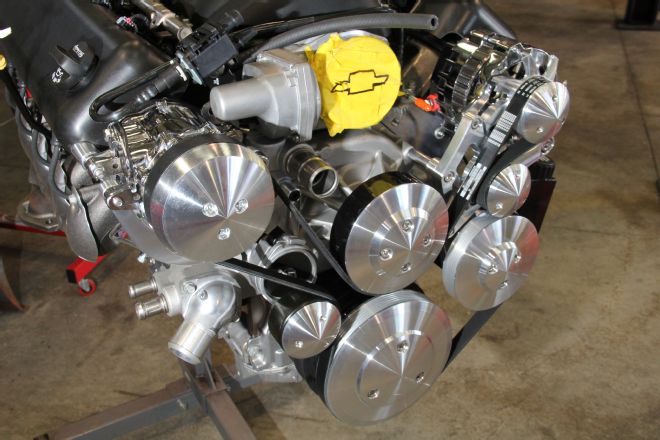
26. Saints & Sinners happened to have an LS3 with the March pulley system on it sitting on the stand. This is very similar to what will be used on the ’57. Stay tuned for more!
LS7 Wet-Sump Conversion on HotRod.com