Since the internal combustion engine is nothing more than an air pump the exhaust system is a very important part of the system. You know the story, air in, air out. In the world of street rodding squeezing every bit of horsepower isn’t always a huge priority but a high-performance exhaust system can provide more power and better gas mileage and that all-important tone that simply says hot rod.
Like many hot rodders, when we were building our Chevy 348 “W” motor we blocked off the intake manifold heat riser exhaust passages in an attempt to keep the intake manifold cool. Modern alcohol fuel boils quite easily so we did everything possible to keep the intake cool. However, blocking those passages effectively eliminates a crossover for the exhaust gases, making a crossover pipe even more important for an efficient engine.
After selecting the proper size exhaust pipe relative to the size of your engine (remember bigger isn’t always better) it’s time to choose a muffler to provide the exhaust note you like. If your car arrives at most shows in a box then a louder exhaust note may be fine. If, on the other hand, you plan on driving your hot rod for six or seven hours on the highway you will no doubt opt for a more subdued sound. Regardless of your choice in tubing and mufflers there is one often-overlooked item that can improve three distinct functions: power, gas mileage, and sound, and that item is a simple crossover pipe. Our research shows the crossover pipe is generally good for a few horsepower, the torque curve generally comes in earlier and the sound drops between 2 and 6 decibels. In most cases it will also take that dreaded highway drone and convert it to a purrrrrr. That’s a lot of benefit for one small modification.
We recently built a 348 Chevy engine running stock exhaust manifolds that we ported out to 2-1/8 at the exit flange. We opted for 2-1/4 stainless tubing for the exhaust system with a set of free-flowing mufflers from Stainless Specialties. The engine is going in a 1960 Corvette that has an X-member chassis reminiscent of a 1940 Ford frame. When it came time to run the crossover pipe there was precious little room behind the motor.
While it doesn’t happen often, in this case we could actually be considered “forward thinkers.” Rather than attempt to find a location for a crossover pipe or an X-pipe back in the chassis, we opted to run the crossover pipe forward, under the oil pan. This keeps the pipe tucked up and out of the way and by using a center flange it was all still removable.
Without going into a long theory on exhaust it seems for best results the crossover pipe should be as close as possible to the exhaust manifold or header collector. Our research also indicated the crossover pipe did not have to be the same size as the exhaust pipe, and some dyno-tests indicated that a smaller pipe produced more power and torque. That’s good news because it is easier to cut a hole for a smaller pipe. We decided on a piece of 1-1/2-inch exhaust tubing for the crossover pipe, which is roughly 70 percent of the main tubing size.
We purchased some stainless tubing and one 180-degree mandrel bend and set about fabricating the crossover pipe. To seal the flange we used a copper gasket cut from a piece of copper roof flashing and all fasteners are stainless steel. We fabricated both sides of the crossover pipe and tack-welded them to the head pipes. Then we bolted the center flange together and welded the crossover pipe to the head pipes while everything was bolted tight. This ensures a perfect fit. We were sure to allow ample time for everything to cool completely before we unbolted the flange. This is important as the tubing may still try to move around as it cools.
In the end our crossover pipe was very sanitary, virtually impossible to see and yet we are certain we will see gains in all three areas because of this small modification. We fabricated the entire system in about eight hours and felt it was time well spent.
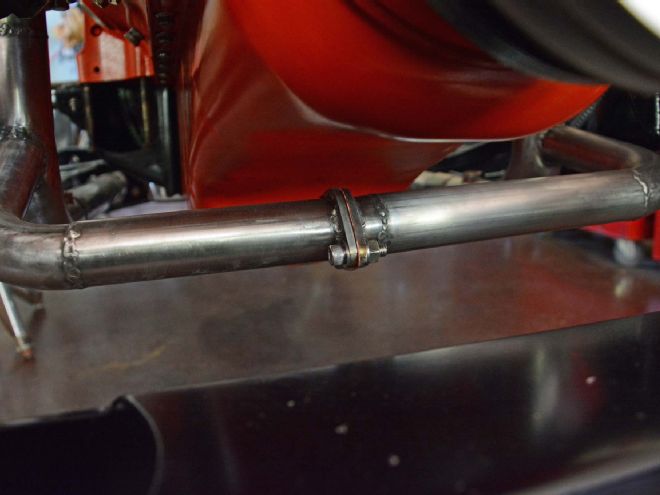
 Fitting a crossover pipe in an X-chassis is easier than you may think; the trick is to go forward under the oil pan. This clean and simple pipe will reduce noise and provide a little extra torque.
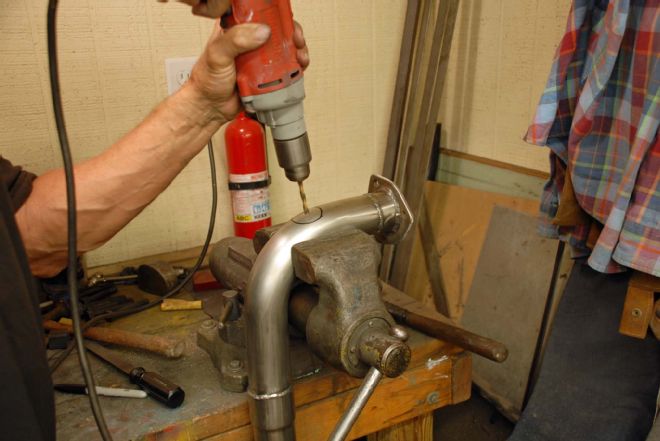 After determining and marking the best location for our crossover pipe we removed the stainless steel head pipe and drilled a pilot hole in the center of the location.
 We made the final hole with a Uni-bit we recently purchased. This bit goes all the way up to 1-1/2 inches, perfect for our crossover.
 A little work with a die grinder and carbide burr opened up the hole to accept our crossover pipe.
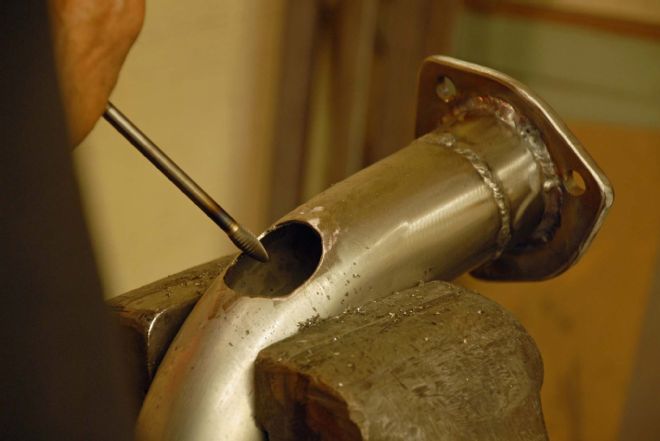
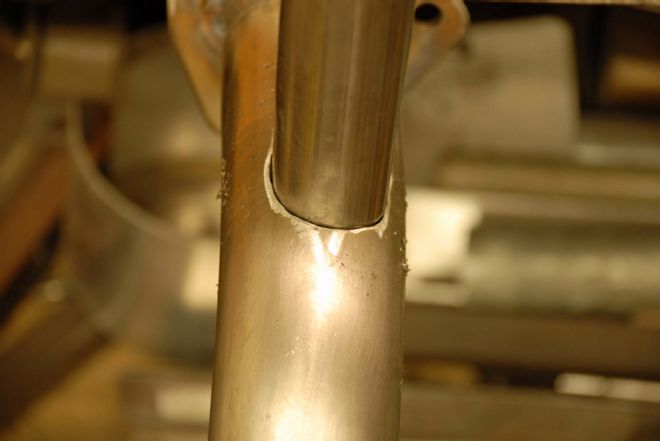 The opening is carefully fit to the pipe, which makes welding much easier. Also the end of the crossover pipe is trimmed so it does not protrude into the main head pipe.
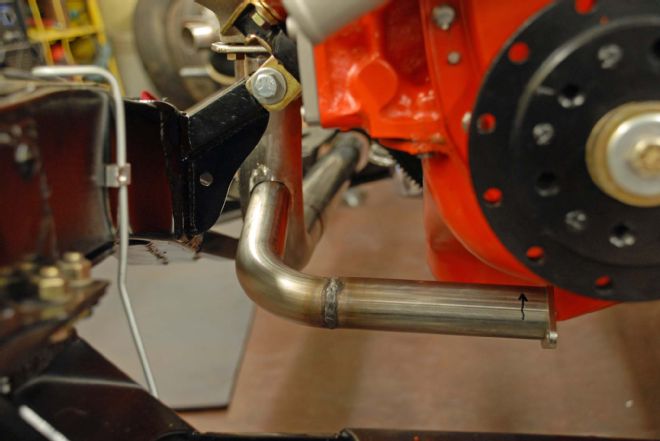 We used a 90-degree bend to make the turn along with short pieces of straight tubing. A simple two-blot flange will join the two sides. Here the pipe is testfitted for clearance and tack-welded using a Miller Synchrowave 200 TIG welder.
 Satisfied with the location of the pipe and flange, we TIG welded the flange to the pipe and began to make a copper gasket.
 Heavy copper roof flashing from your local box store works well for gasket material, a transfer punch locates the exact center of the flange hole.
 Two 5/16 holes were drilled for the flange bolts, the block of wood supports the thin sheet copper.
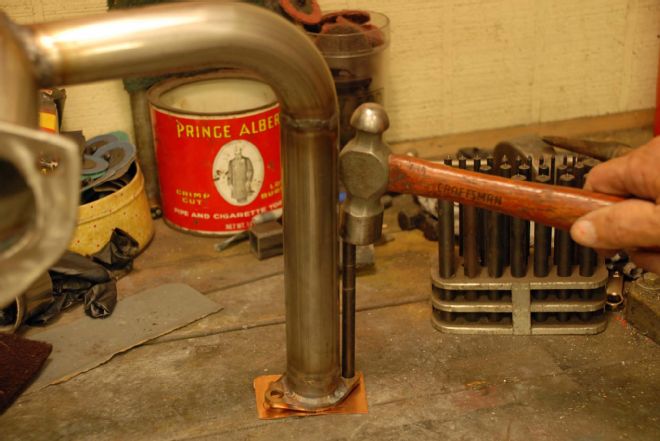
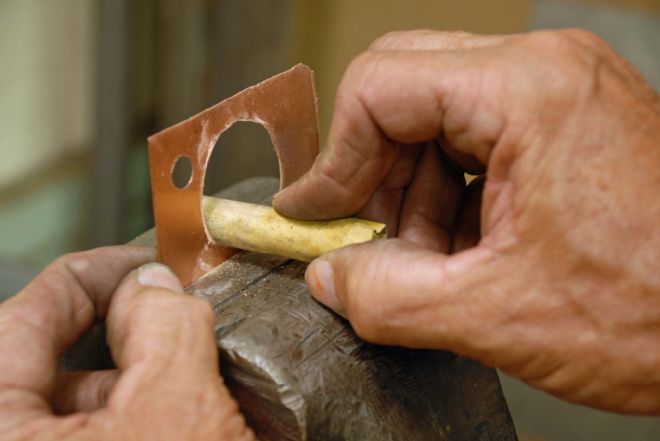
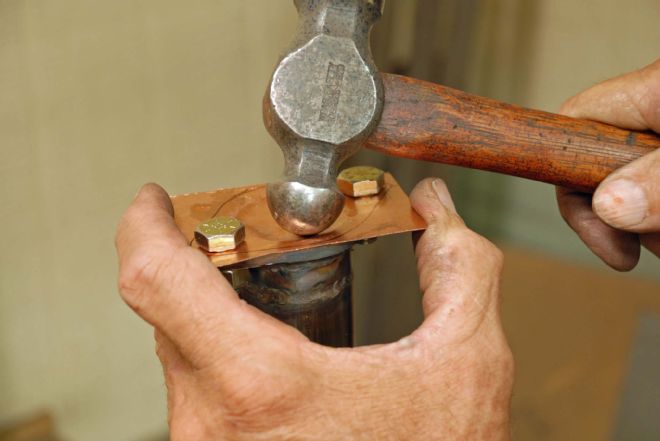 With the copper sheet bolted to the flange a ballpeen hammer is used to tap out a mark of the inside radius.
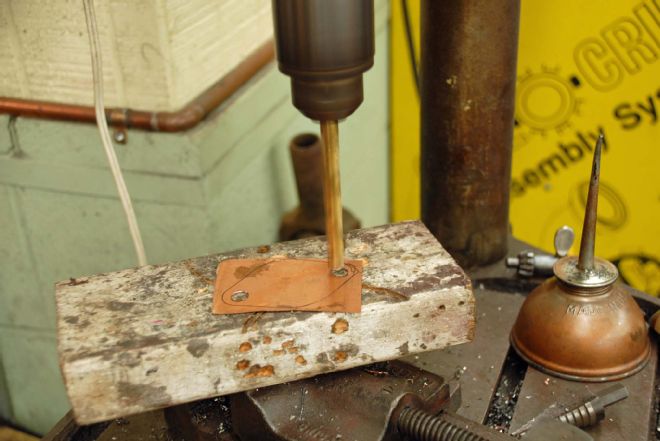
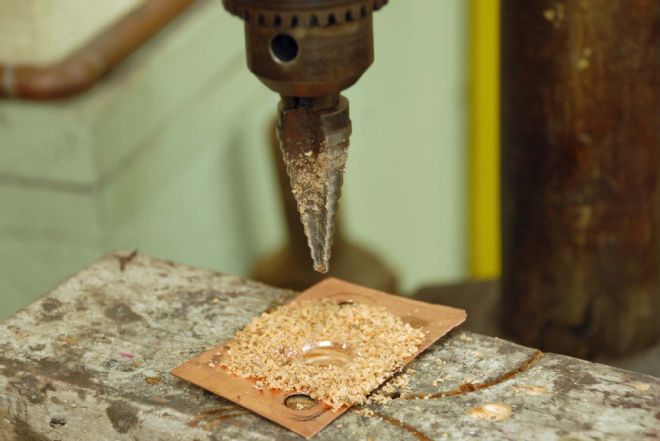 After drilling a pilot hole we used a Uni-bit to drill the larger hole, once again backed up by the wood block.
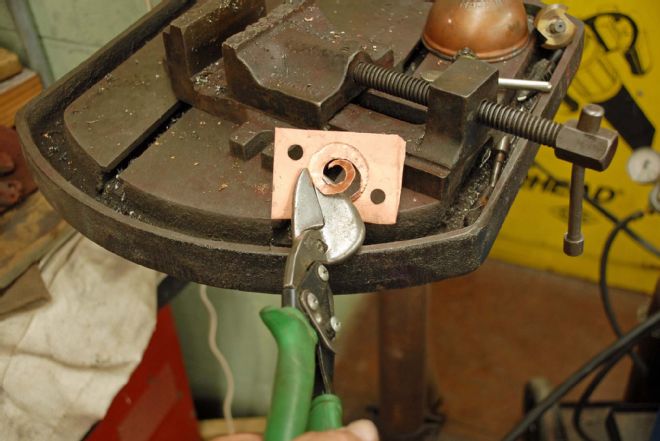 Using the hammered line as a guide tin snips makes short work of cutting the copper sheet.
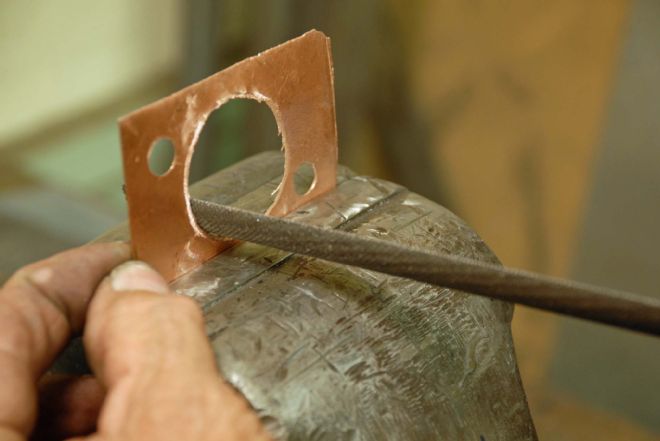 A half-round file is used to remove the burrs left behind by the tin snips.
 A piece of steel round-stock with some 180-grit paper finishes the opening nicely.
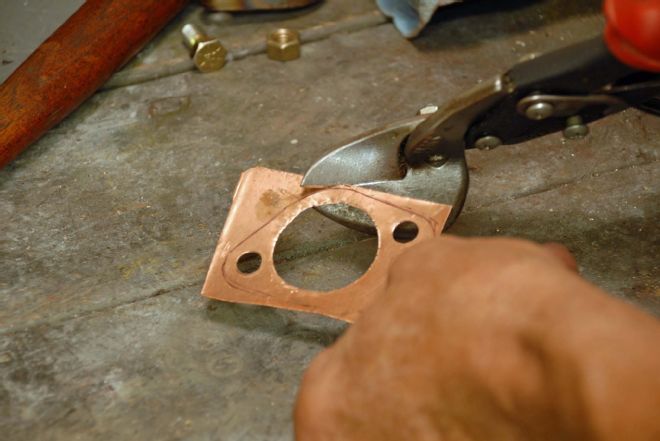 Once again the tin snips were called into action, this time to form the outside shape of our copper gasket.
 The passenger-side pipe fits perfectly and we previously welded the two-bolt flange in place. Note the crossover pipe is just tack-welded to the head pipe at this time.
 And here is the finished product, a copper gasket between stainless steel flanges, a combination that should seal perfectly and last a lifetime.
 Next we bolted both sides together at the center flange and welded the crossover pipes to the head pipes in position to prevent any unwanted twisting or warpage. This ensured the center flange would align perfectly. We MIG-welded the head pipe joint using a Millermatic 140 and stainless steel wire.
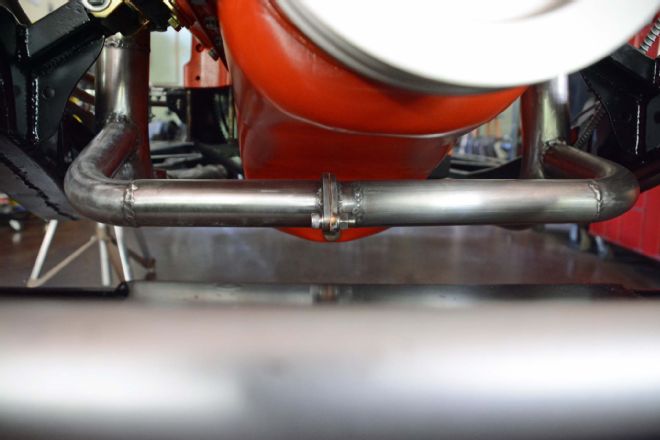
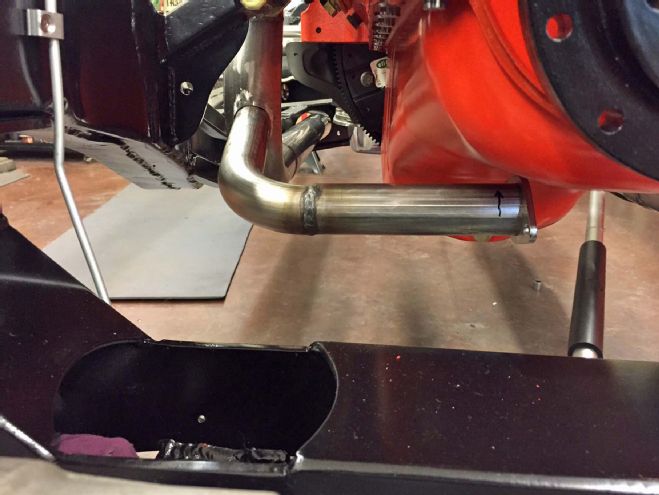
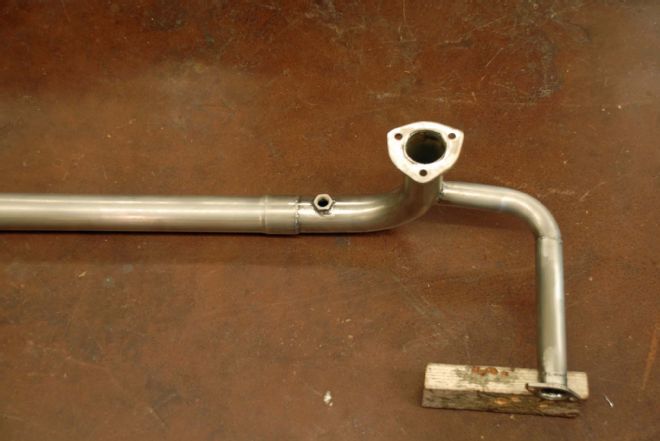 We removed one side of the pipe to better illustrate how the crossover pipe and head pipe are connected. The small hole in the exhaust tubing is the Oxygen sensor port for our FAST fuel injection.
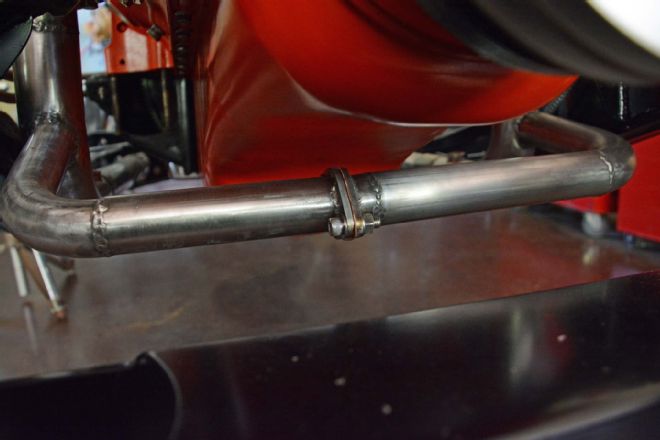
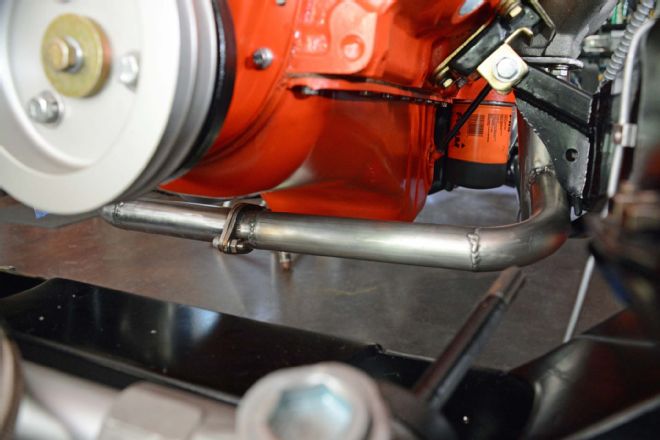
And here is the finished crossover pipe. Clean, simple, and effective this project will improve power and sound and the good news it is tucked up out of sight.
We removed one side of the pipe to better illustrate how the crossover pipe and head pipe are connected. The small hole in the exhaust tubing is the Oxygen sensor port for our FAST fuel injection.
And here is the finished crossover pipe. Clean, simple, and effective this project will improve power and sound and the good news it is tucked up out of sight.