Ask Ford fans about the venerable Coyote motor and they’ll likely tell you that it was forged by the hands of the Man Himself and passed down on wings of angels. While that is surely stretching it, in all honesty, when FoMoCo released the Coyote in 2011, it was a game changer. Up until that point, the only method to a 400hp stock Mustang was forced induction. OK, so the 2000 Cobra R might have been underrated at 385 hp, but that was the only naturally aspirated Mustang with close to 400 hp from the factory. That’s not to say that the older modular motors aren’t worthy of their acclaim, but it’s no secret that prior to the Coyote, if you wanted to make big power without dropping huge money on your modular motor, a power-adder was the answer.
But Ford changed that with the new 5.0. It was high revving and insanely efficient, it responded well to mods, and it was capable of big power without boost. In fact, bolt-ons and a tune were worth as much as 70-80 hp at the wheels. Heck, 500 rwhp or more was achievable with a stout rotating assembly, ported heads, a Cobra Jet or Boss intake manifold and accompanying throttle-body, and big cams that allowed the Coyote to breathe at 8,000 rpm. Of course, an efficient motor responds well to boost, and tossing 10 psi on the new 5.0 is a recipe for an easy 600 rwhp or more.
But for everything the new Coyote is, it certainly isn’t without its faults.
Oil pump failures aren’t new to the Mustang
“If you plan on significantly raising the rev ceiling or increasing the power on your Coyote, especially with a supercharger, then billet oil pump gears are more than just cheap insurance. They’re a must,” says Mike Schropp, Engine Development Supervisor, Livernois Motorsports.
Oil pump gear problems aren’t necessarily new to the Mustang world. High-horsepower, high-revving 3V and 4V modular motors also experienced similar problems, but generally to a lesser extent in normally aspirated form because of their lower rev ceilings. Simply put, lightly modified modulars ran out of breath before the oil pump gears became a problem. But failures on supercharged modulars weren’t uncommon, as their higher power levels and increased load on the crank worsened oil pump-killing harmonics (more on that later).
But modulars aside, the Coyote quickly earned a reputation for oil pump problems because unlike its predecessors, the Coyote had the capability of making enough power and spinning high enough rpm that problems with the oil pump gears arose.
Schropp explains, “The Coyotes spin a lot more rpm than the modulars, and big power levels are easily reached, so oil pump problems were more prevalent.”
The problem and the fix
As gearheads pushed the envelope with the Coyote both in rpm and power, it was only a matter of time before stock parts began to fail. As luck would have it, the stock oil pump gears were some of the first OEM parts to bite the dust.
“Back in 2011 we began seeing problems with the stock powdered metal oil pump gears shattering, especially on supercharged applications that utilized an inexpensive, aftermarket crank damper,” Schropp says.
Livernois Motorsports not only dug deeper in order to find the root of the problems, but the in-house team of techs worked with FoMoCo to find a solution.
Schropp says, “We worked extensively with the engineers at Ford to track back the oil pump gear failures, but their testing didn’t produce such problems.”
After copious amounts of research, Livernois realized that the problems weren’t apparent with Ford’s testing procedures because the power levels and rpm limits weren’t nearly as extreme as seen in the aftermarket.
“The inner oil pump gear is lugged off the crankshaft, which means the crankshaft harmonics are passed through oil pump gears and into the balancer,” says Schropp.
As one might guess, as power levels and rpm increase, so do the harmonics of the crankshaft. As these harmonic levels increased, ultimately the powdered metal oil pump gears proved too brittle to survive the abuse.
As mentioned, most of the failures were found in supercharged applications that utilized inexpensive balancers.
“Canceling harmonics is important, so in addition to the upgraded billet oil pump gears, a quality crank damper is also recommended,” Schropp says. “Increased crankshaft harmonics aren’t the only problem. Some supercharged applications add so much load on the snout of the crank that it actually causes the crank to move just enough that the oil pump gears can bind, only worsening the problem.”
OK, so the OEM oil pump gears can’t hang with high rpm and big power, but what about the fix?
“We designed a bulletproof set of billet aluminum oil pump gear replacements that feature a computer-controlled, precision-hardened finish, are hand-deburred and finished, and have tolerances measured and blueprinted to within plus or minus 0.0005 inch,” says Schropp.
The high-quality Livernois Motorsports billet oil pump gears are available as freestanding gears, or for those who don’t want to split their own oil pumps open, Livernois offers an exchange program that allows enthusiasts to trade their stock pump and gears for a new pump with the billet units already installed.
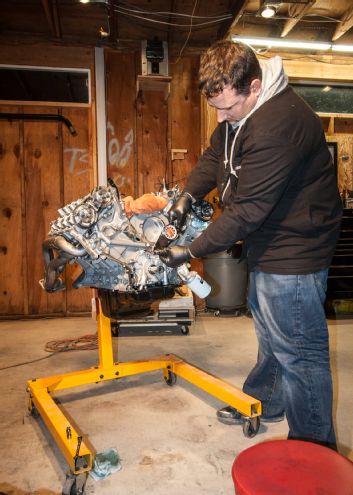
01. We paid a visit to the Mustang gurus as Stanton Performance in Northern California for help with the install. Taking our time, it took us a half-day from start to finish. While the billet oil pump gears can be installed with the motor still under the hood, expect the process to take considerably longer that way due to the confines of the engine bay.
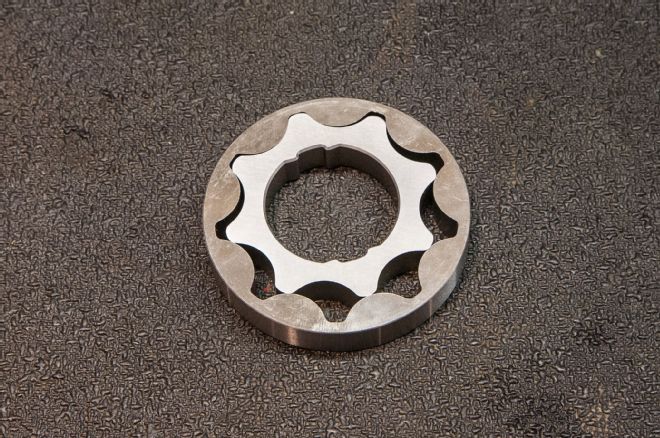
02. Unlike the brittle stock powdered metal units, the Livernois Motorsports billet oil pump gears are bulletproof thanks to billet construction along with a computer-controlled, precision-hardened surface and tight tolerances that are measured and blueprinted to verify each piece is within plus or minus 0.0005 inch. They retail for $469.99, which is cheap insurance if you ask us.
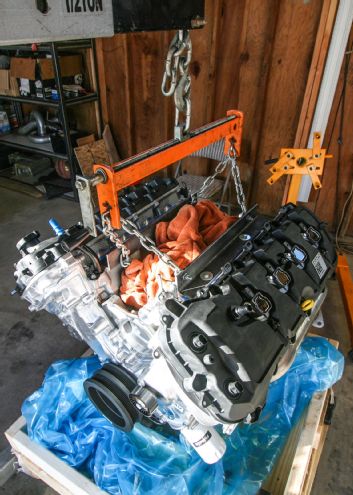
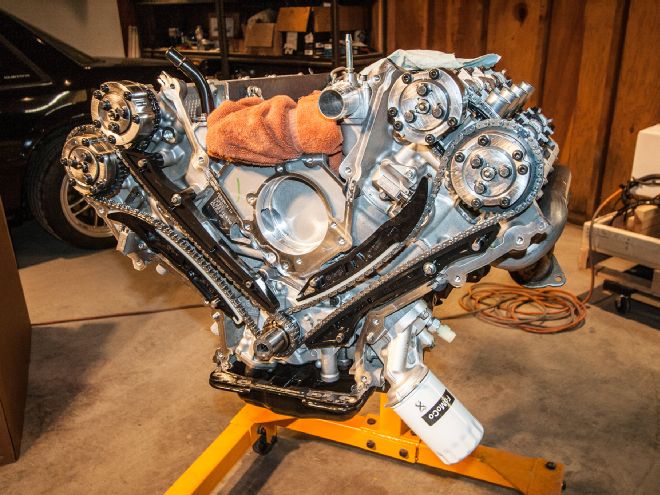
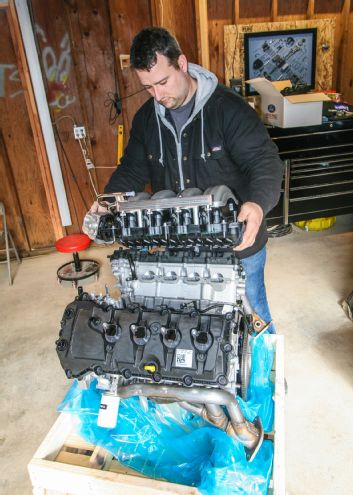
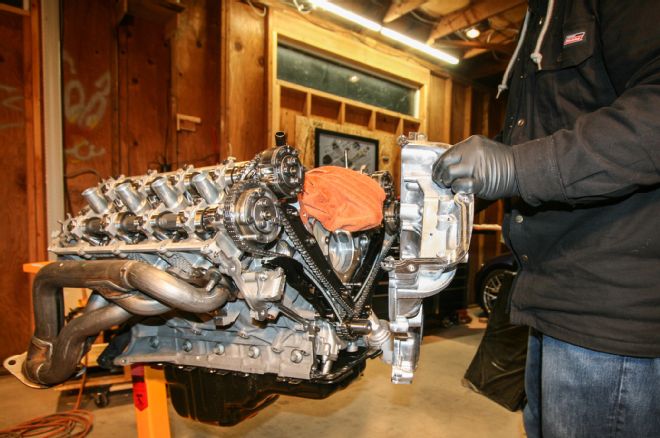
03. In order to lift the Ford Racing M-6007-M50 Coyote crate engine out of its crate and onto an engine stand for better access, Stanton Performance used its hardy Coyote lift bars. These trick lift bars utilize massive pieces of angle iron, and the intake manifold bolts to safely raise the 5.0 skyward.
04. Jeremy Stanton of Stanton Performance begins the install by removing both the engine harness and the intake manifold.

05. Now it’s time to remove the water pump pulley, followed by the water pump and the upper coolant hose.
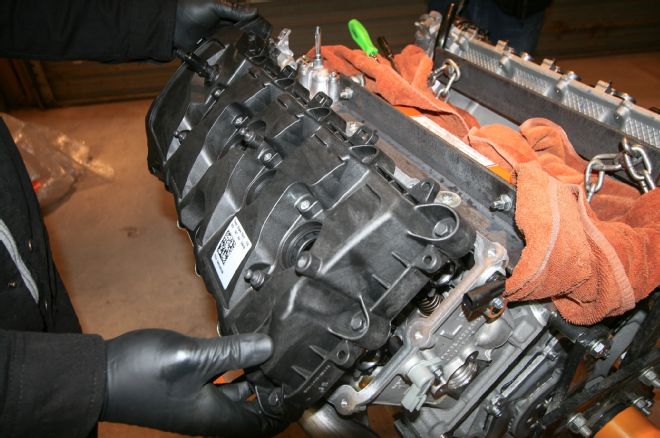
06. The ignition coils and valve covers are the next pieces to leave the building.
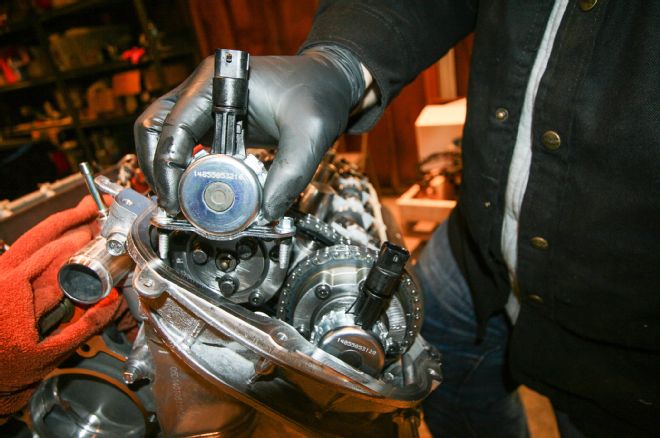
07. While technically you don’t have to remove the VCT variable-force solenoids since they’re attached to the timing cover that will soon be removed, we ditched them for safekeeping.
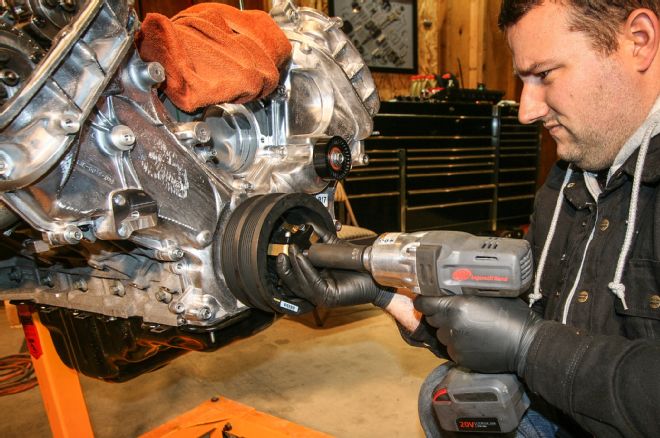
08. After the crank bolt has been removed, it’s time to use a quality crank damper puller tool to remove the crank damper pulley.
09. After the plethora of bolts are removed, the timing cover comes off.
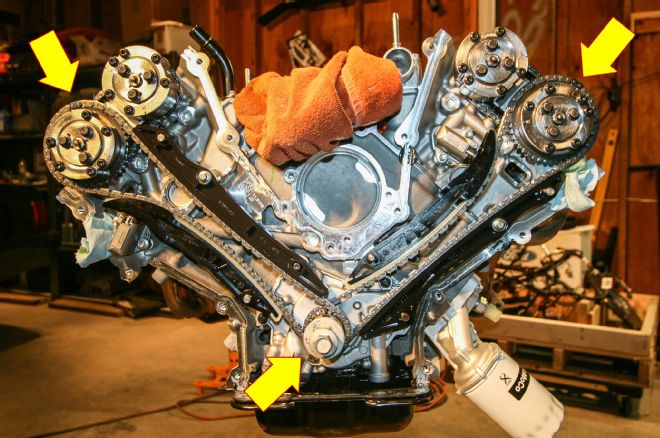
10. Before removing all of the timing chains and their associated components, it’s a good idea to spin the motor over until all of the timing marks are in alignment. While some people use the QR Codes on top of the cams as timing marks, we ensured that the timing marks on both the cam chains were aligned with the marks on each cam gear and the crankshaft sprocket.
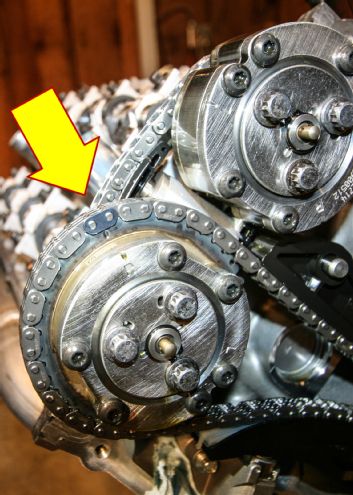
11. Here’s a close-up shot of the dark timing link on the cam chain aligned with the timing mark on the cam gear.
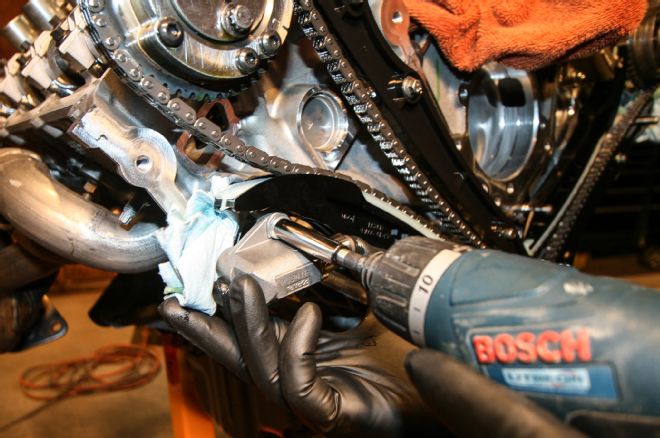
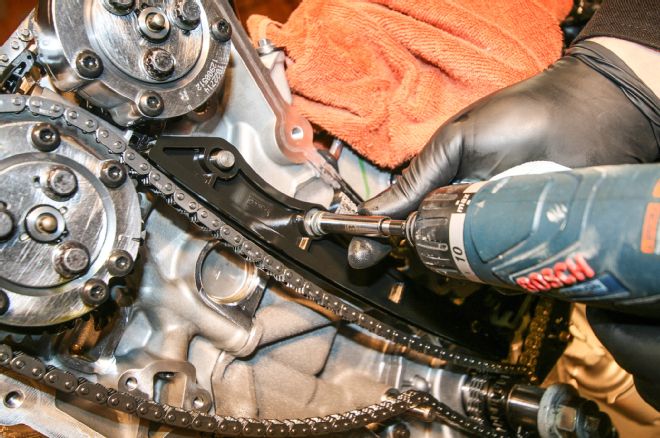
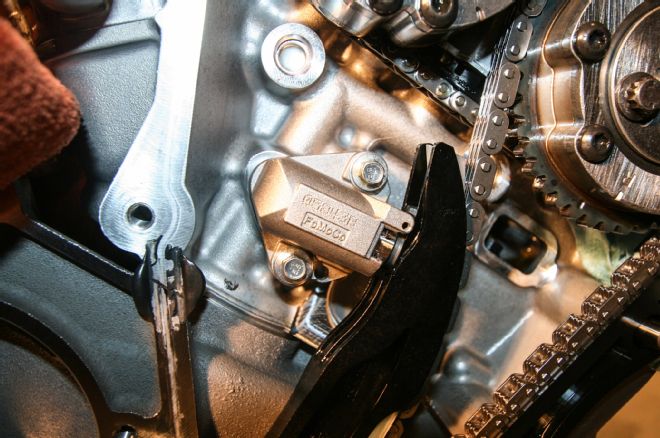
12. With everything in proper alignment, it’s time to remove the right-side primary timing chain tensioner. Be careful—it will be under some tension.
13. Now the timing chain tensioner arm can be removed.
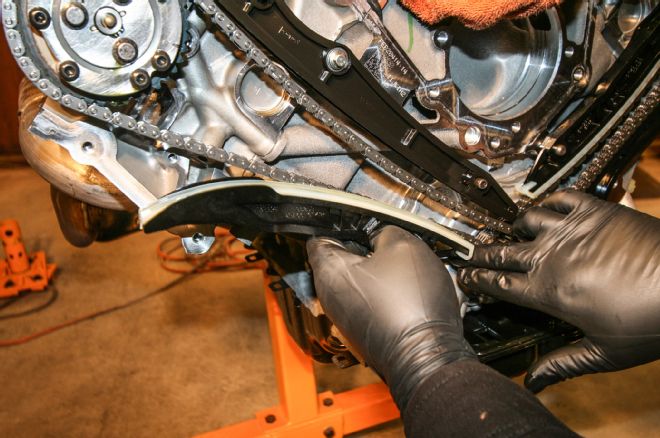
14. Next comes the upper timing chain guide.
15. Now the right-side timing chain can be removed.
How strong are the stock oil pump gears?
Obviously there are exceptions to every rule. Nothing is gospel. But generally speaking, billet oil pump gears should be considered mandatory under two circumstances.
“Most light bolt-on cars can’t rev high enough to hurt the oil pump gears in naturally aspirated form, but if you plan on adding cams and other high-rpm parts that seriously boost power or forced induction, then gears should be considered a must,” Schropp explains.
The other circumstance?
He says, “If you have easy access to the oil pump gears because the motor is out for other repairs, then it’s a good idea to add the billet units since accessing them with the motor installed in the car makes the installation more difficult.”
It’s not impossible by any means to install the billet oil pump gears with the motor still under the hood. It just makes access that much harder.
The verdict
While the Livernois Motorsports billet oil pump gears won’t add power or street cred, they will protect your motor from catastrophic meltdown in the event of an OEM oil pump gear failure. Whether you plan on keeping your Coyote in naturally aspirated form and taking advantage of the additional rpm and power that a Ford Racing intake manifold and aftermarket cams add, or you plan on introducing some boost, consider these gears a must-do mod. In fact, if you ask us they’re cheap insurance. After all, blown motors aren’t cheap.
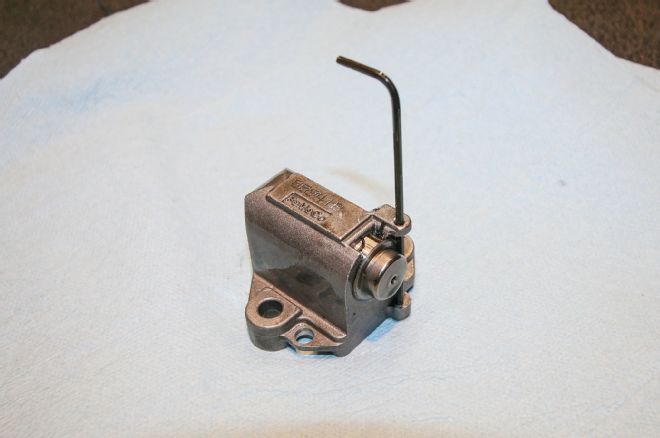
16. Before reinstalling the timing-chain tensioners, they need to be compressed. We used a press, but a vise also works. Once the tensioner is depressed, place a pin holder to keep it depressed (a hex wrench works well). When everything is installed, pull the pin to reintroduce the proper chain tension.
17. Here’s a closer look at the timing chain tensioner mounted in place. Note how the tensioner pushes against the tensioner arm, which then maintains proper chain tension.
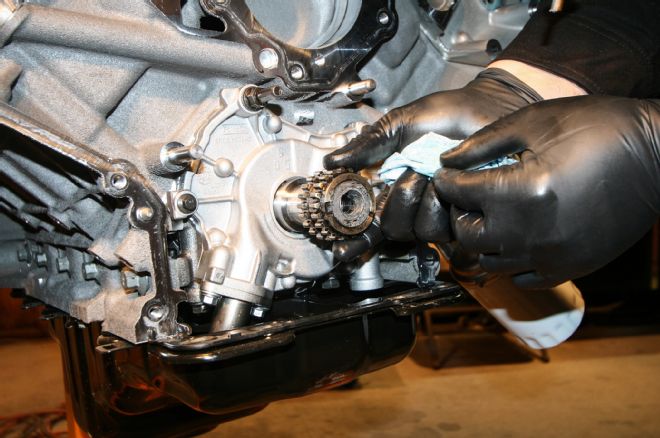
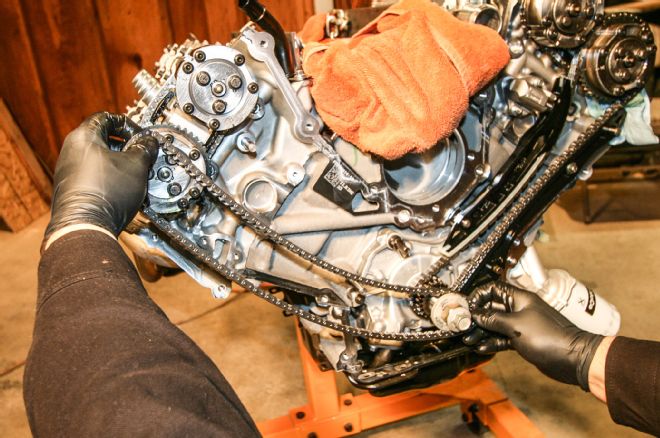
18. Rotate the crank 90 degrees clockwise and repeat on the left-side primary timing chain and its associated components. Then the crank-mounted timing gear can be removed.
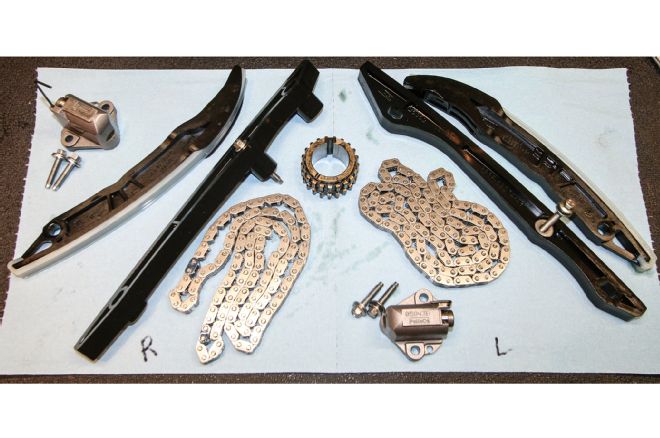
19. Here’s a look at all of the primary timing chain components that were just removed.
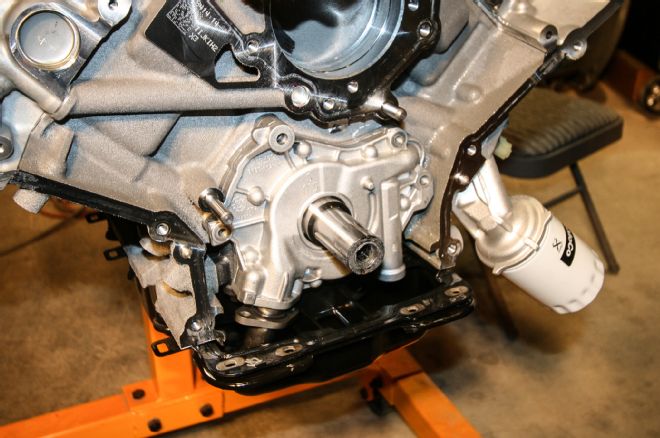
20. Now the oil tube needs to be separated from the oil pump. Take your time removing these bolts—you don’t want to drop them into the oil pan.
21. After the bolts are removed, the oil pump can now be separated from the motor.
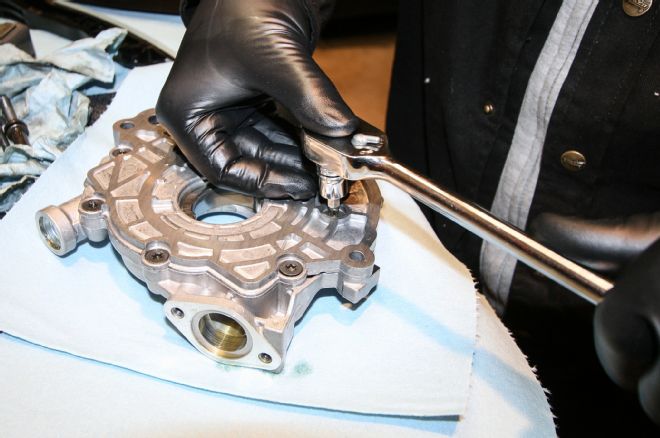
22. It’s time to dive inside the oil pump to access the oil pump gears. Take your time with the Torx bolts.
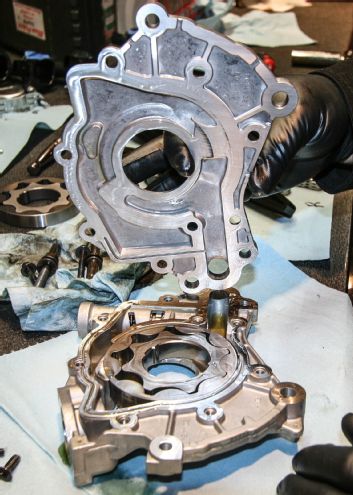
23. Now separate the back plate of the oil pump to gain access to the internal gears.
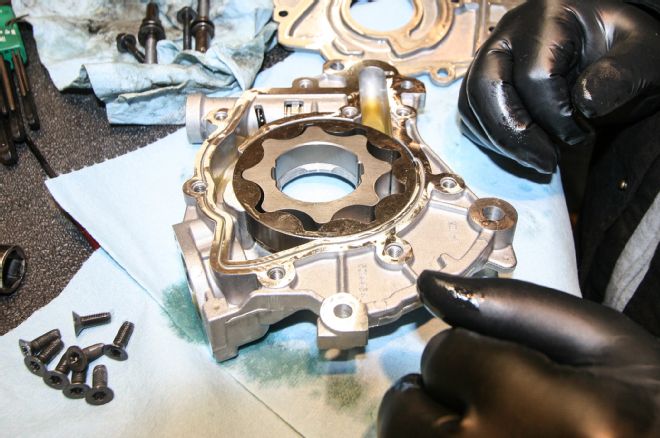
24. Before installing the Livernois Motorsports billet oil pump gears, be sure to give them a thin coat of oil and rotate them to ensure that they don’t bind before you put the pump back together.
25. Begin the reinstallation with the oil pump. Work in the reverse order of the removal.
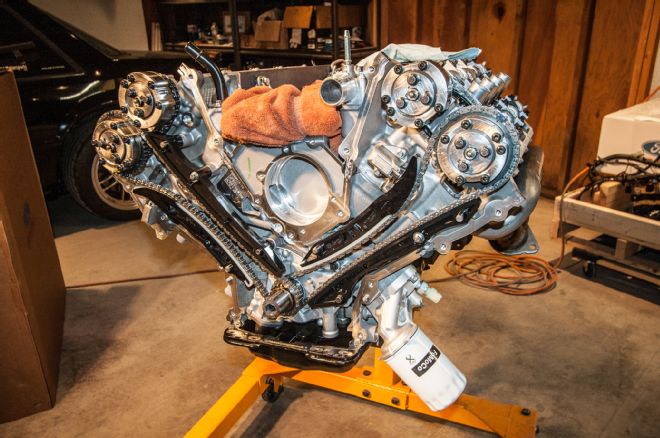
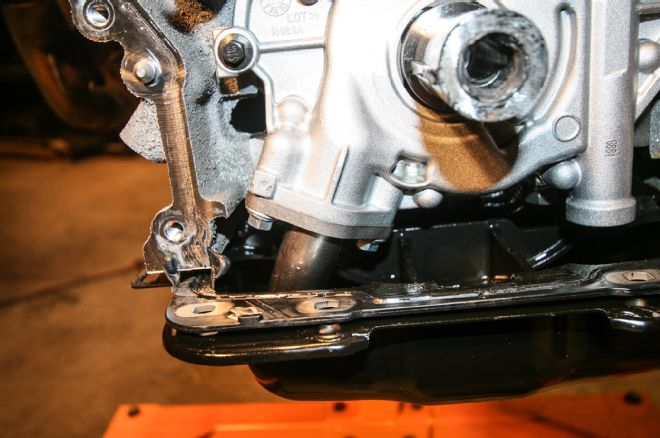
26. Here’s a cool shot of the Coyote before the timing cover is reinstalled. Don’t forget to use silicone sealant and a gasket at the head–to–cylinder-block joints and the oil-pan–to–cylinder-block joints to prevent oil leaks.
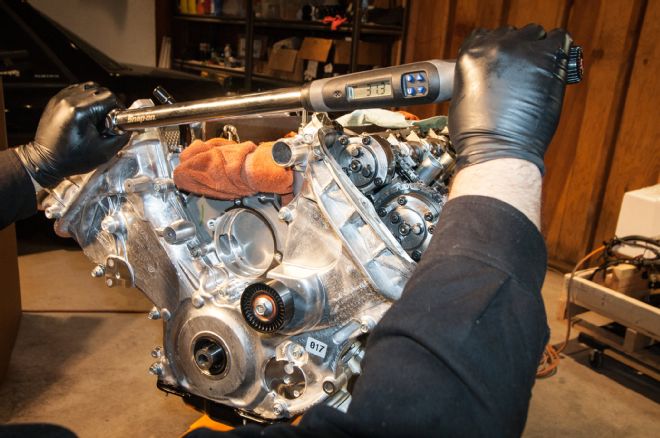
27. Be sure to follow all of the factory torque sequences and specs when reinstalling all of the components.