During my Jersey Shore musician days, I drove around in a 1964 Plymouth Valiant drop-top. I loved that car. It wasn't much to look at, with its faded turquoise paint, Slant Six heart, and torn bench-seat interior. But for me, not only was it a source of entertainment during the hot Jersey coast summers, it was my daily driver for a period of time. The paltry $700 price tag was the right price for a starving musician.
This transmission would be a prime candidate for a bulletproof build
I drove that thing around like I owned the streets. At speeds over 10 mph the carpets lifted off the floors due to the natural "vents" in the sheetmetal. The 13-inch wheels buzzed loudly as I hit the speed limit on the local streets. To top it off, the hubcaps regularly flew off when I took a turn too fast. But it had two things that I really cherished: a convertible top and that crazy pushbutton transmission.
I loved that pushbutton so much that when it came time to decide on what would shift the gears in my new 1965 Plymouth Barracuda build, I decided that the buttons would be back on the dash. I found a 1964 dash, complete with all the bells and whistles and planted it in my 1965 Barracuda. Lastly, an original V-8 904 pushbutton trans was located a few hours away and brought into the mix, cables and all.
However, when we got the final horsepower numbers on the supercharged 360 that would propel my fish down the road, the hot rod gurus said that the light duty 904 I chose would not hold the power. So the rare transmission was sold off, and a later issue 904 was located. This 1971 transmission had beefier internals and would be a prime candidate for a bulletproof build, one that would handle the 500-plus horsepower of the new motor.
Both can be built to handle all the horsepower that street and race applications can produce
The Chrysler 904 and its derivatives are known as some of the most efficient transmissions installed in American cars. First offered in 1960, this TorqueFlite transmission was set behind both Slant Six and small-block V-8 motors. Its beefier counterpart, the 727, debuted in 1962 and is very similar in size and shape and can be mistaken for a 904 (like I did on one occasion). Both are three-speed transmissions, and both can be built to handle all the horsepower that street and race applications can produce.
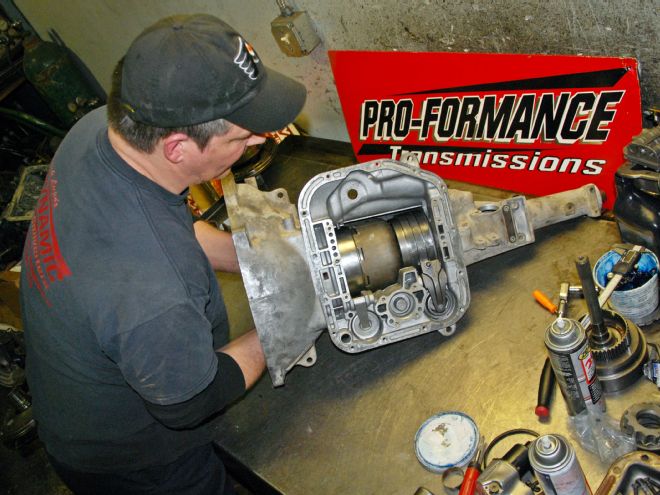
To get my 1971 904 done right, I called Pro-Formance Transmissions in Newark, Delaware. The knowledgeable techs there were happy to put some life back in my worn Mopar trans. Since I was running a later-model transmission with my pushbutton linkage, the original shifter and cables had to be modified. That's where Imperial Services came in. A reengineered shift system was built to run my more modern 904 and get the trans into the right gear at the right time.
The trans was in relatively good condition when it was torn down
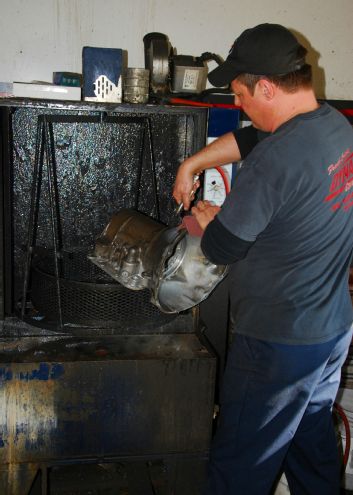
1 Before the rebuild started, Pro-Formance chief technician Sean Wiley took to the washer and cleaned the case. Then he blew-dry all the nooks and crannies to remove any remaining moisture.
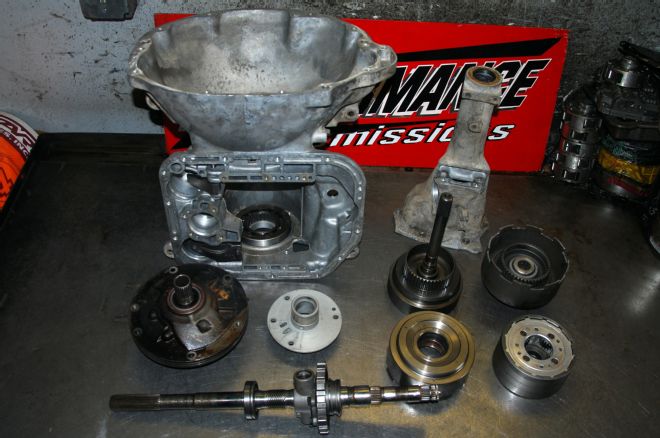
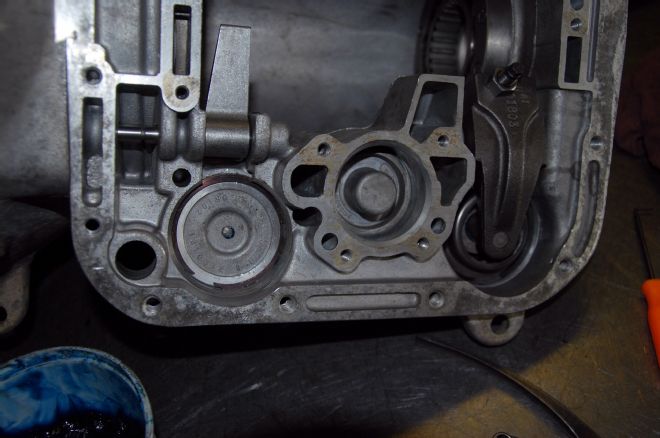
2 Once everything was cleaned, this was our starting point. We reused everything that was still in good shape. Luckily, the trans was in relatively good condition when it was torn down.
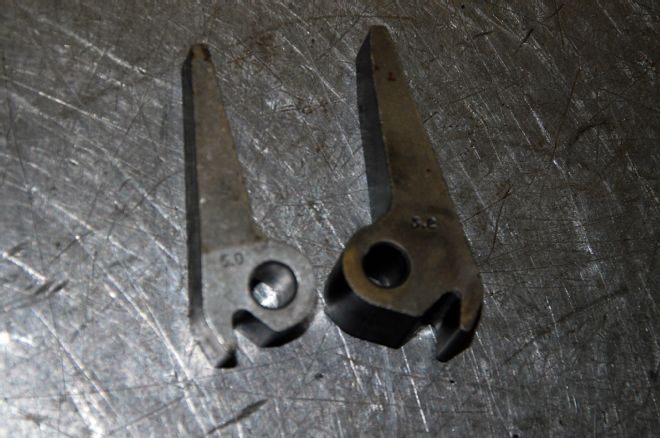
3 Here we have a pair of intermediate band apply levers. The one we used in our build is on the right; the OE piece is on the left. We upgraded from the OE 3.2-ratio lever to the 5.0 lever. This will give us firmer 1-2 shifts and better 2-3 shifts.
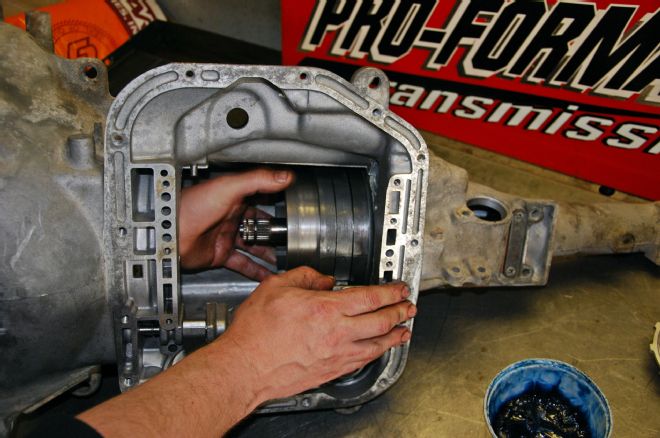
4 Next, the intermediate band apply lever was installed. Here you can see the trans with the servos installed in position.
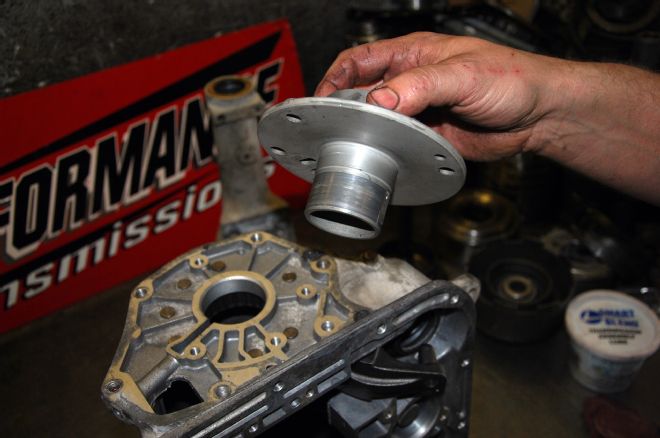
5 Wiley installed the governor support housing. The original unit was reused and was in excellent condition. This piece supports the lower Reverse drum and the output shaft and is the sealing surface for the governor rings.
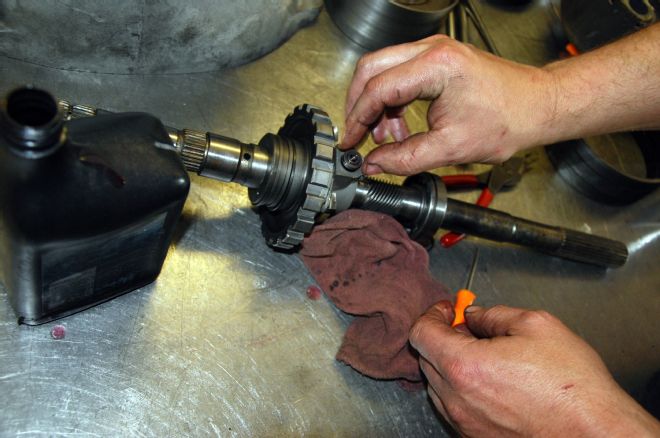
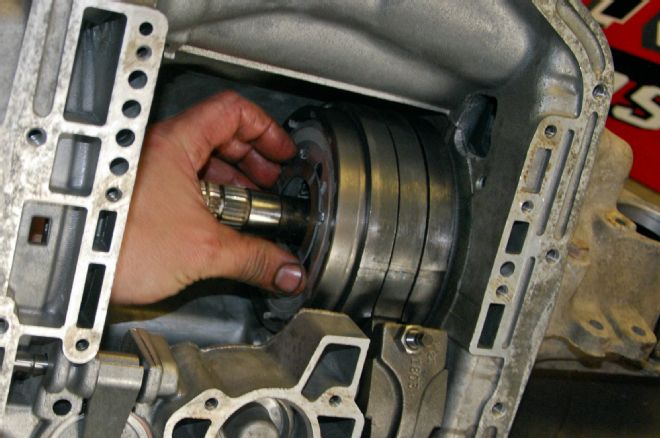
6 Next we moved to the output shaft. Here the governor was being taken apart, inspected, and cleaned. It was then lubed and reassembled, ready for installation.
7 Wiley laid down a fresh gasket and added new governor sealing rings. He installed the freshened output shaft.
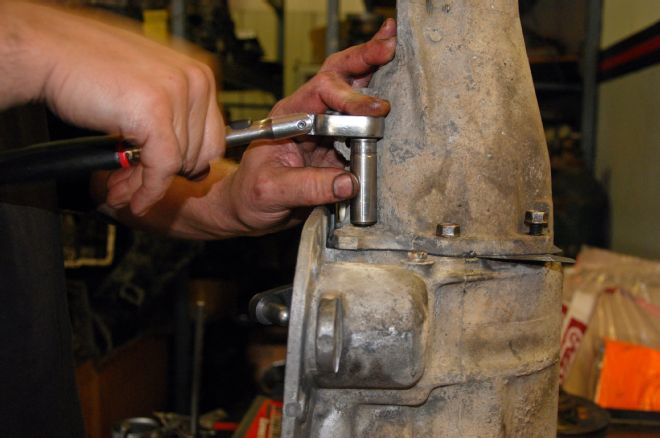
8 Wiley tightened the extension housing to the case. Before this was done, thread sealer was placed on all bolts to prevent leakage, an important step that is sometimes skipped by some builders.
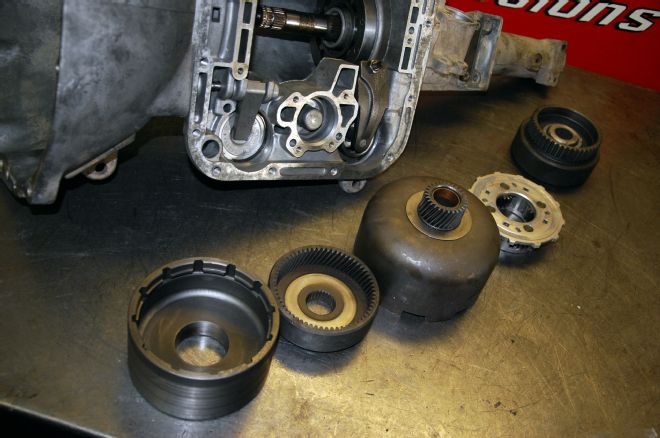
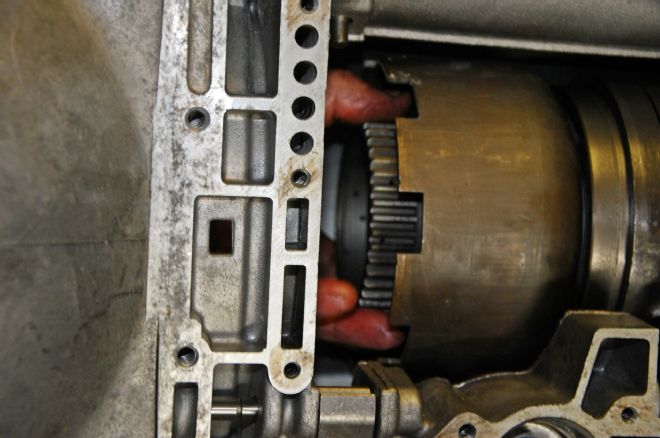
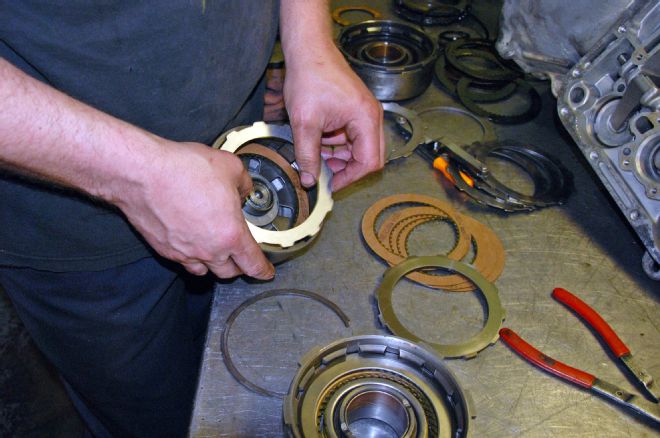
9 Here's the complete planetary system laid out prior to installation. These pieces were salvaged from the transmission and were all in excellent condition.
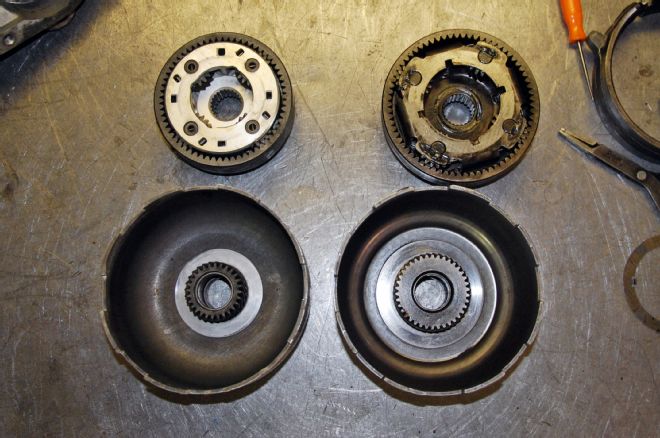
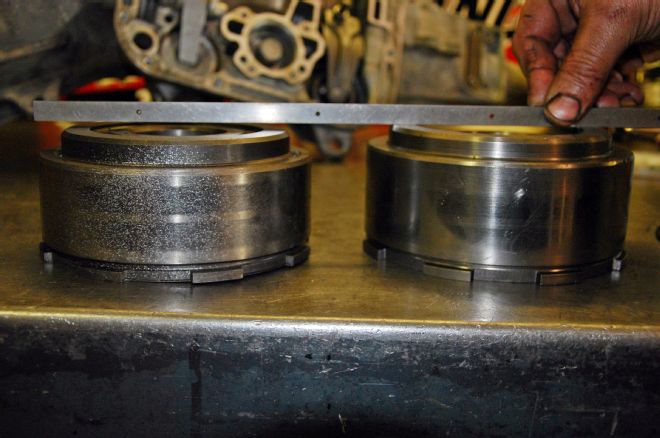
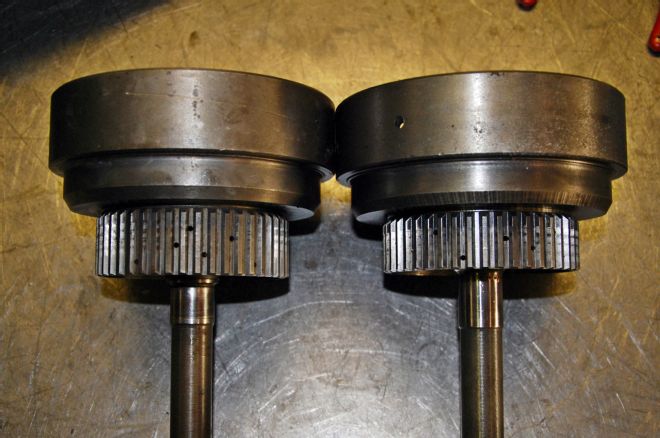
10 Check out the difference between the OE 2.45:1 First gear set on the left and a 2.74:1 First gear set on the right. Notice that the center gear on the right is much larger than the gear on the left. We opted for the original 2.45 gearset in our build due to my preference. It will give a less aggressive launch than the 2.74.
11 This is the other side of the sun gear and annulus assembly. The stock 2.45 ratio is on the left; the more aggressive 2.74 is on the right.
12 Wiley installed the Low/Reverse drum and band assembly. Before it was installed, a generous portion of lube was put on the inside of the lower Reverse drum where it rides on the governor support.
13 Next, the back planetary and thrust washer were installed.
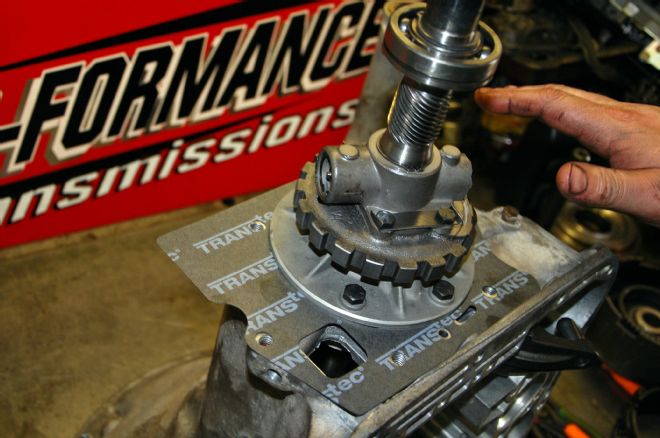
14 That was followed by the installation of the sun gear annulus and top planetary assembly.
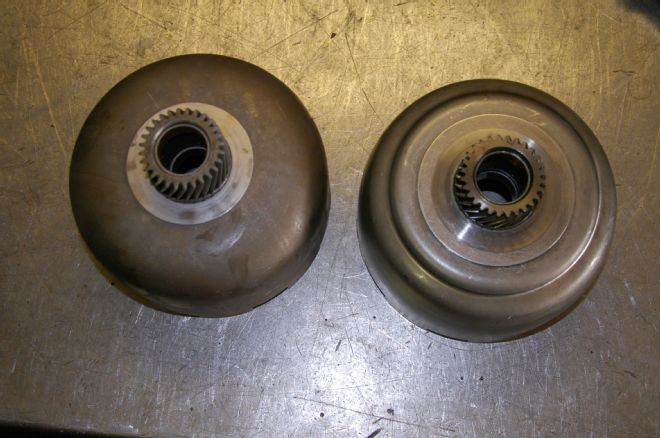
15 I decided to upgrade from the original four-clutch drum (left) to a heavier-duty five-clutch drum (right). This will give me more durability and a firmer shift. Notice the height difference.
16 The forward clutches in the forward clutch drum were installed. This is a trial-and-error process using steel discs of different thicknesses to set the proper clutch clearance.
17 Due to the fact we chose a five-clutch direct drum, we needed to use the proper forward clutch drum, which is pictured on the left (the original is on right). Notice the difference in the extended splines for the extra clutch in the direct drum.

18 This is the 904's fluid pump. After the pump was assembled, we aligned the halves for proper fit. Here Wiley attached a band clamp to the pump halves to align them before they were tightened together.
19 Wiley installed the forward and direct clutches inside the unit. Now we were ready to install the intermediate band and pump.
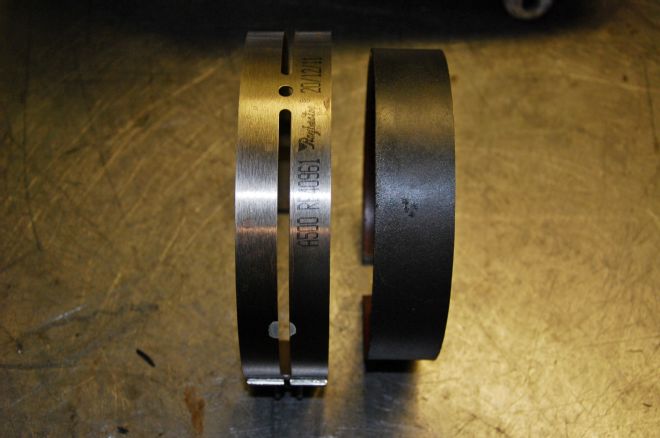
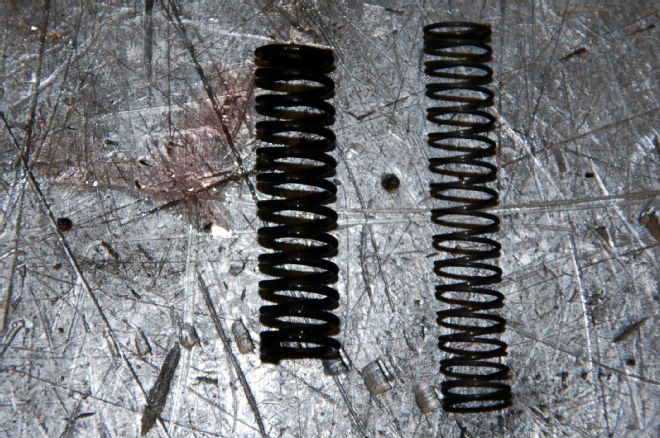
20 Here are two intermediate bands. The original is on the right, and a wider, stronger late-model band is on the left. We decided to upgrade to the later model for more durability and firmer shifts.

21 Wiley installed the band strut and checked the band adjustment. He checked for proper play in the band to ensure proper shifts and to increase band longevity.
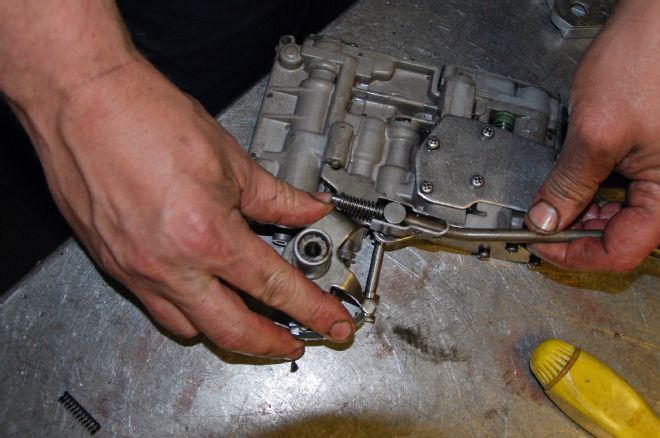
22 Here's the 904 valvebody. Wiley disassembled the valve body to install a detent spring with a lighter pressure. Since I'll be running a pushbutton shifter from a 1964 Barracuda, the lighter spring was required to work properly with the pushbutton cable assembly. The pushbutton unit and cables were modified by Imperial Services.
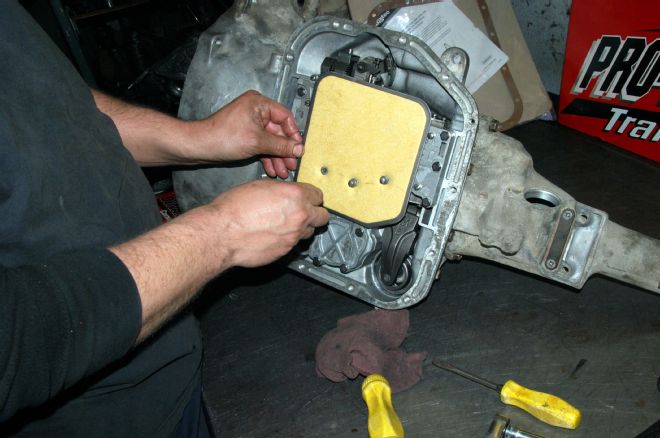
23 Wiley installed a Dacron filter. This type of filter is recommended for use with any automatic TorqueFlite due to its increased filtering capabilities.
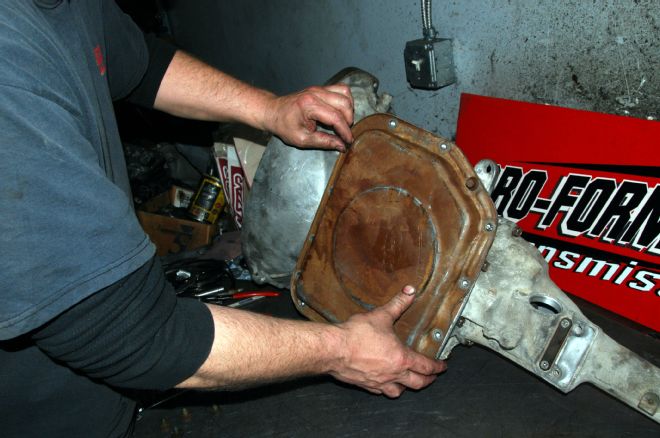
24 Wiley replaced the pan gasket and installed the transmission pan. Ready to hit the dyno!
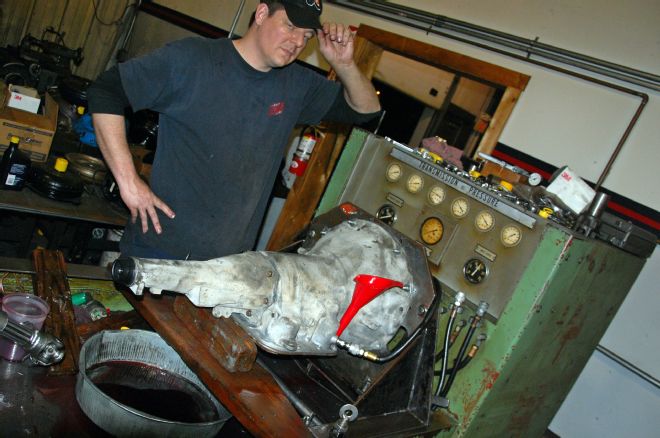
25 Every Pro-Formance transmission is dyno-tested for reliability prior to leaving the facility. This checks shift characteristics and transmission pressures and also allows Wiley and company to look for leaks. This 904 build notched a perfect score. Now it's ready to mate up with my Paxton-supercharged 360 and my Imperial Service modified pushbutton shifter.