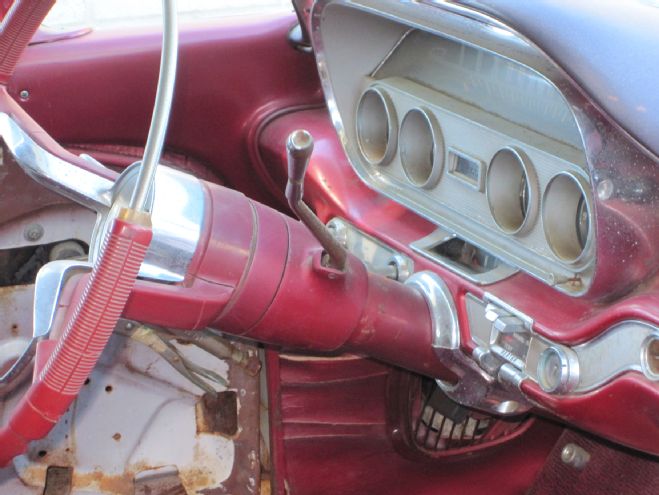
You may recall I had swapped out an old Hydromatic for a new Phoenix Transmission TH400 in the '60 Catalina I'm working on. Not long after the swap I decided to go a step further and switch the car from it's rather worn-out original column shift to a floor shift configuration as well. I grabbed my laptop and punched up the Lokar website and ordered one of their trans-mounted shifter assemblies (PN ATS6400A) along with a rectangular base shifter boot (PN 70FMB).
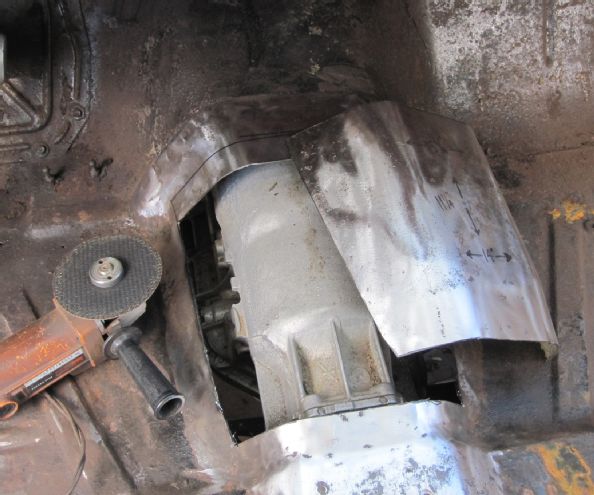
As I waited for my new Lokar components to arrive I got back to work on the Catalina. I began by removing the shift lever from the column and then climbing back under the car to disconnect the shift linkage from the lower column to the transmission. It was then I realized that the new TH400 filled the trans tunnel much more than the original Hydro. So much so that it was obvious I'd never be able to get my hands up onto the top of the transmission, let alone the shifter mounting bracket assembly … Now what?
After a couple of minutes spent questioning my decision to make the swap in the first place I then focused on how I might proceed. It looked as though I'd either have to drop the transmission, attach the shifter assembly and then reinstall it, or access the transmission from the inside of the car. After weighing both options I chose the latter since I'd have to cut an access opening in the tunnel for the shifter in any case. At this point I at least had the forethought to hold off doing anything until the new shifter assembly was in hand and I could more accurately determine just how much of the transmission hump I'd have to cut out.
True to form, Lokar shipped my parts purchase in short order and once I had parts in hand I grabbed my tape measure and tools and climbed inside the car to get to work.
While I waited for my new Lokar components to arrive I figured I'd get the preliminaries out of the way. I knocked out the roll pin holding in the original column shift lever and removed it and then climbed under the car and removed the shift rod running from the lower column to the trans. It was that point I noticed that there was little room between the TH400 and the tunnel walls (perhaps an inch on either side), I'd never get my hands anywhere near the top of the trans so I'd have to assess my plans.
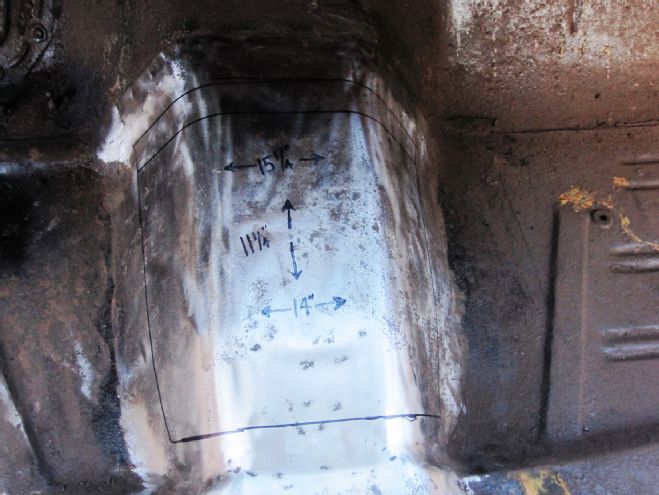
Rather than drop the transmission (I'd installed only days before) I figured it'd be easier to wait until the Lokar shifter arrived so I could measure the main mounting bracket and cut the access opening in the trans tunnel the correct size. As soon as the parts did arrive I went ahead and measured and marked the top of the tunnel and got ready for the next step.
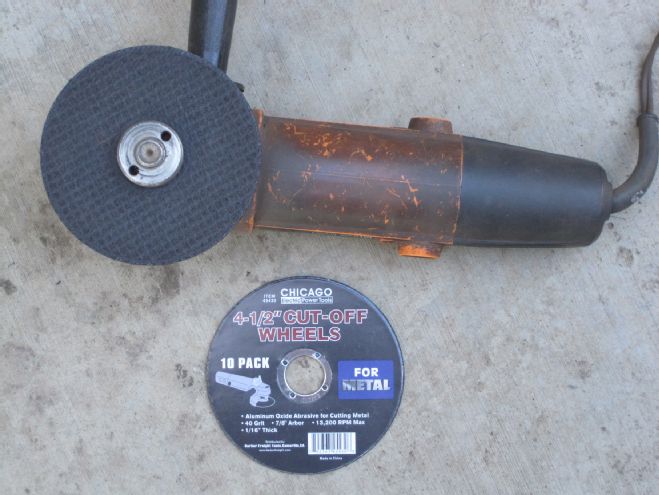
I grabbed my trusty Harbor Freight 4-inch grinder, installed a fresh 4-1/2-inch cut-off wheel, and proceeded to make my cuts—making sure I was careful not to let the wheel go too deep and hit the top of the trans.
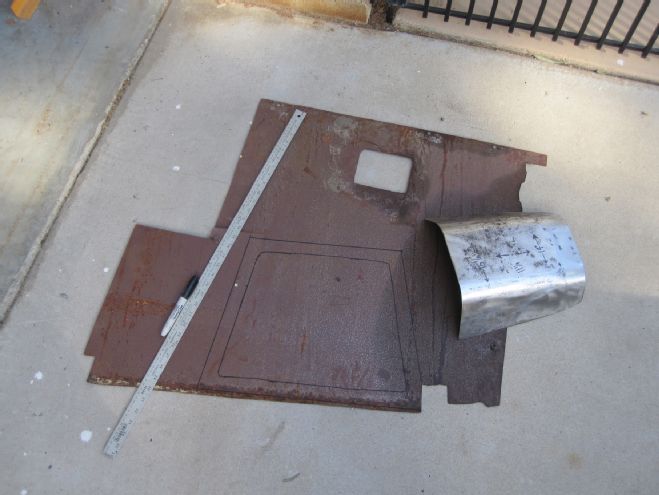
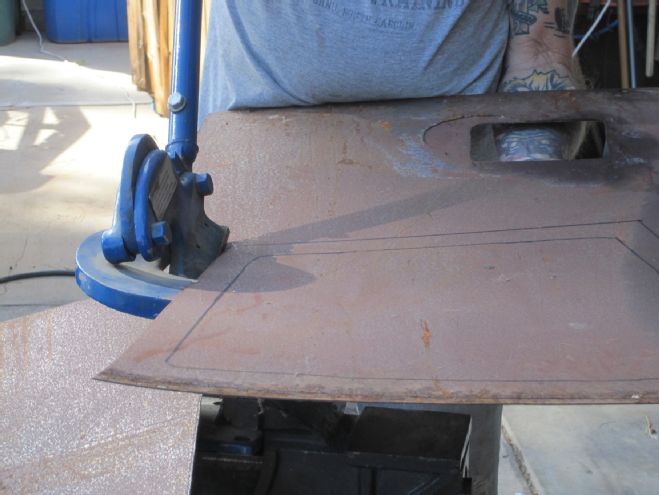
Once I'd cut the opening and deburred the edges of the cap I scouted my scrap metal stash for a piece of 18-guage sheetmetal large enough for me to cut a one-piece flange that'd fit around the edge of the section of tunnel I'd cut out. I planned to cut the flange in one piece so I measured it from side to side and front to rear transferring the dimensions to the sheetmetal and using my Eastwood shear to cut out the flange. Needless to say, I screwed up my measurements and ended up having to cut the flange into four separate strips instead (should have just done that in the first place).
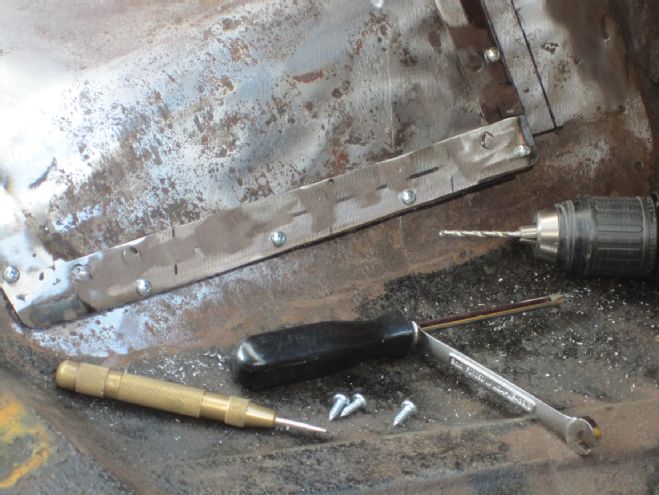
After punching a few holes in each strip of 18-gauge I then rosette-welded one on each edge of the tunnel cap positioning them half on and half off the piece so the outside half of each strip overlapped the tunnel. Then I drilled a few holes in each strip and through the edge of the tunnel starting on the left side inserting a sheetmetal screw in each as I progressed to hold the tunnel cap in place.
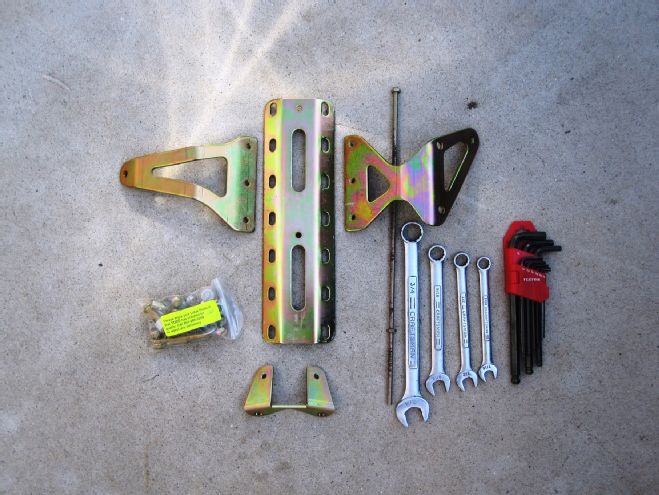
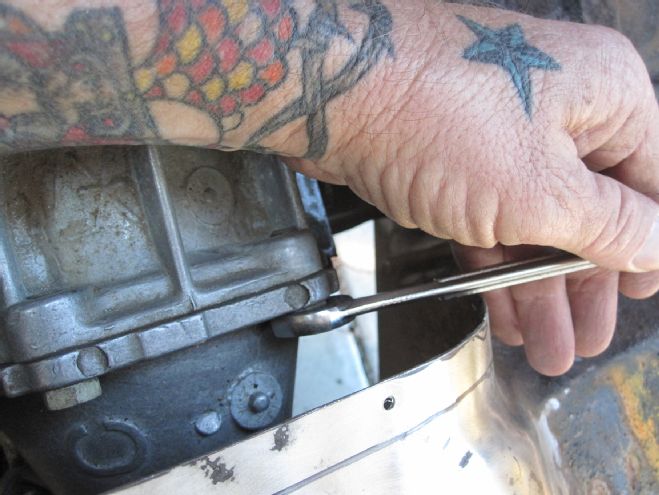
With the interior preparations complete the next step was to begin assembling the shifter mounting components. The tools needed for the install are standard Allen wrenches in 1/8-, 5/32-, 3/16-, and 7/32-inch wrenches, or socket sizes 5/16-, 3/8-, 7/16-, 1/2-, 9/16-, 5/8-, and 7/8-inch, and a tape measure.
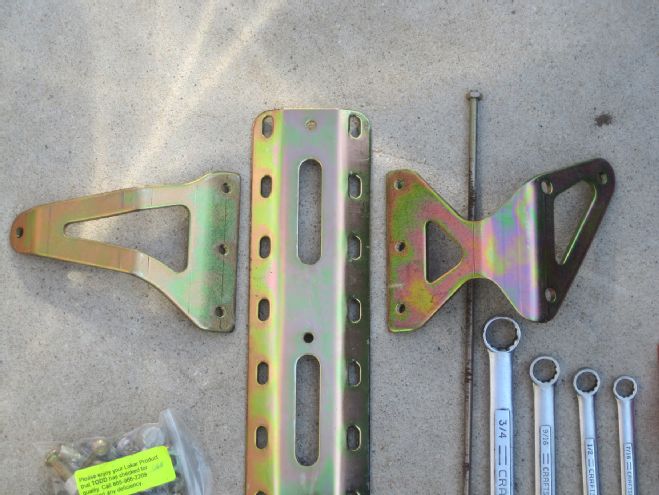
This close-up shows the main bracket and the two side brackets, and it shows the orientation of the side brackets as well. In this application the righthand bracket is the one with two cutouts and the single cutout bracket on the left.
Of course Lokar supplies all the components and hardware needed as well as an easy to understand and follow instructions.
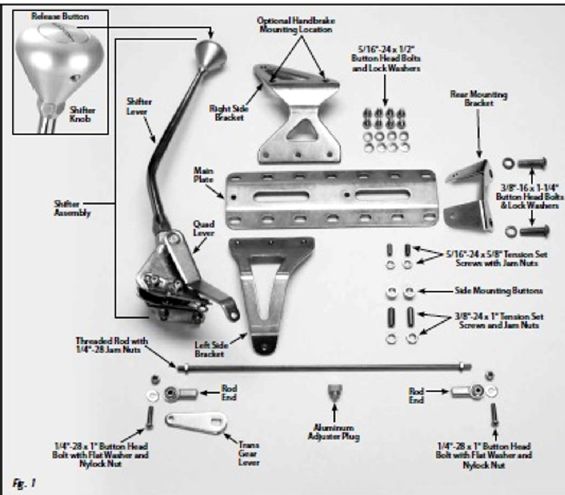
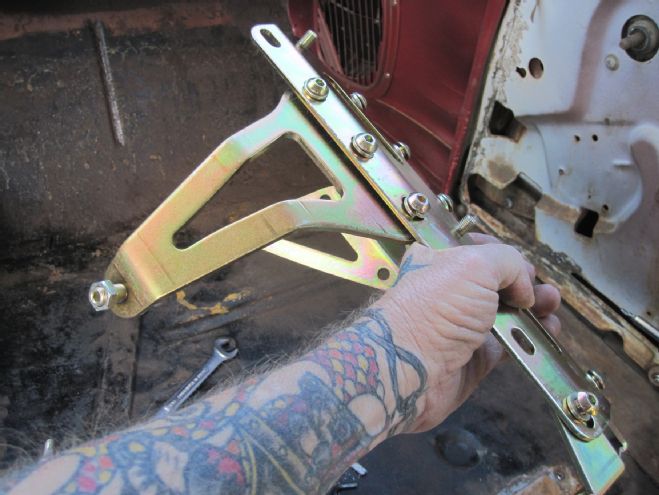
Assembly is begun by attaching the left- and right-side brackets to the main bracket.
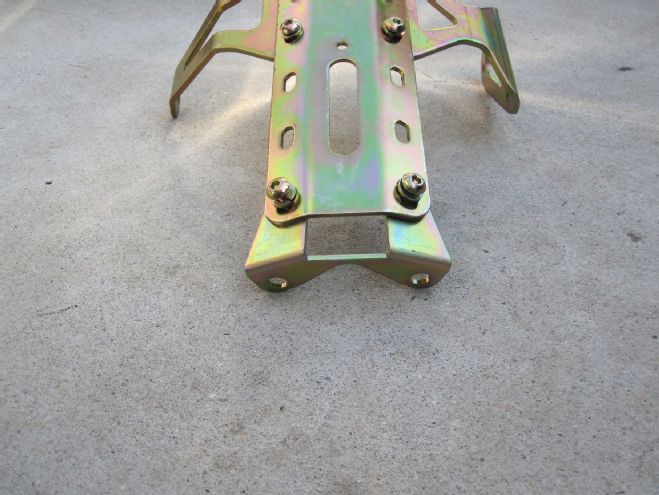
The next step is attaching the tailhousing bracket.
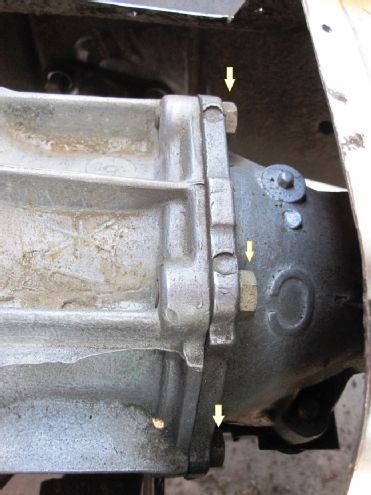
Here are the trans tail shafts bolts, the two outer bolts are where the tail bracket attaches to the transmission. Lokar supplies replacement bolts but in my case the opening I'd cut was a bit too small for me to get an Allen wrench in there so I reused the original bolts out of necessity.
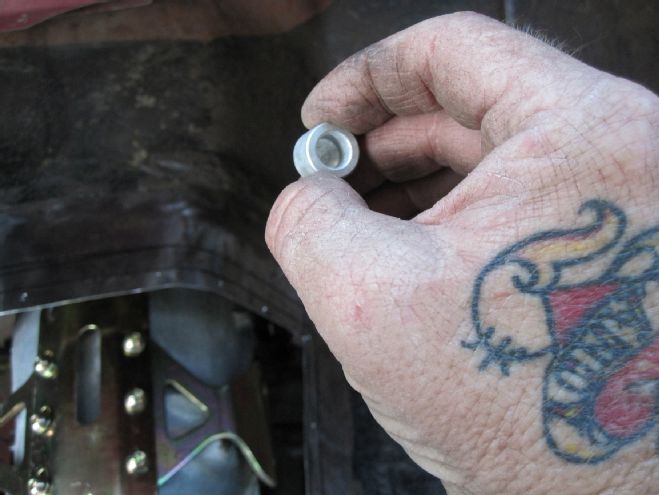
This is one of the two aluminum buttons, which fit into the circular indentations on either side of the transmission. Install the 3/8-24x1-inch tension set screws through the side brackets into each side mounting bracket and the buttons into the trans indentations.

Here you can see the button in place and the right-side bracket nearby.
The 3/8x1-inch bolts are threaded into each side bracket and the ends of the bolts inserted into the buttons on each side (slightly snug but not tightened).
There are two set screws in the hardware pack they're threaded into the top of the main bracket and act as tensioners, which are tightened against the top of the transmission case to snug the main bracket to stabilize it.
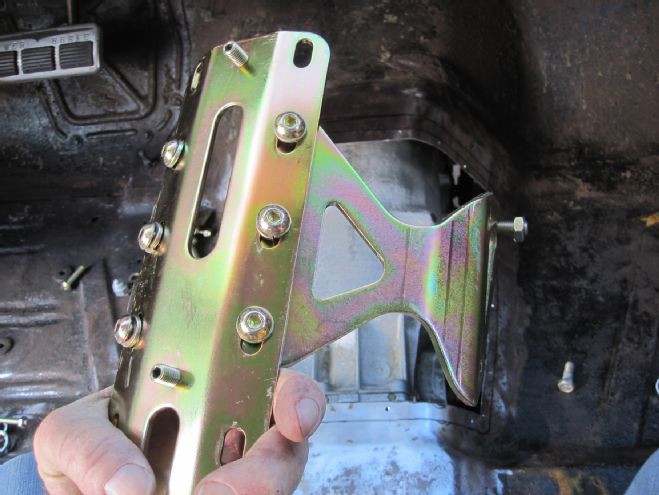
This image shows the bracket assembly in place on the transmission. The side bracket bolts are inserted into the buttons on the side of the case, the tail shaft bracket mounted via the tailhousing bolts, and the set screws holding off the main bracket from the top of the case. If at this point everything is aligned all the mounting bolts can be tightened fixing the mounting bracket assembly permanently in place.
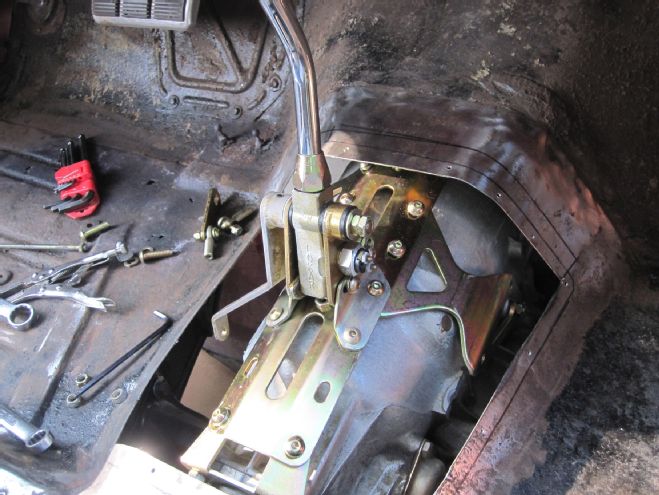
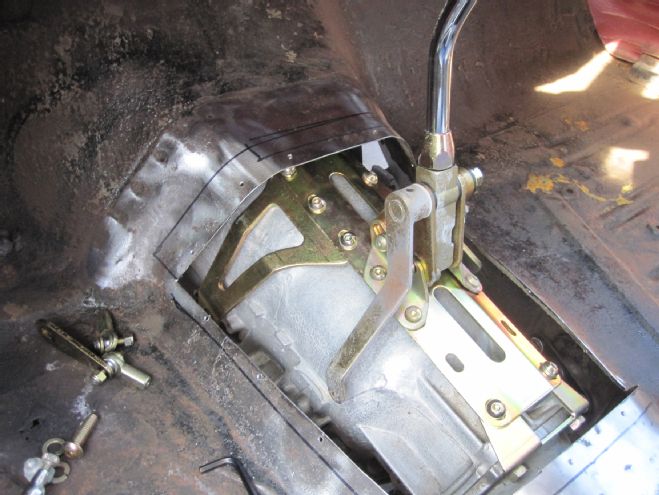
The next step was to mount the shifter assembly to the main bracket by bolting the two "banana" brackets to the main bracket. There are several mounting position options from front to rear on the transmission. I decided where I wanted the shifter to be positioned so that it'd be comfortable and wouldn't interfere with the dash. I then made sure the two button head bolts that attach the left side “banana” bracket to the shifter assembly (in the curved, slotted holes) were tight. Before tightening the shifter assembly down to the main bracket I moved the shifter through all the gear positions again to be sure the shifter lever and knob didn't come in contact with the dash or where the seat would be. (The shifter assembly can be tilted forward or backward if needed by loosening the button head bolts in the curved, slotted holes in the left side banana bracket.)
Next, I put the shifter into the Park position and checked the position of the quad (upper shift) lever. It'll need to be pointing to about the 4:30 position. If not, you can loosen the set screw in the top of the quad (upper) lever, slide the lever off of the shaft, reposition it at approximately the 4:30 position, and retighten the set screw.
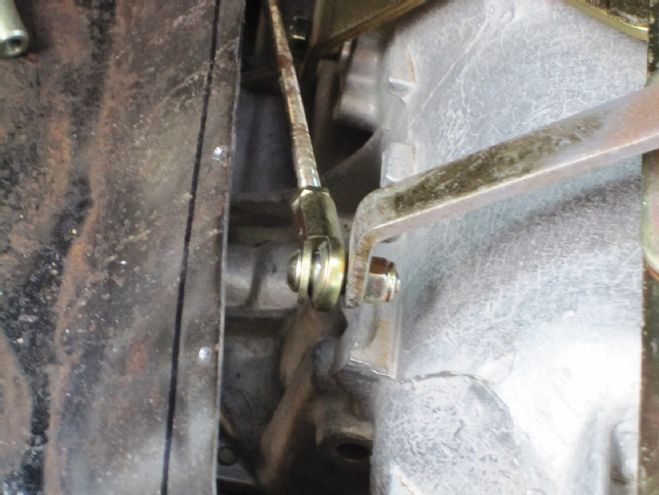
Next, I removed the rod end from the new lower trans gear lever (included in the hardware package) and installed it on the trans (in place of the original lever) and secured it with the original nut. I placed the lower trans gear lever in the Park position with the top of the lever pointing up and slightly toward the rear of the transmission, at about the 1:00 position.
Then the threaded rod was connected to the quad (upper) lever and to the trans (lower) gear lever. I checked to make sure that nothing interfered with the travel of the threaded rod. (If there's any interference, the threaded rod can be bent slightly as needed.) Next, I verified that both the shifter and the transmission were in the Park position and measured center-to-center between the ¼-inch holes in the trans gear lever on the transmission and the quad (upper) lever on the shifter. I subtracted 1-3/4 inches and came up with the length I cut the threaded rod to. I then installed a rod end onto each end of the threaded rod and attached the assembly to the inside of the trans gear lever and to the outside of the quad (upper) lever as shown—and the assembly was complete.
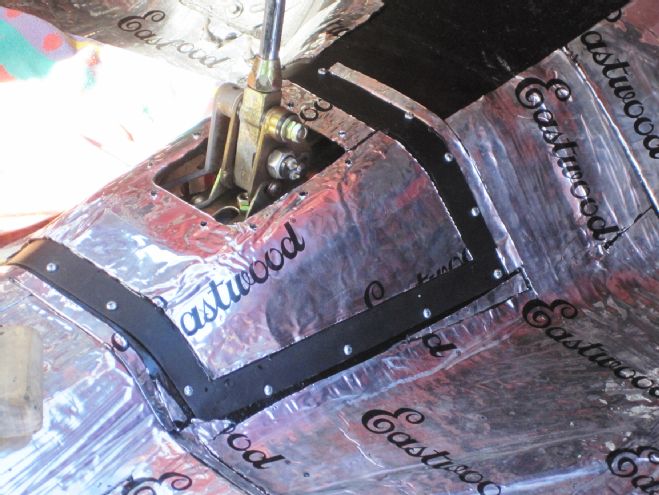
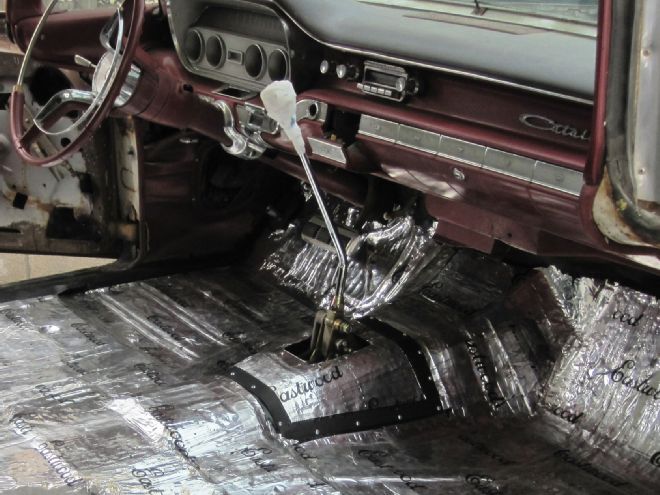
With the install finished I went back to the trans tunnel top and using the shift boot bezel as a guide I cut an access hole in the top and drilled the screw holes for attaching the shift boot once the Eastwood sound deadener and the carpeting were to be installed. Thanks to the top-quality shifter assembly and great instructions I was able to make my Lokar floor shift conversion in a weekend. In my opinion, if you ever consider performing a conversion of this sort I highly recommend Lokar products—you won't be sorry.