If you know the early small-block Chevy engines ('55-'57), you're aware of their inherent accessorizing shortcomings. For one, the smooth-faced (non-drilled/tapped) cylinder heads provide no help for bracket mounting and the only available points of attachment are already being used by the engine mount brackets. Forget about moving the mounts to the side of the engine, as the block's smooth and free of holes there, too.
For those not wanting to swap out their vintage SBC for a later, more accommodating V-8, there is a solution when it comes to adding power steering: Classic Performance Products' front-mount power steering bracket (#PS808). When used with their '69-'70 big-block style pump, it nearly gives the appearance of an OE application, had Chevrolet even thought beyond their generator-adapted power steering option of the time in the first place! (The PS808 can also facilitate CPP's remote-fill pump setup — either '65-'68 Chevelle big-block or '68-'72 big-block pickup — if alternator/generator clearance is an issue with a standard reservoir fill cap.) There is one more limitation to overcome in order to fully facilitate the new PS pump, however.
Factory design of the early first-gen SBCs utilized a press-on harmonic balancer fit to an undrilled/tapped crankshaft. Now, it's not so much the orientation of the balancer to the crank as it is the fact that the crank pulley itself is riveted on, preventing the installation of a double-groove pulley. But the lack of a threaded crank does pose an issue when it comes to installing a new balancer. The solution? Simple: drill and tap the crank!
That not-so-simple task is something typically better suited for a machine shop, preferably with the crank removed from the engine. But your average guy (likely, you) does not want to be bothered with all that trouble and expense just in order to install a $50 power steering bracket, right? Well, while our searches revealed a local engine shop (Superior Automotive in Placentia, California) could perform the task without having to remove the crank (they have a bellhousing type fixture that vertically jigs the engine in a drill press), we actually delved quite deeper, ultimately coming up with a viable DIY procedure.
Though the installation of the bracket/motor-mount is really straightforward, the crankshaft conversion takes a little more time, a lot more patience, and a couple job-specific tools. With a ton of research, an equal amount of OE parts cross-referencing, and a bit of technical ingenuity, we came up with a dual-purpose drill-and-tap jig for in-vehicle crank snout modification*: two solid-steel guide bushings machined to fit (female) a 25/64-inch drill bit and a 7/16-24 tap, as well as (male) the ID of harmonic balancer to be used with the balancer still installed. For applications where the balancer has been removed, a collar notched to clear the keyway and slide over the crank snout can be used. Performing the job with the balancer on seems to provide more stability for the drill/tap bushings, though we performed the work both ways to illustrate steps more clearly.
(*Even with a low-performance engine as such, there is rather high margin for error attempting to modify a precision balanced engine component in its "natural elements," and thus we recommend seeking professional help: in other words, a qualified machine shop — if there is even the slightest bit of doubt on your end.) CT
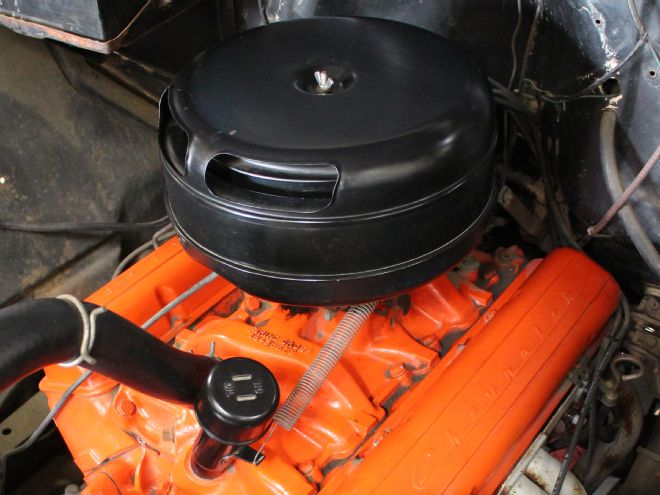
01 The venerable small-block Chevy V-8, in its earliest form, circa 1955. With little hop-up potential and less to offer in the accessorizing department, it serves well in a vintage environment. But thanks to Classic Performance Products, the early "bare-bones" 265ci can be outfitted with power steering, as we're about to show you.
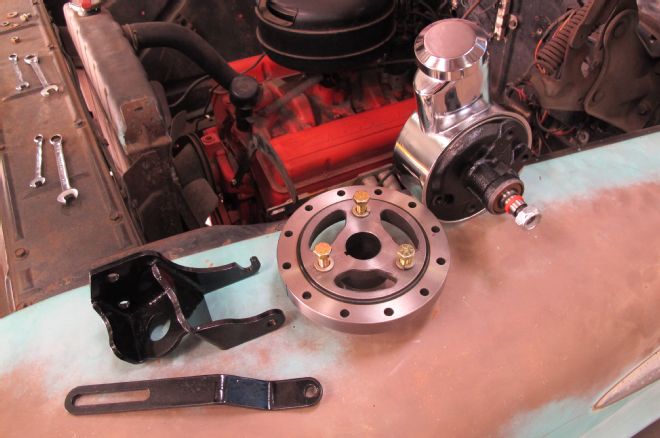
02 CPP's integral engine mount/power steering pump bracket (#PS808) is a very simple bolt-on, designed to use their '69-'70 big-block pump or optional remote-fill setup (see text for particulars). Also shown is CPP's 327/283ci replacement harmonic balancer, which allows for the necessitated use of a dual-belt pulley. We'll be showing you how to incorporate that, as well.

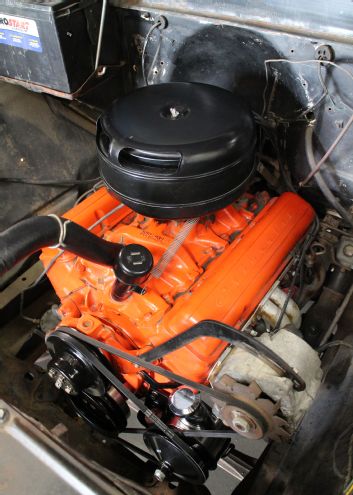
03 The early first-gen small-blocks utilize forward mounts — and with no casting provisions for side mounts, unless you're willing to update engines, you're stuck with the biscuit-and-pedestal style setup. No additional mounting points on the front of the engine make it difficult to add accessories...but not impossible.
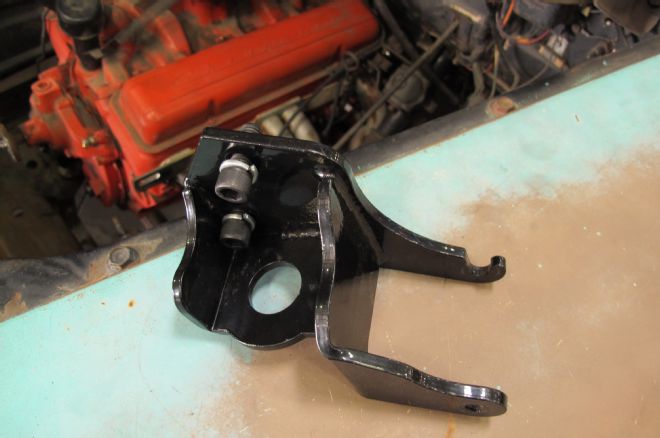
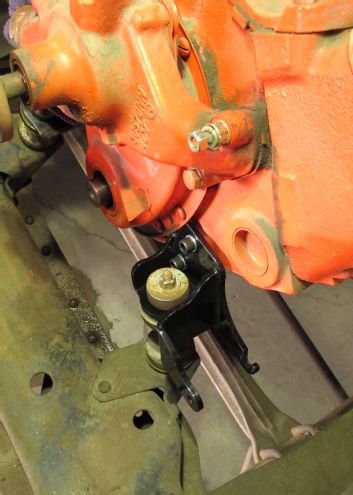
04 CPP's front-mount power steering bracket integrates the OE mount configuration with a cradle for a GM pump/reservoir, easily resolving the 265's limitations.
05 Theoretically, the engine should support itself via the right-front and transmission bellhousing ear mounts, but for safety's sake, secure the engine accordingly (with a hoist) while removing the driver-side mount.
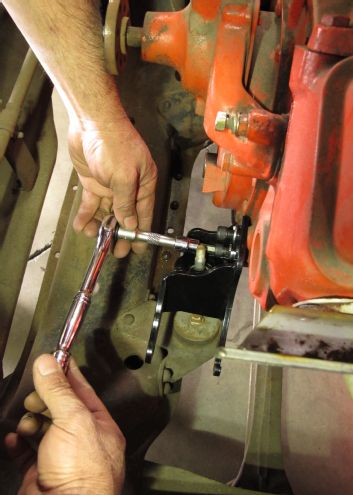
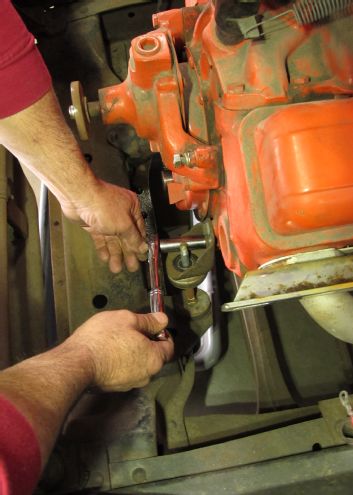
06 & 07 When installing the #PS808 braket, which attaches to the block using the supplied socket-head Allens, replace the engine mount bushings, and/or the link end assembly, if needed. Normally, a job as such would proceed with the pump installation, but here's where we detour for a bit to address the balancer situation.
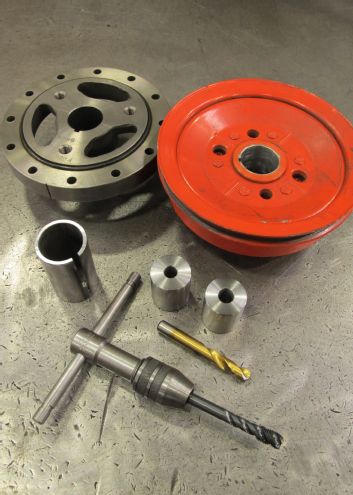
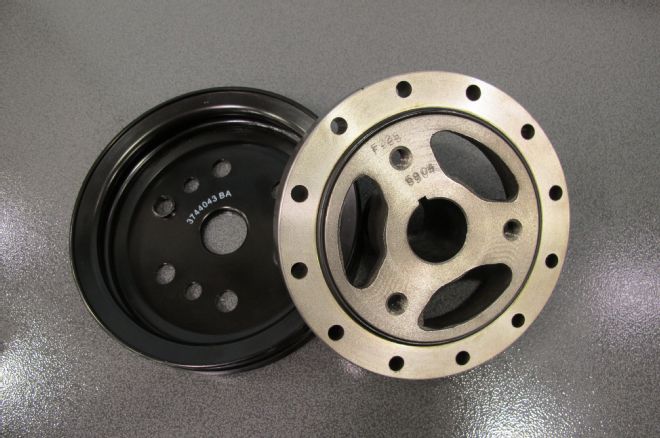
08 & 09 The stock 265 (and many early 283/327s) use a press-on balancer with a riveted single-groove pulley. That poses an issue, as the new power steering pump belt requires a double-groove pulley for its offset location — thus, the need to swap balancers. CPP's 6-1/8-inch harmonic (#18-35) solves the pulley issue, however, the undrilled/tapped crank needs to be "dressed" appropriately.
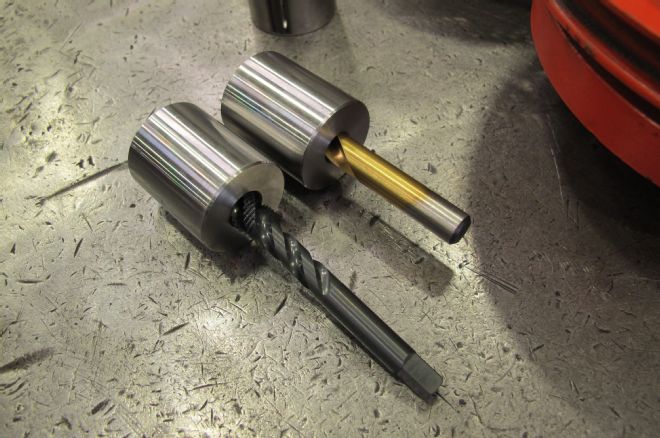
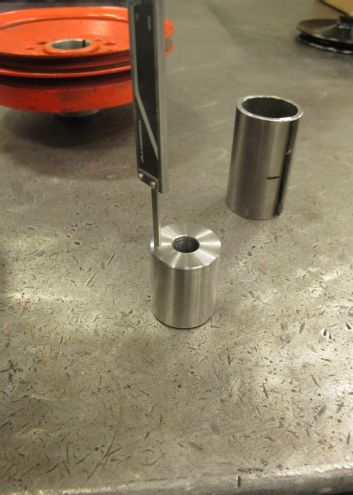
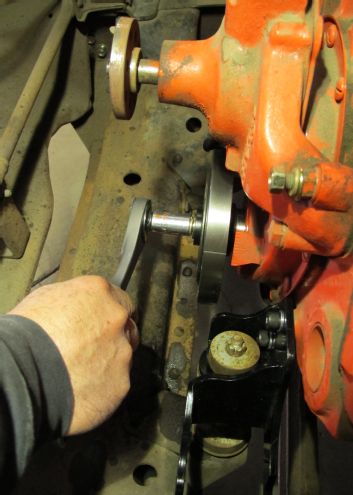
10 In a perfect world, drilling and tapping a crankshaft should be done with it removed from the engine, in a jig, by a machinist. When the world is not perfect, some resourceful DIY'ers resort to ingenuity, which in this case translates to an in-vehicle/in-engine drilling and tapping via solid-stock guides, machined to the ID of the damper hole (1.225-inch OD) with correlating drill/tap center IDs (25/64-inch and 7/16-20, respectively).
11 The machined "bushings" are to keep the drill bit and tap centered and aligned, either with the balancer in place (preferred) or along with a steel tube collar without the balancer.
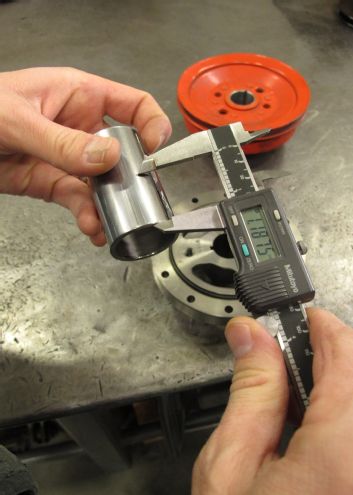
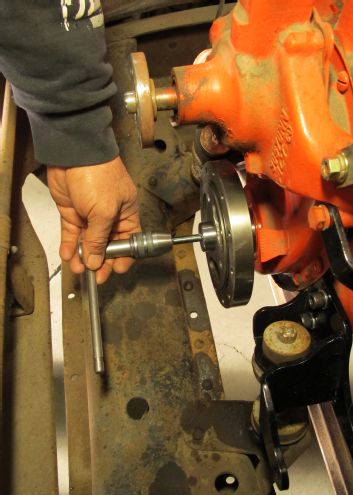
12 & 13 If the damper has already been removed, the abovementioned collar acts as a guide for the bushing. In this case, we used 1½-inch tubing (1/8-inch wall), notched for keyway clearance and alignment. If the fit is too snug over the crank snout, 0.120-wall tubing can be used. The collar must be sized to length based on the snout extension and length of the drill/tap bushing.
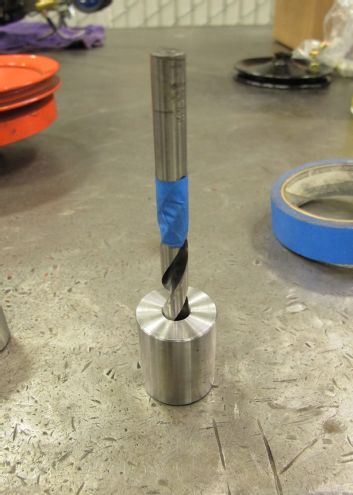
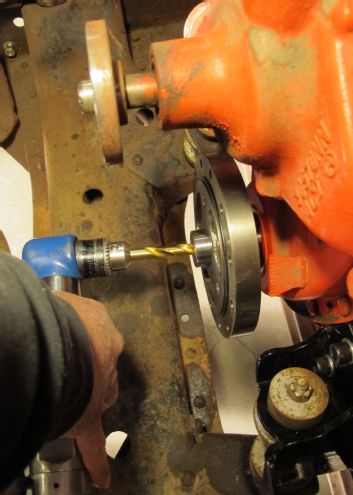
14 The overall length of the collar and bushing combined will help determine the amount of drill depth required, which we marked on the bit for visual reference with blue masking tape.

15 Using the collar may not be quite as stable as opposed to drilling with the balancer in place — either way, don't force the drill. And maybe more importantly, use a high-quality bit, as the hardened steel will put up a good fight.
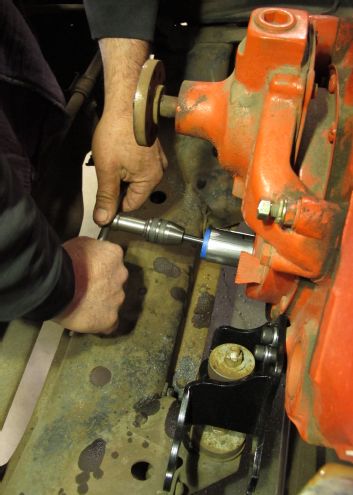
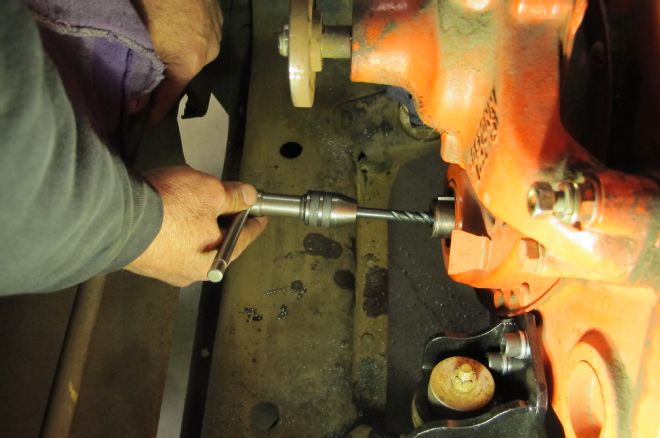
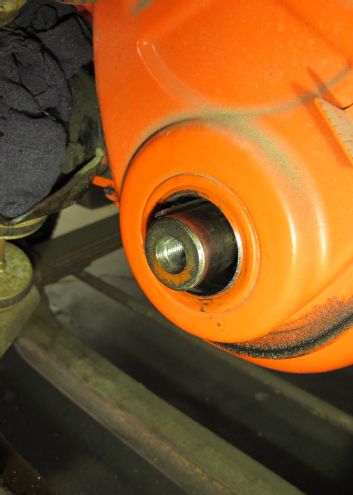
16 & 17 Once the hole has been "squarely" drilled, proceed with the threading using a spiral tap (resembles drill bit), which will help pull cut material back out rather than push it in, making for a cleaner, more accurate thread.
18 With an initial depth of thread cut, the guide bushing can be removed and the remainder of the crank tapped as such. Remember to use a liberal amount of cutting oil during the process, keeping the tap as clean from metal debris as possible.
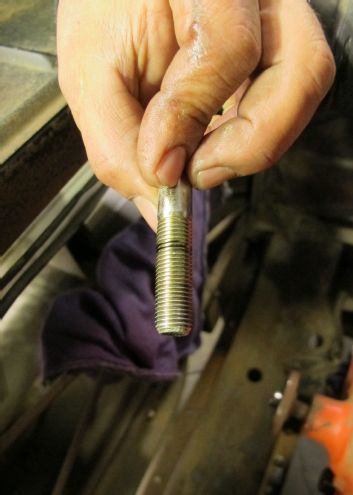
19 All that hard work and effort should ultimately net you these results: clean, sharp, and straight 7/16-20 threads to accept a standard small-block balancer bolt and ultimately avoid having to hammer the harmonic balancer onto the crank, a recipe for potential internal component damage if not done correctly (ie, resetting the main bearings by hammering on the "back" of the crank once the balancer is installed).
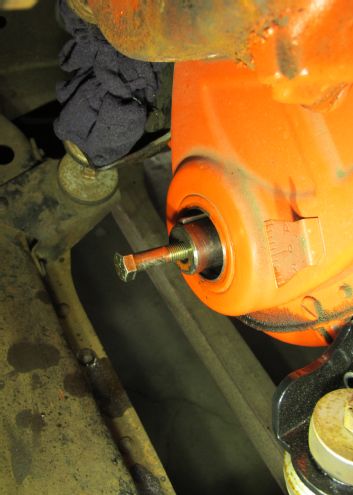
20 & 21 Speaking of the balancer bolt, if you do not have an installer tool, simply use a longer 7/16-20 Grade-8 bolt marked with the hole's overall depth to prevent bottoming out and ruining your fresh new threads.
22 Proceed with the usual balancer installation procedure, noting that, unlike the OE damper, the new one will sit approximately ¼-inch further out from the factory timing tab (balancer engagement on the crank snout is the same; the balancer itself is positioned differently).
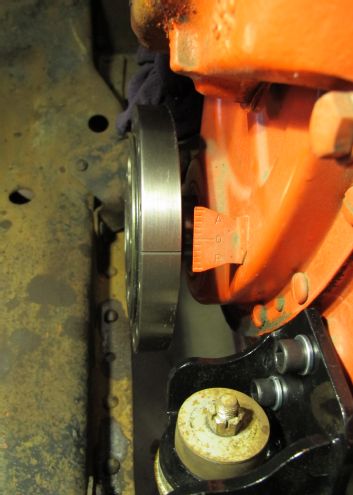
23 The timing mark, on the other hand, lines up in the same position as the original as they're both oriented by the keyway location.
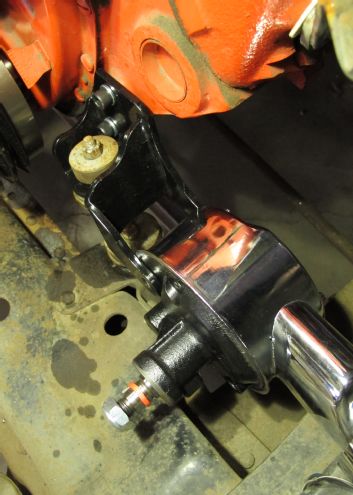
24 Once the balancer has been installed, the bolt is removed and the new dual-groove pulley bolted on, followed by the reinstallation of the correct balancer bolt and washer.
25 Now, the rest of the power steering pump install can resume. The pump sits in the "cradle" of the #PS808 bracket using its lower rear stud and lower front threaded hole to mount.
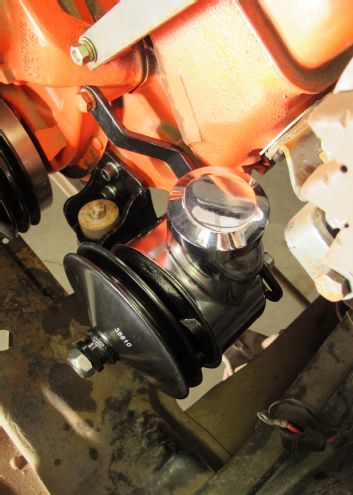
26 The adjustment arm can either mount off the upper water pump hole, or as shown here using the lower one to accommodate the alternator/generator adjuster arm above.
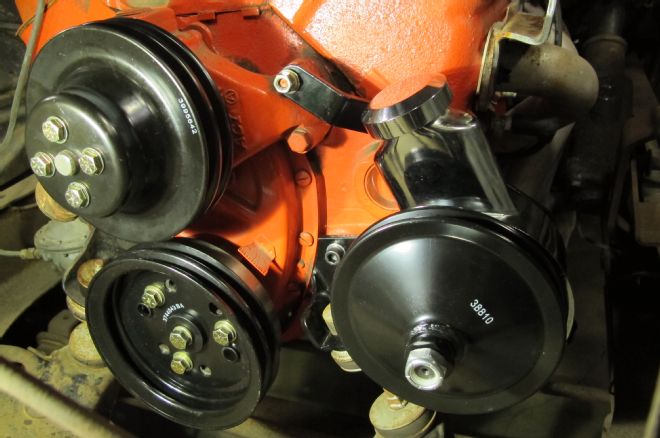
27 Our setup uses the following pulley configuration: #CP38810 single-groove power steering, #CP38811 double-groove crank, and #CP38813 double-groove water pump. (Numbers printed on crank/water pump pulleys are OE).
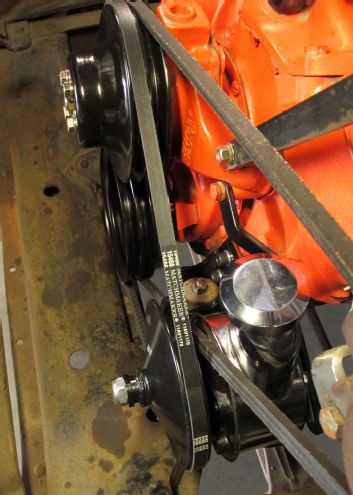
28 The setup also called for a #15466 belt for the PS pump. Note the amount of clearance for the alternator belt — the longer the belt, the closer it will ride near the pump body.
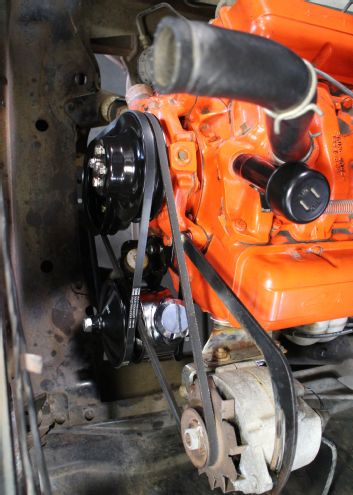
29 All said and...DONE. Our newly power-steering-accessorized 265 complete with bolt-on harmonic balancer and crank pulley. Now we just need to install the CPP 400 Series power steering box conversion to go with the pump!