It’s not easy living in the shadow of your big brother, especially when “he” is the most popular engine to ever leave the factory.
The 305 small-block debuted in 1976 in a variety of cars and trucks. It featured the same crankshaft as the 350, but in a block with the same bore as the old 265. This made for a small bore/long stroke combo that made plenty of bottom end torque to move heavy cars and trucks, but with a small enough displacement to pass emissions requirements and offer acceptable fuel economy during the various fuel crises of the 1970s.
For its designed goals, the 305 succeeded tremendously. Produced from 1976 to 1998, the much-maligned 305 was never intended to be a performance engine like some other small-blocks. Regardless, it was pushed into that role with the third-generation Camaro, where its output would top out at 210 horsepower with a Tuned Port Injection system. It later made 225 hp in the ’96-’98 fullsize trucks. The problem will always be the small bore, which limits the size of the valves you can run, and the block casting itself, which cannot be machined out more than 0.060-inch, and that’s only recommended on an early version. (That still leaves you with only 313 or so cubes with the stock stroke.)
Today, a lot of people still run 305s, between different classes of oval track and drag racing, and on the street where swapping to a 350 block is not an option for various reasons. So what is an enthusiast to do when they want more power out of their 305? How much power can you get out of one with basic bolt-ons? We decided to find out.
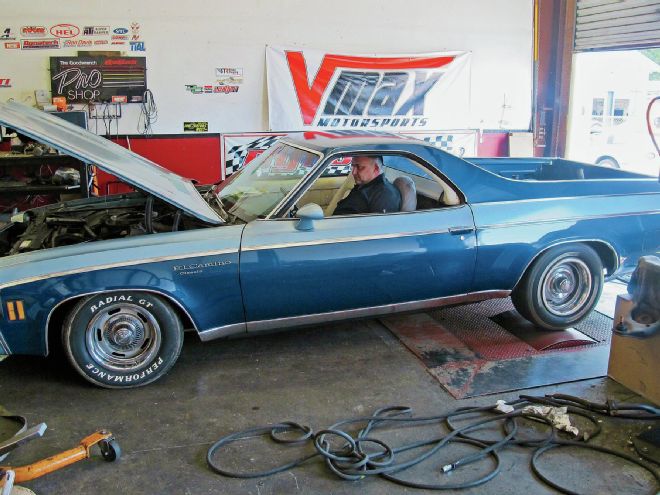
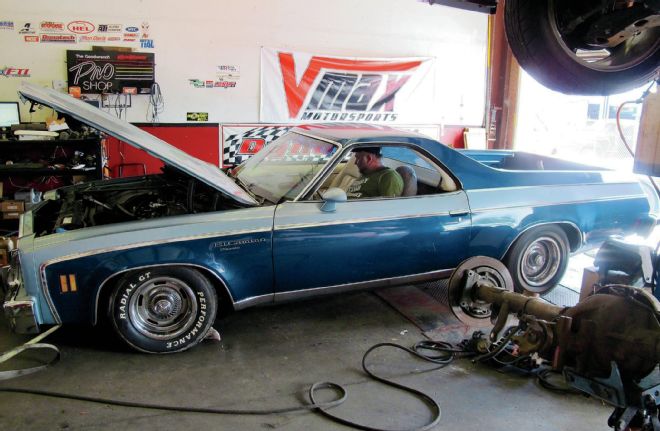
We had access to the perfect test subject, a clean, one-owner ’76 El Camino with about 100k miles on the odometer and a bone-stock 305. Then we hit the Summit Racing website, and ordered up an assortment of bolt-on performance parts that would let us see what we could squeeze from the stock short-block, while still maintaining honest streetability. Check out what we got.

01. Our starting point is a stock, one-owner LG3 305, factory rated at 140 net horsepower. It breathes through a Rochester 2GC two-barrel carb, tiny valve heads, stock manifolds, and a single exhaust. On the chassis dyno, we could only get 85 hp and 154 lb-ft of torque out of it. Despite being in perfect operating condition, the engine refused to rev past 3,300 rpm on the dyno. Oh, there were dark days for enthusiasts after 1972.
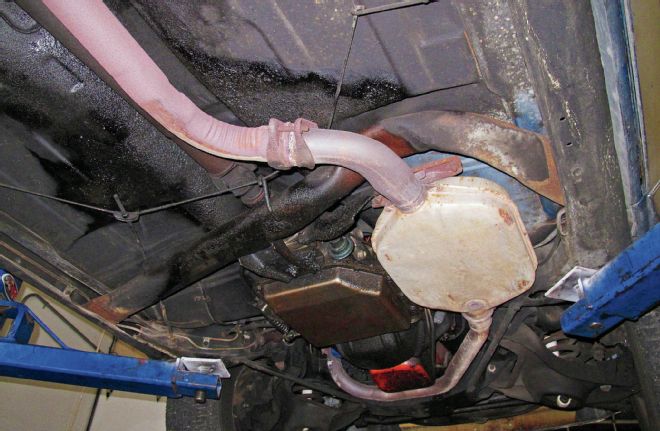
02. The original exhaust is further hindered by the massive 25-lb catalytic converter. Just the weight loss alone from removing this part is worth it, but these flowed like mud and hampered factory performance.
03. Our subject El Camino is in amazing shape for a 100,000-mile, almost 40-year-old car. The factory exhaust unbolted with a minimum of fuss, and was quickly discarded.
04. The stock transmission crossmember had to be pitched to free up enough room for the new dual exhaust.
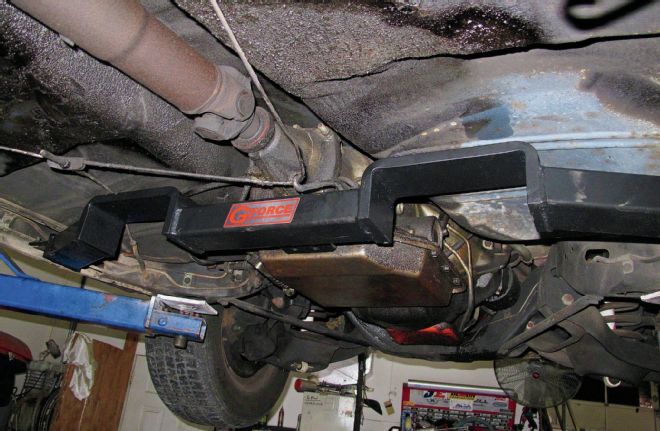
05. Replacing our factory unit is this new one from Summit Racing, PN SUM-770322. Besides its beefier construction, it features cutouts for dual exhaust pipes, and can be used to convert our El Camino to a 200-4R transmission at a later date if the owner so decides.
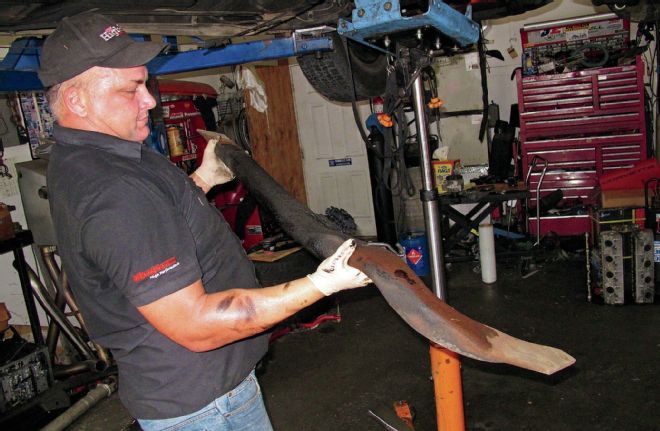
06. Factory iron manifolds have never been known for their flow attributes; these are going in the scrap pile as well.
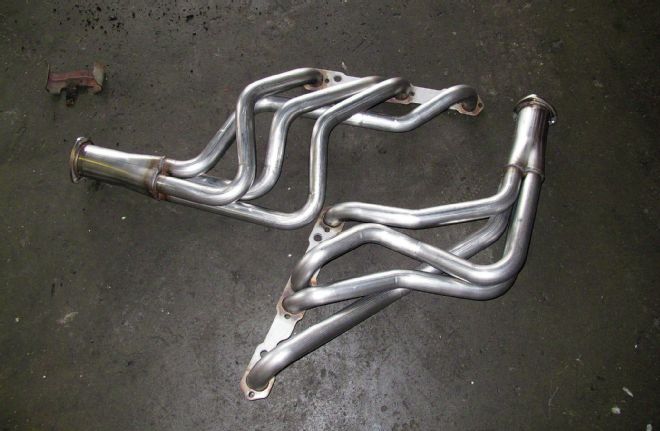
07. The first upgrade for our 305 will be this set of Hooker long-tube, stainless steel headers, PN 2451-2HKR. They feature 1-5/8 diameter pipes, the perfect size for our displacement. Too big a header pipe on a small displacement engine can kill exhaust velocity, hurting bottom end torque and horsepower. It’s the same principle as on the intake side. Too big an intake manifold and/or carburetor will kill air velocity going into the engine in the same way, hurting bottom end power. The tubes are made from 16-gauge stainless steel, with a 3-inch diameter collector.
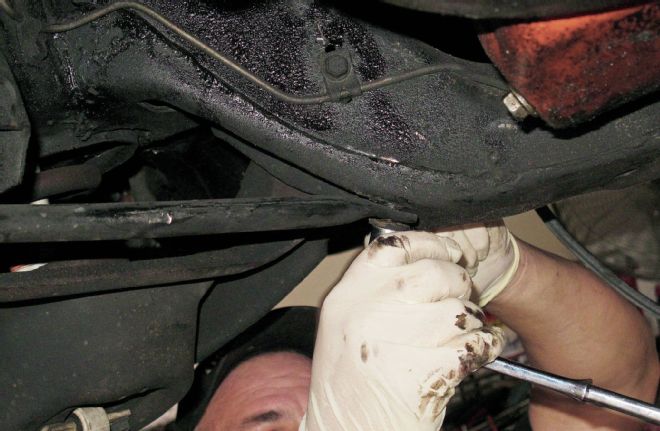
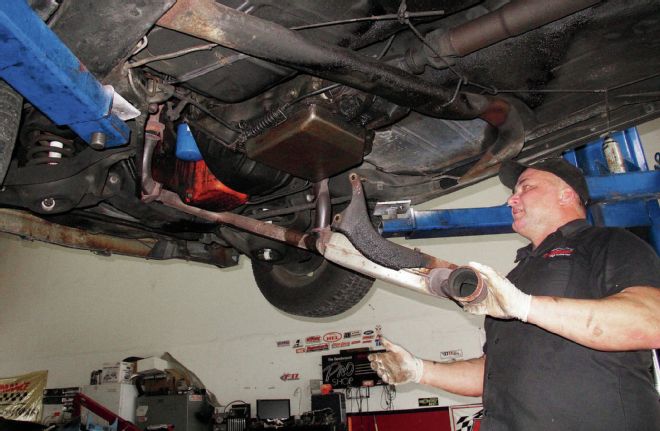
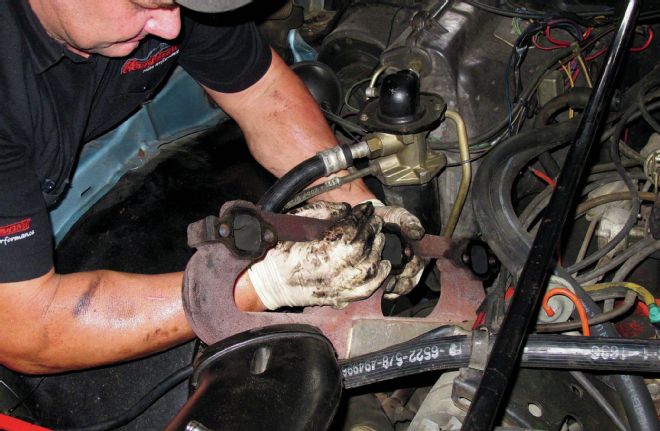
08. The A-body chassis features a support from the framerail to the front crossmember when under an El Camino or station wagon. These have to be unbolted to install headers, along with removing the oil filter on the driver’s side.
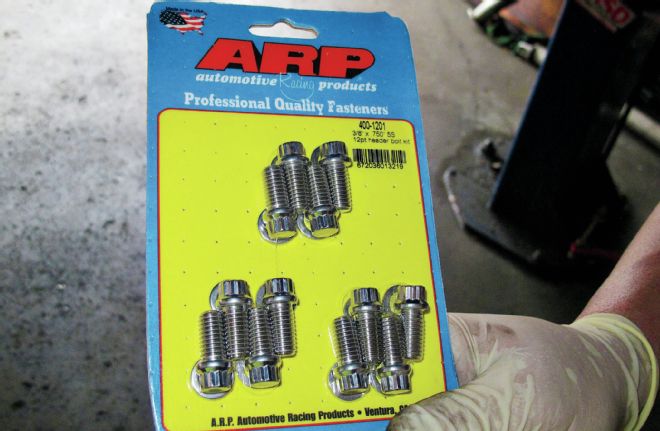
09. To secure our headers, we picked up a set of stainless ARP header bolts, PN 400-1201.
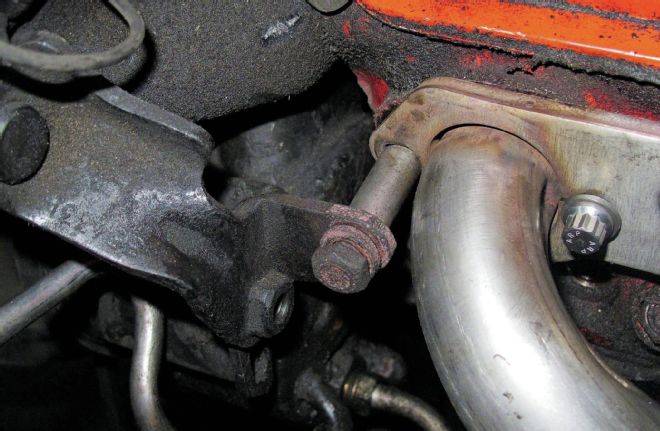
10. Our El Camino came with factory air, and to retain the compressor, we had to reuse this exhaust bolt, and make a spacer to use it with our headers. We also had to trim the rear compressor bracket to fit with the headers.
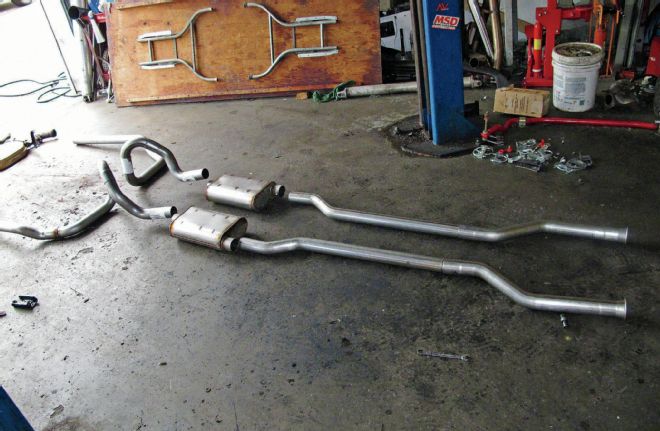
11. From the headers back, we picked up a dual exhaust kit from Summit Racing, PN SUM-680131-SS. It features fully stainless steel construction, 2.5-inch pipe diameter, and turbo-style mufflers.
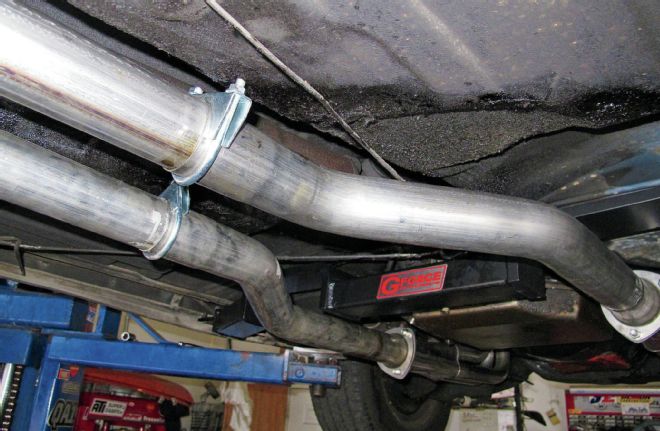
12. The Summit Racing kit comes with longer than necessary pipes, to accommodate the various lengths of different header assemblies, so you’ll need to trim some sections of pipe to fit your specific application.
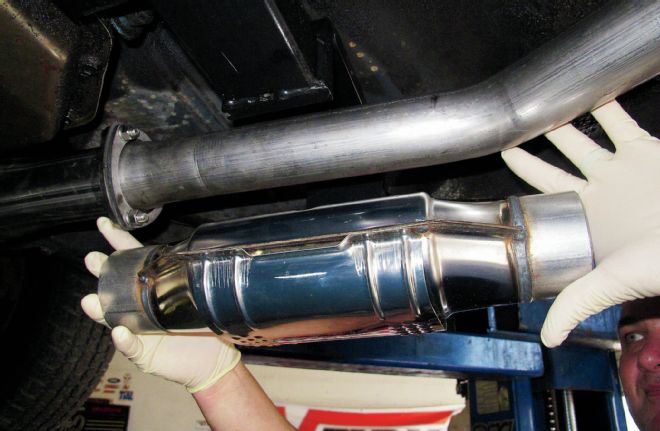
13. For those who have to keep their catalytic converters to maintain legality for inspection and tagging, you can replace the outdated and inefficient factory converter with a modern converter like this one from Summit Racing, PN SUM-670030. It features a ceramic-honeycomb internal material that cleans the exhaust emissions better than the original converter, but without the exhaust restriction.
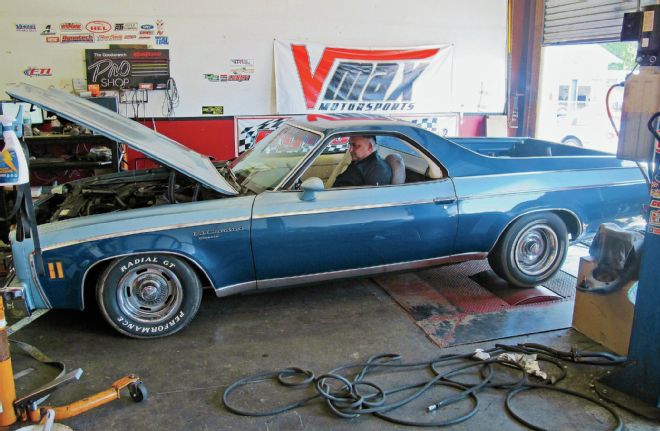
14. With the exhaust fully installed, we strapped the Elky back to the chassis dyno to see what we got. Still breathing through the anemic two-barrel, we picked up six horsepower and 2 lb-ft due to the better flowing exhaust. We also were able to run the engine up to 4,300 rpm, before the engine hit the wall. Our better exhaust paves the way for bigger gains with our next batch of bolt-ons.
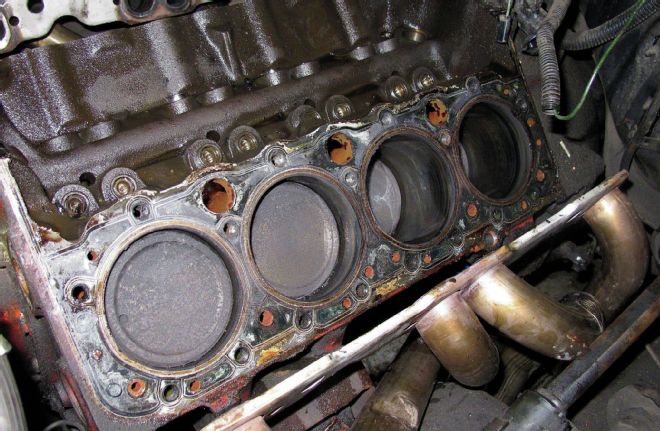
15. Once the engine cooled, we drained the coolant and oil, then pulled the top end off the engine. Inside, we found a very clean engine, with some of the factory hone cross-hatching still on the cylinders, no sludge, and very little carbon buildup on the piston tops. We used some lacquer thinner on a rag to wipe the tops of the pistons off, and they cleaned up completely. From the factory, our 305 came with 8.5:1 compression.
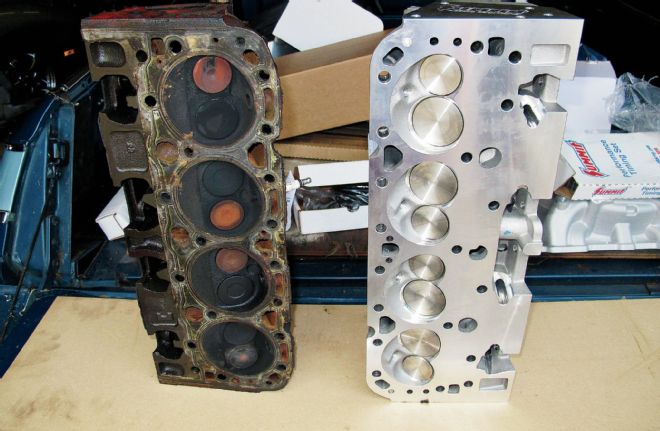
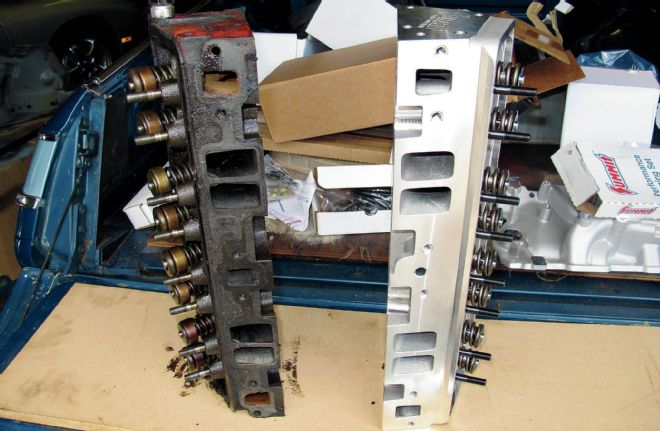
16, 17. The factory cast-iron 305 heads (left) came with 62cc open combustion chambers, with 1.72-inch intake valves and tiny 1.3-inch exhaust valves. Replacing them will be a set of Trick Flow Specialties Super 23 aluminum heads, PN TFS-30310001. Designed for small-bore small-blocks (3.736-inches minimum required) they have 1.94-inch intake valves, 1.5-inch exhaust valves, and 175cc intake and 67cc exhaust runners. The heart-shaped, closed combustion chamber is a modern, efficient design that will help with a more complete burn of the air/fuel mixture, and the 56cc volume will also give us a welcome boost in compression. They come equipped with high-performance single with a damper valvesprings, machined valve locks, and stainless steel valves.
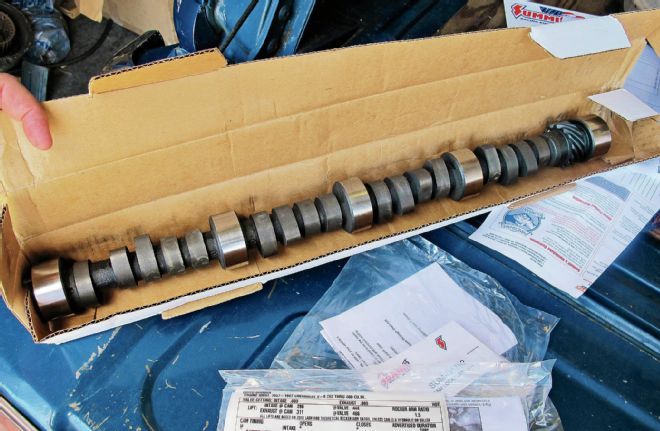
18. The factory 305 cam is in the trash, replaced by this Summit Racing flat tappet grind, featuring 0.444/0.466-inch lift, 288/298-degree advertised duration, 112-degree lobe separation, and a basic rpm range of 1,600-5,200. Combined with the new heads and intake, this should give us great gains on the bottom end, along with even larger gains on the top end.
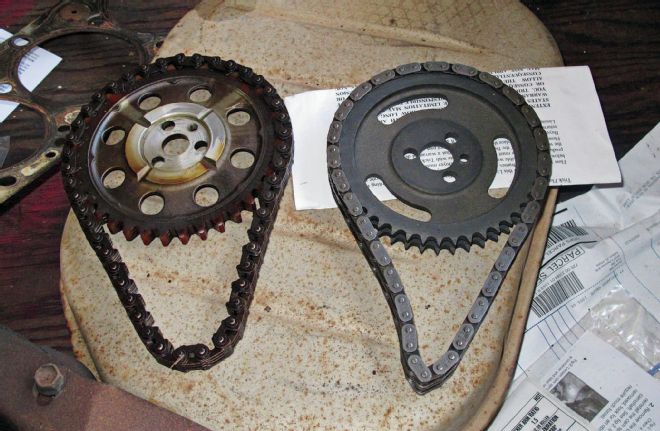
19. Along with the cam, we pitched the factory nylon tooth timing set for a Summit Racing dual true roller timing set, PN SUM-G6600-9.
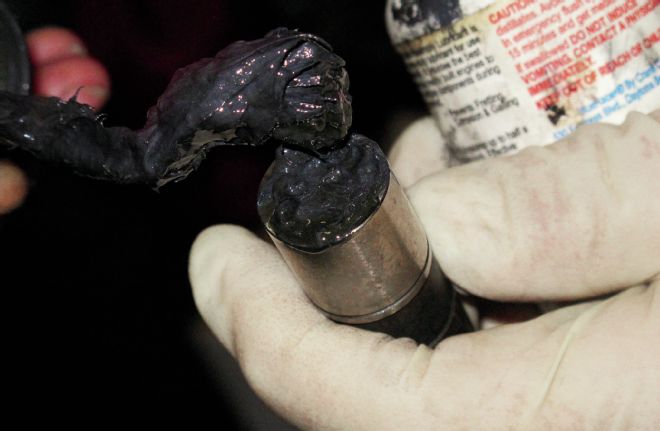
20. When installing new flat tappet lifters, you should give the face of the lifter and sides a good coating of moly assembly lube to lubricate and protect them during initial startup.
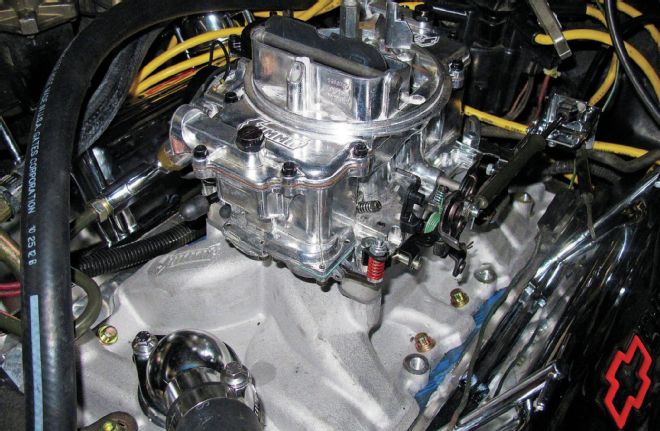
21. We replaced the factory two-barrel setup with this Summit Racing Street & Strip Stage 1 dual-plane intake, PN SUM-226012. On top of that is a Summit Racing Street & Strip 600-cfm vacuum secondary carb, PN SUM-M08600VS. It’s a one-piece design that eliminates gaskets below the fuel line to reduce the risk of fuel leaks, color-coded vacuum ports for easier installation, high-flowing power valve channel, and externally adjustable center-hung floats with clear sight glass float windows.
22. We also added a Summit Racing 110-gph (gallons per hour) high-flow mechanical fuel pump, PN SUM-250020-1.
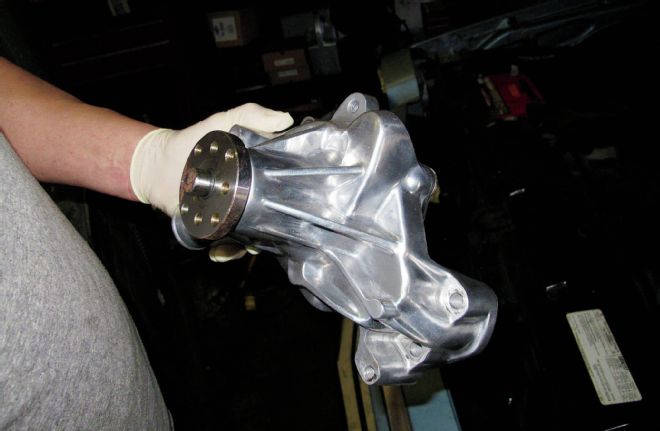
23. It didn’t seem right installing a crusty old iron water pump next to those aluminum heads, so we snagged a ProForm high-volume polished aluminum water pump, PN 67264, and an ARP Racing stainless water pump bolt set, PN 430-3201.
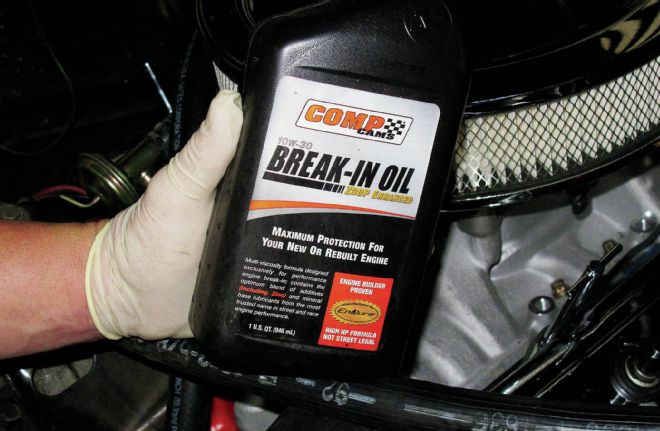
24. To break in our new flat tappet cam, we used 5 quarts of Comp Cams’ ZDDP-enhanced break-in oil, PN 1590. It features all of the proper additives necessary for a successful flat tappet break-in and initial new engine startup.
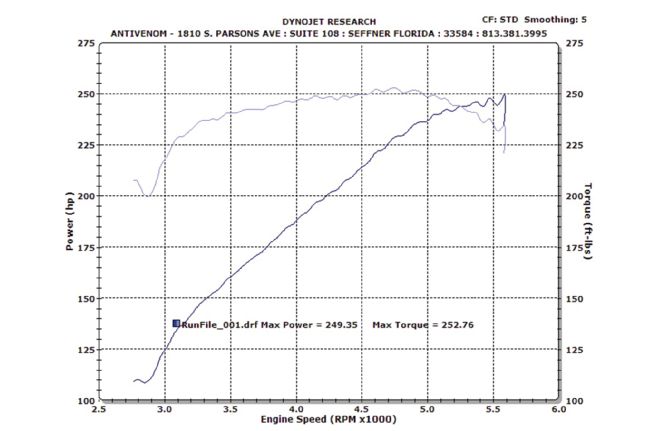
25, 26. After breaking the cam in, we strapped the car back down to the Antivenom Performance chassis dyno to see what we gained. Not only did we break 100-rear-wheel horsepower, we blew past 200, settling in at 249.35 at 5,600 rpm. Max torque was 252.76 lb-ft, and it was better everywhere on the curve.
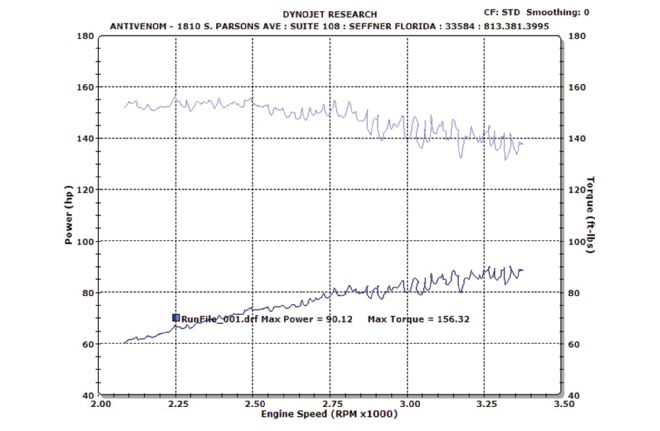
27. Here’s the graph showing what we got after the headers and dual exhaust. It was so chocked by the intake and two-barrel we only picked up six ponies.