After decades of use, there are few original parts on a well-used Pontiac that don't need to be replaced. The GM '64-'72 A-body muscle car design is such that the fuel tank is protected from the rear by the bumper, but is fully exposed to road damage on the underside of the vehicle. Once the factory galvanized coating wears off, the tank's exterior surface is prone to rust, seams start to seep fuel, and the general condition deteriorates quickly. When it gets to this point, it's not just a cosmetic issue—it becomes a safety consideration as well.
Stock replacement tanks for most Pontiac muscle-car applications, along with sending units and tank straps, are available from many of the Pontiac resto-part suppliers that support this magazine. When you purchase a replacement tank, be sure to ask if the retaining straps and fuel-gauge sending unit are included or sold separately, as you'll need them for the install.
Removing and replacing the fuel tank in early-'60s Pontiacs is relatively easy, as there is usually only one line going to the fuel pickup in the tank and a vent. In later models, as emissions requirements became more stringent, a fuel-return line was added, with several more lines to follow.
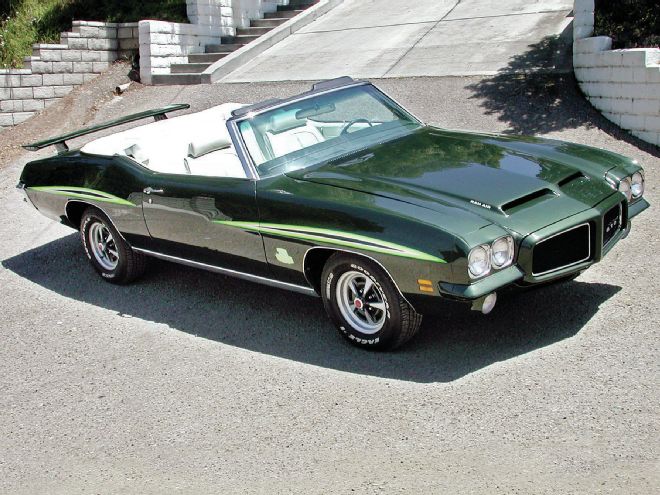
Our subject vehicle is a '71 GTO Judge convertible (one of only 17 made), and it has a handful of fuel, return, and vapor lines coming from it. We took digital photos of the line routing and connections, and labeled the parts before we disassembled the original system so that the reassembly was free of the dreaded question, "Where did this go?" It also helps to have a factory service manual as a reference, should you need it.
Since the original factory gas-tank insulation was already missing, we're adding a protective layer of top insulation to this new tank. From Scosche Industries, Accumat is a heatshield/sound-damping material. It will provide a cushion between the tank and trunk floor, eliminating the chance of metal-to-metal contact.
The most critical part of swapping out the fuel tank is the fuel itself. The safest method is to run the tank as dry as possible by driving the vehicle, and then siphoning out the leftover fuel into an approved fuel container. We weren't able to get it all out, but the few gallons left were not very heavy.
Once the tank was removed, we poured the residue into the same fuel container. It's helpful to use a cone-shaped filter for this part of the project, as there might be dirt in the last bit of gas. If the gas is old, however, you'll want to discard it. (Check with your local city or county for proper disposal instructions.) Once the old tank is removed, let it air out for several days to remove any dangerous fumes.
There is nothing exotic about this resto project—a floor jack, jackstands, and normal SAE handtools will accomplish the job nicely. To make a little more working room, you might want to put the vehicle up on heavy-duty jackstands and remove the rear wheels. Having a helper makes things easier, but it isn't required.
We ordered the correct tank for this '71 Judge (the various connections and filler necks differ almost each year) with the filler neck attached. (Replacement tanks are available with and without the filler neck.) We will also install an N.O.S. sending unit that the owner has in his parts supply. Replacements are available from resto-part suppliers. A new metal retaining ring and rubber O-ring come with the tank.
If you're building a show car or just want to make your hobby driver a little safer, this is a worthwhile project, plus the fresh plating on the tank looks great from the rear. Now follow along and see how it's done.
Meet the subject of our fuel-tank swap. It's a '71 GTO Judge convertible undergoing a frame-off restoration. It's one of only 17 Judge ragtops produced that year, and the last year for The Judge option.
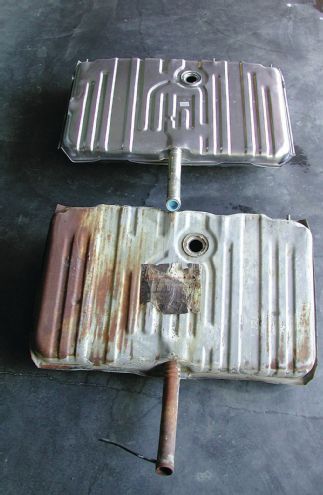
1. Before starting on the installation, we compared the new tank to the factory original we removed to ensure that they are identical.
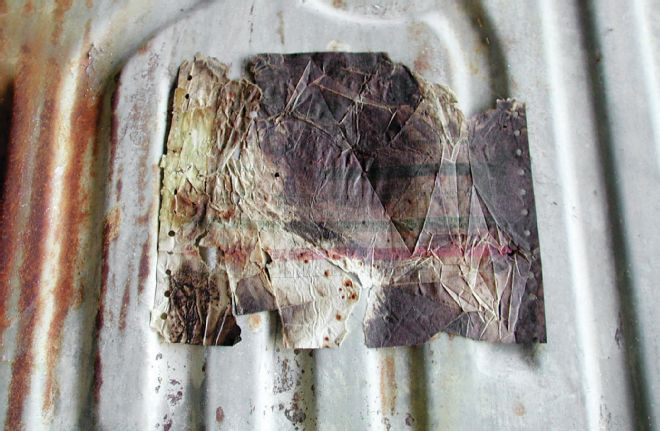
2. This is always a treat for a Pontiac fan. The factory tank still had the vehicle's broadcast sheet attached to its top. This is a holy grail for restorers, as it documents the vehicle and its options in great detail.
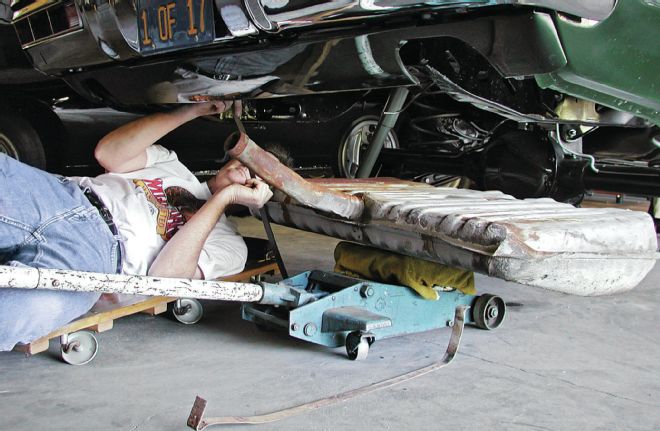
3. We disconnected the fuel line, ground wire, and any other connections at the tank. Then we supported the tank with a floor jack while disconnecting the two long bolts at the back of the tank, which secure the straps. We had to bend the support straps down and out of the way (alternatively, we could have removed them completely) with the tank on the jack.
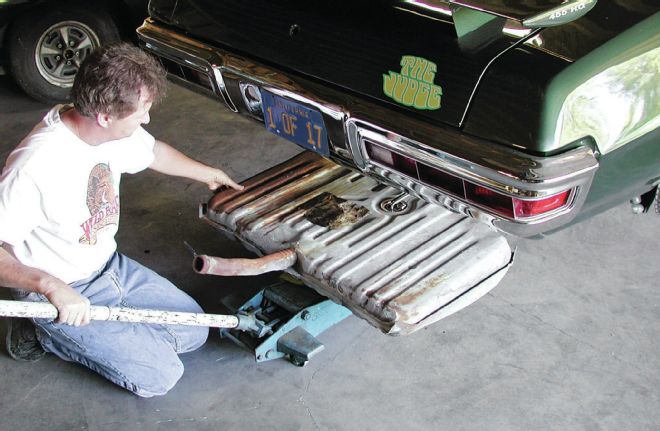
4. The original tank sports several areas affected by rust. On its bottom, there are large dents and abrasions from battles with road debris and bumps over the last 40-plus years.
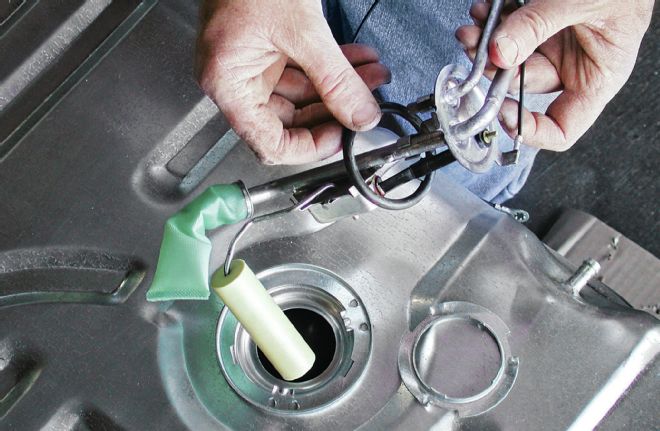
5. We left the original sending unit in the original tank and installed an N.O.S. unit in the new tank. We used care while installing the sending unit so as not to damage the sock filter or float. A new retaining collar and rubber O-ring (shown) came with the replacement tank. We will install the O-ring with the sending unit.
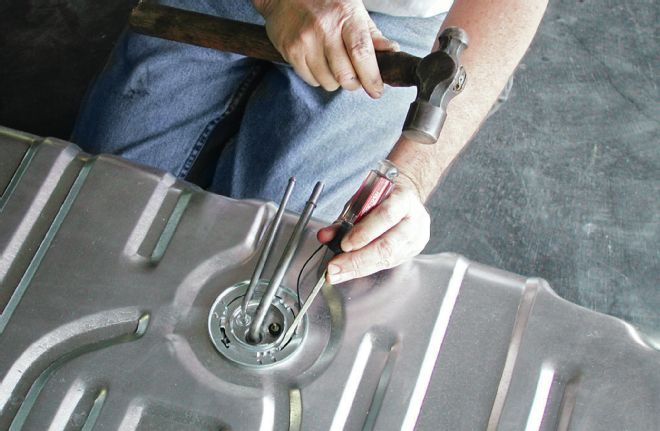
6. Next, we installed the retaining collar, tapping it tightly into place with a hammer and large flat-blade screwdriver. This is a pressure-fit collar that compresses the O-ring as it is seated into position, preventing fuel leaks.

7. We added a sheet of Accumat to the top of our new tank to minimize metal vibration, provide an insulator to prevent metal-to-metal contact, and function as a heatshield. It is self-adhesive, and since it is pliable, it will take the form of the tank.
8. We used a soft towel to prevent any dings or scratches on the new tank as it was jacked into position. If you're doing this task without a helper, we suggest you establish a balance point for the new tank on the jack so you can install the mounting straps.

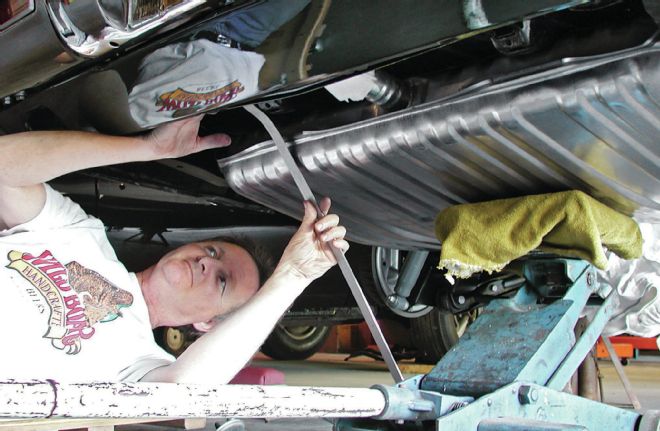
9. We installed new reproduction retaining straps next. At the rear of the GTO, they hook into pockets in the frame and are retained with a special screw passing through the strap.
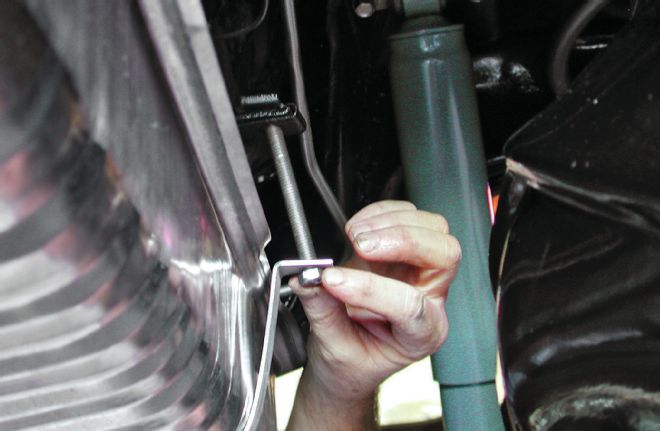
10. The soft metal straps need to be slightly bent to conform to the exact shape of the tank, and then pushed up at the back end to allow the retaining bolt to be inserted. This long bolt screws into a threaded mount in the chassis. Once both bolts were started, we tightened them evenly side to side until the tank was secure.
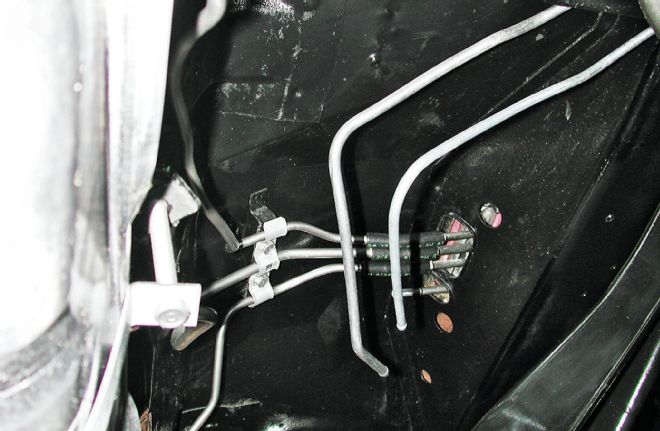
11. This GTO restoration was re-plumbed with stainless-steel lines sourced from Classic Tube. There is a maze of tubes converging in this area, most of them involving emissions. Beside the fuel line and return line, there are vapor tubes to the canister behind the rear seat, and lines that run up to the charcoal canister in the engine compartment. Now you know why we took digital photos of the factory parts during the disassembly.
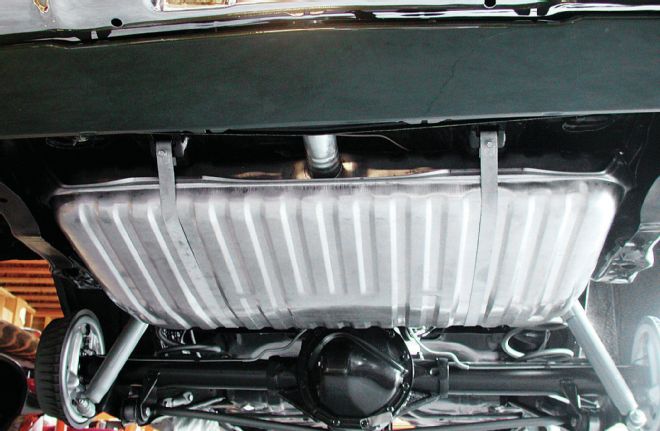
12. The new tank looks great and is ready for any car-show judge. The project only took a few hours.