The performance world is full of stories on how to bolt in a $10,000 crate LS engine into a 100-point, perfectly restored muscle car. The majority of these well-meaning stories seem to miss the mark with regard to budget. For many car crafters, the cost of a new crate engine alone would send their projects into crippling budgetary crisis. Worse yet, the stories seem to gloss over the details that, for the DIY guy, are the real meat of the story. What engine mounts did they use, and is there more than one option when it comes to oil pans and headers? What if you don't want to spend $2,500 on an accessory drive? These and a couple of dozen additional details are what we will cover here. Granted, this story is specific to stuffing a budget-friendly LS truck engine into our Orange Peel '66 Chevelle, but many of the details that surround this conversion will help you with a similar swap into an early or second-gen '68 to '72 Camaro or Nova, or even into a Buick Special, Olds Cutlass/F-85, or Pontiac Tempest.
Engine Quest
Our journey began when we ran across a well-used 5.3L truck engine for sale on Craigslist for $200. The seller had yanked it in favor of a larger 6.0L engine, and his take-out was exactly what we were looking for. The engine came as a long-block that was missing the intake manifold but came complete with the heads, front and rear covers, valve covers, and even the spark-plug coils. We dragged it home, removed the heads, cleaned the block exterior, and then painted it an appropriate Chevy orange. The stock LS truck cathedral-port heads are, other than chamber size, virtually the same in terms of port volume, valve size, and intake and exhaust port flow. Stock truck 4.8L, 5.3L, and 6.0L truck engines sport similar compression ratios that hover around 9.5:1. This is in deference to 87-octane fuel and high loads. We decided to use an inexpensive Fel-Pro composition head gasket that measures a thinner 0.040 inch to help raise the compression to 9.75:1. Next, we installed a new Comp hydraulic roller cam, and just before bolting the heads back on the engine, we decided to double-check the stroke to ensure we had in fact purchased a 5.3L engine. Because the 4.8 and 5.3 share the same small 3.78-inch bore, we rotated the crank to put the piston at the bottom of its bore and used a dial caliper to measure the piston travel. When the caliper read 3.27 inches, we realized we'd been duped. If the engine had been an actual 5.3L, the stroke would be 3.62 inches. This really didn't change anything as far as our engine swap was concerned, but dropping from 325 to 293 ci certainly puts a dent in both torque and horsepower. While we were shooting for 375 hp from the 5.3, we've lowered our expectations to around 315 hp and less torque. Bummer.
But this small setback doesn't really change the purpose of this story, which is to chronicle all the details necessary to complete an LS engine swap.
Cam Specs
Oil Pans— What Fits?
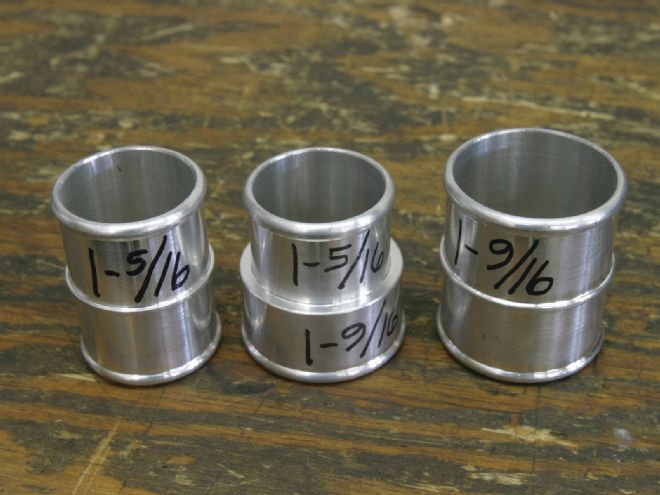
This is our second swap of an LS engine into our Orange Peel '66 Chevelle, and we're still learning new stuff. We wanted to use the new Holley cast-aluminum pan on this application, but apparently it's a popular item and was back-ordered, so it missed our engine installation deadline. Instead, we used a Champ LS1 swap pan, which fit very well. One issue we had with all of the pans was that the wider Comp Cams timing chain required a spacer to clear the oil pump. This didn't appear to be a problem until we tried bolting on the oil-pump pickup. Because the oil pump was now relocated 1⁄4 inch forward, we had to elongate the pickup mount to make it fit.
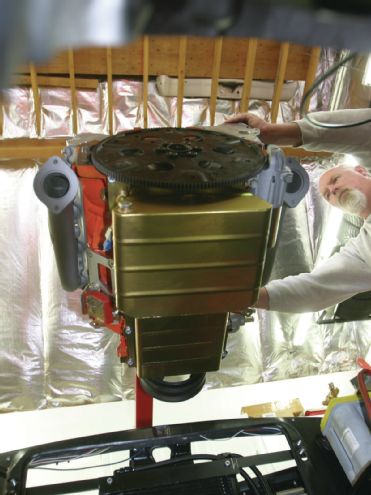
Dropping the motor into the car is always a fun part of the adventure. Car Craft family member Kris Shields helps guide our budget LS into the bay.
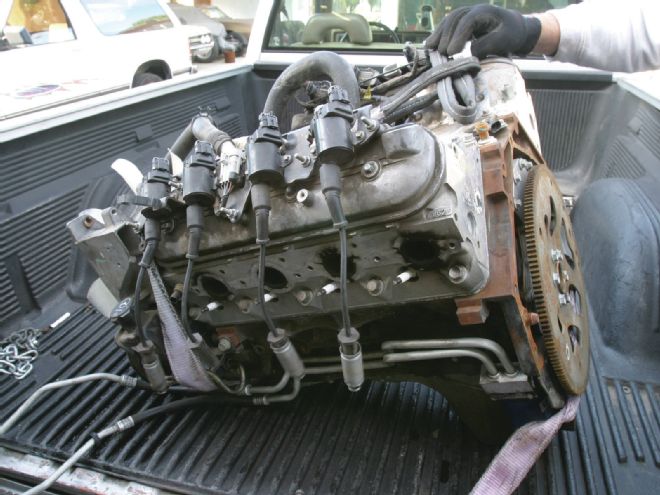
Our iron-block LS truck engine came via a Craigslist ad for $200 that we snapped up too quickly. We should have yanked the heads to double-check the displacement, as we later discovered it was really a 4.8L motor. Checking the stroke is the best way to differentiate the 4.8 from 5.3 motors.
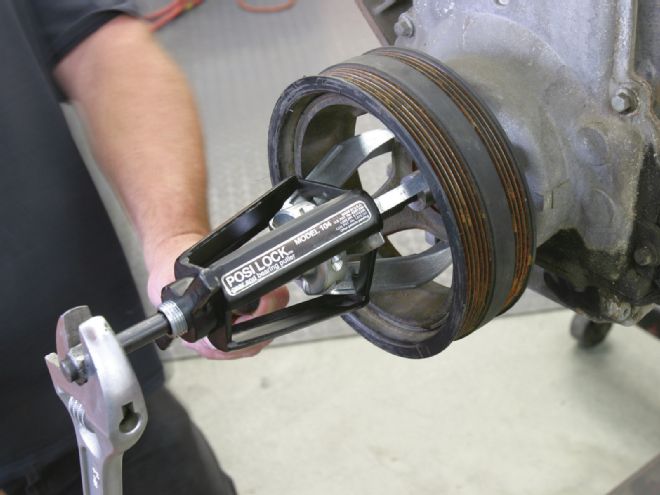
Once we removed the heads, our first step was to access the cam. After building our first LS engine a few years back, we invested in this Posi Lock three-jaw gear puller (PN 104) from Sears. There are no boltholes in the balancer for a normal balancer puller. The Posi Lock jaws fit perfectly into three flats on the back side of the OE balancer. It will also remove crank timing gears.
We chose a mild Comp 216/227 duration at 0.050 camshaft, since our engine was challenged in the displacement department. The big advantage besides adding duration is the cam's impressive 0.600-plus valve lift numbers.
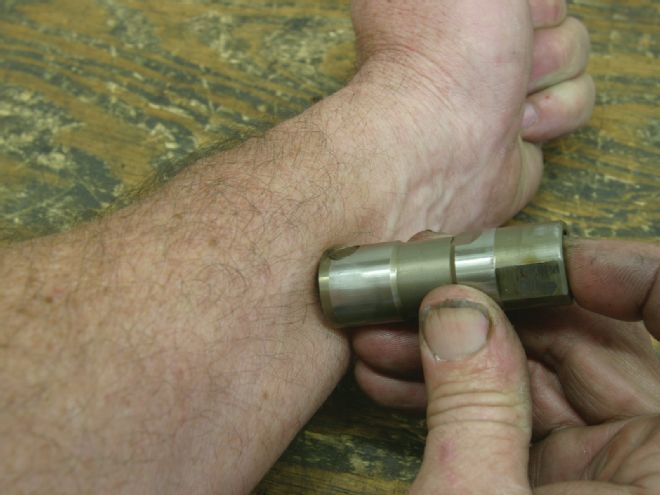
We reused the stock lifters after carefully cleaning them and checking the rollers for any hint of damage. The guys at Crane once showed us how to check for roller damage by slowly rolling each lifter over the inside of your forearm. This sensitive part of your arm will detect catches or flat spots that signal imminent problems.
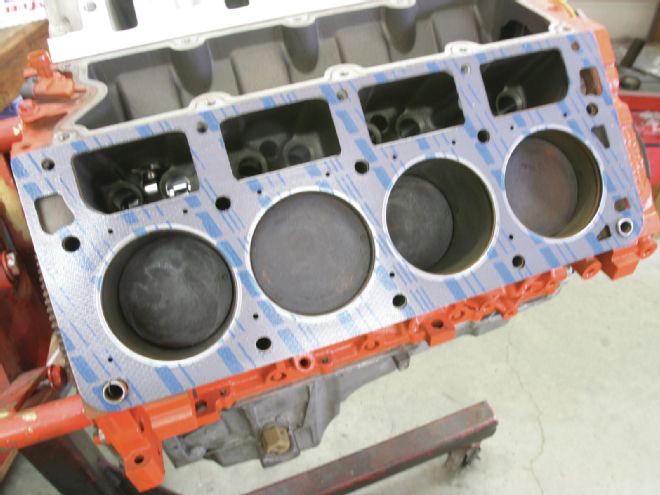
The heads must be removed to service the lifters, so we took the opportunity to swap to a thinner and less expensive Fel-Pro composition 0.040-inch gasket to bump the compression to 9.75:1.
We investigated the Holley pan when it showed up, and it looked as if it should fit with no major headaches in both '64 to '67 and '68 to '72 Chevelles. The front of the pan is shallow enough to clear the crossmember, and its taper should minimize contact with the tie-rod ends. While the Holley pan initially appears more expensive, the price includes the pickup and everything you need (apart from a pan gasket). Other aftermarket pans offer lower pan prices but charge for the pickup as a separate component. In addition, the pans that require an external filter can drive up the price by $100 or more, depending on the style of hoses and fittings. We tried a tapered bottom Milodon oil pan, which is worth 10 hp on a 550hp LS engine, instead of the flat, shallow, leading-edge pans, such as those from Holley or Champ. Unfortunately, the taper hit the crossmember on our Chevelle, and its front width prevented the steering from going to full lock, due to contact with the inner tie-rod ends. Milodon makes a road-race pan that might fit (PN 31507), but at $475.95 from Summit Racing, it's more expensive. CC Editor Douglas Glad's LS3 '65 El Camino used the Chevrolet Performance (GMPP) muscle-car pan successfully, but the sump sits roughly 11⁄2 inches below the engine crossmember. We created the following chart that outlines the part numbers and prices for five LS swap pans that should fit a Chevelle and early Camaro LS conversion. Note that the Milodon and Moroso pans require an external filter that will add to the total cost.
Oil Pan Comparison
Headers and Exhaust
One of the biggest issues with LS engine swaps is headers. We've mentioned this before, but the key is always to purchase your engine mounts, headers, and oil pan as a package, otherwise something is going to clash. We have had good luck with Hooker LS engine-swap mounts, so that dictated using the Hooker long-tube headers. With the engine securely bolted in place, we were pleasantly surprised to discover the headers dropped right in place. Not only that, but the collectors fit snugly about 11⁄2 inches from the floor, allowing for excellent ground clearance. Kevin and his crew at McMillan Speed & Fabrication did a great job of adapting the slip-fit, 3-inch collectors to our 3-inch exhaust system with a pair of Afco stainless V-band clamps.
Parts List
Grand Total: $3,437.96
*Not included in the total
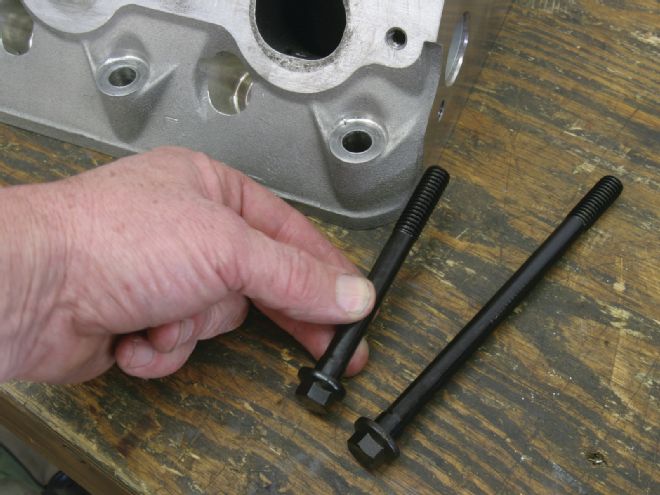
Earlier LS engines use two different lengths of head bolts, while later LS engines changed to a common length for all 10 bolts per head. Our 4.8 motor used the two different bolt lengths. We chose ARP bolts because we planned on doing some head swaps. However, you can buy 10 sets of one-time-use head bolts to save some cash.
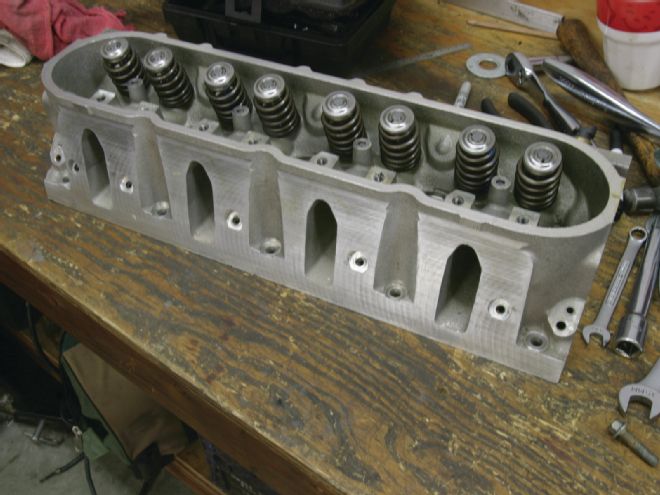
We know that stock LS valvesprings are less than ideal, so we replaced them with a set of Comp beehive springs—to raise the seat and open spring pressure to maintain control over the valves—along with better Comp pushrods.
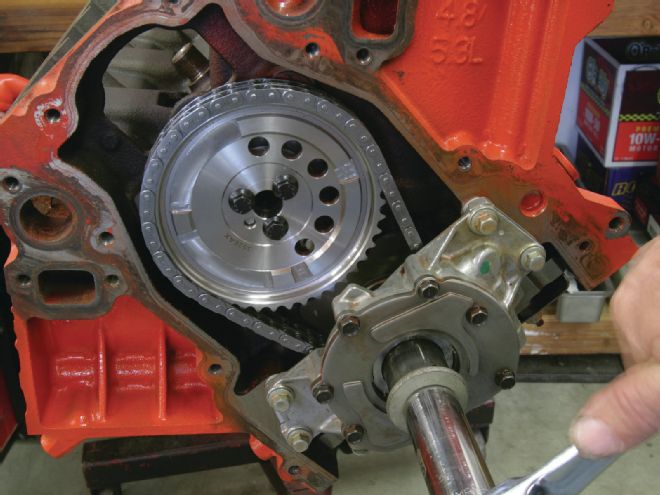
The original timing chain was loose, so we splurged on a Comp billet timing set with a multi-keyed crank sprocket.
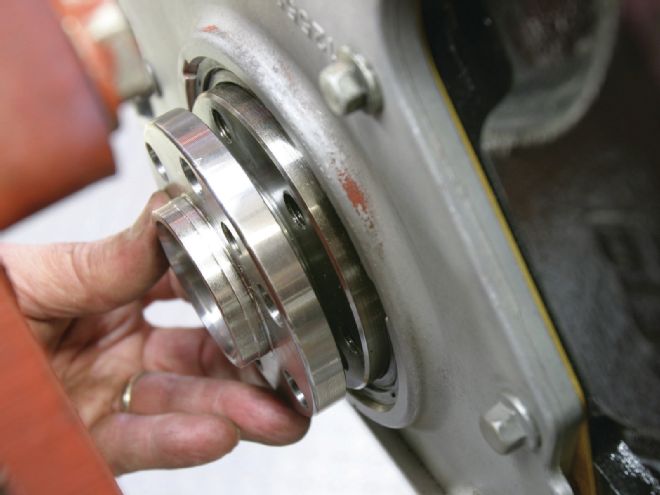
Adapting the LS engine to an older, Chevy-style automatic transmission is easy. We used a Chevrolet Performance (previously GMPP) adapter between the crank flange and the flexplate to properly position the LS flexplate to the converter. This required longer crank bolts. We used ARP metric flywheel bolts. Remember that bolting the trans bellhousing to the engine requires five 10mmx1.5 metric bolts.
We always take the time to degree the cam, but this time we ran into some weird intake centerline readings. We realized that, unlike a first-gen small-block Chevy, LS engines position the intake port in front of cylinder No. 1. This means the first lifter is the intake lobe on an LS engine. On the first-gen small-block, the intake lobe is the second lifter back from the front. Once we were on the correct lobe, everything came in with a 107-degree intake centerline.
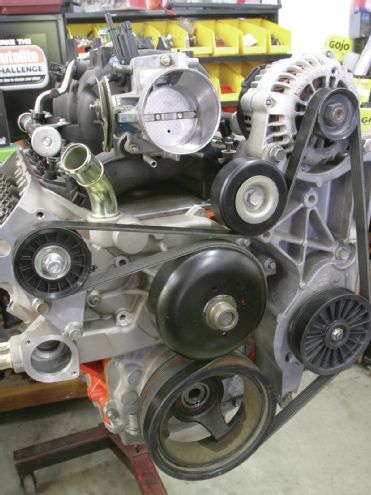
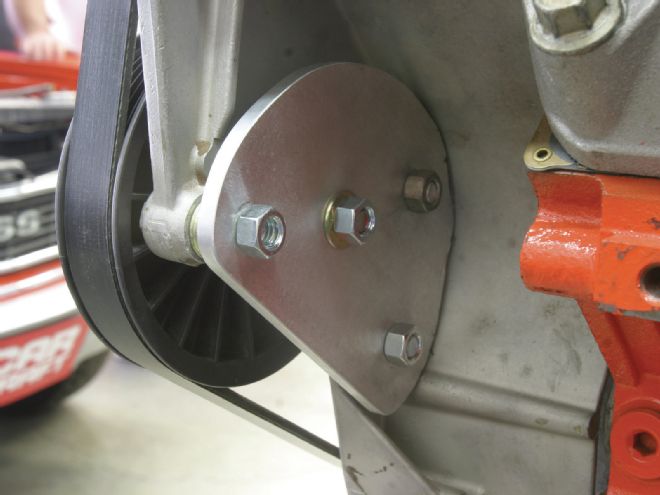
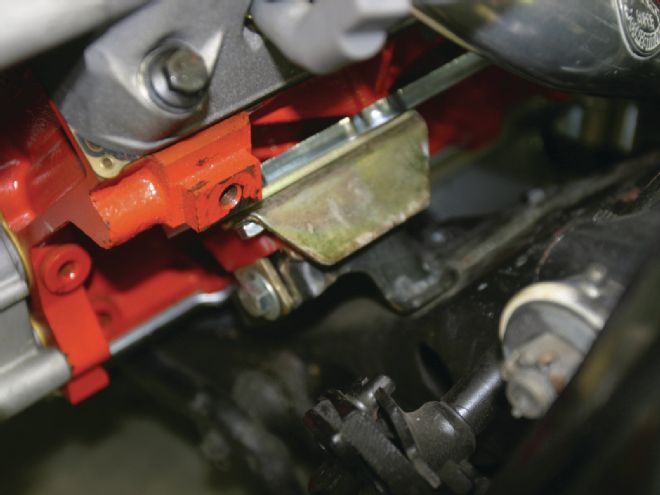
To remain faithful to the budget, we used the stock truck accessory drive. Since the Orange Peel Chevelle has manual steering, we whittled an adapter out of a 1⁄4-inch aluminum plate that bolts to the truck mount and then asked machinist buddy Lucki Candoff to make an aluminum stand for a Dorman A/C delete pulley from an '88 TPI Camaro application. The height of the stand establishes the pulley alignment. It works perfectly and clears the stock steering box.
Here is a rear view of the adapter bracket Candoff built for our power-steering eliminator conversion.
We combined the Hooker engine-swap mounts with a pair of Energy Suspension polyurethane motor mounts to bolt the 4.8 to the stock Chevelle frame mounts. This combination places the engine in the "stock" location, as defined by the placement of the transmission.
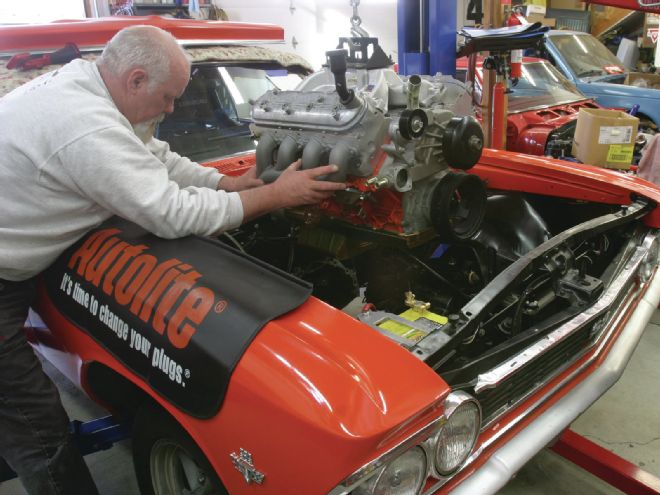
After installing the Comp cam, the stock heads, and our Edelbrock Performer RPM intake, dropping the engine into the engine compartment was relatively easy. That's our pal, Kris Shields, helping with the install. This was the first attempt with the Milodon tapered pan that didn't fit.
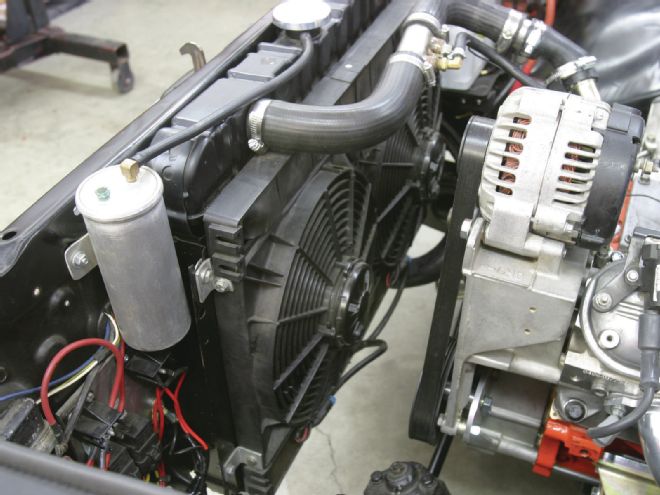
The stock truck accessory drive is very tall but will clear the stock Chevelle hood using the stock-location engine mounts. We had already fitted the Chevelle with a pair of Spal electric fans that keep the otherwise stock copper/brass radiator plenty cool, even in the summer heat.
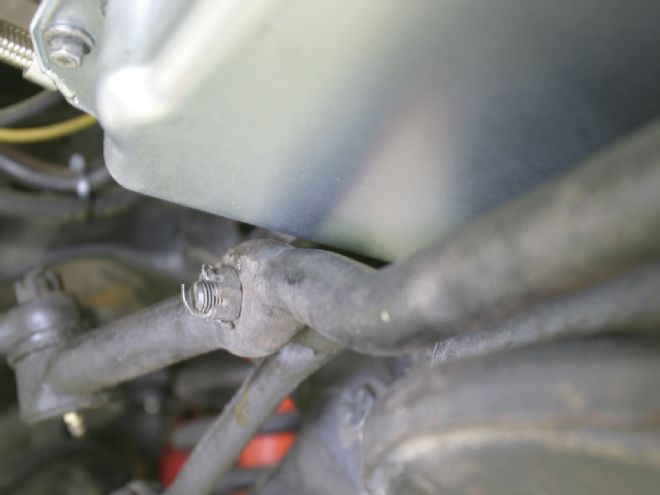
We pieced a bunch of leftover radiator hoses together with scrap stainless tubing to make our upper- and lower-radiator hoses. To make this process less of a hassle, Stealth Conversion, the parts arm of Mike Knell's company Jaguars That Run (JagsThatRun.com), makes these slick aluminum hose splicers that adapt radiator hoses of differing diameters. If we had used these bushings, our radiator hose connections would be much cleaner.
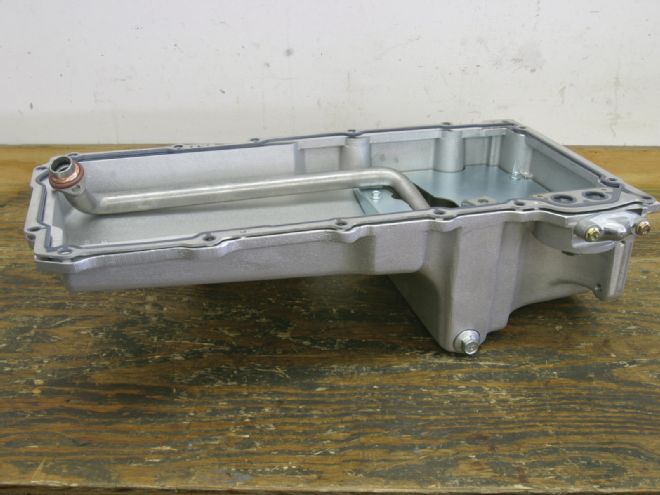
This is Holley's cast-aluminum pan that includes the oil-pump pickup. It also features a built-in oil-filter mount and uses the small GM cover that can be drilled and tapped for an oil-pressure gauge source. We show the Holley pan with a gasket, but the gasket it is not included. The pan carries 51⁄2 quarts and appears to be shallow enough in front to clear the Chevelle crossmember and steering, but at the time of this story it had not yet been installed.
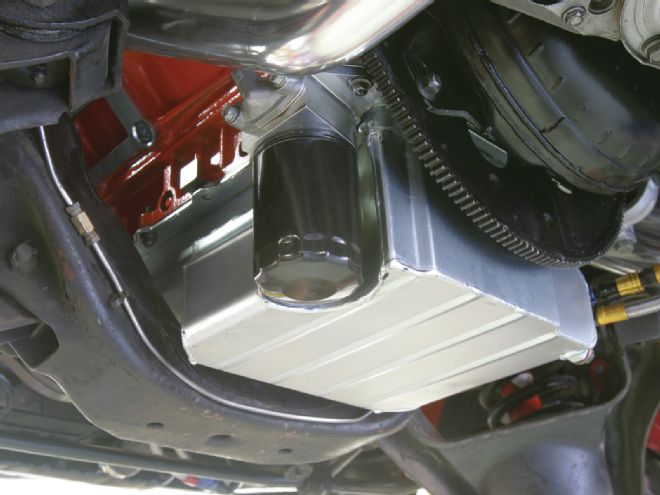
This is Champ's pan as installed in the Chevelle. We also used the optional aluminum oil-filter adapter, which adds $100 to the price but places a stock oil filter in the stock location, eliminating the expense of plumbing an external oil filter.
One of the issues with a Chevelle is the clearance between the tie-rod ends and oil pan with the steering at full lock. Several pans we tried in the past have interfered with the steering. The Champ pan offers excellent clearance on the passenger side and just barely hits with steering at full lock on the driver side. We feel this is acceptable, as this is also a common problem with stock pans on first-gen small-blocks.
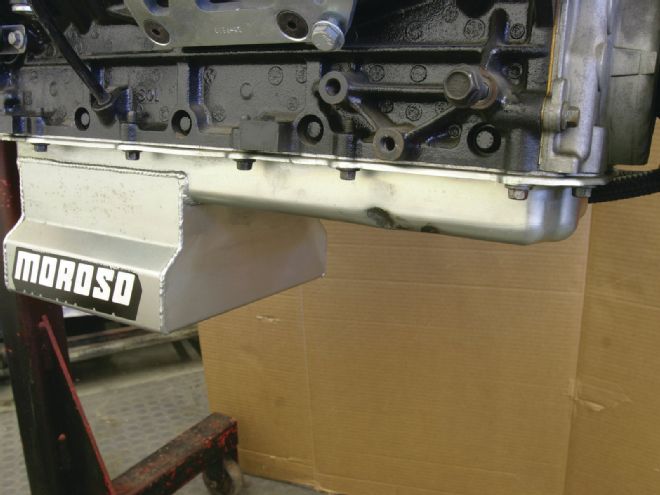
One of the pans that we know fits in an early Chevelle is this Moroso flat floor pan (PN 20140) that we used on our Lester Scruggs 404ci LS stroker motor. The driver-side inner tie-rod dimpled the pan slightly, but otherwise it fit nicely. This pan requires an external oil filter. The Moroso angled sump pan (PN 20141) may not clear the Chevelle crossmember without modifications.
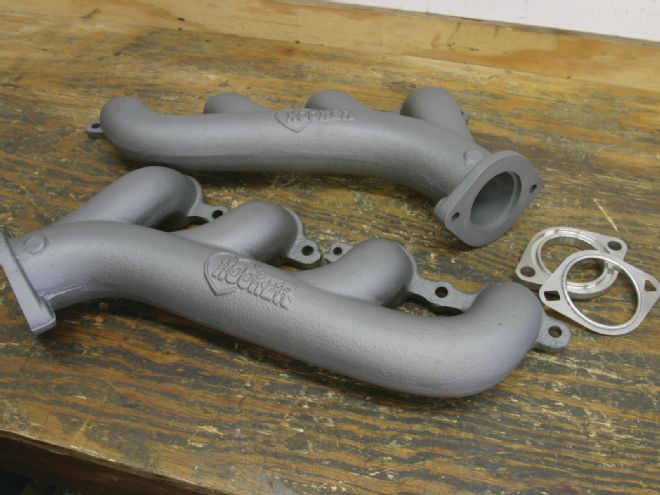
Hooker Headers has just released a set of cast-iron exhaust manifolds for LS engine swaps, which cost less than $300 for the pair. The manifolds tuck in tightly to the block and employ 21⁄2-inch outlets, but you have to supply '10 Camaro factory seals and 10mm metric fasteners.
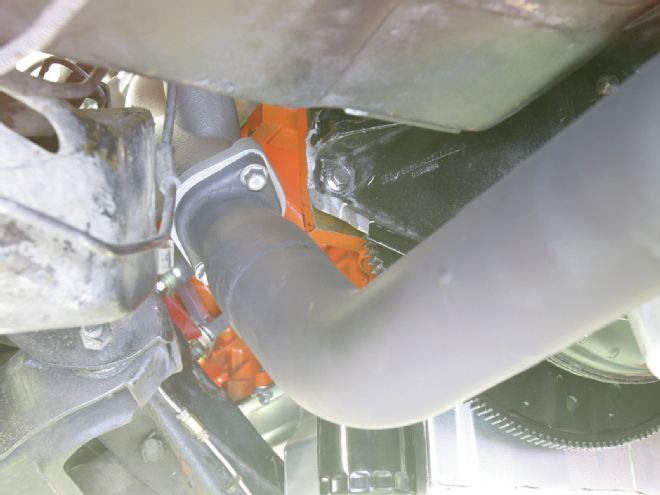
The iron manifolds bolted in place from the top, offering an excellent fit. Dave Blanchard at McMillan Speed & Fabrication TIG-welded the small end of a Hooker header collector transition to the manifold outlet flange that merged to fit our 3-inch exhaust system. Brian then used Afco 3-inch V-band flanges to connect these fabbed pipes to the exhaust system. One big advantage to manifolds is superb ground clearance.
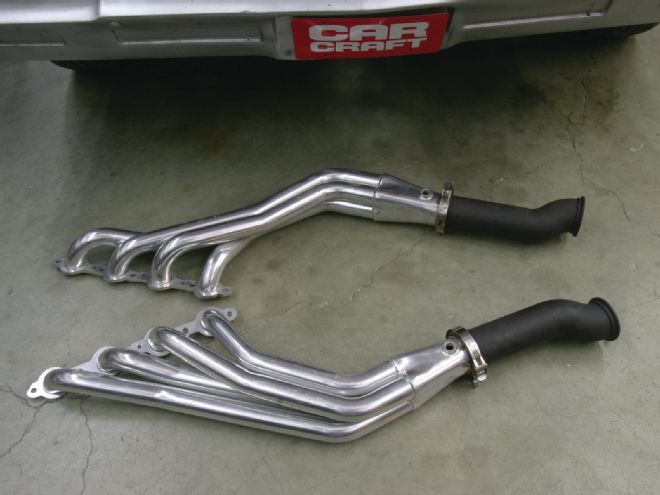
We also tried Hooker's long-tube, 13⁄4-inch headers, and they fit perfectly with only a slight trim to a hydraulic brake bracket. McMillan Speed & Fab created a transition pipe between the collector and the exhaust by using Afco V-band clamps on both ends. The headers will slide in from the top on the passenger side and up from the bottom on the driver side. When was the last time you were able to do that?
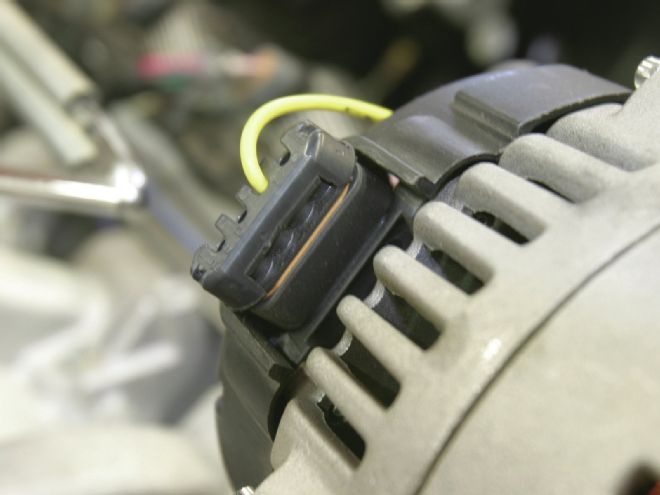
To make the alternator wiring simple, the tech guys at Powermaster told us to include a Radio Shack 82-ohm, 5-watt resistor in line with any switched voltage source to the "L" terminal on the alternator. This can also be used in conjunction with the charge indicator light on the dash without the resistor. We chose to use the resistor with a switched power source and not rely on the idiot light.
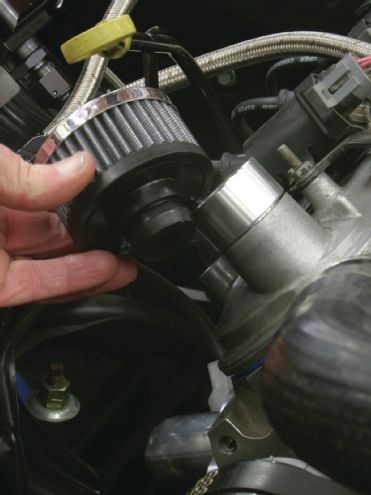
Metco makes this slick crankcase breather adapter that doubles as the oil fill. While our 4.8L is small enough that stock breathers are probably sufficient, this is a great piece for stroker packages or supercharged engines that need all the breather capacity they can get. We used this in conjunction with a PCV valve.
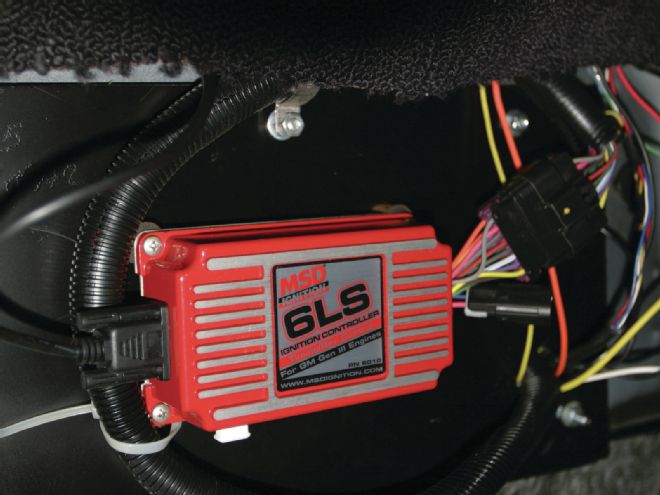
Because we were using a carburetor on our LS engine swap, we also needed ignition control. By now, the MSD 6LS is fairly well documented. We mounted our box on the firewall where the heater box used to reside. All we had to do was connect a few wires and dial in our ignition curve in the software, and the engine fired right up.
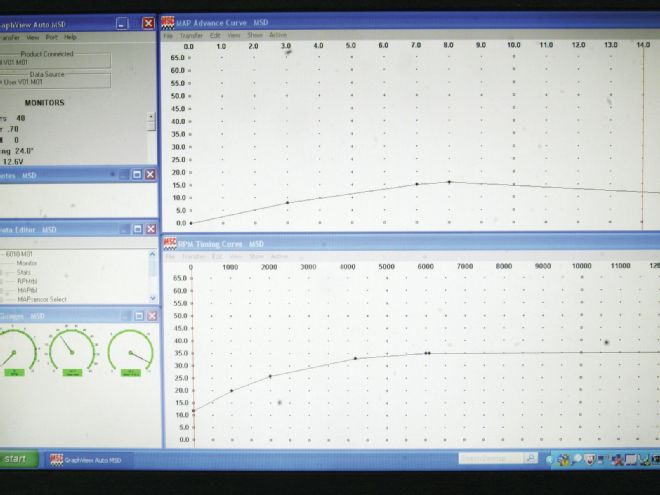
This is a screen shot of the MSD Pro-Data + software that runs the 6LS box. The top curve is the "vacuum advance" using a MAP sensor while the bottom screen is the "mechanical advance" curve. We opted for a 35-degree total advance curve to start with. Testing may indicate less timing.
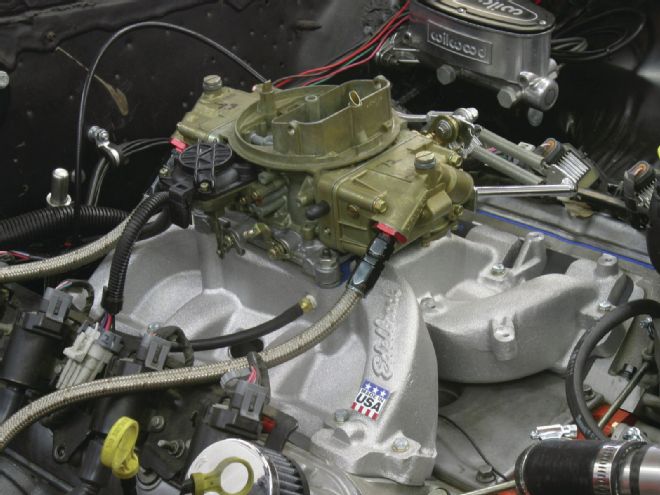
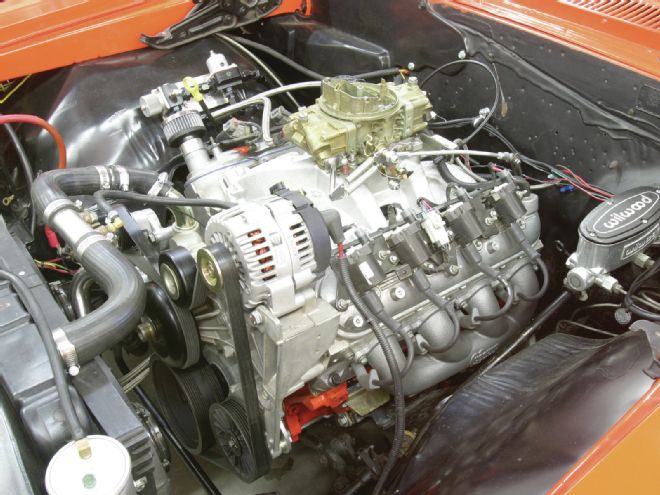
We used an Edelbrock dual-plane intake and a previously owned vacuum secondary Holley 0-3310-4 carburetor. We also used a Holley TV cable adapter to connect to our California Performance Transmission 200-4R. Throttle response is excellent.

Here is our completed LS swap in our Orange Peel Chevelle, complete with iron exhaust manifolds. We do not have our mechanical water-temperature gauge probe installed, which calls for drilling and tapping the water pump.