No matter how good a car looks from the curb or on the show field, everyone wants to look under the hood. Today, engine bays look better than they did any time after the first oil change, thanks to all the products available to keep the underhood area looking as good as new, or even better. Except for the exhaust manifolds. Bare cast steel is going to rust, all the quicker when you add exhaust heat. So while the rest of the engine bay looks great, the exhaust manifolds are often rusted and grungy. And as we all know, rust spreads.
In our experience, what’s available to amateur builders to solve this issue usually produces amateur results, especially if a spray can is involved. Spray-can products just can’t protect against petroleum, solvents, high heat, and age. For a really good, long-lasting finish that’s tough and durable, it needs to come out of a gun or some other coating technique.
Usually.
Eastwood’s exhaust manifold refinishing products are an exception to this rule. Several years ago, we did a test on the stock exhaust manifold on our then-new Dodge Dakota. The manifold looked great and held up well. We also detailed the cast iron exhaust manifolds on a ’54 Buick we were driving daily, and they looked good for the year and a half we tooled around Florida.
Typically, getting the most out of these products is all in the prep. For exhaust manifolds, there are a couple methods you can use. The bead blaster is the most obvious and gets good results. It also leaves the surface of the manifold lightly textured, which Eastwood recommends to give the paint something to adhere to. Eastwood also sells a metal prep gel that can be used inside the manifolds to prep for its internal coating, and it can be used on the exterior as well. Since our bead blaster is down for the moment, we submerged the manifolds in the gel overnight and then applied the coatings.
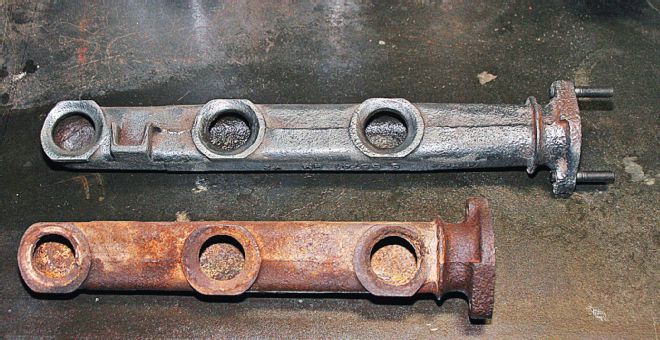
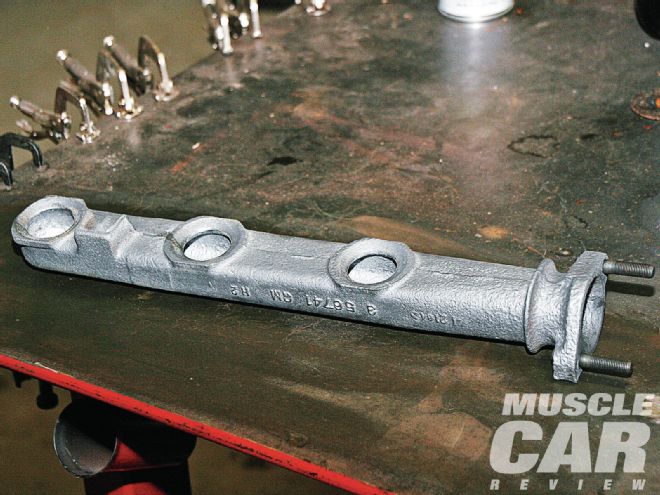
Now, about our manifolds. Yes, those obviously aren’t V-8 manifolds or even Turbo Buick V-6 manifolds. They’re ’65-’69 140-horse, four-carb Corvair manifolds. Consider them “Yenko Stinger manifolds” if it helps, though they’re from the wife’s ’61 Corvair wagon. These were the only really horrible-looking manifolds in our shop, and they were bad enough that we almost gave them away last year. Thick rust, scale, and baked oil coke inside, plus busted studs, made them not worth much, even though they’re the desirable manifolds for Corvairs as all the others are more restrictive. The restoration is going to be exactly the same for any manifold, whether Corvair, Corvette, Coronet, or Comet, so don’t let their odd design put you off. In fact, drilling busted studs on a muscle car manifold would be a lot easier!
It took us a few days of effort, and rain and ambient temperatures played a factor. Our shop isn’t heated, and Eastwood’s instructions are clear about optimal temperatures and humidity levels. We left the paint cans and manifolds in the house overnight to bring them up to temp, sprayed them in the shop, then brought the manifolds into the house to dry overnight. (Besides the too-cold temps in the shop, steady rain put it past the maximum 50-percent humidity the instructions called for.) In our case, we put the manifolds in the bathroom overnight with the fan sucking the fumes out. That’s probably not the recommended way of doing things, but we don’t all have climate-controlled shops and spray booths.
 Our demonstrator exhaust manifolds are in pretty poor condition, but this is exactly the kind of shape most used manifolds are in.
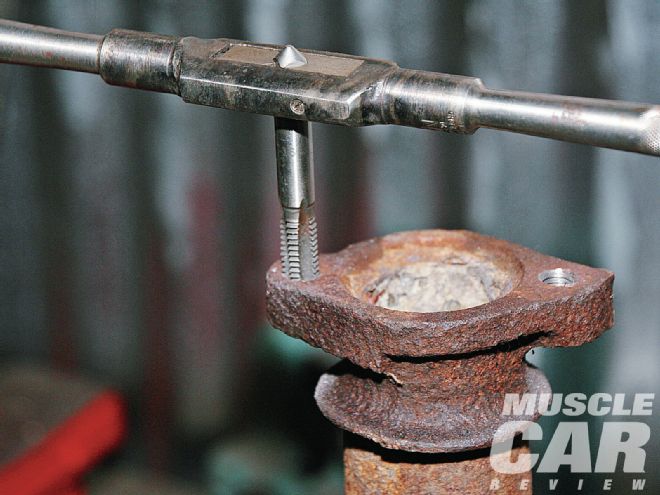
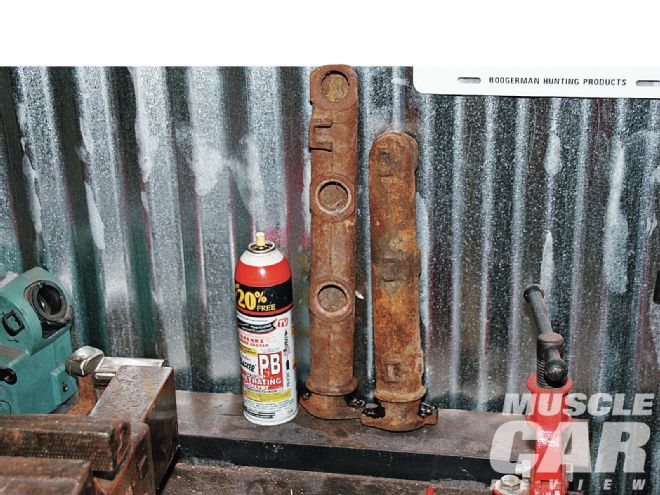
 Ever found a vintage set of exhaust manifolds with the flange studs not broken off? Neither have we. If there’s enough stud left to get a hold of, you can sometimes tease them out by heating the flange with a torch and then soaking with PB Blaster overnight. There was no joy in our attempt.
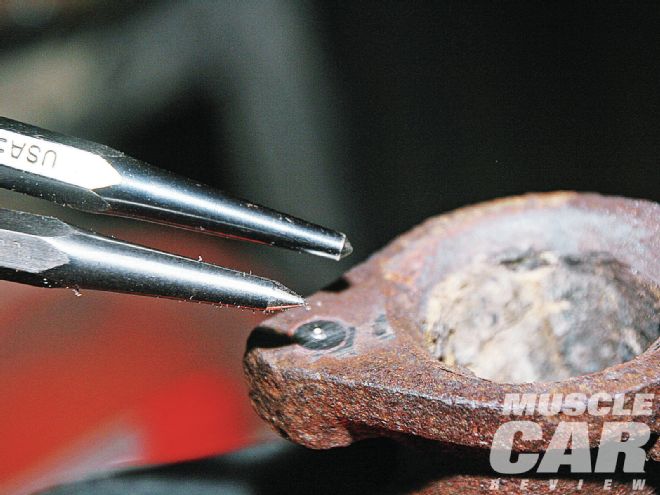 Drilling the busted studs is pretty straightforward, but some tips make the job easier. Many times people will try to drill directly into the busted stud without grinding it flat. We ground it all the way flush with the flange. We also center-punch every hole we drill in the shop, to keep the tip of the drill bit from skating. First we use a sharp prick punch to mark the spot, then expand it with the blunter center punch.
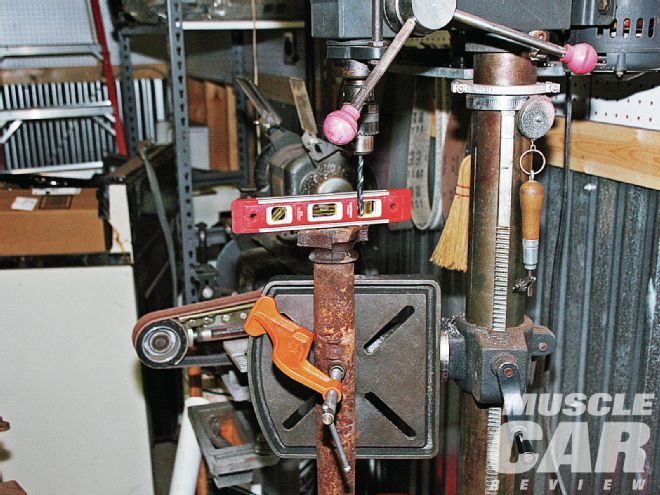 Corvair manifolds are held to the engine with clamps, which made setting it up on our drill press difficult. Had it been a V-8 manifold, we could have very easily bolted the manifold to the drill press table and squared the flange to the drill bit. After getting everything set up, a bubble-level or a small machinist’s square insures we’re drilling perpendicular to the stud.
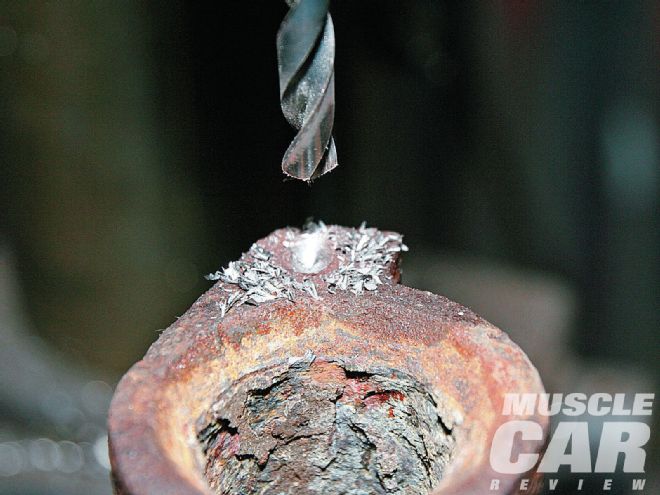 While drilling the stud, you should get silver chips. If you start getting gray chips, you’ve hit the cast steel of the manifold. What really helps is using short bits rather than standard-length, as standard-length bits will often deflect during the drilling operation (ours did). Make sure you use the proper size drill bit for the threads on the stud. Most taps require lettered or numbered drill bits rather than the standard fractional bits most of us have. Our 3/8-16 studs used a 5/16 bit (0.3125), but if the studs would have been 5/16-18 it would have required a letter I drill bit (0.2720).
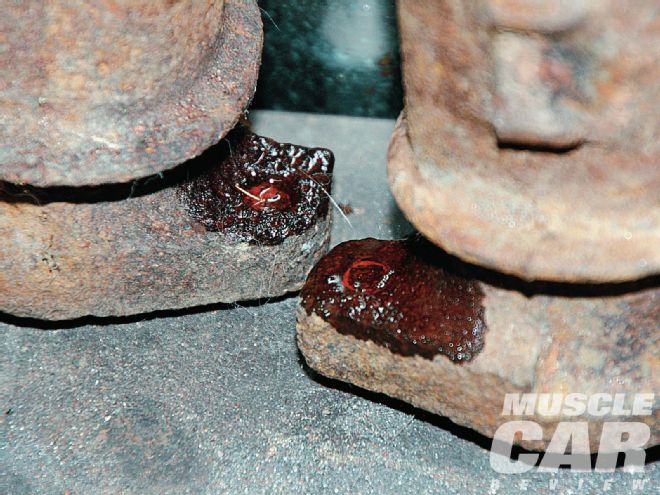
 Factory manifolds seal with gaskets or semimetallic donuts, and after years, small pieces are often mashed into the sealing surface. It required a chisel to get through the remains of countless donuts.
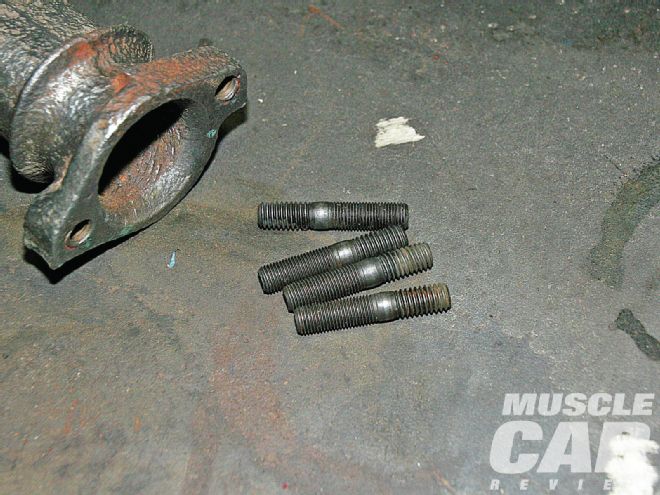 After tapping the holes, we picked up new studs from the auto parts store. A good store will have Dorman cabinets full of special fasteners, including studs in almost every size you could need.
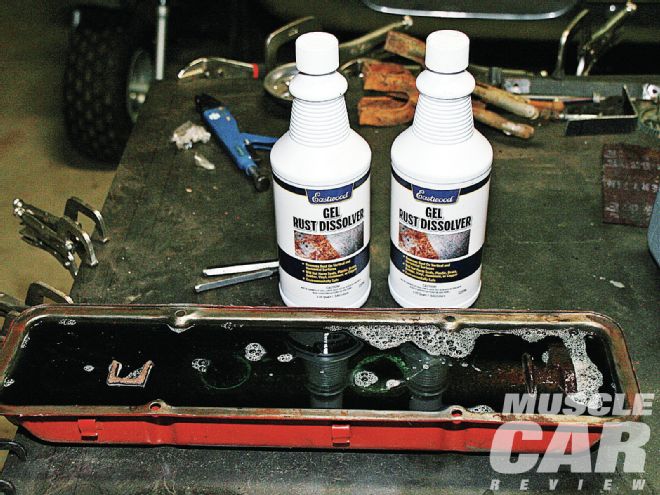 Though Eastwood calls it a gel, the rust eater is liquid. Its main purpose is to clean the scale out of the inside of the manifolds or tube headers, but we submerged the manifold in two bottles of the gel to clean the outside at the same time.
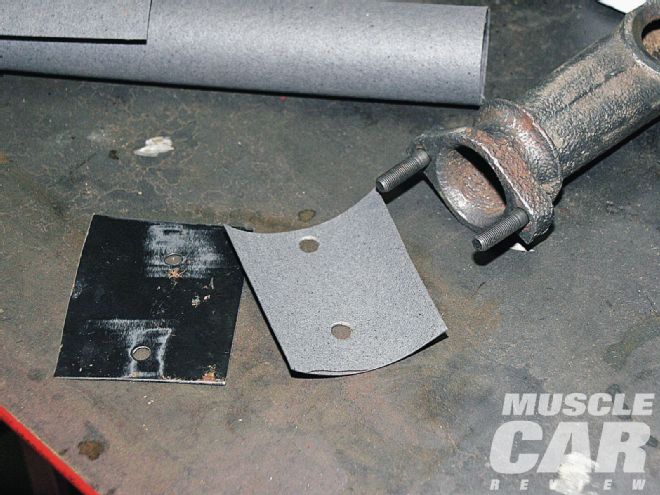 Eastwood’s instructions for cleaning the inside of the manifolds are to cap the end with duct tape and fill the manifold. We did this, and it leaked like a screen door on a submarine. That’s when we decided to simply submerge them, but that probably wouldn’t be practical for larger manifolds. With a roll of gasket material and some scrap sheetmetal, you can quickly make a cap for your manifold in about five minutes.
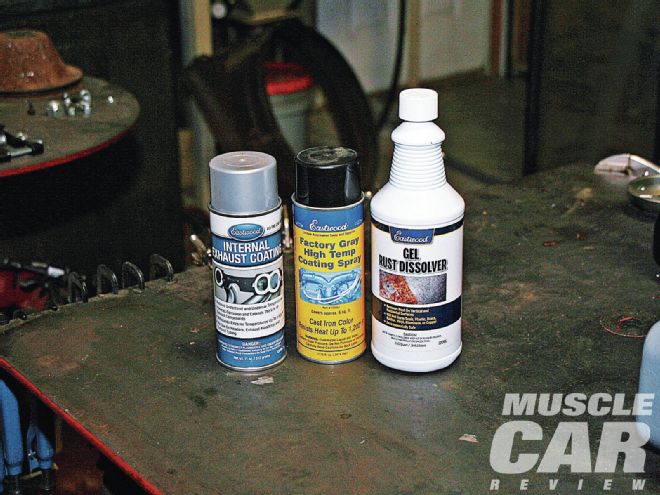 The Eastwood process uses the company’s own metal prep gel, an internal coating, and an external coating. The internal coating probably doesn’t need to be used on cast iron manifolds, but it’s perfect for vintage tube headers that you want to preserve.
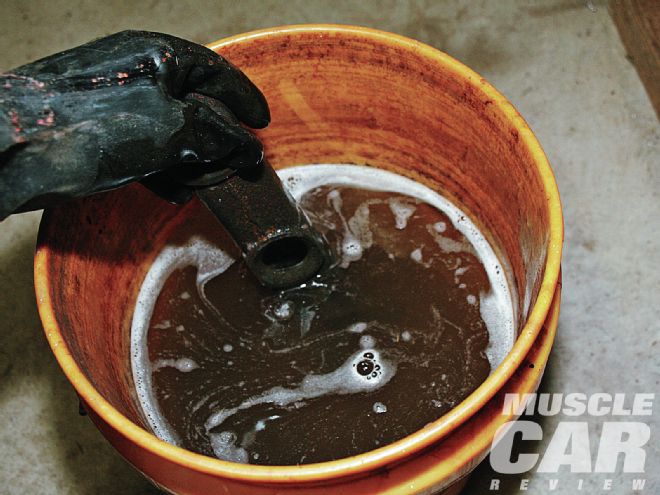 To neutralize the gel, rinse thoroughly in water. Don’t mess around with the gel—use heavy-duty rubber gloves, and use the gel in a well-ventilated area. We left the first manifold soaking inside the shop overnight, and in the morning the whole shop was full of acidic fumes. The next one was set outside overnight. We rinsed it in a 5-gallon bucket of water.
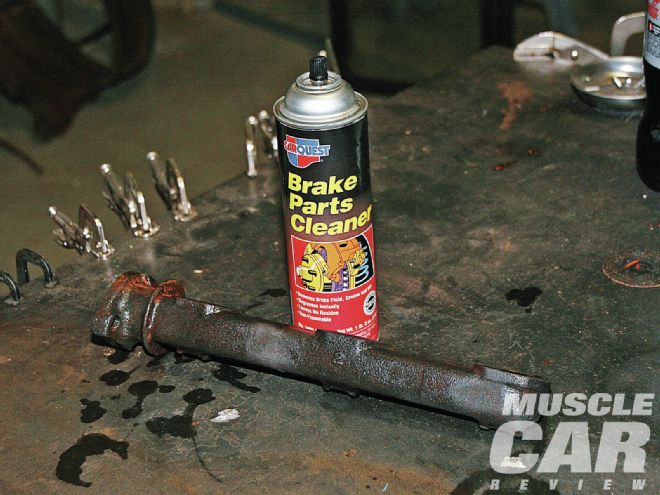 Any time you derust cast steel or bare metal and then rinse it, it flash-rusts, even if you get the water off quickly with an air gun. We figured that if we could displace the water and separate it from the steel’s surface we would eliminate that chemical reaction. While the part is still wet with water, we spray it with brake cleaner. The brake cleaner displaces the water, getting between it and the surface of the metal. Once the part is saturated with brake cleaner, we let the brake cleaner evaporate, leaving rust-free, bare steel.
 If the part had grease or dirt sticking to it, the deruster might not have gotten everything. A little hand detailing with a wire brush may be required.
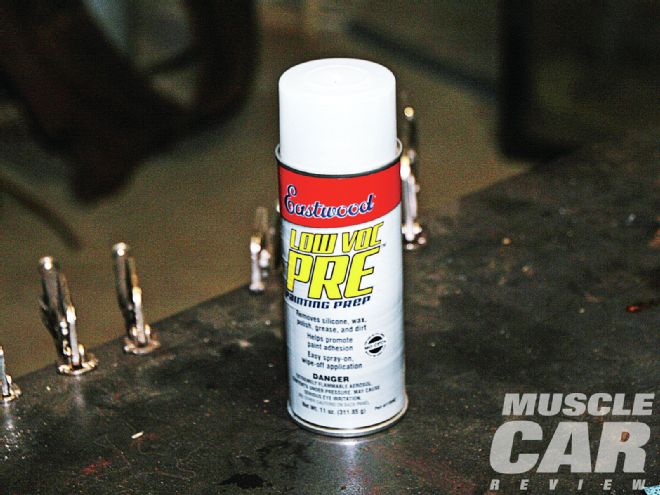 We’re big fans of Eastwood’s Pre paint prep. Prior to painting anything, we give it a good coat of Pre to get rid of any solvents or residue that will affect paint adhesion, then let the piece air dry prior to coating.
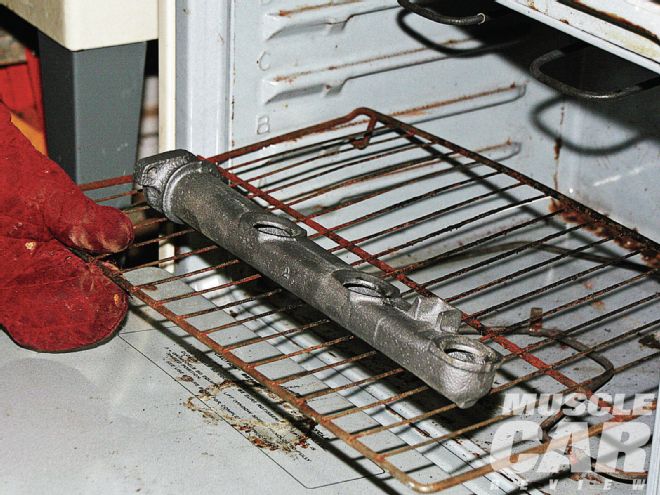
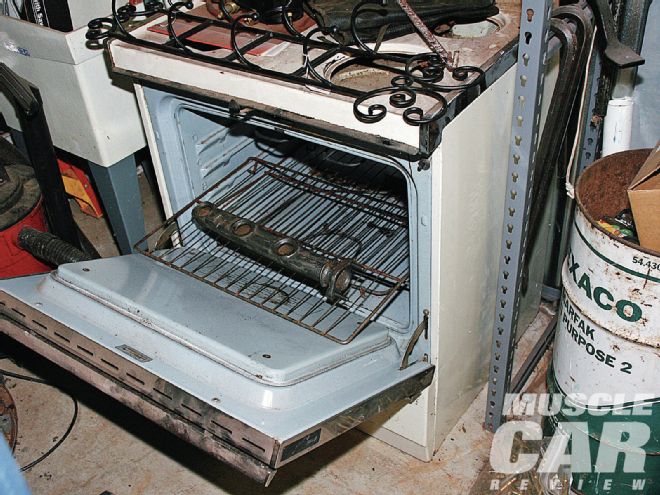 If you media-blasted your manifolds, it’s a good idea to bake them for a couple of hours to release any grease and oil that soaked into the metal over the years. Blasting cleans the surface but won’t get rid of any liquids that soaked in. After soaking them overnight in an acidic solution, then rinsing with water and saturating with brake clean and Pre cleaner, we were confident there were no saturated oils left on ours.
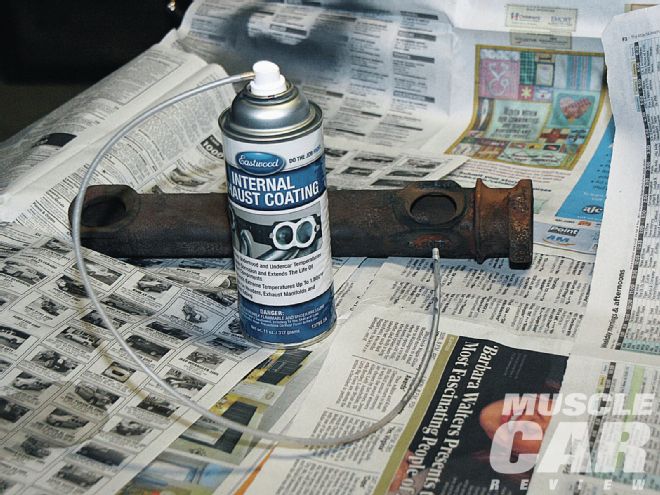 The internal coating uses a plastic tube with a brass nozzle at the end to give a 360-degree fan pattern. Slide the tube into the manifold or header and depress the button while pulling it out. It lays down a lot of material, so pour away any excess and let dry.
 Once the inside was dry to the touch, we gave the outside two light, but full-coverage coats. The instructions advise to use no more than three thin coats, as too much paint buildup will cause the paint to flake off.
 Here’s the finished manifold, treated inside and out, with fresh studs. The final step is curing the coating. The instructions say to bolt it to the car and run the engine for about 20 minutes or so, but our engine isn’t in the car, and we are nowhere near ready to make that happen—a situation many of us are in. Eastwood’s tech guys said the paint, once dried, can be stored and handled like any other painted part, so there’s no need to cure it right away. Once your engine is running, the manifold can be cured then.
The instructions are pretty clear about curing Eastwood’s coatings by bolting them to the engine and running it for 20 minutes or so, letting the exhaust temp cure the paint. But we’ve all heard the stories about sneaking a set into the wife’s oven when she’s out of the house. We called the techs at Eastwood to ask about curing their exhaust coating products in a standard kitchen oven: They’re against it.
First, you don’t want the fumes and particulates in the exhaust coating to be in your food-prep area. We have an oven in the shop specifically for projects like this, but Eastwood is really against baking their manifold coating in an oven, even in a shop.
“It gives off a helluva lot of smoke when curing,” their tech guys told us. “We’ve actually had guys call up while it was curing on their car to make sure everything was OK.” It’ll fill the house or garage with fumes, and they’re not the kind of fumes you want to be breathing for any kind of time. They don’t even recommend it for a detached shop.
We’re glad we called!