
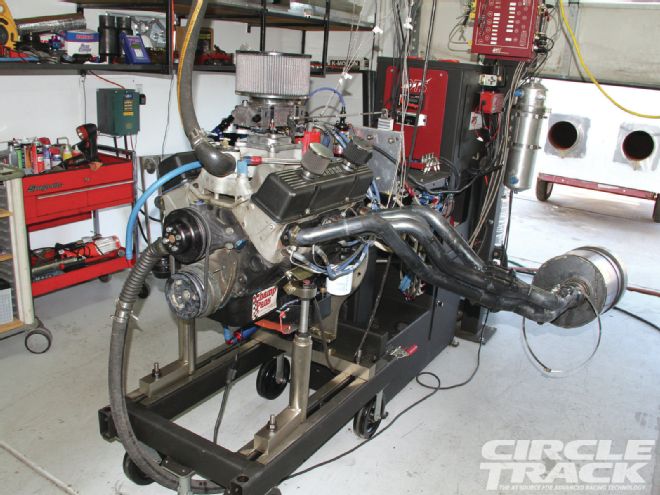
 The rebuild of our 362ci small-block Chevy Dirt Late Model engine started on the dyno at SRE Engine Techniques.
I'm sitting at my desk pouring over the data, trying to find a way to present all of it in a way that makes sense. There's a lot of it! Even with my notes about each dyno run, it's difficult remembering everything that happened in just one day on the dyno. Jet changes, ignition changes, pyrometer readings, brake specific fuel consumption, let's not even bring horsepower and torque into the mix-it's a lot to keep straight. Let's start at the beginning.
When we dropped that Roush Yates engine in our Dirt Late Model project a couple of years ago, we stashed the 362ci SBC that came out of it in the corner of the shop. We didn't know much about the engine, other than it was a 362 with 13.5:1 compression and Brodix aluminum heads. Wanting to build a useable powerplant, we contacted Steve Rolenc of SRE Engine Techniques in Tucson, Arizona. SRE builds quality race engines, and if that wasn't enough, they carry an unconditional one-year warranty. SRE really stands behind every engine it builds.
We started our 362 build on the dyno. It may sound like a backwards way to start a build, but wanting to salvage as many parts as possible, it's important to know what you have to work with. SRE uses a DTS engine dyno, which is run in an open-air environment. According to Rolenc, the lack of a dyno room better simulates real-world air conditions. The engine is also dyno tested with an air filter and mufflers. While this may yield lower horsepower numbers than leaving these components out, real-world conditions are what's important.
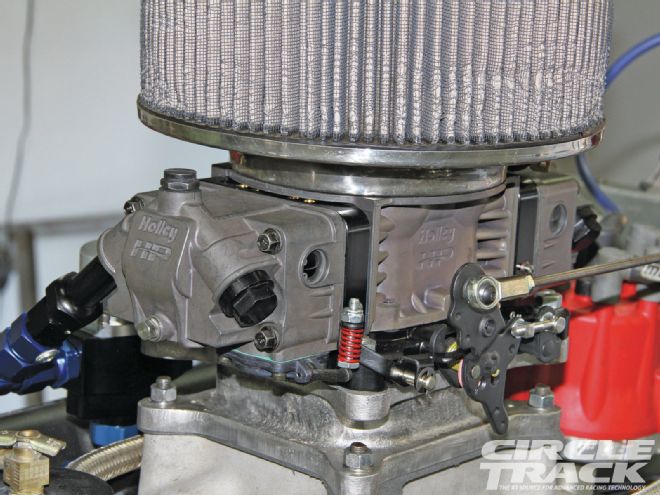 1. Fuel is supplied by a Holley Ultra HP 750-cfm carb.
With the engine on the dyno, Rolenc installed the Schoenfeld 13/4-17/8-inch tri-Y headers and mufflers. The mufflers are installed inside of drums, which exit through 14-inch tubes into an outdoor dyno muffler. Having the mufflers inside the drums better simulates race conditions in the car, when the body of the car surrounds the mufflers.
For fuel delivery, we used Holley's Ultra HP rebuildable mechanical fuel pump, Ultra HP fuel regulator, and Ultra HP 750-cfm carb. Ignition was handled by an MSD Pro Billet distributor, Extreme Duty 6ALN ignition box, and High Vibration Blaster Coil, which supplied plenty of spark (or so we thought-more on that later).
The engine was set up on the dyno in as close to original trim as possible. The idea was to recreate the last time the engine was raced. Obviously, the ignition and fuel systems were new, but these are what will be run on the engine in its new configuration. The Holley Ultra HP carb was run out-of-the-box with 76 jets front and rear, a four-hole carb spacer, valve lash set to 0.026, and Autolite 3932 spark plugs, gapped at 0.021. The series requires Sunoco Blue race fuel, so Rolenc filled the dyno fuel cell and warmed the engine up.
More than 20 dyno pulls were made. To put it in a nutshell, we made 10 jet changes, two timing changes, a distributor change, an ignition box change, a spark plug change, four gap changes, and a valve lash change. We started the day at 402 hp and 397 lb-ft of torque from an engine was supposed to make 710 hp (shame on whoever originally built and sold this engine). By the end of the day, we were able to bring our power output to 501 hp and 424 lb-ft of torque. Tuning was done using information from exhaust gas temperatures (EGT) for each cylinder, brake specific fuel consumption, and horsepower and torque numbers. During the dyno session, there were a few discrepancies in EGT (cylinder No. 4 consistently read 100 degrees hotter than the rest of the engine), an issue with the old distributor, and the new MSD ignition box, which we ended up changing. SRE blends old-school tuning tricks with some new-school technology. The progression this engine made over the course of the day yielded some very interesting results.)
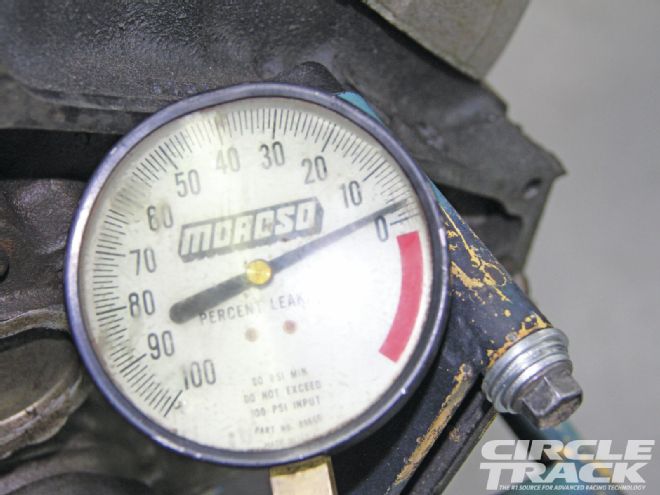 16. Next was a leak-down test. Seven cylinders tested within 1 and 4 percent, but cylinder No. 4 had 40-percent leak-down.
Next on the agenda was the tear down. The carb was removed and packaged for storage, as we plan on using it once the rebuild is complete. Then Rolenc removed the intake manifold and valve covers. The valve lash was set hot on the dyno at 0.020-inch. He remeasured lash before digging into the heads and most had dropped to 0.016-inch, but two (No. 1 and No. 2 exhaust valves) had not tightened as much as the rest, measuring 0.019- and 0.020-inch respectively. Rolenc tells us this is because the coolant passages in the heads give the ends different cooling properties and this is normal.
Next was a leak-down test. Seven of the eight cylinders performed well, showing between 1- and 4-pecent leak-down. Cylinder No. 4, on the other hand, was a different story. As soon as compressed air was introduced to the cylinder, the gauge jumped to 40 percent, and you could hear the air escaping. After a little investigative work, Rolenc determined that both the intake and exhaust valves were leaking. This explained why this cylinder's EGT was almost 100 degrees hotter than the rest of the engine on the dyno.
With the leak-down test complete, the heads came off. Rolenc quickly removed the valves from the No. 4 cylinder to find the source of the excessive leak-down. Using a concentricity gauge (valve guide runout), Rolenc measure the exhaust valve seat at 0.008 and the intake at 0.0092. SAE standard tolerance is 0.002, and SRE uses 0.001 as its standard, so these are very far out of spec. Consequently, combustion gasses are allowed to bypass the valve back into the intake side of the cylinder head and intake manifold.
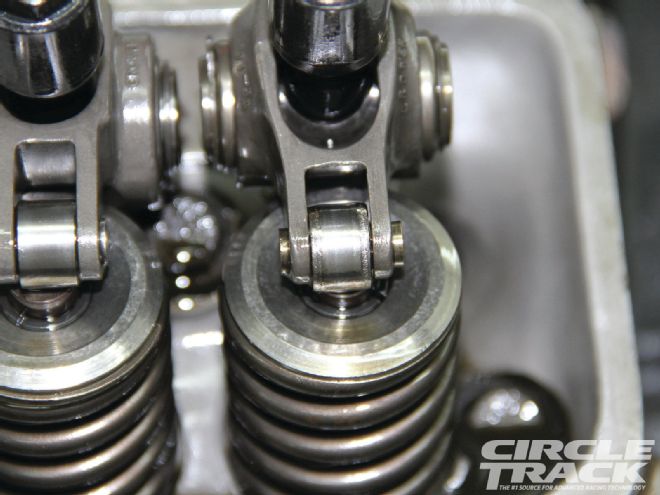 17. Rolenc also discovered the roller end of an exhaust rocker what badly worn. This wear was also into the cap that sits on the valve.
After taking some time to examine the cylinder heads, we came to the conclusion that at some point in the life of this engine, it had blown up in a big way. One intake port in the cylinder head had been welded (and not by a trained professional), and there was one odd-ball pushrod. The weld job looked as if the head was welded while still on the block. And to make matters worse, not much was done to match the port to the rest of the head. The lifter bores in the block had been sleeved, which initially we looked as a smart move by a good engine builder, but once we learned more about this engine's checkered past, it may have been done as a repair from a near-catastrophic failure.
Shifting our attention to the bottom end, Rolenc removed the oil pan and turned the engine over. At first glance, everything looked good, as the rotating assembly consisted of a Scat crankshaft, Carrillo rods, and SRP pistons. All of the internals were on the old side, which isn't necessarily a bad thing. Rolenc's concern is that these components could be on the heavy side, and lighter components would work better. The crankshaft had some weight removed and some weight added (from the looks of it by the same guy who tried to fix the cylinder head).
Once we take a closer look at each component individually, we will be able to figure out what we can keep and what will be replaced.
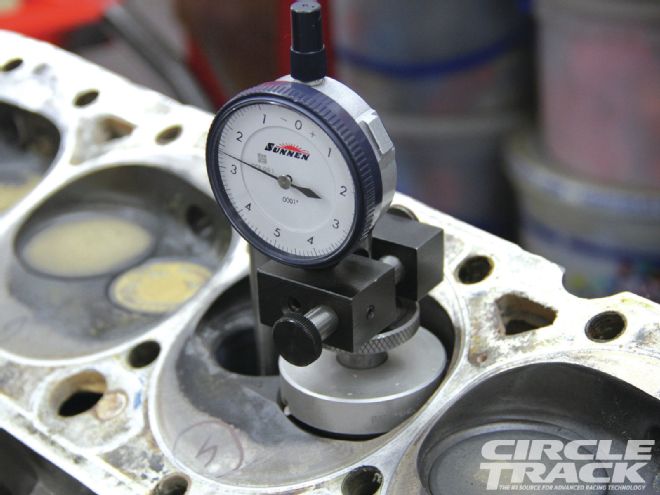 30. Using a concentricity gauge, Rolenc measures 0.008- and 0.0092-inch runout on the intake and exhaust guides. Spec is 0.001-inch.