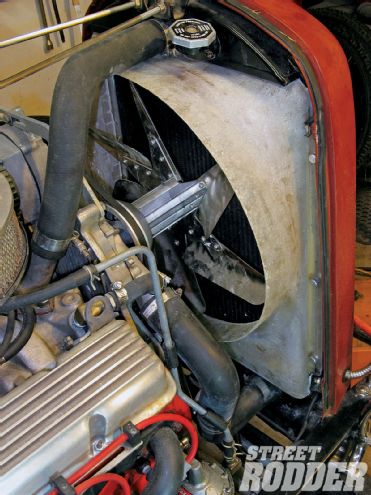
If you've seen the article elsewhere in this issue where U.S. Radiator fabricated a fan shroud for Project Shop Truck, chances are you want one for your project. And for good reason; even electric-fan manufacturers will begrudgingly tell you that all things being equal a belt-driven fan with a shroud around it is about the most effective cooling option going. As a secondary benefit, a properly designed shroud also makes fan location nearly irrelevant; the fan can be several inches from the core and/or overhang the tanks by a fair degree and still operate properly. I have a third reason: I intend to run a thermostatic fan that requires a shroud.
But if you're like me, you're wondering how on earth a normal person with normal-person tools can pull off such a masterpiece. Metalworking equipment costs a lot to buy and requires a fair bit of training and practice to use-properly at least.
There's an alternative that uses many tools you probably already have, a few inexpensive materials, and a few skills that you can pick up along the way. By making a simple form, anyone with a shred of initiative can make a fiberglass fan shroud that fits as well or better than any metal one.
Fiberglass lends itself beautifully for such a job. Provided it's laminated properly, it's incredibly strong-pound for pound several times stronger than aluminum or steel, in fact. It withstands temperatures hotter than what an engine's cooling system dissipates. It also finishes with popular automotive primers, fillers, sealers, and paints (the polyester resin is the same basis for body fillers after all). And best of all, it assumes the shape over anything that it laminates. In fact, the inspiration for this job came from a construction technique popular among car audio fabricators. They use it to make OEM-looking speaker pods and subwoofer enclosures.
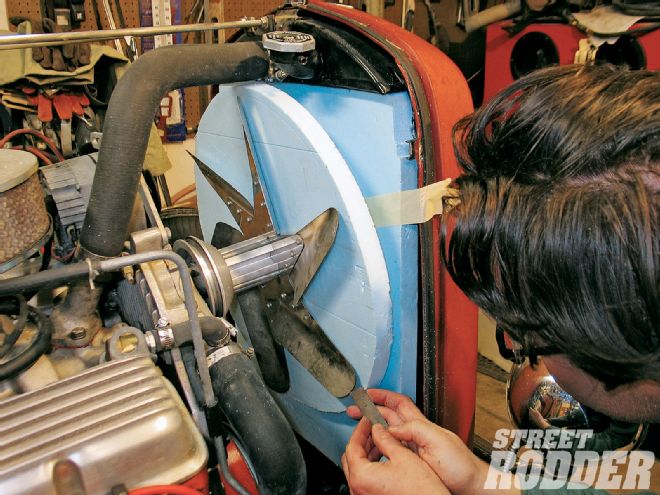
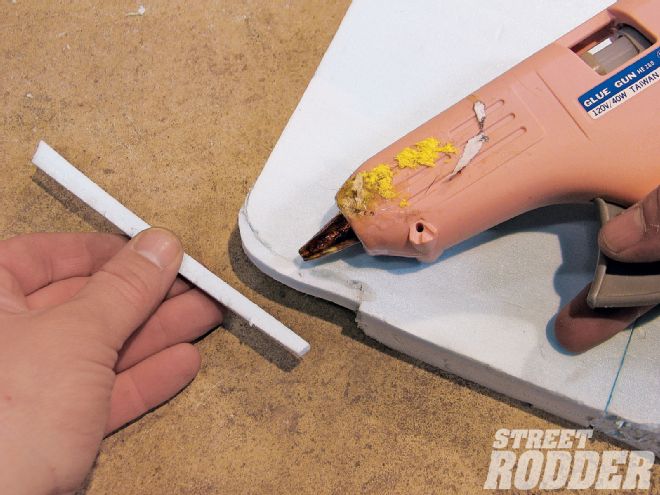 With the foam back in place I could see where I needed to add material to make the buck conform to the brace's profile. Hot glue makes adding foam almost easier than removing it, but choose wisely since the hard and gummy glue can make shaping a bear.
The key is the buck. There's no hard-and-fast way to make one but it has to have one property going for it: It must be stable enough to hold its shape during the fabrication process. Beyond that, you can use just about anything; if you can whittle something into a shape, you can make a fiberglass part that looks just like it. I forced myself to use spare materials from past projects, none of which were automotive specific, just to prove how open and easy buck construction can be.
The fiberglass-specific materials weren't much more of an investment either. I have a very good fiberglass supply shop, and even though I'm picky and won't use anything less than the best Iso tooling resin, I'd eat my hat if I spent more than $40 on materials. I spent half of that again on my mounting hardware, but that would be necessary regardless of shroud construction. The only fiberglass-specific tool in my arsenal is a ribbed roller, and that was way less than a sawbuck.
Construction took three days' worth of afterhours work. A shop owner told me that a similar-looking metal shroud took two full days to produce. But the big difference is who invests the time; that was a proficient fabricator with a shop full of big tools, and two days of work at his $85 to $120 hourly shop rate, which adds up pretty quickly.
But a homemade shroud like this has greater value than just better cooling and savings; every time I lift the hood my ego gets a little dividend on my investment.