Engine swaps are one of the timeless traditions of hot rodding. Maybe it’s dropping in a small-block to replace that six-banger, or big-block instead of a Mouse. There’s numerous this-for-that combinations out there and one of the more popular ones is installing a modern LS engine into a classic Chevy. Going to a modern powerplant has several advantages. The aluminum is much lighter than the iron used in earlier engines, the EFI system will most definitely net better fuel economy, the self-tuning nature of the engine’s computer system adds to driveability, and LS engines make serious power for their displacement. Yeah, they are a bit challenged in the looks department compared to Gen I small- and big-blocks; but if your goal is to make a car fun to drive, they are hard to beat.
LS swaps have been going on for over 15 years now, so it’s a lot easier than it was in the early days to shoehorn one in. However, there’re still a few small hurdles to leap. The EFI system has specific needs and since everything is computer controlled there’s a lot of wiring to wrangle. Thanks to the aftermarket, the whole install process has morphed into, for the most part, a plug-and-play deal.
The five key areas for an LS swap are: the fuel system, headers, engine mounts, oil pan, and electronics. Some people would add cooling in there, but, in truth, an LS engine doesn’t care about the radiator so long as it has sufficient cooling capacity.
An LS engine will even mate up with old-school automatic transmissions, but it really shines when combined with one of the newer computer-controlled overdrive transmissions, both in terms of performance and economy.
However you decide to go, there’s most likely an aftermarket ready-to-go solution available, which sure beats the old days of having to MacGyver everything. For this install we had a 1967 Chevelle with an all-iron big-block engine backed by a TH400 trans. It sounded great, but the gas mileage was awful and to be honest, it really wasn’t that fast or fun to drive. The owner really wanted a nice driver and, as it was, his drives mainly consisted of going from one gas station to the next. Given all of this, we thought his ride would be a cool candidate for an injection of some 21st century technology.
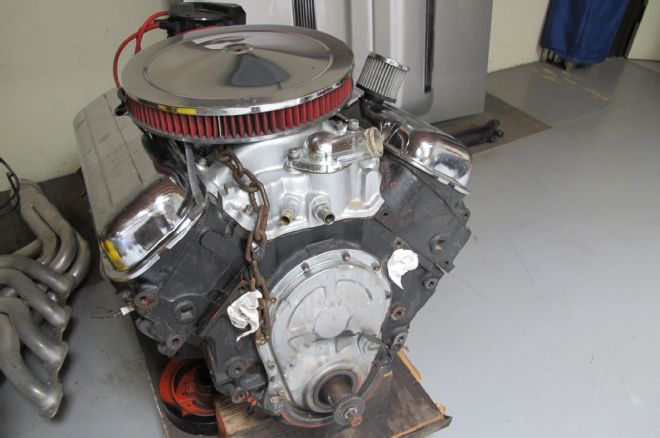
01. Before removing the tired big-block we weighed the Chevelle and came up with 3,680 pounds with 57 percent of the weight over the front tires. We’re sure the LS will save us weight, but we were curious as to how much.
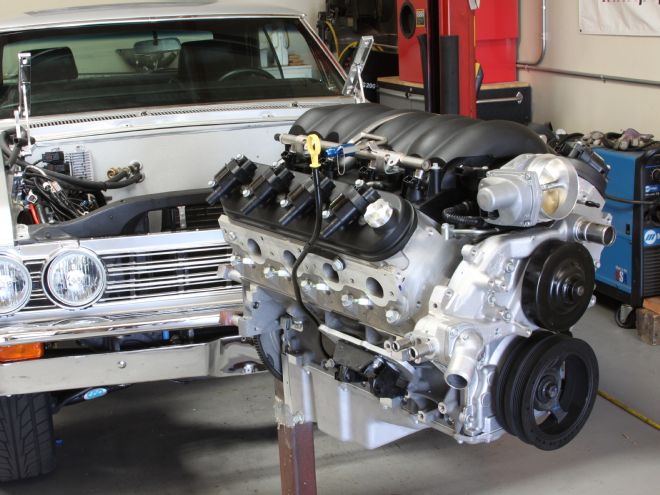
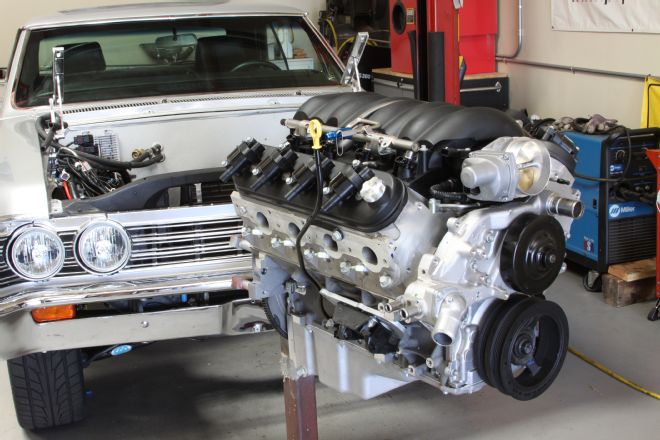
02. This Chevrolet Performance crate engine is the 6.2L (that’s 376 cubic inches for those that don’t roll with the metric system) LS3 (PN 19301326). Rated by GM at a conservative 430 horsepower, it comes complete from the fuel injectors on the composite intake to the coil packs and oil pan. At a street price of under $6,000, it’s not cheap, but when you consider it’s an all-aluminum EFI-fed LS then it’s certainly a great bang-for-the-buck.
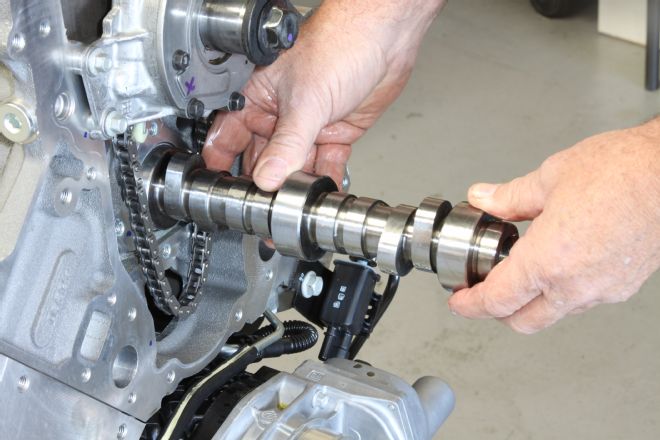
03. We wanted a bit more power, but we didn’t want to tear apart a brand-new engine. The solution was to toss in a slightly bigger camshaft from the folks over at COMP. Turns out that GM fits their crate engines with fairly conservative camshafts. This means that tossing in something bigger can yield more power for very little effort and cost. In this case we went with at 222/234 duration, 0.566/0.576 lift, 113 LSA cam (PN 146-426-11) that wouldn’t require new valvesprings.
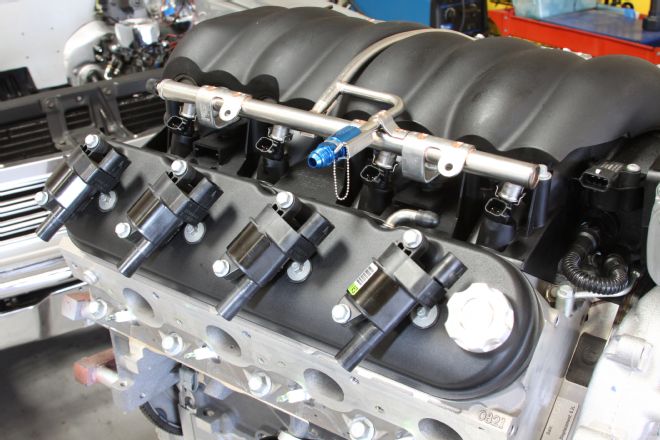
04. To dress up the LS engine a bit we swapped over to a set of black Holley valve covers (PN 241-91). They’re a great bang-for-the-buck option and help to declutter the engine a bit. We also flipped the fuel rail around so the inlet was on the passenger side and used an Earl’s adapter fitting (PN 991966ERL) to convert our GM push-lock to an -6AN fitting.
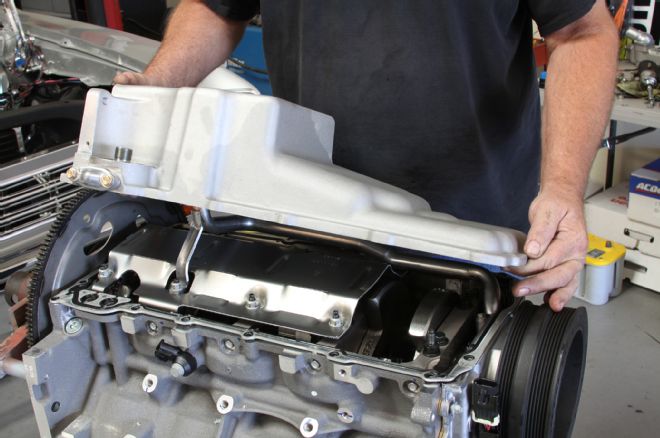
05. The crate engine came to us with a fifth-gen Camaro oil pan, which is fine for a new Camaro, but way too big for most swaps. To solve this we picked up one of Holley’s newly redesigned LS retrofit pans (PN 302-2), which has a shallow front section for extra crossmember clearance. You can buy a windage tray for a fourth-gen F-body, or do what we did and cut down the one that came with the crate LS3. These pans come in black powdercoat as well as bare aluminum, and Holley also offers trap-door pan-baffling for those that plan on hitting a road course or autocross.
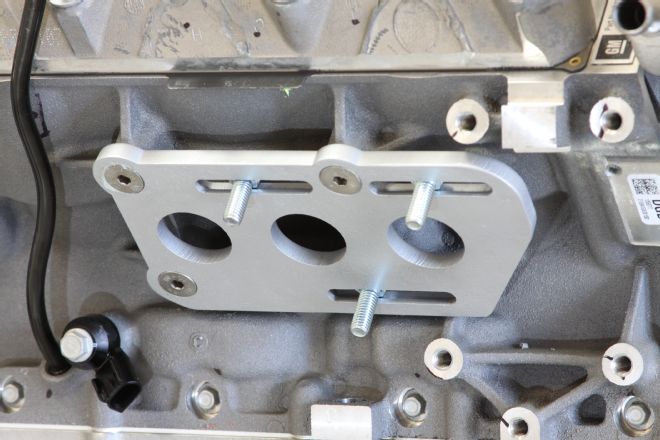
06. We were doing this install over at Stoker’s Hot Rod Factory and David Stoker had these sweet LS engine mount plates he developed. The nice part of this design is that it allows the engine to slide forward and back to help nail down just the right placement.
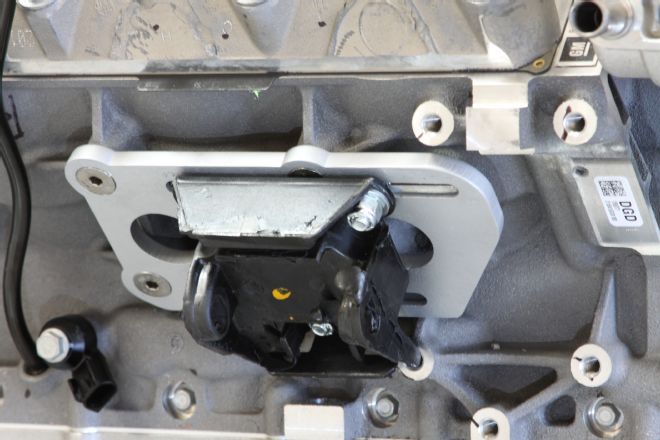
07. To these you can bolt any standard small-block Chevy engine mount. However, we found that with stock-style mounts we needed to grind down the steel heat shields a bit to clear the block so next time we will use a pair of the Energy Suspensions urethane mounts (PN 3.1114G) that we’ve had good luck with in the past.
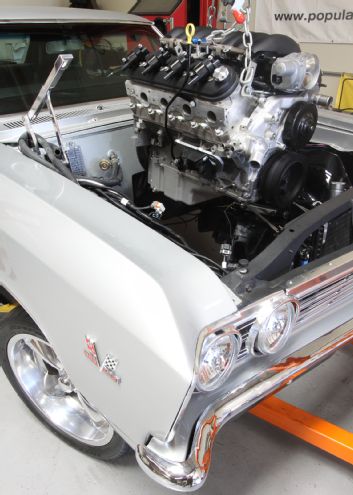
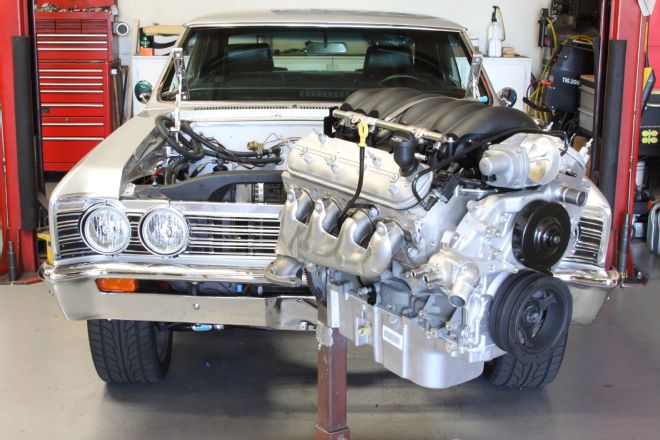
08. With the engine all sorted out it was time to get it into the 1967 Chevelle.
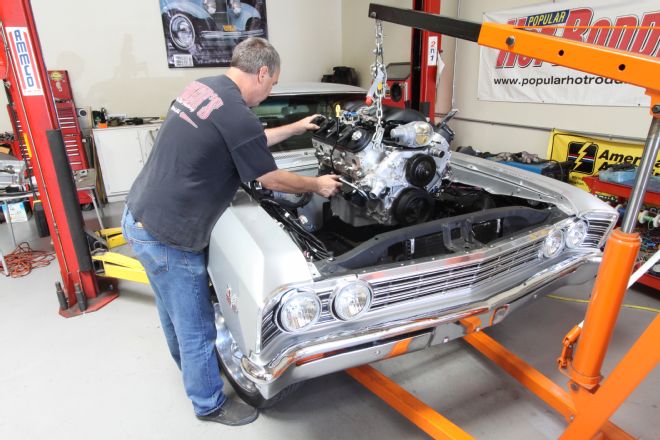
09. Rather than bolt the transmission to the engine and try dropping it in as one large assembly we opted instead to install the engine first. This let us more easily use the slotted engine mount plates to get the engine in just the right spot.
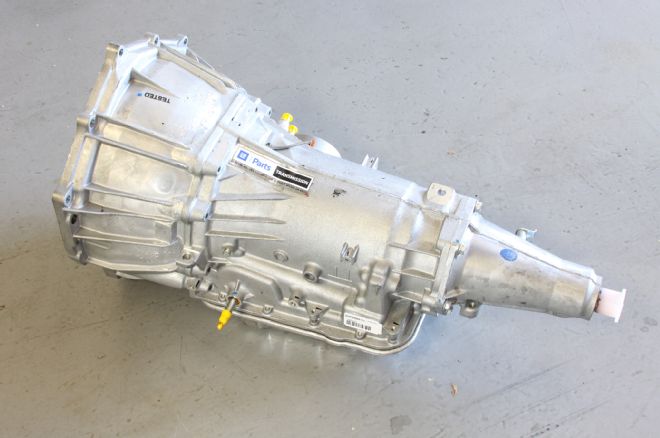
10. The transmission we’re running is Chevrolet Performance’s 4L65E (PN 19260380). This trans is the perfect choice behind an LS since the computer to control this trans “talks” with the computer for the LS engine and makes the overall install much simpler.
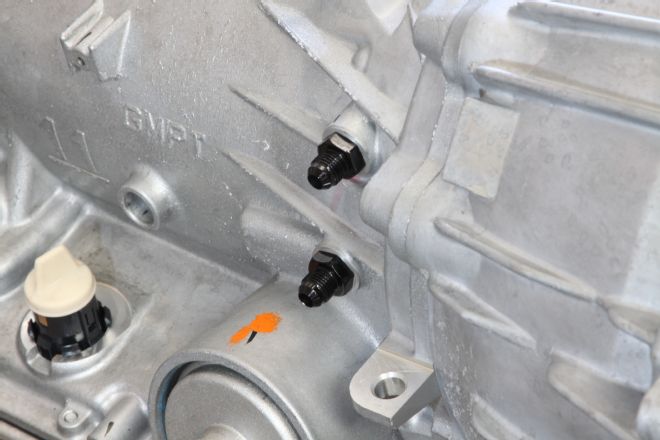
11. The fittings on the trans are GM-style, quick-disconnect types and it’s difficult to find the corresponding fittings for them. Our solution was to hit up Sweet Performance for a set of their 4L65E adapter fittings. These -AN fittings are designed specifically for the 4L65E, so don’t think any old fittings will work.

12. We poured some fluid in the Chevrolet Performance torque converter (PN 19299802) and mated it to the 4L65E transmission. With that done we raised it under the Chevelle. We did find that some “clearancing” of the tunnel with a hammer was needed, but not a ton. Ironically, we found it was harder to fit a 4L65E in the space than the theoretically larger 4L85E transmission due to the large servo on the side of the 4L65E and the shape of the bellhousing, so you might want to keep that in mind when parts shopping.
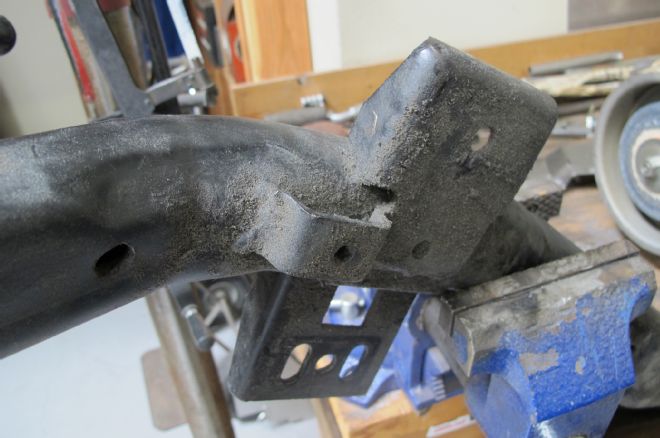
13. Instead of spending cash on a new crossmember we were able to reuse the stock one by cutting off the extra mounting tabs and slightly repositioning it on the factory Chevelle frame.
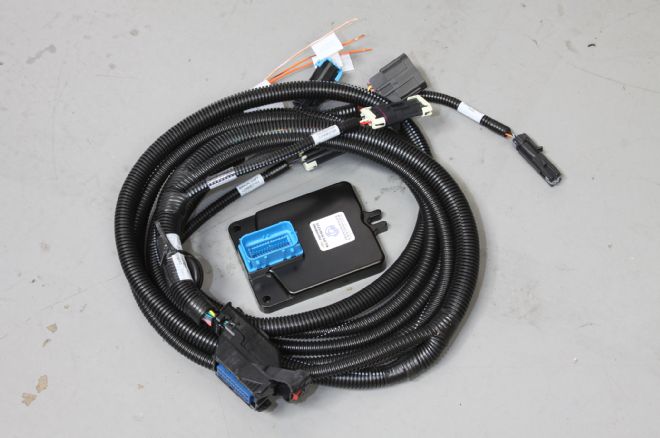
14. The transmission is electronically controlled so we went with Chevrolet Performance’s factory-style Transmission Control Module (TCM) (PN 19302405). What’s nice is that this TCM talks with the engine control unit to help make sure everything functions as it should. Like all the GM harnesses, all wires were clearly marked as to where they went.
15. The main ECU can mount just about anywhere, so long as it’s away from high heat. We chose the firewall for a more OE look.
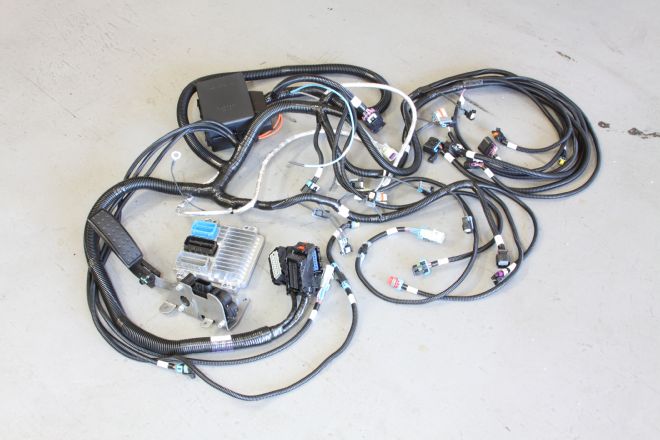
16. Even the once-complex task of wiring up an LS engine is now a plug-and-play deal, especially if you’re using a Chevrolet Performance crate engine. This kit (PN 19258270) included the controller, engine harness, mass air flow meter, MAF mounting boss, oxygen sensors, throttle-by-wire pedal assembly, and sensor mounting bosses. The computer came pre-programmed to run a stock LS3, so we will need to do some tuning due to our cam swap.
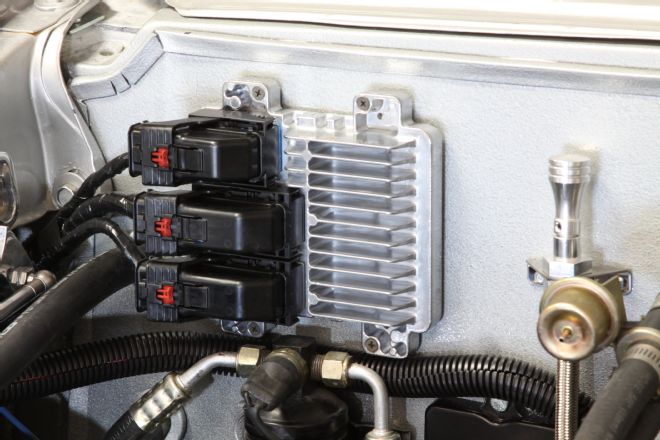
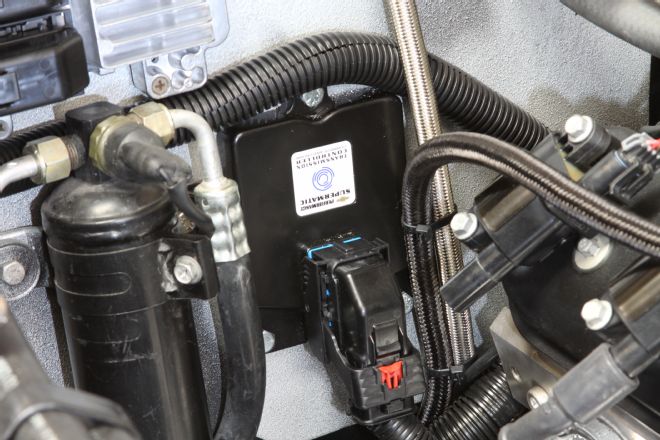
17. To stay with the OE look we mounted the engine’s ECU on the firewall above the transmission TCM. The fuse box was mounted in the forward area of the engine bay, just behind the battery. All these parts are weathertight, so they can be mounted in the elements, or tucked away under the dash.
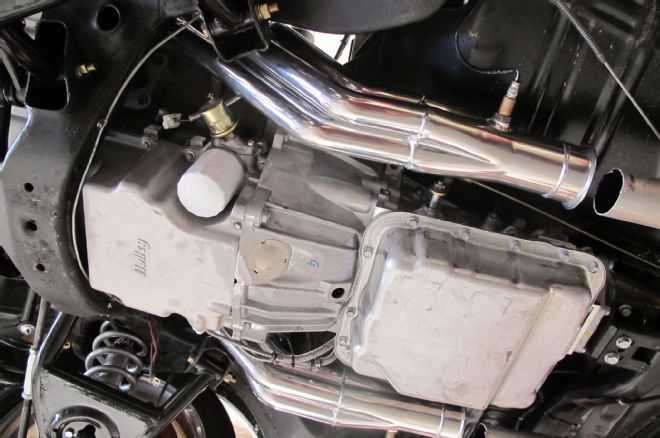
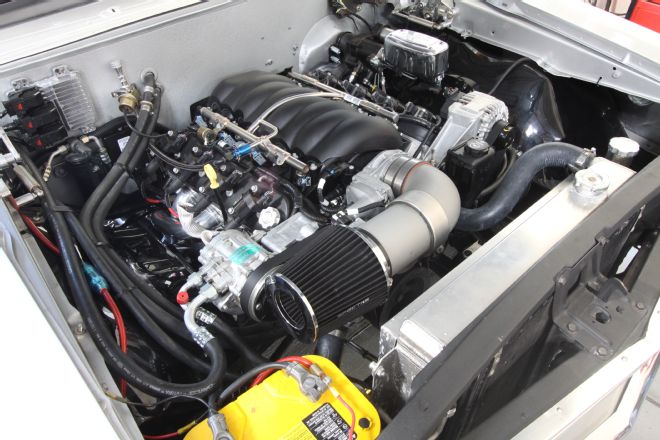
18. For headers we hit up the guys at Doug’s for a set of their Chevelle LS swap ceramic-coated 1.75-inch headers (PN D3336). The fitment was great and we were able to slide them in from the bottom with no fuss. If you look near the oil filter you can see where we drilled and tapped (1/8-inch pipe) the bypass plate to accept our Auto Meter oil pressure sending unit.
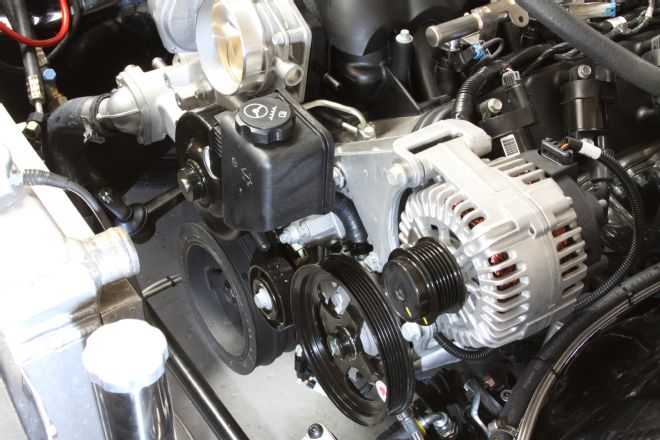
19. You can spend as much, or as little, on pulleys as you want. In this case, we just wanted something functional and reliable and this kit from Chevrolet Performance fit the bill perfectly. The kit (PN 19257325) included a 150-amp alternator, power steering pump, and all the brackets, tensioners, and belts needed. Chevrolet Performance sells a kit with an A/C compressor, but it’s not compatible most aftermarket systems such as Vintage Air. Given that the kit uses all OEM quality parts installing it was very easy and everything fit perfectly. If we were on a super-tight budget we could have sourced something like this from a boneyard, but we felt the convenience of having all the bolts, nuts, and widgets, along with the sparkly new parts, was worth the asking price.
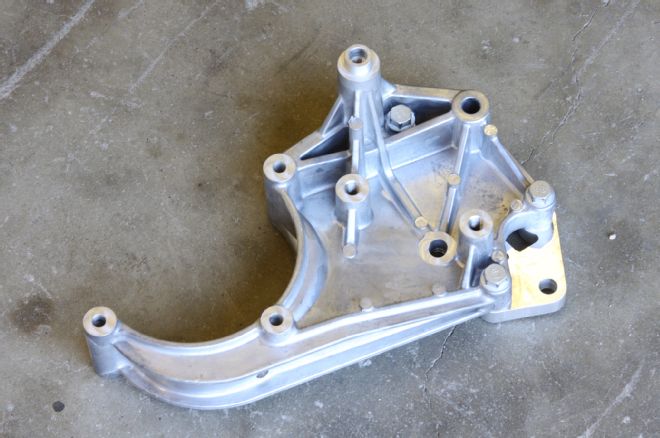
20. Our Chevelle already had a Vintage Air system, so our next challenge was finding a way to mate the Sanden compressor, in the correct position, with the Chevrolet Performance pulley system. The answer was this compressor bracket from Holley Performance (PN 20-134).
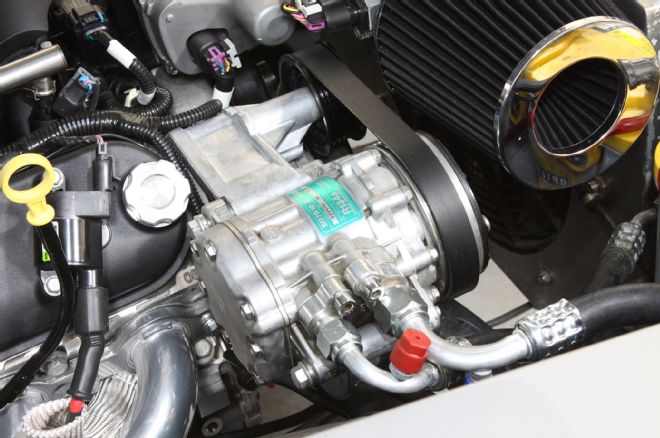
21. The Holley bracket located the Sanden compressor high on the passenger side of the engine, which is exactly where we wanted it. The cast-aluminum bracket also matched well with the Chevrolet parts.
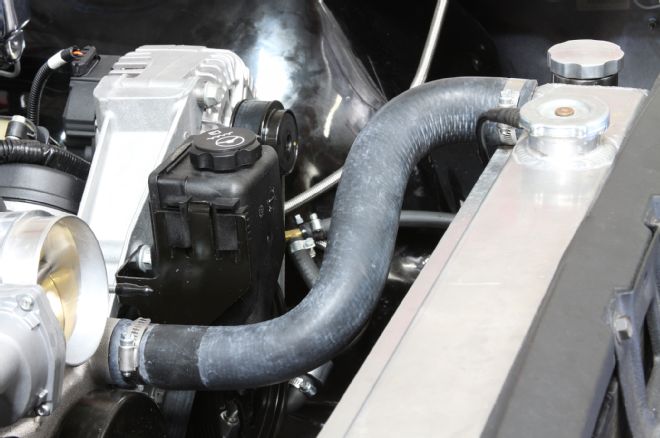
22. Hoses are always a bit of a challenge, but after digging around our local parts store we found two that would work. For the upper we used part number D71852 and for the lower C70391, both from Carquest.
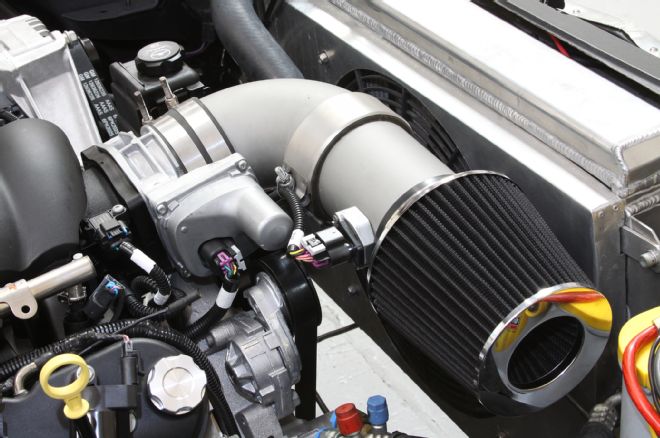
23. We used the Chevelle’s existing radiator, so it didn’t have the tradition setup with both the inlet and outlet on the right. This made running an air intake challenging since the upper hose blocked going to the left and the Optima battery blocked going very far to the right. For now we used an aluminum 90-degree elbow and a short tube (with the MAF bung installed) with a Spectre Performance air filter (PN 8131) to get us by. Later, we might swap radiators or relocate the Optima battery so we can get the filter farther away from engine heat.
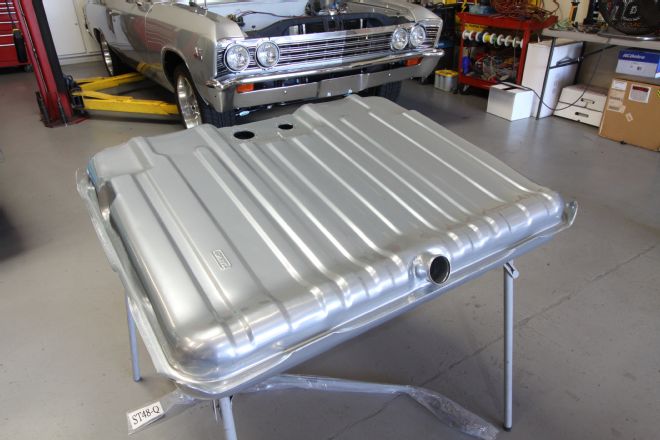
24. LS engines, and EFI engines in general, have very specific fuel needs. It’s easy to overcomplicate things, but we decided to keep it simple. The main player in our EFI fuel system is this tank from Tanks Inc. (PN TM37B-T). It’s internally baffled for EFI and even though it looks like stock tank, it’s 1-inch deeper for increased capacity. The steel tank is galvanized and then powdercoated silver.
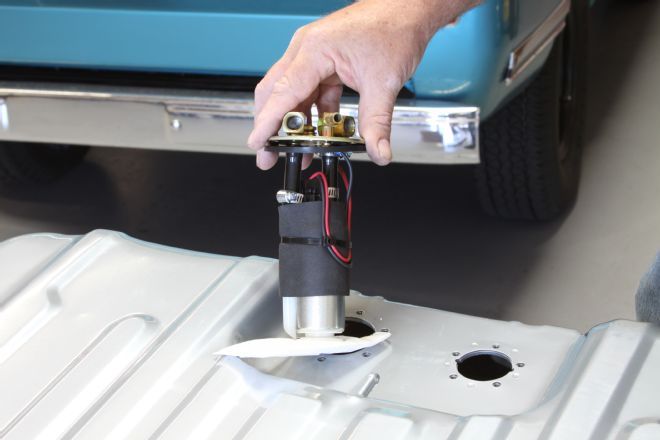
25. The tank used Tank Inc.’s high-flow (255-lph) submerged pump (PN GPA-4), which had an integrated filter at the base of the pump. This filter will be supplemented with an in-line Holley filter.
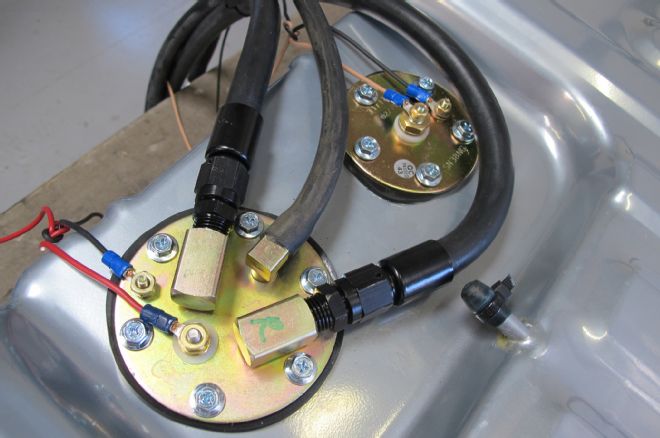
26. Next to the pump we installed the 0-90-ohm fuel level sender (PN TAN-GML) and then started plumbing and wiring the system. The three ports are supply (from the pump), return (from the Holley 12-846 fuel regulator), and vent line. For the hoses we used Earl’s push-lock products because they’re easy to install and easy on the wallet. We mounted the Holley regulator under the car, back near the tank.
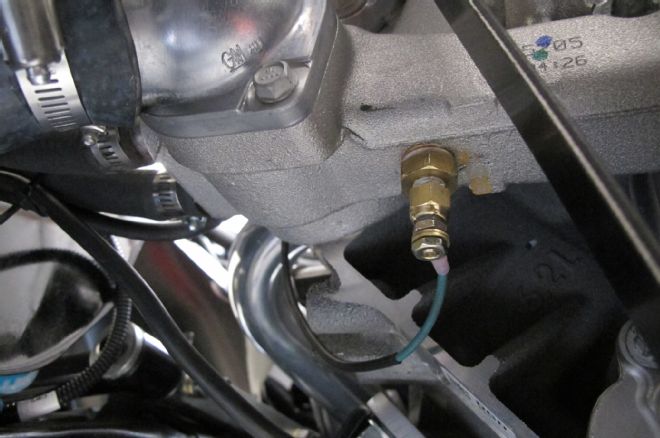
27. We mounted the water temp sensor on the bottom side of the water pump. This one sends to an Auto Meter gauge. The ECU has its own sensor, which comes with the crate engine, on the front of the driver-side head.
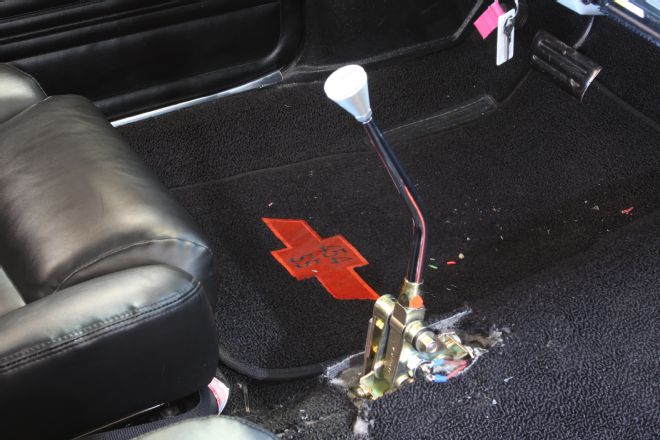
28. We could have modified the Chevelle’s three-speed shifter to work with the 4L60E Chevrolet Performance transmission, but we found an easier, better option. What we went with was this Lokar Performance Products floor-mount shifter (PN FMS64L60DL). To clean everything up we also used their rectangular shifter boot and ring (PN 70-FMB).
29. And here’s our completed install. With all the heater and A/C lines it’s a bit crowded, but we liked the factory look it has and were happy that the engine fired up on the first try. We took this moment to reweigh the Chevelle. Turns out ditching the iron big-block (with a TH400) in favor of the aluminum LS3 (with the 4L65E) knocked 266 pounds off the car! Most of that weight came off the front and the car is more balanced with 53 percent of the weight on nose. This weight savings is more impressive given all the electronics we added to mix.
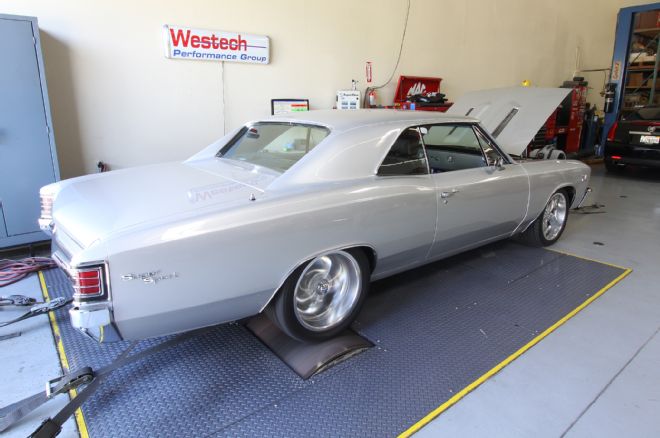
30. The car ran, but it was a bit off, most likely due to the cam swap. So, we drove it over to Westech Performance for some tuning on their Superflow chassis dyno. But, our day was cut short when something went wrong.
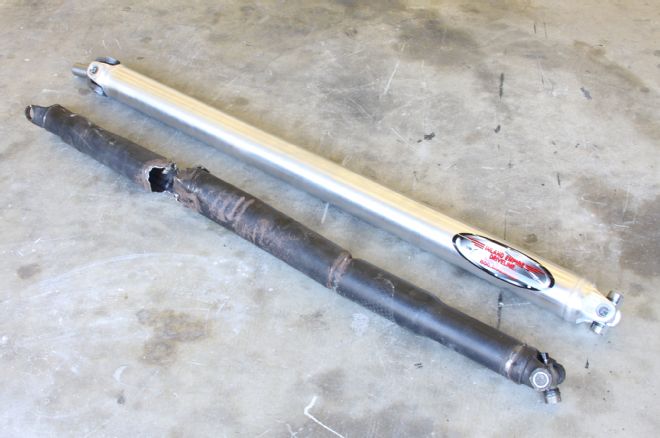
31. What happened was that the stock driveshaft twisted in half and did a number on the floor and exhaust system. We spoke with the guys over at Inland Empire Driveline and they thought it had more to do with the higher rpm of the new LS3 than with the power levels. Turns out those old driveshafts just weren’t designed to spin at 6,000 rpm. So, here’s a few words of wisdom. When you spend all that money on an LS swap, don’t cut corners on your driveshaft. The 3.5 inch aluminum shaft Inland Empire made for us will most likely outlast the car and cost less than all the repairs we had to make to the floor and exhaust system. Live and learn.

32. With the Chevelle repaired, and the new driveshaft installed, went back to Westech to finish our dyno tuning session. The Chevy put down 416 horsepower and 407 lb-ft of torque to the rear tires! Peak horsepower was around 5,700 rpm, but the power easily carried to 6,000 rpm. Peak torque was at 4,700 rpm, but even way down at 2,900 rpm it was sill churning out 390 lb-ft. After driving the Chevelle around town for a few weeks we also noticed a huge improvement in fuel economy. So there you have it, more power, less weight, improved driveability, and better fuel economy.