
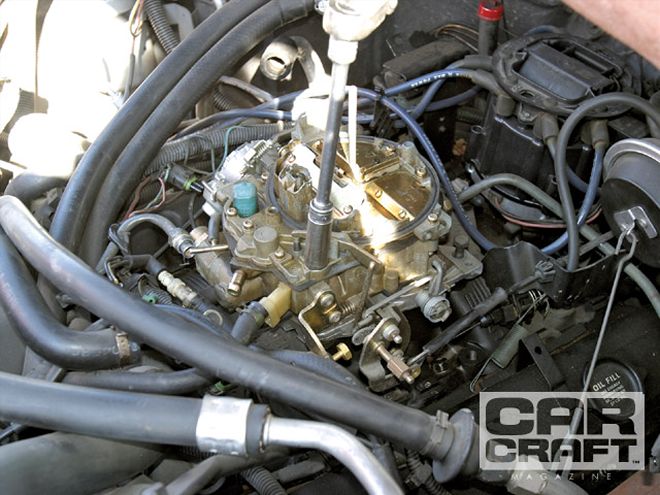
 Our '85 Monte was in need of improved part-throttle performance. The carb came off so Sean Murphy could have his way with it.
If there were a category titled Good Carb, Bad Reputation, the Rochester Quadrajet would be at the top of that hit parade. It's doubtful there is a domestic fuel mixer more universally misunderstood and scorned than the Q-jet. And yet, for those who speak fluent carburetor, the opinion is that this is an excellent piece when properly installed and tuned. Perhaps it is the Q-jet's complexity that makes it an easy target. Within the Q-jet family, the electric or feedback Q-jet is even more despised. Rather than just jump on the blame train, we decided to take one on-or more accurately-apart. Our '85 Monte Carlo rejuvenation project is afflicted with one of these unresponsive feedback Q-jets, making it a perfect candidate for a rebuild.
Since the electric Q-jet dialect was unfamiliar, we sought out a reliable knowledge base, which brought us to Sean Murphy's door at Sean Murphy Induction (SMI). Murphy's expertise spans the breadth of most domestic carburetors, so he was intimately familiar with our carburetor's eccentric notions. The Q-jet's electronic solenoid circuit is tied directly into the primary main metering circuit and is commanded by the computer that sends out part-throttle signals based on input from a narrow-band oxygen sensor. The solenoid circuit constantly adjusts the air/fuel mixture based on these signals from the computer. The primary metering circuit still functions like an original Q-jet except that the primary metering rods now move much more rapidly to adjust the air/fuel mixture.
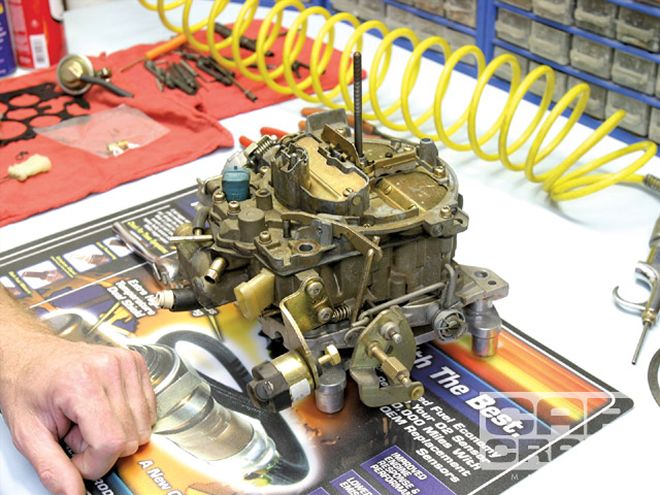
We yanked the Q-jet off the Monte's L69 305 engine and shuttled the carb down to SMI, where Murphy could more closely inspect its inner workings. We're only going to cover the main items on the rebuild list, since a step-by-step Q-jet rebuild session would entail many more pages to do correctly. Most of the modifications Murphy performed on this carb can be replicated on nonfeedback Q-jets, so there's much to learn about these fuel mixers. If you'd rather send your carb to SMI, the company can perform all the tricks and return it to you looking like new.
It's a little-known fact that the original name of Joan Jett's band was Joan Q-Jett and the Blackheart Exhaust. Honest...
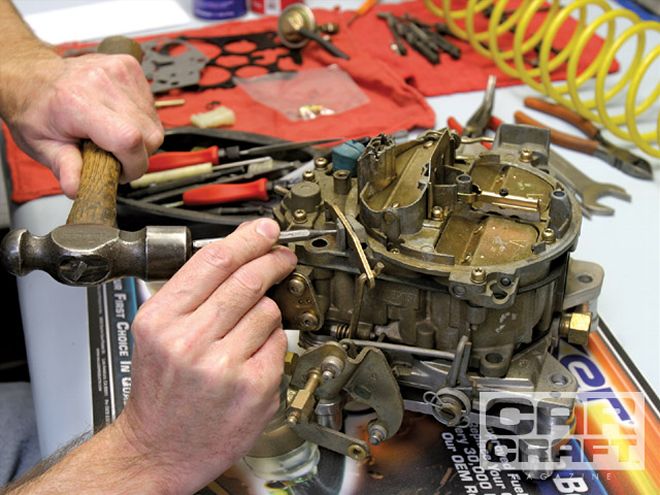
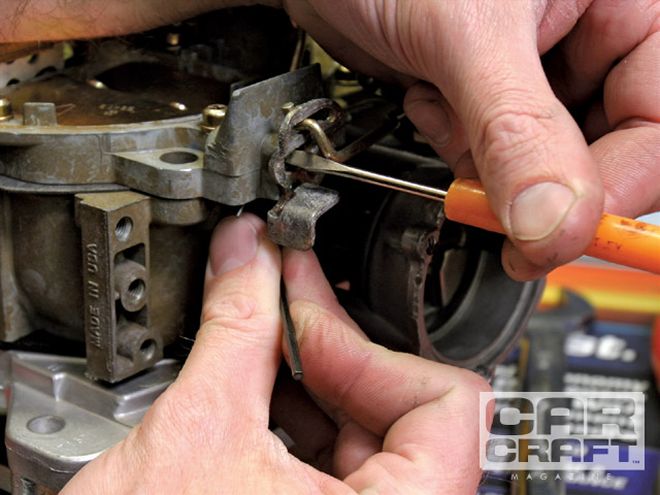
Most Q-jets require driving out this roll pin to remove the accelerator pump arm. Only push in the pin far enough to remove the pump arm. This will give you enough room between the choke housing and the pin to lever it back in place during reassembly.

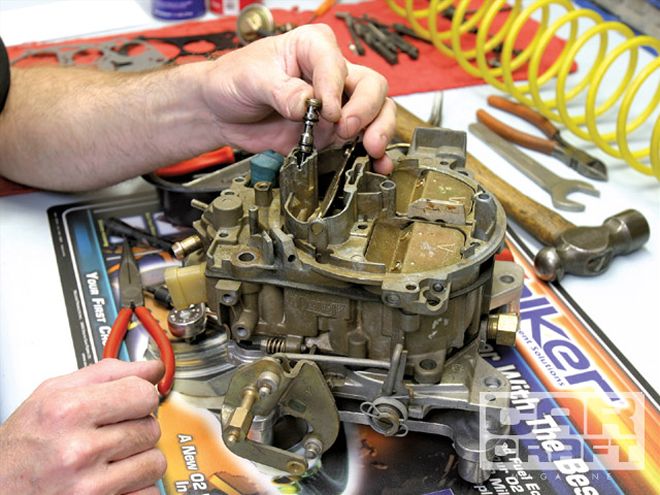
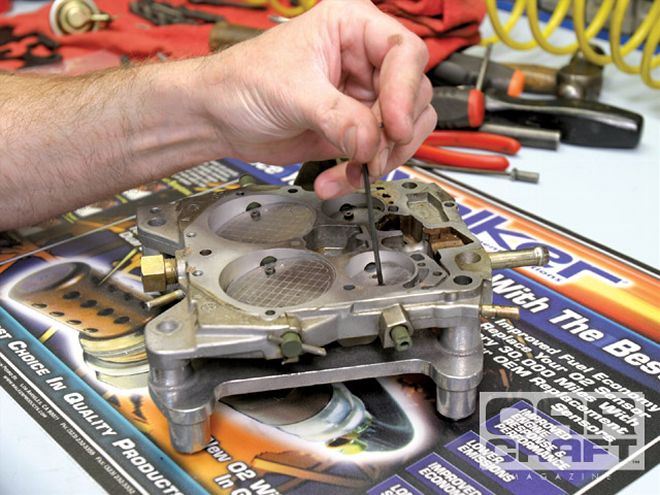
Using needle-nose pliers, remove this throttle position sensor (TPS) plunger. Don't lose it; GM doesn't service this part anymore, so it's scarce.
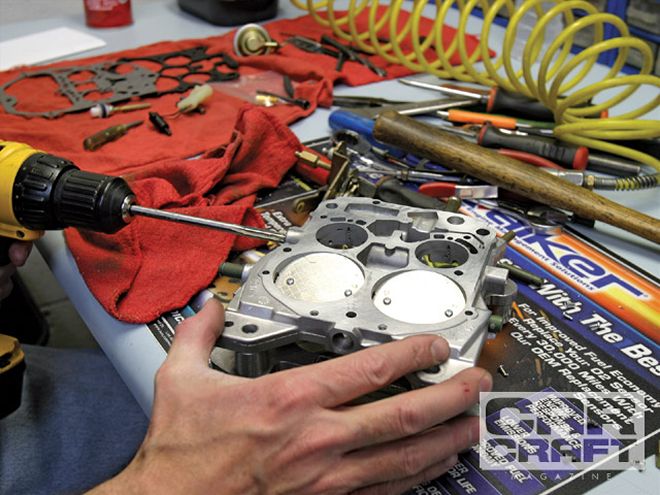
Using a flat-blade screwdriver, remove this idle air bypass valve. Now remove all 12 lid screws using a Torx T-25 male socket. Don't forget the two tapered screws hiding inside the choke housing. Carefully remove the lid and disconnect it from the secondary air valve arm.
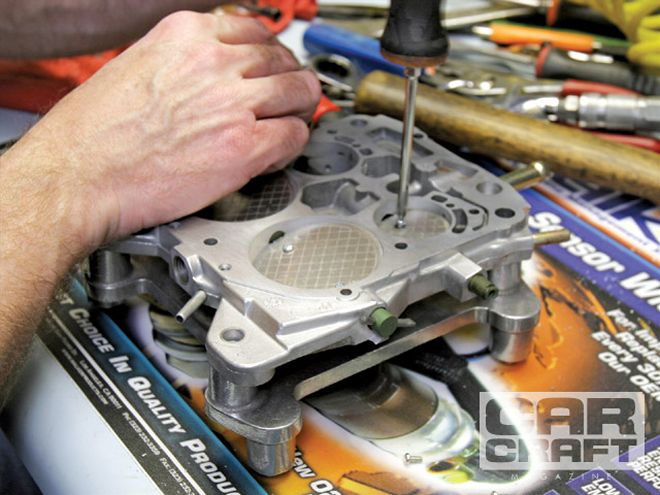
Note the orientation of the different springs above and below the flat plate. You'll need a special double D tool. Murphy made his out of a length of mildly flattened 1/4-inch tubing, but Sears offers an OTC tool as well. The assembly unscrews out of the base. OTC also makes a special tool to remove the primary metering jets out of the carb.
Bush It
One classic problem with Q-jets is a loose primary throttle shaft. SMI sells a bushing kit that is easy to install and will really improve throttle response and driveability. A classic symptom of a worn primary is excessive idle rpm-even with the idle-speed screw turned all the way out. The procedure is easy to do yourself, or you can send the carb to Murphy and he'll do the restoration for you.
Use a small grinder to remove the small stakes on the throttle shaft screws. The ends must be ground down or it will be nearly impossible to get the screws out. Don't bother with the secondary shaft. It rarely is worn.
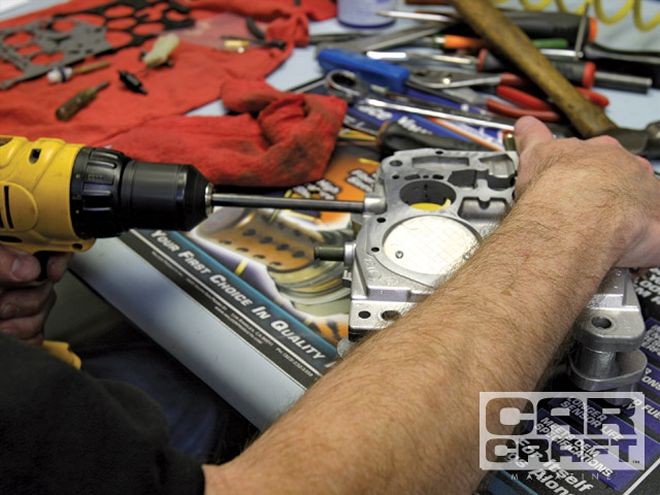
Remove the primary shaft from the throttle plate.
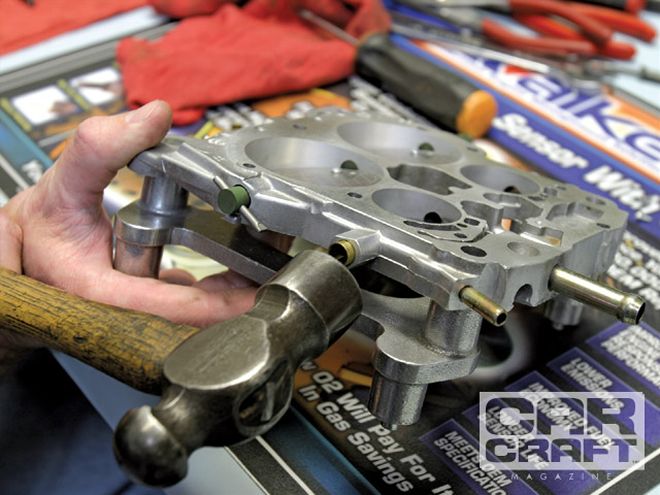
The passenger-side bushing can be lightly tapped into place with a hammer.
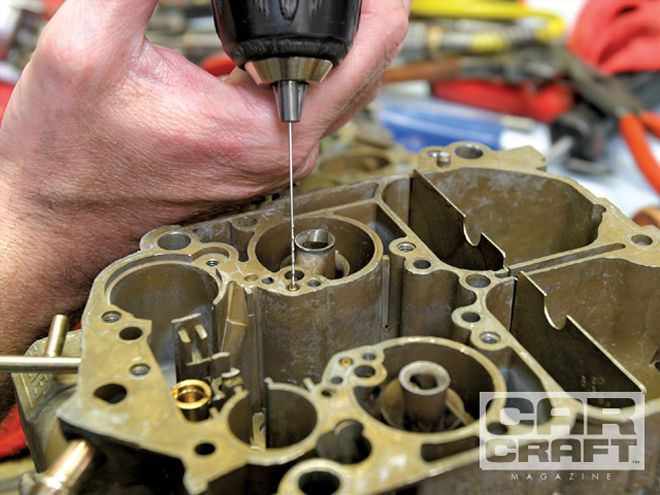
Rochester stepped the hole in later Q-jets, requiring you to carefully drill the driver-side bushing hole with an 11/32-inch drill bit. Work slowly here and only drill down deep enough (usually 3/8 inch) to accommodate the bushing.
Tap the bushing into place and then use the supplied reamer to carefully size the bushing to allow the throttle shaft to turn easily.
Use a small amount of thread-locking compound on the new SMI screws for the throttle butterflies. Carefully position the butterflies to fit as tightly as possible to the throttle bores. The test is to hold the baseplate up to a light source to see minimum light around the butterflies with the throttle closed against the idle-speed screw.
Performance Mods
SMI's performance feedback Q-jet upgrades are intended to improve driveability and throttle response. Keep in mind that only very small changes are necessary to see big gains in part-throttle feel. These mods are part of SMI's Stage 2 upgrades, if you would rather have SMI do the honors. Keep in mind that as far as secondary jetting is concerned, the electric Q-jet still allows the tuner the full range of metering rods and hanger adjustments, just like the older Q-jets.
Murphy drills the idle downtubes from 0.032 to 0.034 inch to add a little more fuel to the idle circuit using a jobber-length drill bit. He also drills the accelerator pump discharge holes in the carb lid from 0.026 to 0.029 inch.

The choke pull-off is also the diaphragm that controls how quickly the secondary air valve door opens at WOT. Murphy grinds the tip of the nipple to expose the restrictor located inside and then drills this restrictor to 0.016 inch, which allows the air valve door to open faster.
You can also change the opening point of the secondary air valve door by loosening the small Allen locking screw and then using a small, straight-blade screwdriver to adjust the door-spring tension. The proper tension is one that will open the door the quickest without causing a bog. Too loose an adjustment created the undeserved Quadra-bog nickname.

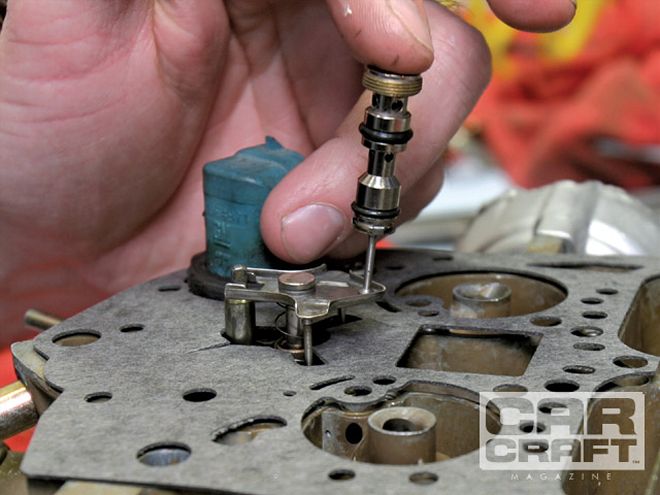
During reassembly, Murphy coats the TPS plunger with grease to ensure it operates smoothly. Often the plunger sticks, which causes driveability problems. Also lightly stretch the spring underneath the plunger to ensure it has the proper tension.
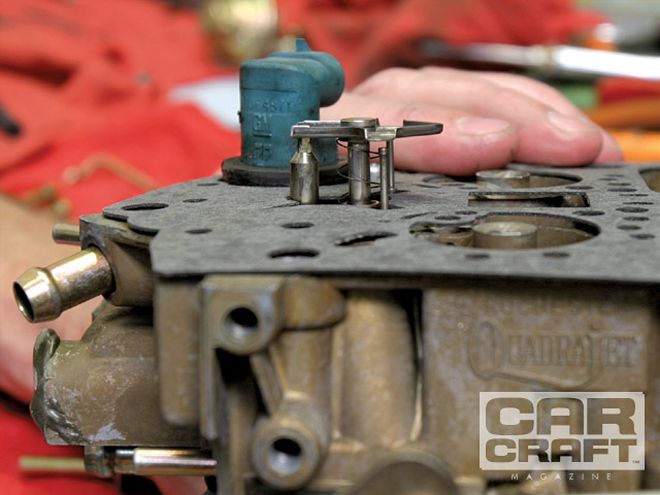
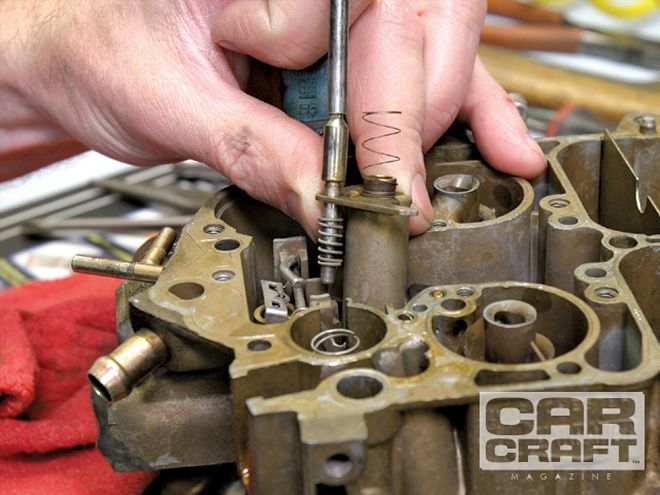
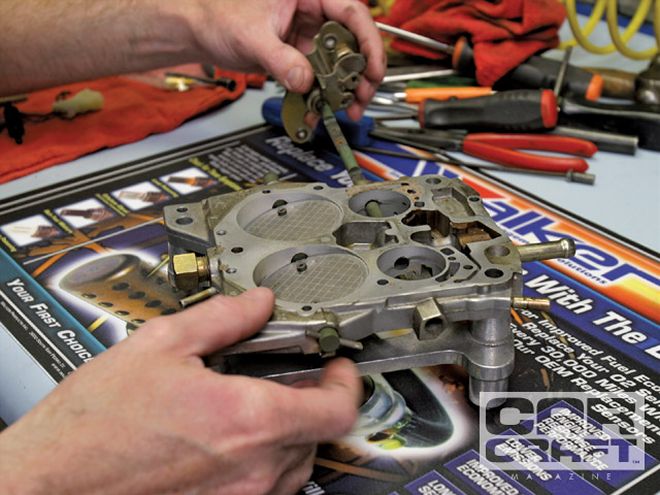
When reassembling the primary metering rod assembly, make sure the rods touch the horizontal part of the mixture control assembly baseplate when at rest. As you can see (arrow), they don't in this photo. If not, lightly stretch the two small, primary metering rod springs until the rods touch. This will eliminate a possible part-throttle stumble.
This is the orientation of the idle air bypass valve to the primary mixture control solenoid plunger plate. The solenoid moves up and down, which also moves the air corrector. The air corrector screws into the top of the carb. Murphy says this idle air bypass valve is the proper way to adjust the carb for idle quality, not with the idle-mixture screws. The stock adjustment is to bottom the air corrector and then turn it four times counterclockwise. Turning the air corrector clockwise (down) is richer, while counterclockwise (up) is lean. There is also a dwell adjustment once the carb is back on the car, using this same idle bypass valve. Dwell is adjusted to 30 degrees using the six-cylinder scale.
With the Q-jet back together, Murphy set the idle-mixture screws at the factory spec 33/4 turns out (the needles have a very fine thread pitch). It's now ready to bolt back on the Monte.