There have been countless air-conditioning installation stories in just about every automotive magazine over the years, and for good reason--we all want to drive our old vehicles in comfort. But how easy is it for the average Joe to install an aftermarket air-conditioning system? After all, it's a pretty serious endeavor. Well, I was about to find out. In all my years of building cars and trucks in shops, I had never installed an A/C system.
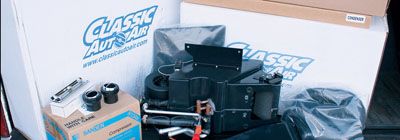
Sure, I've read articles about it, seen it done from afar, and have even had to write articles on the subject, but never actually put one in. And while I consider myself fairly skilled in many areas, I don't know much about A/C systems except they blow cold air and seem somewhat complex. In my quest to distance my '72 C-10 from the "beater" moniker, it was time to install air conditioning in the heat-only-equipped truck. I called Classic Auto Air and discussed my needs, and they suggested the Perfect Fit system for '67-72 heat-only Chevy trucks. Their kit would retain the use of the heater controls to operate the A/C and is available in two vent configurations: in- or under-dash. I'm not one to have a lot of stuff hanging under the dash, so I opted for the in-dash vents even though it would mean having to cut the holes, which may not be for everyone. After telling Classic Auto Air what engine I had and where I wanted the compressor, they shipped their Perfect Fit kit--now I just had to install it.
The install is actually pretty straightforward, but there is quite a bit of ground to cover, and much of it was new to me. Classic Auto Air did a good job of putting together a comprehensive kit, which comes with over 20 pages of instructions that seem a bit daunting at first, but reading through them a few times to get familiar with what's ahead is always smart.
What I am going to do with this article is amend the instructions from Classic Auto Air and touch on the areas I had trouble with as well as outlining the basics. Obviously, if they have over 20 pages of instructions, we can't cover it all in six, but hopefully between the two you'll be set. A big part of the install is actually removing the old heater parts from the truck. Do yourself a favor when it comes time to remove this from the engine side of the firewall by loosening either the inner wheelwell hardware or the passenger-side hood hinge to get the box out. It's a tight fit and you'll fight it otherwise.
The Perfect Fit kit comes with a wiring harness that is pretty easy to hook up, but make sure you ground it well. Classic Auto Air says this is probably the biggest problem people have when they try to run the system. If you choose an in-dash vent setup, obviously the better you measure your cuts and the more careful you are making them will net the best results. You'll need a 2 1?4- and 1 3?8-inch hole saw for the vents and for a tube that passes through the core support. In the end, you'll also need to have an A/C shop crimp the ends of the two hoses that hook to the compressor. Don't forget to clock the hose and the fitting after you cut it because once they are crimped they're not going anywhere. When you're done with the install, you'll need possibly the same shop to evacuate and charge the system for the first time. This is a big investment; don't skimp out on the end!
If at any point you have questions or get stumped, call Classic Auto Air and they'll be happy to help--I think I called them three or four times myself. So, even though it may be winter time where you are, get ready for summer now and give Classic Auto Air a ring. If I can do it, so can you!