
A couple of months ago, October 2008 to be exact, we started a buildup of an engine that clearly defines "built on a budget." We decided we would reuse the rotating assembly and build from that, making a reliable driver-style engine that would propel any A-Body into a cruise night or simply down the highway. In that issue we tore down and diagnosed what we had to work with and devised a plan of attack.
In the November issue we showed what we did in regards to assembling the short-block. We highlighted the basic ideas of what you need to check and how it went together to make it last.
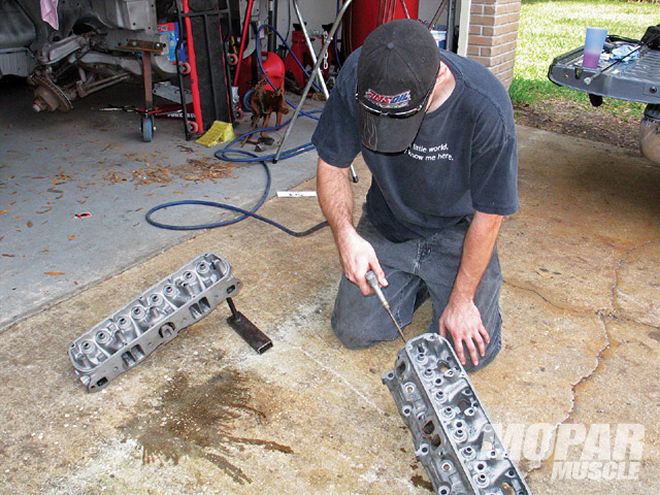
In this issue, we show you what we did to put the heads together. Since we had the heads apart for machining, we decided to do a little port readjusting and cleaning. We know what you're thinking: It's a basic 318 build, and how much can porting the heads really help? Your question is valid. The approach to this budget-built 318 really means that doing the extra work we did to the heads may not be warranted, but what the heck, we needed something to do.
 This intake port is an as-cast port...
After we spent a little time cleaning up the head's ports, it was time to take them to the shop for some basic machining to make sure we had a good set. The first thing that Kevin from Auto Performance Engines handled was to clean the heads and make sure we had no cracks or other damage that would render them useless. Doing this ensures you don't waste money on rebuilding a set of bad heads. Next came the decking of the head surface. It's standard practice-or at least it should be-to give the head-to-block surface a good surface cut, just to make sure you're dealing with a true surface. We decided to take a little more than just a surface cut to make the chamber a little smaller. Doing this can get you in trouble later on because you could cause issues with valve-to-piston clearance or hurt the quench area, among other things. We decided that removing .020 inch would give us a nice flat mating surface, and we still had ample clearance. The compression ratio is bumped up a minimal amount by doing this, so you decide if it's worth it for your engine.
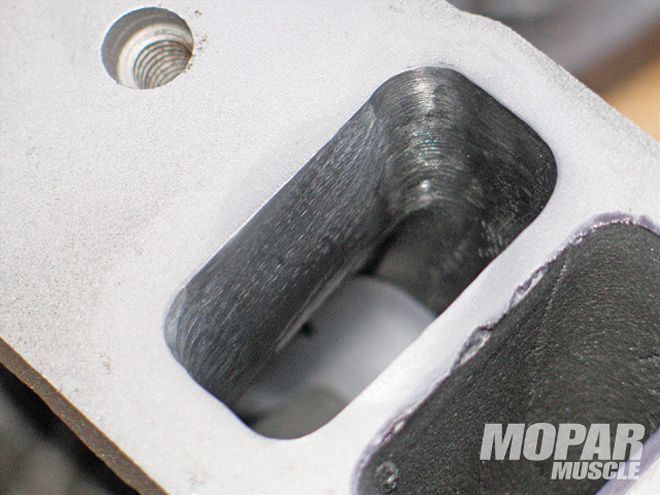 ...and this one has been cleaned up a little bit. Remember, the heads are where power is made, but depending on your combination, you may not want to partake in the sucking up of cast-iron dust by doing any porting. The main focus of our port cleaning was to at least gasket match the intake port on the head with the port on our intake. The marker line shows the gasket port as marked by tracing the port hole of our gasket.
After the head's surface was milled, we had Kevin focus on the valveguides and seats. Our exhaust guides needed to be replaced, and the exhaust valves were also bad so a change was in order. This presented a dilemma. Do we stick with the stock 318 valve face-dimensions, or do we use larger valves? Again, this is a budget build, and going too large with valve replacement can actually hurt the engine's performance. Think of it like this: When forcing air through an opening, the larger the opening, the less velocity you get. Take too much velocity away from an intake charge, and you get no performance. So keeping that in mind, a factory 318 intake valve measures 1.78 inches, and the exhaust is 1.50 inches. Not what we would call a performance setup. Since we needed to replace the valves, and the seats needed reworking anyway, we decided to use a set of two-barrel-equipped 360 valves. The 360 valves measure 1.88 inches for the intake, and 1.60 inches for the exhaust. Remember, this is just a small change, but we are now giving the engine more air without overdoing it.
With that decided, we had to focus our attention on the springs and other related valvetrain parts. Our springs are matched to our Comp Cams PN 20-223-3 cam-which, by the way, measures a valve lift of .477/.480 inch, and a duration at .050 inch of .224/.230 degrees. It's not a monster, but it will fit our build nicely. With an older Mopar small-block, pre-Magnum heads, the rocker arms are mounted on a shaft, and are non-adjustable. Make sure that when your shop does the machine work to the heads, they also make sure the valve tips are even across their face. If not, you could have issues with a valve hanging open because the stem is too long, or a valve not opening properly if it's too short. This is an extreme explanation, but you get the point.
After the machine work was completed, we took the heads home, assembled them, and put them on the engine. Now that we've got the engine assembled, stay tuned as we install it in the car and hit the Dyno.
Parts List And CostsHeadwork$400ValvesIntake$40Exhaust$39.60Cam, lifters, springsComp Cams PN {{{K20}}}-223-3$385Rebuild Kit{{{Summit}}} PN FEM-205717M-000, w/o pistons$185Cam Bearings Summit PN CLE-SH875S$30Oil Pump Summit PN MEL-M72HV$54Frost Plugs Summit PN SLP-381-8010$23CarburetorBG Speed Demon PN 1282010$350Damper Professional-Products PN 80012 $70IntakeProfessional-Products PN 55026 $150Total$1,726.60