In the May ’02 issue of Kit Car, we offered a Crate Engine Buyer’s Guide and a treatise on how to buy a crate engine. This time out, we advise you on how to install and start up your new engine-in-a-box. —Editor
Turnkey crate engines for kit and other project cars have grown enormously in popularity. The reasons are obvious—building an engine yourself can be time-consuming and laborious. In contrast, a mail-order mill offers simplicity, time savings, a warranty, and a minimum of parts scrounging.
On the other hand, installing a crate engine may not be as easy as the name suggests. You can’t simply drop it in between the fenders of your Cobra replica and turn the key. Several preflight procedures should be followed before you head down the road, as recommended by the crate-engine suppliers we contacted. Looking at crate engines in general, these factory-built mills run the gamut from small- to large-displacement blocks and from mild to wild power levels. All major brands are available in either carbureted or fuel-injected models, and in just about any size or type: a 350 Chevy, a Ford 302, a 426 Hemi, or even a Viper V-10. For the kit market, Ford and Chevy V-8s are the most popular.
Professional kit builder John Steele of JPS Motorsports says that if you’re trying to decide between a Ford or Chevy, the latter is generally easier to install. “With Fords, there were so many parts changes over the years,” he laments. “One time I put a 428 in a Cobra, and the flywheel, crank, and harmonic balancer didn’t match. The castings vary from year to year and with the particular application. We had to pull the flywheel off for rebalancing, match it to the crank, and changed the weights on the harmonic balancer. On Chevys, they’re all 99 percent interchangeable.”
For Cobra replicas, though, Ford is still the engine of choice, in such configurations as 289, 302, 351, 428, or the much-touted 427 side-oiler. Truth be told, though, the 427 center-oiler with a properly blueprinted oiling system is just as durable an engine as the side-oiler.
Also, many original Shelby Cobras were fitted with 428s disguised by 427 valve covers; those engines actually have a broader torque curve, which is better for getting off the line and driving around town. Ford’s 429/460 crate engines are even less expensive and have a number of performance parts available for them as well. The only drawback is that they are a bit bulkier and may require some custom fitting in the engine bay.
The bottom line is this: You can save quite a few dollars by going with a good enough alternative.
Steele is particularly fond of the small-block GT40 package from Ford. “It works best in replicas,” he feels. “With aluminum heads and other good parts, it’ll pump out 345 hp, and it’s a lighter engine, too. I usually change out the oil pan for more capacity and add a windage tray for more horsepower. I also change the roller rockers to lightweight ratio rockers.”
For Porsche replicas and other VW-powered kits, the venerable 1,600cc flat-four is still available as a new factory engine. Interestingly enough, they are made in Mexico where the undying Beetle continues on as an evergreen production car. On aftermarket flat-fours, Steele recommends specifying TRW valves because he’s found that some have soft stems, which can cause the rockers to hammer the tops and lose adjustment. Also, with mechanical valves, it’s important to check the adjustment before starting up the engine.
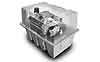
Whatever the type of crate engine you choose, note whether it has been pre-run or not. High-performance crate engines are often dyno-tested, but that usually adds a few hundred dollars to the price. The advantage is that you probably don’t have to do the break-in procedure outlined below, and this type normally includes a dyno sheet that verifies the claimed output of the engine. Prices for crate engines are often competitive if not lower than an engine you built yourself with new components. (You can, however, beat the price of a crate engine by using salvage-yard parts—unless, of course, you throw a rod and have to foot the repair bill.) When calculating costs, consider whether you plan to pick up your crate engine at a drop-off point or have it delivered to your driveway for an extra charge. Either way, you’ll need an engine hoist to move it—that’s one heavy box!
Note that while many crate engines arrive as virtually complete turnkey packages, others are long-blocks that require adding accessories such as a carburetor, a starter, pulleys, a water pump, a distributor, plug wires, and so forth. (Tech tip: if you install a carburetor from a similar engine but with a smaller displacement, make sure to resize the jets so the air/fuel mixture is not too lean.) If the manufacturer recommends a particular carburetor or distributor, it’s better to stick to that recommendation, which is usually based on dyno testing. Altering the combination may yield different horsepower and torque figures.
Before installation, clean off any paint from engine-mount bosses and other mounting surfaces. Some types of crate engines are known to occasionally come with a bit of debris in the oil pan, so if it’s not difficult to replace the gasket, pull the pan and inspect for metal shavings. Whether you clean the pan beforehand or not, replace the oil and filter after the initial break-in (within the first 50 to 100 miles), especially if it’s a high-performance engine.
Regarding oil, in addition to filling the crankcase, pre-fill the filter and pressure-lube the internals prior to that first critical cranking. Accomplish this by rotating the oil-pump shaft with a drill motor (make sure it’s turning in the same direction as the engine rotation).
Do not turn the engine over with the starter motor for oil priming! For an extra measure of care, particularly on an expensive performance engine, you may want to pull the valve covers off to make sure oil is flowing out of the push-rods and onto the rocker arms. Some high-performance engine builders recommend using a synthetic oil or at least a slightly thinner viscosity (5W-30) oil for the first 1,000 miles or so. Steele prefers single-viscosity 30W non-detergent as a break-in oil for the engines he installs in Cobra replicas.
Although normally the engine should have been dialed in at the factory before shipping, it wouldn’t hurt to check the static timing and the firing order on the spark plugs at the distributor cap. While you’re at it, make sure your plug wires and other heat-sensitive components aren’t too close to the exhaust headers (especially in a Cobra replica) and that the ground wire has solid metal-to-metal contact with the frame. Good grounding is particularly important for fiberglass-bodied kit cars. Don’t forget to add coolant mix to the radiator as well.
If your kit car is on the ground, set the emergency brake, chock the wheels, and check that the gearshift is in Neutral or Park before starting up the engine. Make sure your garage area is well-ventilated, too. Remember, if you turn the ignition key for the first time and the engine doesn’t fire up right away, don’t keep cranking it. Shut it down and check the fuel-delivery system. If the engine does kick off OK, run it to 2,000 rpm right away to dissipate the oil on the camshaft. For proper break-in, vary the revs from 1,800 to 2,500 rpm for the next 20 minutes, and keep checking the oil pressure and water temperature gauges (an extra pair of eyes helps here).
Before the engine temperature rises, remove the radiator cap and check both the coolant flow and for possible leaks. Also, make sure the electrical system is charging the battery and that the pulleys are in alignment. After the engine has been running for 30 min-utes, set the ignition timing and carburetor settings, if applicable.
Once you’ve finished running the engine at no load and checked everything out, you can head out on the road. Drive your kit car at varying speeds and loads on the engine for the first 30 miles, making sure not to use a lot of throttle or high revs (more than 5,000 rpm).
After that, run five or six medium-throttle accelerations to about 5,000 rpm (55 to 60 mph), then let off the throttle in gear and coast back down to 20 mph. Drive the next 500 miles normally, without high revs (again, staying below 5,000 rpm), hard use, or extended periods of high loading. Don’t forget to change the oil and filter in the first 50 to 100 miles. After you’ve babied your crate engine during this break-in period, it’ll be good and ready to head out on the highway for some serious long-range cruising.