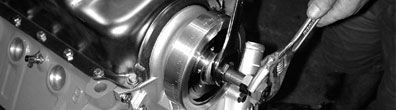
 Now back to assembly. We went with a lightweight Probe SFI race damper-an elastomer unit which uses a steel hub and aluminum inertia ring. For street use, consider the Probe's heavier all-steel damper, which likely dampens better.
As we completed our story last month, our prepped 360 bottom-end was stuffed with a Mopar Performance stroker crank and built up into a stout little short-block. The MP crank stretched the cubes to 408, while Milodon four-bolt main caps, Eagle H-beam rods, and a set of Diamond forged stroker flat tops provided the beef.
To show we were serious, we were also packing a serious but sane Crane roller cam, spun by Milodon's excellent gear drive. We had horsepower in mind for this combo, and the top end wasn't going to hold us back. We ground ourselves silly getting huge flow from a set of W-2s (Nov. 2001 p.54), and the ante just kept getting stepped up. Getting ready for this month's installment, we found that Mopar was dealing on tunnel-rams, so we added one to the program-though a more conservative (by comparison) single-plane is also part of the mix for the dyno test to come.
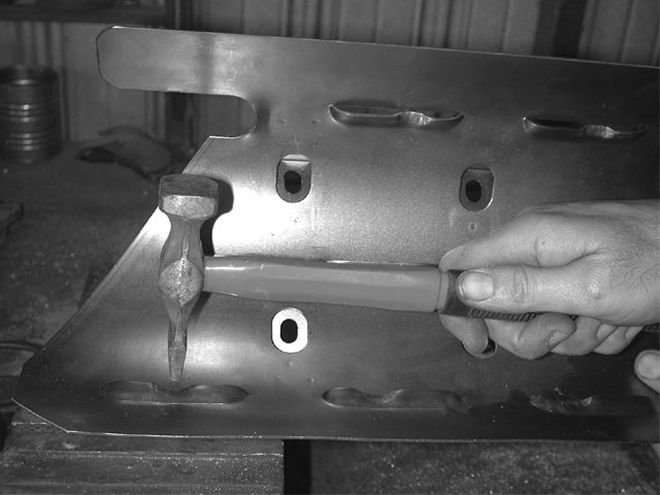 We found that with the pan on, the edges of the tray were pushed in slightly, enough to cause a clearance problem. Some hammerwork with a notched bar of steel backing it up had the tray clearanced for the 4-inch stroke.
Building a hot engine combo gets tougher the more radical you go, and though this isn't an all-out race engine, our 408 is much more involved than screwing together a basic stock-style 360. Therefore, it's up to the engine builder to make sure everything is right, from ordering parts that will complement each other, to making them fit together like they should. We can't wait to hear this one singing on the dyno, but before that happens, it's all wrenching, grinding, measuring, and checking. When all's said and done, and we've buttoned on the last piece, hearing the sweet sound of our "mini-mountain" small-block pull will make it all worthwhile.
Backtracking
Double-Checking Pays Off
We thought the bottom end of our big-inch small-block was sewn up for good last month, but a lucky catch saved us from potential problems inside. We carefully checked and set the clearance between the Milodon windage tray and the moving hardware swinging above, dropped the pan in place, and buttoned it up.
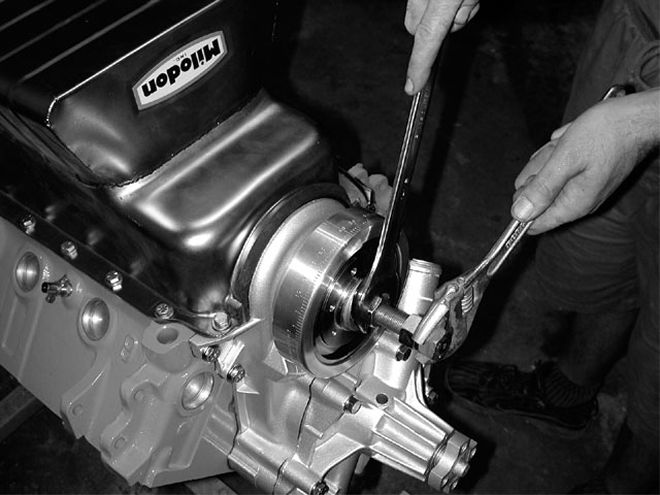
 The tray was bolted back in and the position of the dimples verified in line with the rods. When you've got 4 inches of crank, sometimes you just gotta make more room.
Here's the deal. The sides of the pan press against the sides of the tray when it's bolted up, squeezing the ends of the tray in toward the crank. This is not a problem with a stock stroke, but with the 4-inch arm, it pushes in the louvers of the tray towards the rods. It may not hit, but it may be too close for comfort. Luckily, we heard a slight interference inside and opened it up to investigate. Pan-off, plenty of clearance; pan on, contact. The fix was simple-we just marked the lower louvers in line with the rods and dimpled for a margin of safety.
Valvetrain Variables
The Ups And Downs of Cam Peripherals
We had milled, long-stem-type Econo W-2 heads, plus solid roller lifters and aluminum rockers. No, there won't be a cataloged pushrod for this combination. The truth is, any time the valvetrain or related components are changed, things have to be measured. For us, a set of custom pushrods were a given, so we tackled the challenge of figuring out what we'd need and then ordered them from Crane.
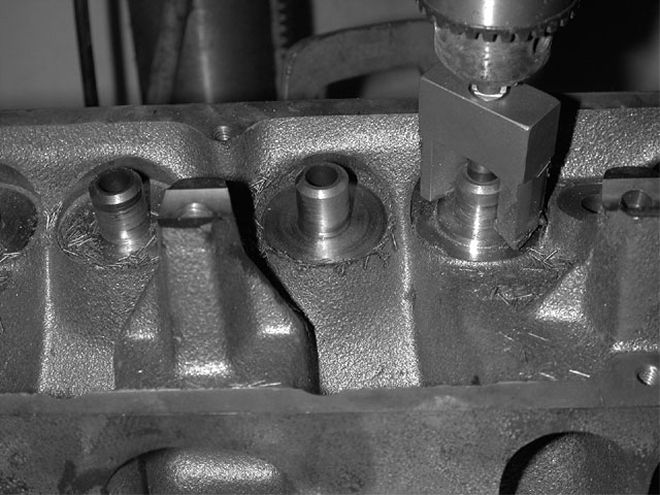 The Econo W-2s come with production-style stepped spring seats, which need to be machined flat for use with a dual spring. We cut them flush ourselves using a spring seat-cutting tool and arbor from Powerhouse.
Ratio 'Rithmatic
Checking Compression Changes
If you build or own a stock engine, you can look in a book and get the compression ratio, and it may be close to what's in the engine-but don't bet on it. When building a high-performance engine, the significance of compression ratio isn't just figuring out what it is, it's a matter of working out what you need it to be, selecting the right combination of parts, and dialing it in. The final compression ratio is the volume above the piston at Bottom Dead Center divided by the volume above the piston at Top Dead Center, typically calculated with the volumes in cc's.
The volume at TDC is a combination of chamber volume (cv) + gasket volume (gv) + piston clearance volume(pcv) [can be (-) if the piston is above the deck] + piston valve notch volume(pvnv) or - dome volume (dv) (if domed pistons are used, the listed dome volume is net including notches) + about 1 cc for crevice volume (crv ) (the area surrounding the top ring land).
66cc cv + 8.4cc gv - 1.1cc pcv + 4cc pvnv + 1cc crv = 78.3cc
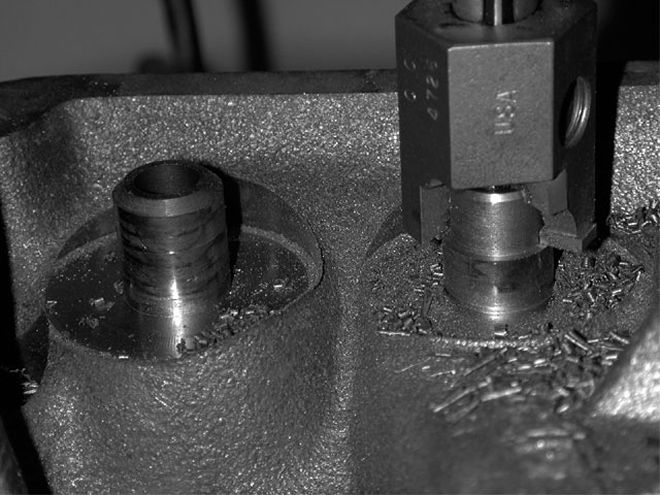 There's no room within a dual-spring assembly for a stock-style umbrella seal. We used a guide cutter (also from Powerhouse) for 0.500-inch P/C type seals, which cuts the guides for the seals and trims the top. We also had to cut the top of the guide down 0.100 inch to get enough clearance for the lift we are running.
The volume at BDC is the volume at TDC + the swept volume (sw). To get swept volume in cc's for an eight-cylinder engine, take the engine's cubic inches (final) x 2.048, or do the pi R2 long math and use the conversion 16.387cc per cubic inch. If you played hooky during math class in high school, this is when you will realize that the stuff really was that important (find a calculator).
78.3cc + 835.6cc sw = 913.9cc913.9 divided by 78.3 = 11.67
Talking Heads
Adding Springs, Retainers, And Seals
Our big cam choice meant double springs and the related machining and checks, so first on the list was to machine the spring seats for dual springs and the top of the guides for P/C Teflon seals, which are compact enough to fit within a dual-spring assembly. Clearance checks are a critical part of avoiding potential disaster, and include checking the installed height of the springs and the retainer-to-guide clearance. Luckily, the long-valve W-2s solve most of the clearance problems associated with high lift and production heads.
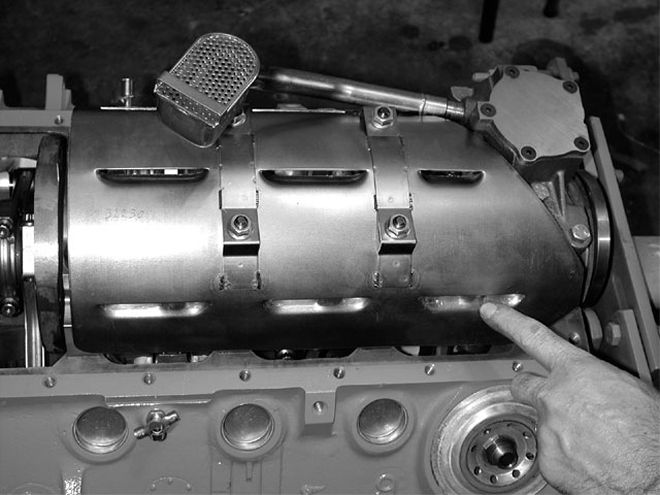
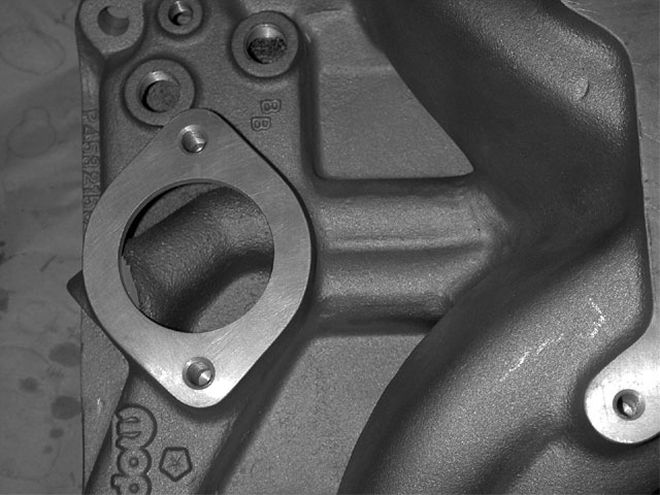 By passing the water heat while keeping the stock water-pump bypass functional requires drilling or cutting open the water passage to open it up to the thermostat housing. The water loop going under the plenum is filled with epoxy to block it off.
Tower Of Power
Topping It Off With A Tunnel-Ram
For induction, we found that the MP tunnel-rams are currently at a bargain basement price while you can get them, so we snapped one up. Granted, the W-2 T-ram isn't a toy-it's a true race piece-but being gluttons for punishment, we actually plan to use this on a street/strip mill. We also figured we could tune it to work. Street or race, the tunnel-ram will benefit from some gentle massaging with a sharp carbide cutter to get the most out of it.
Lower Profile
M1 W-2: The Practical Alternative
OK, we know a tunnel-ram might be a bit further than many would like to go, and it won't fit under any stock Mopar hood. To even the score between wild and practical, we picked up a Mopar Performance M-1 W-2 single-plane, single four-barrel intake. MP currently has only two single-plane intakes listed for the W-2: the race manifold, which is cast for a short 9.200-inch-deck block, or an M-1 with an unusual water-heat passage under the plenum. The water heat is to fit within certain sanctioning bodies' rules for a heated manifold, while the W-2 is sans exhaust crossover. Like the tunnel-ram, we ported the intake, and we bypassed and blocked the water passage.
 The runner exits are matched to the same dimensions as on the tunnel-ram.
Seal Of Approval
Assuring The Leak-Free Guarantee
Once we cut the decks of our engine's block for O-rings, the cast was set. We would run copper gaskets and O-rings for a bulletproof compression seal. We likely could have gotten away with a good conventional composition gasket, but long-term, who knows what kind of chemical enhancement this engine might be subjected to (hee-hee-hee). Sealing with copper gaskets just requires sensible prep.
Bolting Up
Spinning Wrenches, Making Time
When the time came for the final assembly of the top end, all the hard work was done. Everything was already prefitted, massaged, and all the critical clearances were checked.