Competition. When it comes to our cars, this word is usually associated with how they perform, either in a straight line or through the corners. This kind of competition is the foundation of hot rodding's heritage. However, the quest for improved vehicle performance is only one side of the competition equation, and as the end users, it's generally the only side we see or care about.
As the end users, all we see is the final result. The beginning, however, is farther up the food chain, starting with the manufacturers, though it's a different kind of competition. They hear from us that we need a widget to go faster or corner better, and they set out to provide us with said widget. They develop the widget we ask for, throw it on the market, and we use it. The degree of effectiveness of the widget is then judged against the other widgets available. The more widgets available, the more incentive each supplier has to improve their widget. Conversely, if they've got the only one in the market place, they don't have any incentive. "Hey, it's better than what you had, so stop complaining" is their attitude.
For years you had three choices when it came to exhaust systems for your Mopar: Headers that hung below the car and caught on speed bumps and driveway curbs; headers that required cutting a huge hole in the inner fenders to route a pipe around the frame; or stock manifolds. At the time, dragging pipes or cutting the car was preferred over stock manifolds in the name of performance.
Enthusiasts hated the arrangement, but there was no incentive to improve the situation, because there was no competition in the marketplace. If you wanted better performance, you went with headers and chose whichever evil you could most easily live with.
Recently, however, enthusiast's tastes changed, and they traded performance for stock, non-intrusive iron manifolds. Performance is still desirable, but we're no longer willing to pay the price previously demanded. That opened up a hole in the market--performance-enhancing exhaust headers, with the fit of OE iron manifolds installed with no butchering or dragging.
On the Paddock Project Charger, owner Mike Paremsky had gone through the engine already, adding an Edelbrock intake, hotter cam, and MP Stage V cylinder heads to improve performance. But he (like many other Mopar enthusiasts) drew the line at headers because of the old compromises. He wanted carefree driving without worrying about ripping off the headers, and he wasn't willing to cut the car.
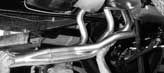
Now that there's newfound competition in the market place, Tube Technologies, Inc. filled the hole by developing headers for A-, B- and E-Bodies that fit like they were supposed to: Up out of harm's way and in the confines the factory provided. Based on our previous experiences installing a set of TTI's headers on a small-block/automatic trans A-Body ("They Fit!" May 2000), we talked Mike into a set of tti's pipes. As you may have guessed, these fit, too.
Installing headers is never easy, and we had the advantage of a lift to get the car off the ground. You'll need at least a couple of feet of clearance between the ground and the car to get these in, but that's the biggest hangup.
Disconnect the steering linkage to move it out of the way, and remove the dipstick tube, starter, and spark plugs. Finally, to gain the last bit of clearance, unbolt the motor mounts and rock the engine over on its side while slipping the pipes in place. It sounds complicated, but it really isn't. With the lift, we did the job in less than three hours. That's a far cry from the days of old when installing headers on a Mopar was easily a weekend project.