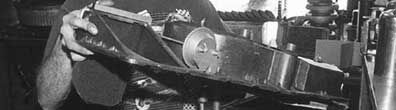
 This is our starting point--the plenum box out of a '70 Challenger. While ours came from an E-Body, the basic components and processes for disassembly and repair will work across the board.
In the previous story, we started the restoration of a complete air conditioning system with the help of Classic Auto Air in Tampa, Florida. We gave a complete overview of what the basic components of a Mopar’s A/C system are and how they relate to each other, discussed the different types of refrigerants available, and showed the process Classic Auto Air uses to restore the filter/drier canister to re-create a system’s hard lines and fittings. To our knowledge, Classic Auto Air is pretty much the only game in town when it comes to the restoration of these pieces, but as we showed you, the level of detail and correctness is matched only by NOS pieces. In fact, Classic Auto Air components are better in most cases because there is no shelf wear or surface rust.
The second step in restoring our A/C system is to tackle the plenum box. Located under the dash, this is the central system of the car’s heater, cooling, and vent system. It regulates the temperatures of the heater, houses the fan, and directs the flow of air.
It’s also generally a mystery to most enthusiasts. But as we found out, other than having a special plenum clip pliers to remove the fasteners, there is nothing to taking one apart, cleaning it up, and putting it back together. We followed along as the guys at Classic restored this one, and picked up a few tips to pass along on checking components. They’ve done Mopar boxes so many times they don’t need any factory diagrams, but if you tackle it yourself, we suggest getting a new manual to help you put it back together.
Basically, there are only a few things in the plenum box that can fail: any of the vacuum canisters used to open the various doors that regulate the heating and cooling, the heater and evaporator cores, the water valve assembly and temperature sensing unit, and the air conditioner and heater blower motor resistor. Checking for component failure is a simple matter of visual inspection for everything except the vacuum canisters. If there are signs of leakage on anything that has fluid in it, it needs to be repaired, just like a radiator. If the motor resistor wires are broken, it needs to be replaced. As for the vacuum canisters, it’s simply a matter of hooking a rubber line to one end and plugging the other port with your finger, then sucking on the line. If the lever moves, it’s good.
Classic Auto Air can supply you with what you need to repair or replace most any components found in your plenum box, or you can have Classic Auto Air restore the entire assembly to concours condition for you. Good, uncracked plenum boxes are also becoming harder to find, but as we discovered with ours (which was not cracked), the case and covers are made out of fiberglass and plastic, so they are easily repaired should they have been kicked once too often. Follow along as Tim Cordelieone at Classic walks us through the restoration, as well as showing us a couple of neat tips and tricks.
In the next installment, we’ll complete our A/C system restoration by completely rebuilding our compressor.