Think about this: the C5 Corvette is 20 years old. Yep, with the arrival of 2016 it means that the C5 Corvette debuted at dealerships 20 years ago. And it’s been 12 years since the last one was sold new at a dealership. Kinda unreal, huh?
There’s no doubt the C5 has proven to be an excellent sports car, one of the best ever built in America, and finally put the Corvette on par with its European and Japanese competitors. But after 20 years, even the best vehicle starts to have things wear out and need some service. Time, use, exposure to sunlight and UV rays, temperature cycles and just a lot of Corvette worthy driving can mean your C5 needs some attention to its high-use items.
The beauty here is working on a C5 is relatively easy, and you can do quite a bit of the work yourself. This is supported by the ample amount of replacement parts offered by companies like Zip Products to keep our C5s working and looking like new.
A common problem with the C5 electric seats is that they develop an excessive amount of front-to-back play when the seat is in any position (except its most rearward). It’s no fault of the seat’s design, just things wearing normally over time. Zip Products has a budget-friendly kit to fix this issue, one that installs in less time than it takes to watch a football game.
Along with that, everyone knows weatherstripping wears out and loses its effectiveness over time, no matter the amount of mileage. Hot/cold cycling, UV exposure, doors being opened and closed countless times, and the Targa top being pulled off any time there was nice driving weather to enjoy. This is also a pretty easy thing to fix, and Zip Products sells the necessary replacement weatherstripping to silence that wind noise and keep the rain and moisture out of your C5’s interior.
Follow along as AntiVenom shows you how easy it is to fix these simple things in a matter of hours.
Parts Used:
Zip Products Weatherstripping (PN WS-4650, WS-4550)
Zip Products Seat Track Repair Kit (PN I-2413)
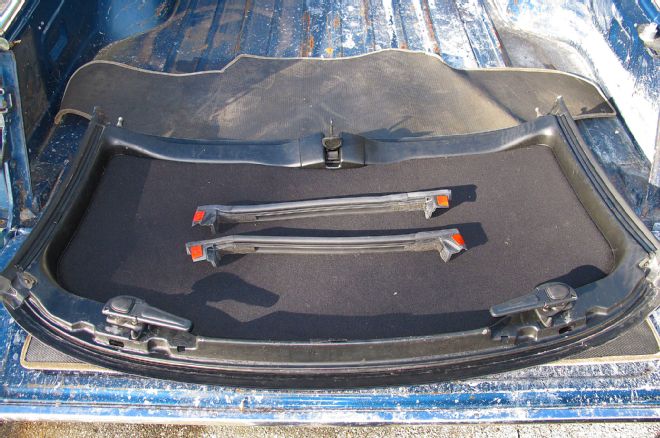
01. Our first item to replace is the worn-out weatherstripping on our C5’s Targa top and adjoining rear roof and pillar area with new pieces from Zip Products. Nothing sucks more than being in a downpour and getting soaked inside your Corvette!
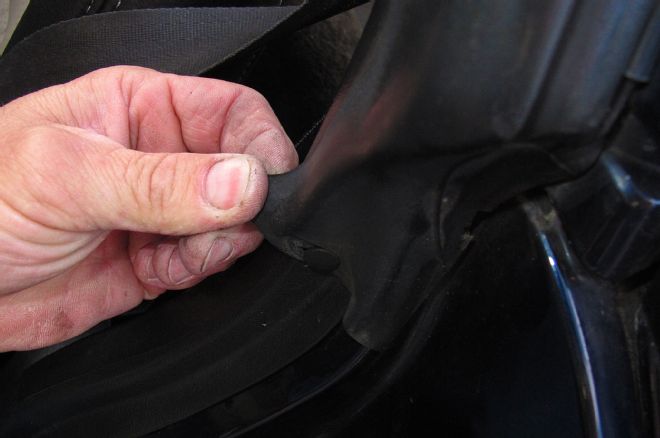
02. The first step is to remove the retaining screws holding the side weatherstrips on. Once the screws are out, you can just pull the old stuff off.
03. The factory used weatherstrip adhesive in the corners, so you’ll need a razor blade to clean all the old goo off, and then hit it with a wire brush and some lacquer thinner to fully clean up the surface for the new weatherstrip.
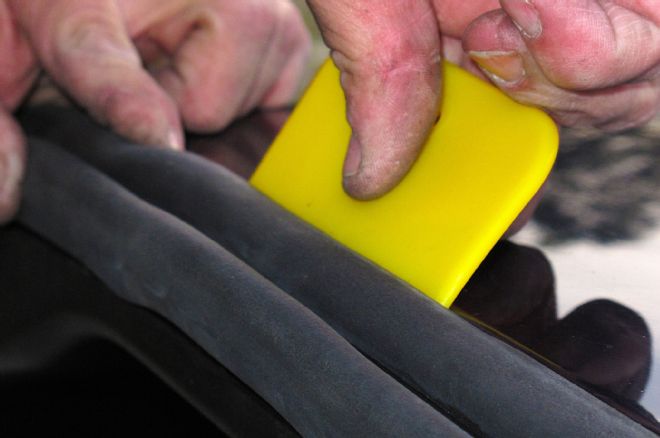
04. With the surface clean, the new weatherstrip on the top can be installed. The replacement pieces come with two-sided tape installed on the corners to hold them in place, but we recommend using some weatherstrip adhesive also for a good seal and retention. Once the sides are pressed into their channels, the Targa top is ready to go.
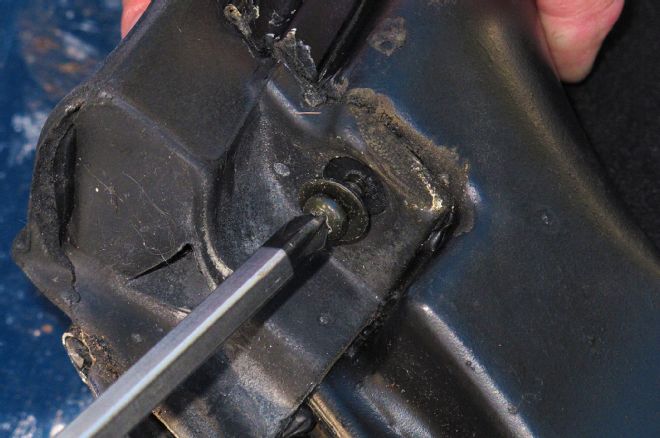
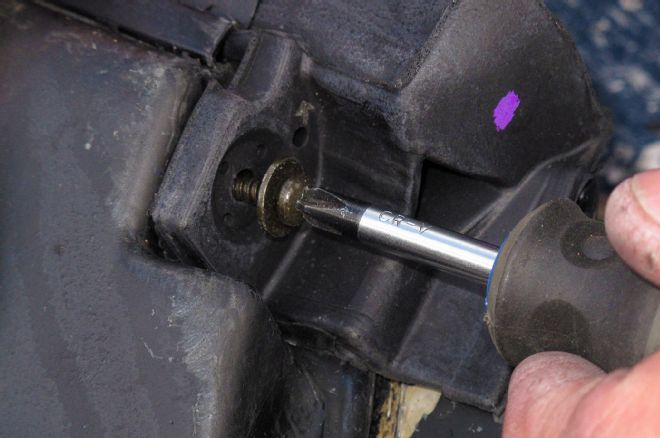
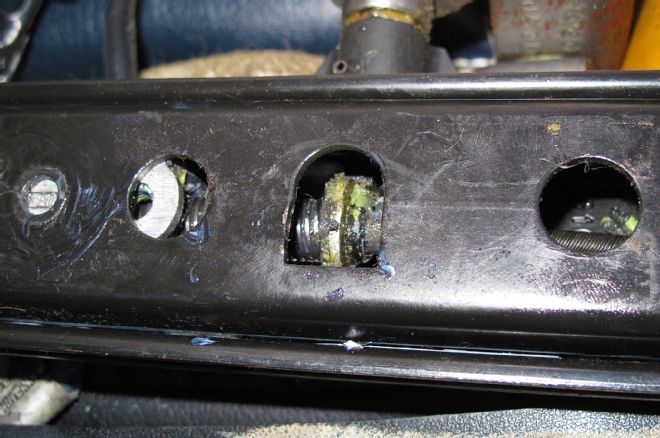
05. Back on the body, the first step to remove the pillar weatherstrip is removing this body clip holding the weathstrip in place. Then it can be pulled free from the body.
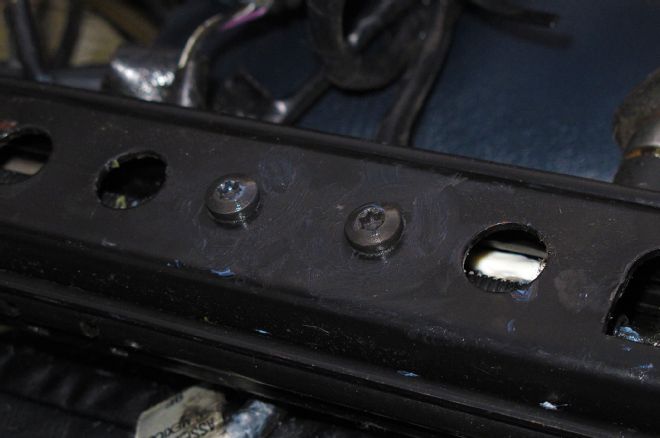
06. Up at the top corners on the pillar and rear roof, there are two screws holding the weatherstrip to the body. One is vertical (pictured), while the other is horizontal and just in front of the pictured screw.
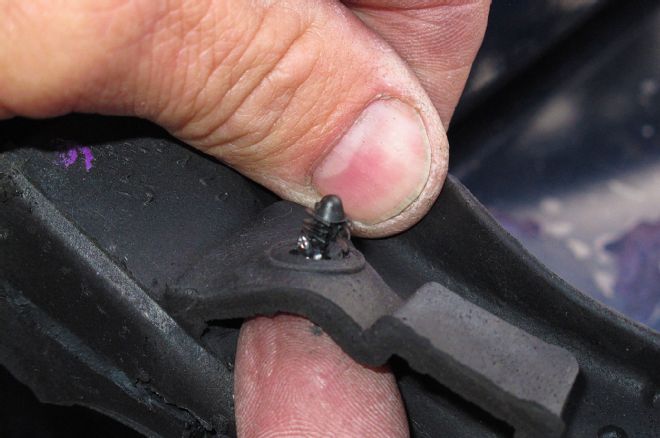
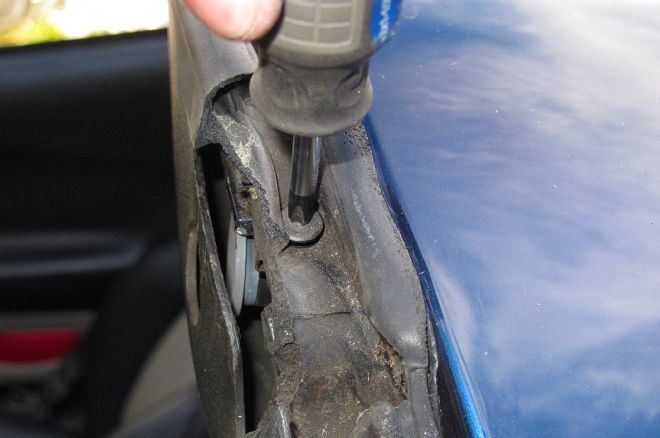
07. On the new weatherstrip piece, you need to install the retaining clip removed earlier into the new weatherstrip, and then install it onto the body.
08. Once in position, reinstall the retaining screws at the corners before you press the rest of the weatherstrip into its channel.
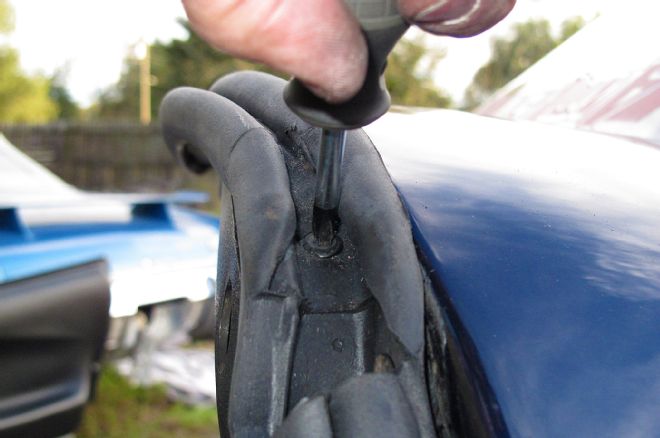
09. With the screws back in, press the weatherstrip into its retaining channels along the roof and sides of the pillar.

10. When finished, you should have a nice, tight seal all the way around. The best way to test this is with a dollar bill. The bill should pull through, but slowly with resistance. If it doesn’t, recheck your installation, because you could end up with a leak.
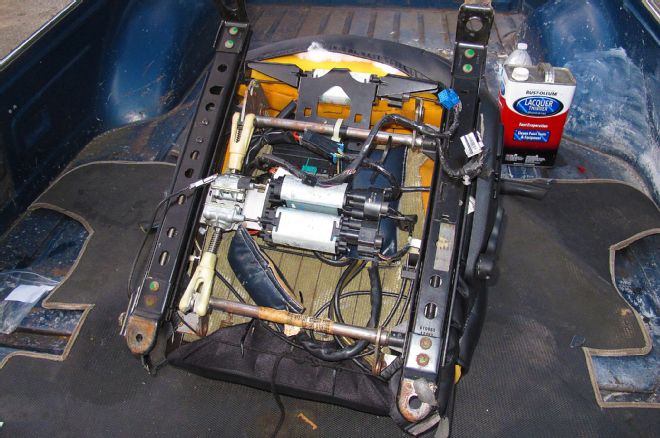
11. Our next repair is fixing the front-to-back play in our seats. The buckets are held in by four bolts that are easy to remove, but don’t disconnect the power from the seat until after the front bolts are removed and the seat is all the way forward to give access to the rear bolts.
12. Remove the plastic cover off the seat rail.
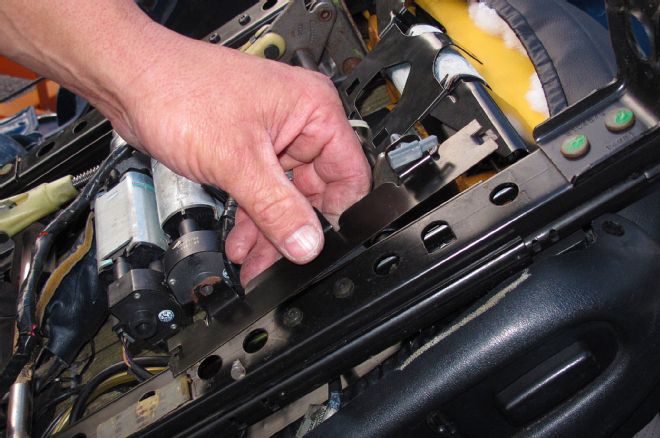
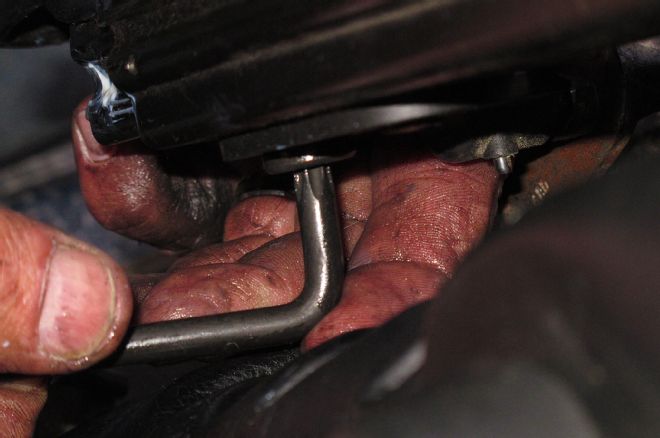
13. Using the supplied Torx wrench, remove these two retaining screws that hold the adjuster guide in place.
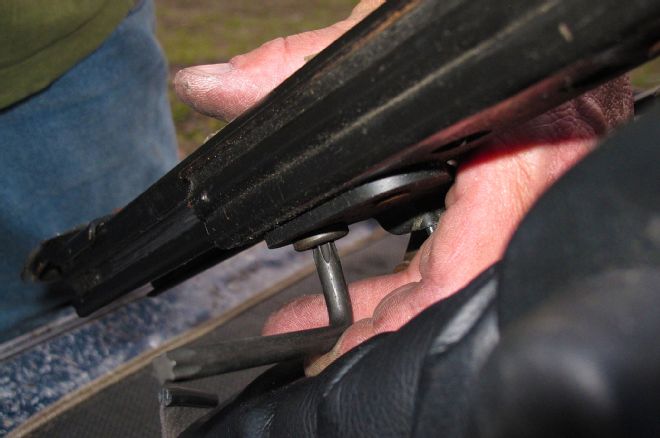
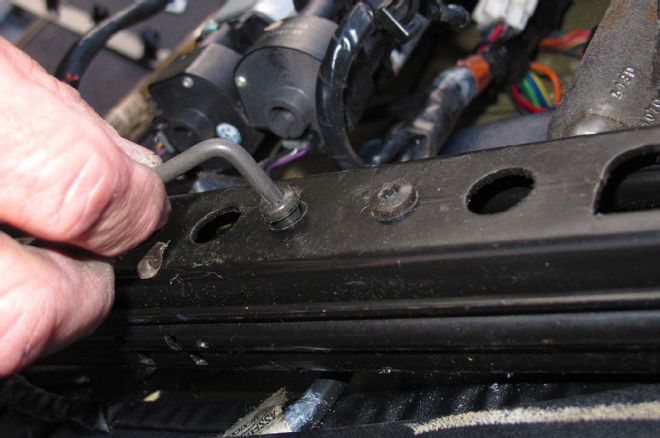
14. Then, using the supplied Torx wrench, remove the rear retaining bolt.

15. Now you can slide the seat adjust shaft assembly out of the seat track. Be sure to note where the forward guide is at on the track so you can position it back in the same place later.
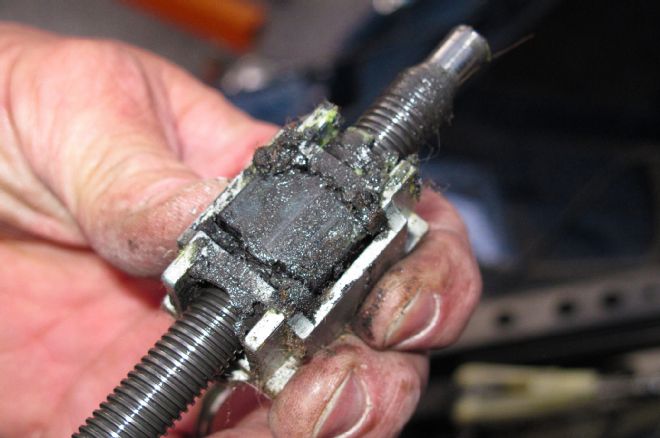
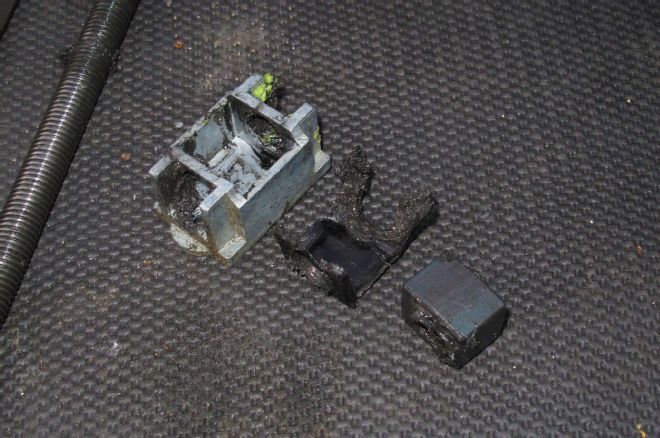
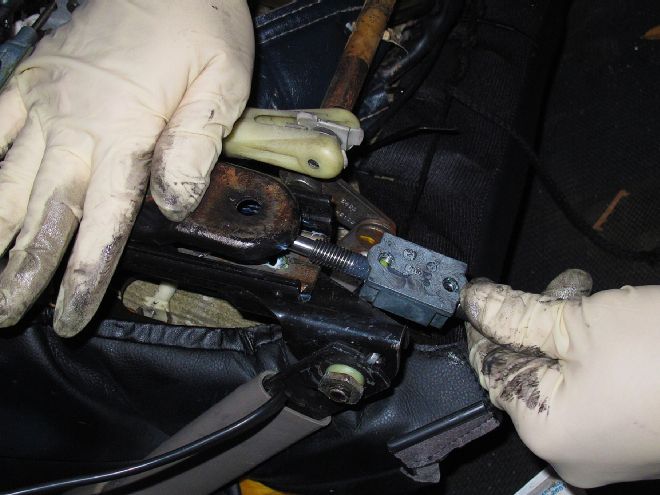
16-17. Here’s the cause of that annoying play in your C5’s bucket seat. The center bushing is cushioned by a rubber isolator that wears out over time and lets the adjuster move [backwards and forwards].
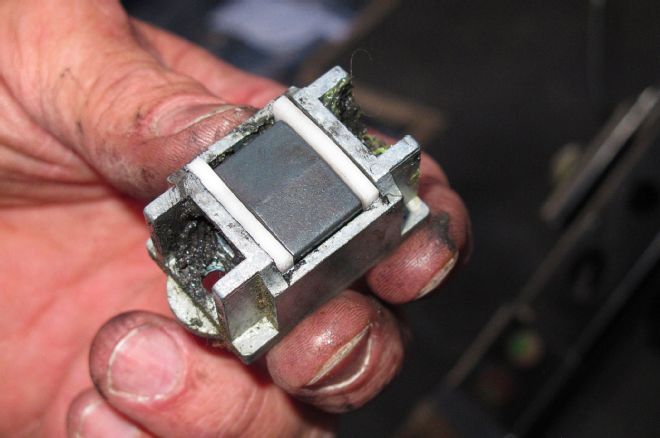
18. The solution is a new bushing kit from Zip Products. It replaces the worn-out rubber piece with two Teflon inserts that hold the center bushing firmly in place, and resist wear much better than the factory rubber isolator. They install as pictured. When reinstalling the bushing, take note that the slightly peaked side of the bushing goes out. If you install it the wrong way, with the flat side out instead, you’ll never get the assembly back together.
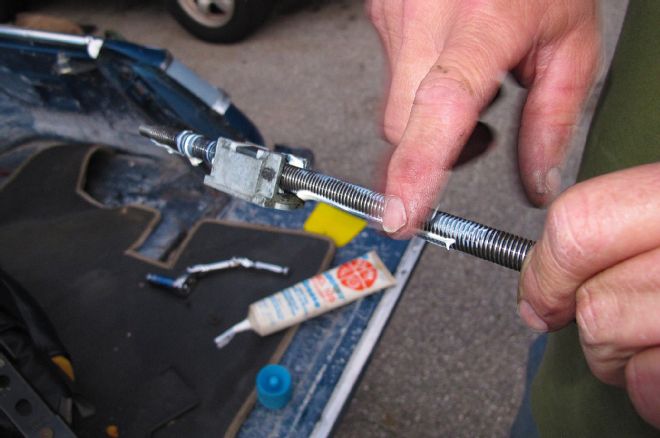
19. While you’ve got it out, now’s a good time to apply some fresh grease to the adjuster’s jack screw for smooth operation.
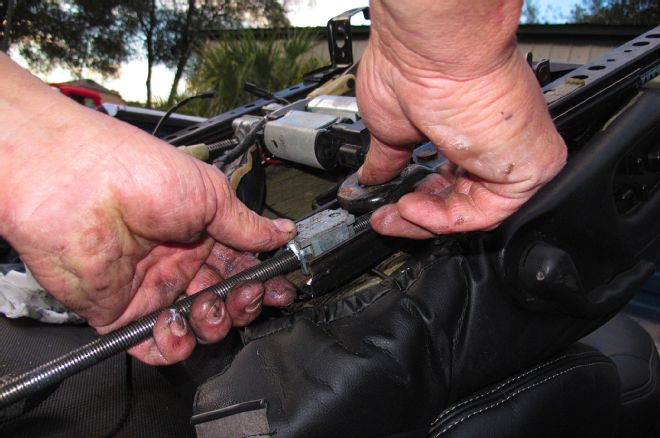
20. With everything ready, the adjuster is reinserted back into the seat track. Be sure to place the forward adjuster block in about the same position it was before disassembly.
21. The nipple on the end of the adjuster goes into the receptacle inside the track assembly. Make sure you seat the nipple fully into the front assembly, otherwise you won’t be able to bolt it back in place, and/or the seat adjuster won’t work properly.
22-23. Once that’s done, reinstall the retention bolts removed earlier and you’re all set. This process is the same for the tracks on each side of the seat.
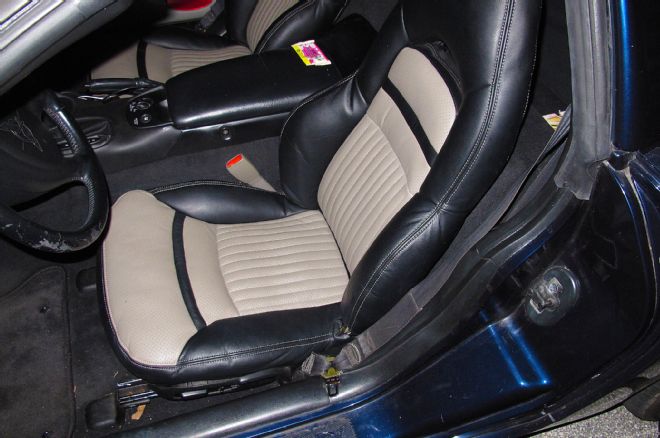
24. With the other track taken care of, we bolted our bucket seat back in and felt the pleasure once again of a play-free power seat. The whole process took about an hour to do, and the closest thing to a specialized tool required was the already included Torx wrench. This, combined with our new weatherstripping, have made a big difference on our C5, quieting the interior down and keeping the seat perfectly positioned when enjoying a spirited drive on a curvy country road.