When your Mustang is also your daily driver, the part of it that you see most often is the interior. Such is certainly the case with our Project Road Warrior 1965 Mustang hardtop, which sees tens of thousands of miles of road use over the course of a year. When we started the car’s revitalization effort, it had a stock black vinyl bucket seat interior—completely functional and comfortable, but not up to the standards of a “magazine project car,” so the plan was to upgrade the upholstery and creature comforts with NOS and aftermarket parts. An Old Air Products A/C system was present and worked perfectly, so that will be retained.
While the car was undergoing the sheetmetal work in South Carolina, Kicker Car Audio began fabricating the custom interior panels to contain the coming stereo equipment, including kick panel speaker enclosures, rear deck speakers, and mounting the subwoofer and amp in the trunk. While that was going on, car owner Courtney Barber (www.teammustanggirls.com) undertook the process of installing the TMI Sport XR upholstery then trucked the car up to North Carolina where two different shops helped finish some of the hard work. You saw the finish body/paint work and drivetrain installation in our last installment in our January 2016 issue, after which the car went to Classic Speed & Custom also in the Charlotte, North Carolina area for finish assembly. More on that in the next installment—this time check out what went into finishing the interior in Road Warrior.
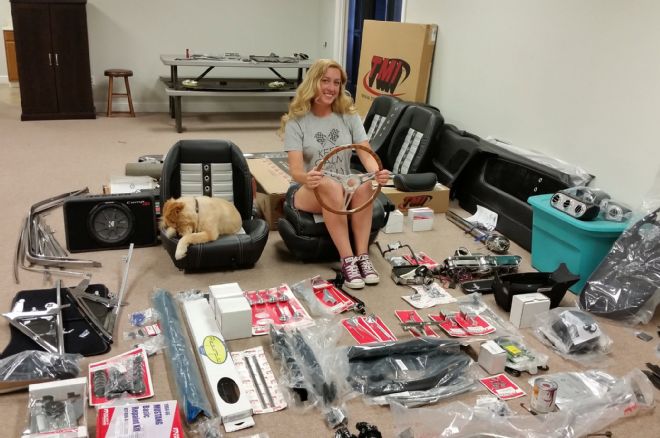
1. Courtney Barber with the interior for her 1965 Mustang. That’s co-pilot Roxie in the passenger seat.

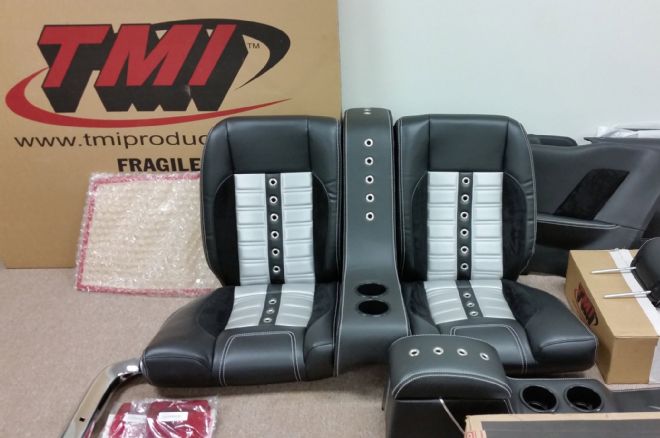
2. When you order a complete upholstery kit from TMI Products, here’s how it comes to your door.
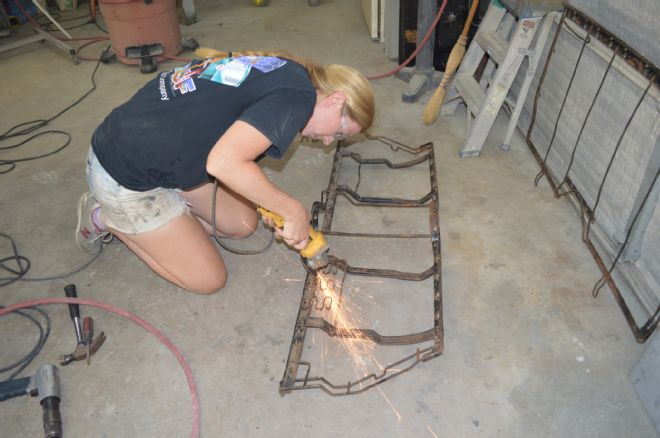
3. Stock Mustang seats are plenty comfortable but lack any kind of bolstering to keep you in place.
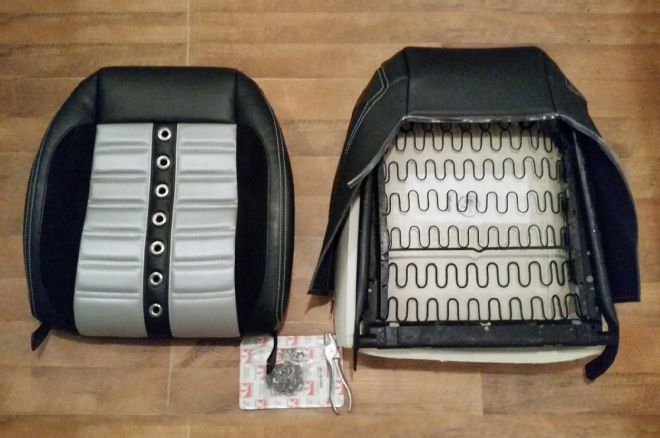
4. You can get complete seats from TMI, but we opted to keep the stock frames and springs and use TMI’s Sport XR upholstery kit and new foam (sold separately). Installing the upholstery is straightforward—cut away the stock hog rings that hold the upholstery to the seat frame, add the TMI foam, and then stretch the material over the foam and reattach with the new hog rings provided. It’s always easier to do this after letting the upholstery sit in the sun for a while to “loosen up” and make it easier to stretch over the seat.

5. This is a hog ring and the proper pliers to install it, which are available from TMI or any upholstery shop/outlet. There are a bunch of rings on each seat, and installation will wear out your hand, but isn’t difficult.
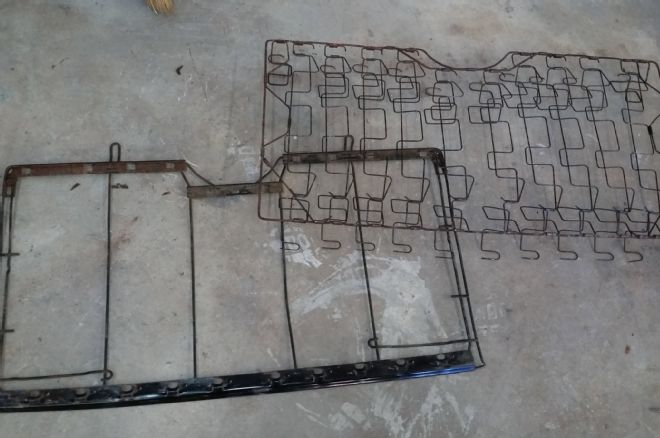
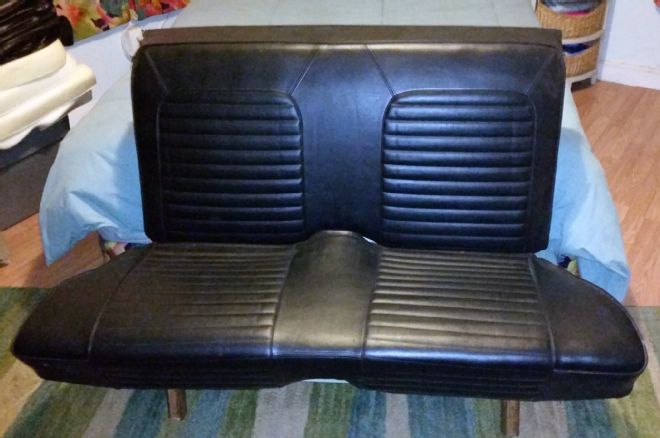
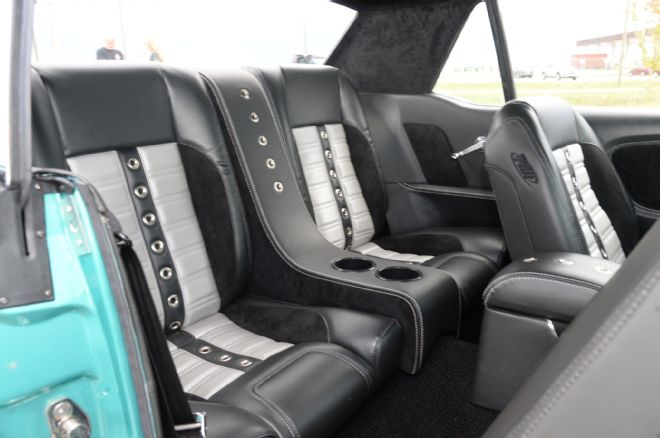
6. The only downside to the Sport XR upholstery for the rear seat (part no. 46-70524-6525-99) is that you have to cut away the stock seat springs. TMI supplied custom-molded foam to replace it and the finished seat is very comfortable, but understand this is required before you take on the project.
7. Installing the rear seat upholstery is basically the same as the front seats. Just be careful to position the upholstery seams and foam so that once the hog rings are secured, everything lines up.
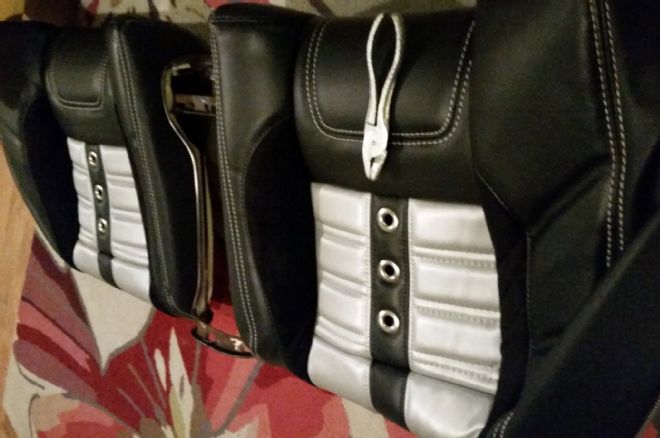
8. The finished rear seat and center console, waiting to be installed in the car. Visible in the background are the new Sport XR door panels and rear seat panels, also from TMI.
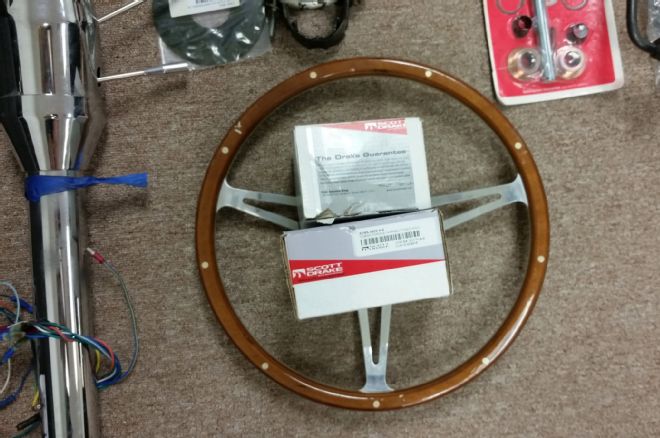
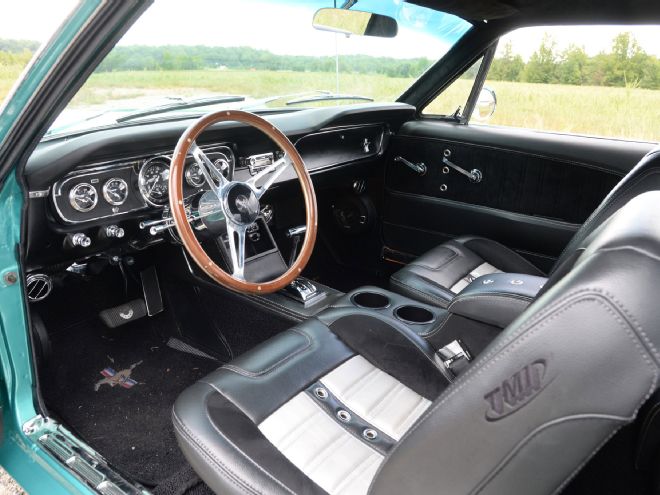
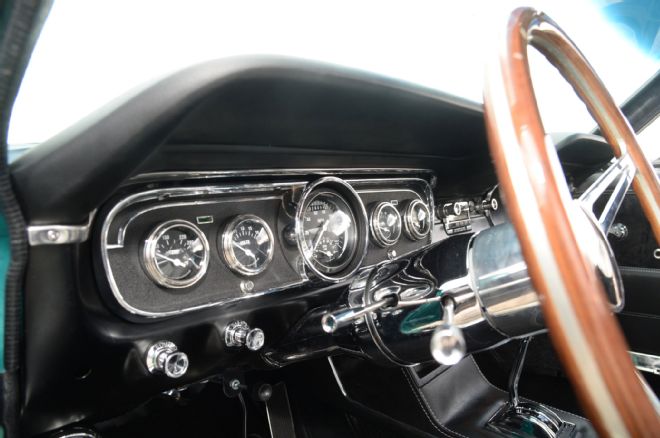
9. Scott Drake provided the interior trim items and this steering wheel, a beauty called the Corso Feroce, that is a replica of the wood-rimmed wheel originally equipped on 1967 Shelby G.T. 350s and G.T. 500s. The tilt column is from ididit/Scott Drake.
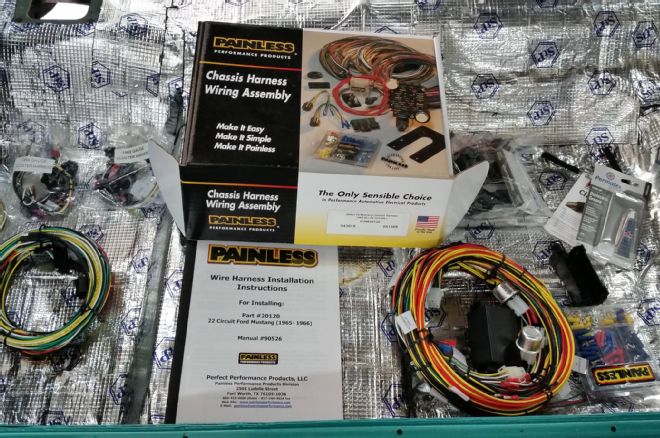
10. The car’s original wiring had been cut and re-spliced in several places over the years, so we decided that since the car was completely apart we might as well put all new wiring in it. Painless Performance came to the rescue with its 1965-1966 Mustang Direct Fit chassis harness (part no. 20120) with 22 circuits. To help install the harness (and a bunch of the under-hood connectors too) we used a Performance Plus Connection Delphi 12085270 crimping tool for Weather Pack connectors, as well as a full complement of connectors and wiring accessories.
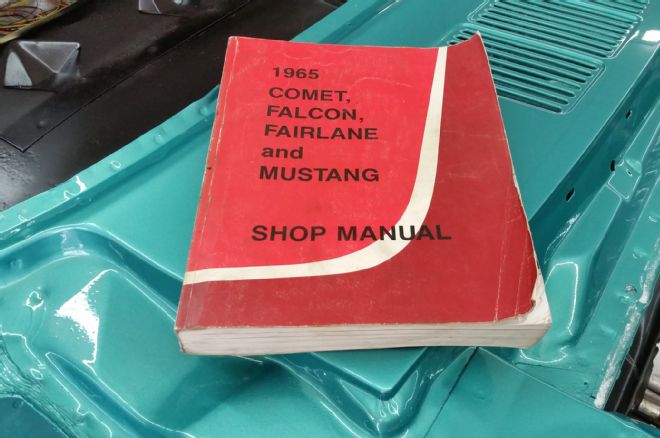
11. A factory shop manual is always handy to have when rebuilding a car. Don’t leave home without one. Courtney’s rally buddy, Bill Tumas, sent her this one after her millionth technical question.

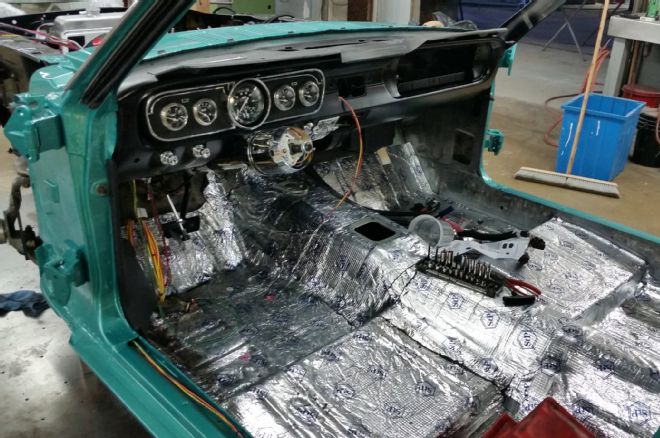
12. Courtney installed the Scott Drake Magic Mat, which is 2mm-thick sound deadening material that also insulates the interior from heat/cold and helps eliminate vibrations and harmonics, especially critical when the Kicker stereo gets turned up to 11. It comes in 20x29 sheets and is self-adhesive, so it’s easy to apply.
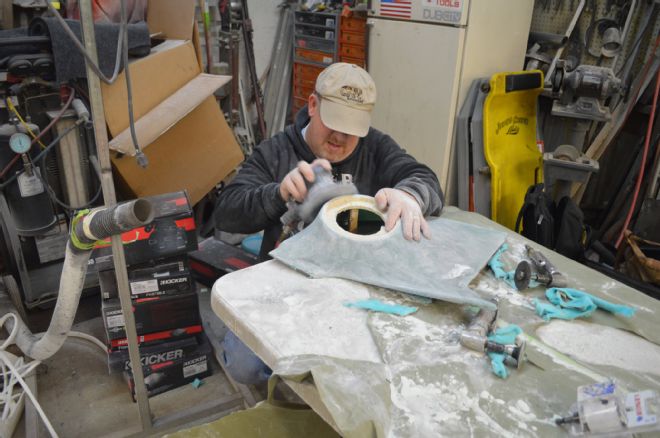
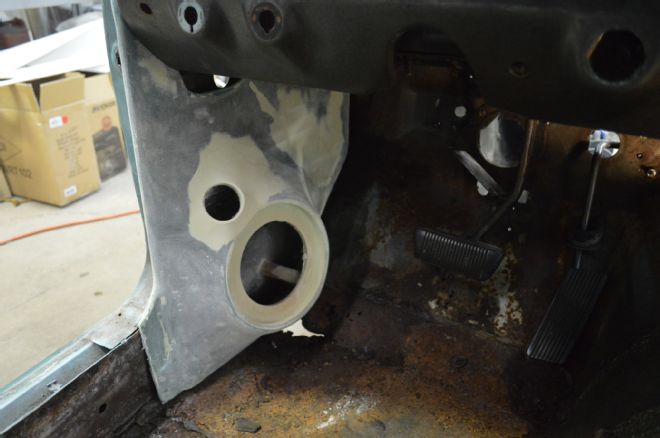
13. While the major bodywork was happening, Kicker’s John Myers began creating the stereo installation parts. That included custom speaker enclosures for the kick panels, as seen here.
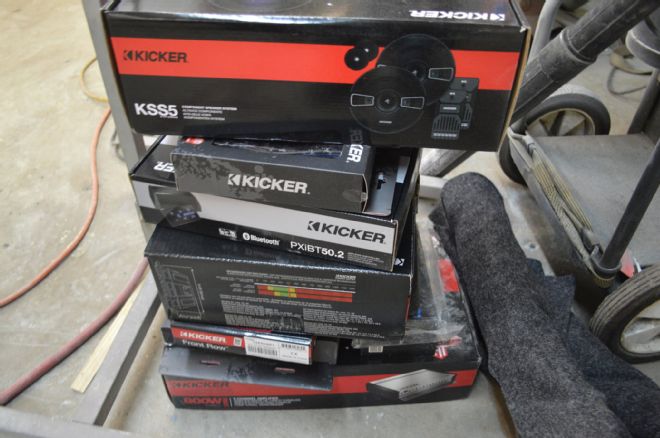
14. As one of Team Mustang Girls’ primary sponsors, Kicker supplied all of this (plus handled the installation) for Project Road Warrior. When you’re on a 5,000-plus-mile road trip, proper tunes are paramount to happiness.
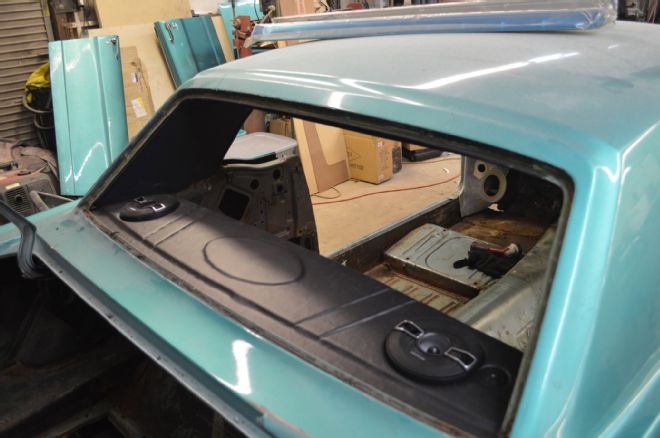
15. These are the KSS65 6.5-inch round component speakers as installed in the package tray, with a custom-upholstered (by Myers) panel. These are the same speakers that are in the kick panels.
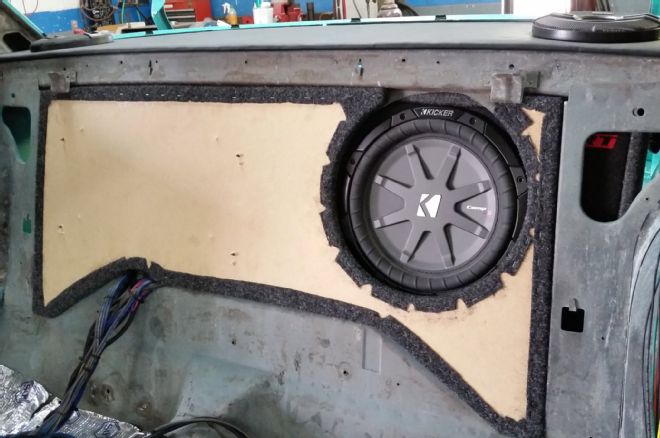
16. And here’s how the Kicker TCompRT10 10-inch, 2-ohm thin-mount subwoofer enclosure and KX800.5 five-channel amplifier were installed. The sub fires through the rear seat, and since bass is non-directional it doesn’t matter if someone is sitting in front of it—it still thumps.
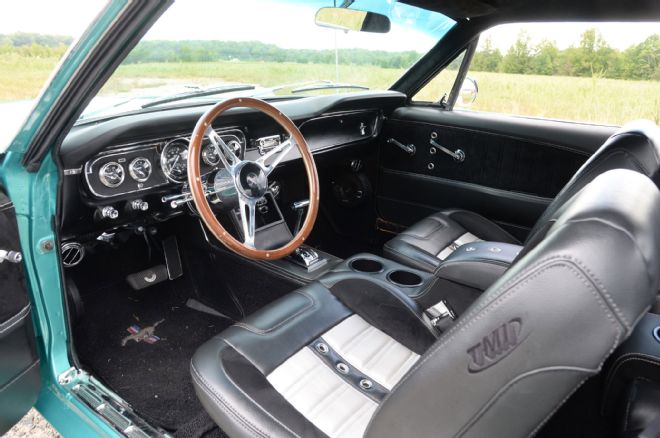
17. And here’s the finished interior in PRW. The TMI seats are super-comfy and the center console has two handy cup holders that even fit a Super Big Gulp. Two thumbs up!
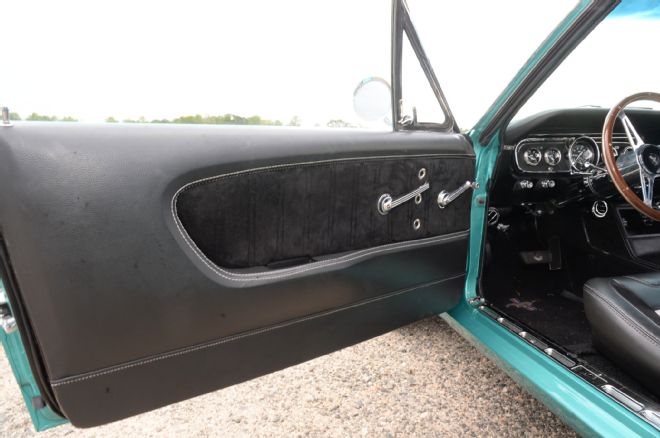
18. This is what the Sport XR rear seats and center console look like installed. Also notice the TMI side panels.
19. The matching door panels. These take a little bit of work to fit properly, due to production tolerances among cars.
20. The gauges are from Classic Instruments in a 1966 Mustang bezel, installed and wired by Courtney. The Kicker PXiBT50.2 Amplified Controller with Bluetooth (it replaces the head unit and is compatible with Bluetooth media devices) is mounted in the TMI console. A reproduction Scott Drake AM radio is in the dash, hooked up to the Kicker auxiliary output so it still works.