
For many of us, getting a project truck to the point that it needs wiring is met with mixed emotions. It's great to be that much closer to driving your dream, but stringing all those conductors from one end of a vehicle to the other without sparks flying is a rather daunting task, but it doesn't have to be. Regardless if one knows nothing about electrical systems or is an expert, wiring a car from scratch or cutting down an existing harness isn't worth the effort given the variety of kits on the market.
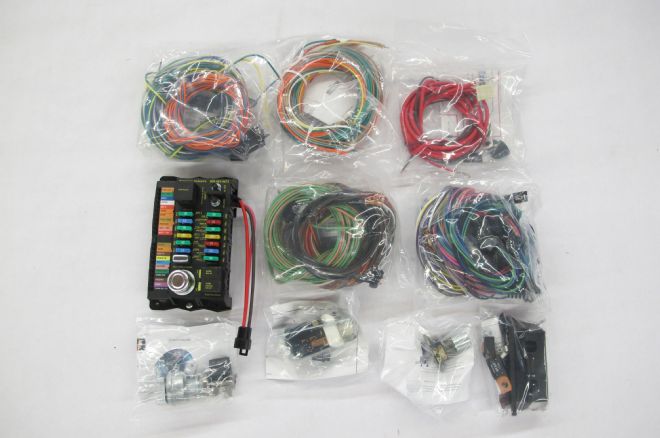
Basically wiring kits fall into two broad categories—those that have the wires already attached to the fuse panel and require the terminals to be installed at the devices to be powered, and those that have the wires attached to the connectors for the loads and are then connected to the fuse panel.
Another obvious consideration when shopping for a wiring harness is the number of electrical circuits needed. In some cases, few are required. However, if a long list of electrical devices like air conditioning and power windows will be included, more circuits will necessary. Of course it never hurts to plan ahead, if your truck won't have air conditioning now, but it will be added in the future, choose a harness that provides that option.
For some time we've watched our own Jason Scudellari, who manages our Tech Center, get his '56 Chevy on the road. Finally at the point where wiring was the next step, Jason surveyed the options and chose a Highway 22 kit from American Autowire.
The Highway 22 Wiring Kit is a modular wiring system that has 22 power circuits with 15 fuses and one circuit breaker. Wiring for headlights includes a three-position headlight switch, there is also a 40-amp electric fan or fuel pump relay; micro-relays for horns and turn signals; and an accessory harness for radio, electric wipers, heater, air conditioning, fuel pump, and interior lighting. This kit also contains a floor-mounted dimmer switch and includes all the connectors and terminals necessary, and battery and accessory power tap studs are also provided for system expansion. For ease of installation each wire has laser-printed identification every 2 inches and use GM color codes. While American Autowire has done everything possible to perfect their harnesses, careful installation is still required. First and foremost, follow the instructions. Also, invest in a good wire stripper and crimp tool, both are available from American Autowire. Poor connections are often the source of problems. But while faulty connections can be a problem, many electrical issues are caused by something as simple as a poor ground. Ground wires must be connected to a clean, bare metal surface, and remember, painted or powdercoated surfaces are great insulators, which makes them lousy grounds.
American Autowire has made installing a safe, reliable wiring harness quick and easy. They offer kits for virtually any application from simple basic systems to those that will accommodate every electrical system imaginable. They really do take the worry out of wiring.

1 Don't let this happen to you! More than one classic trucker has been driven bonkers trying to wire a ride from scratch.
2 American Autowire offers a variety of wiring kits to suit any need. From completely original restorations to modified trucks with every conceivable electrical device, they've got them covered.
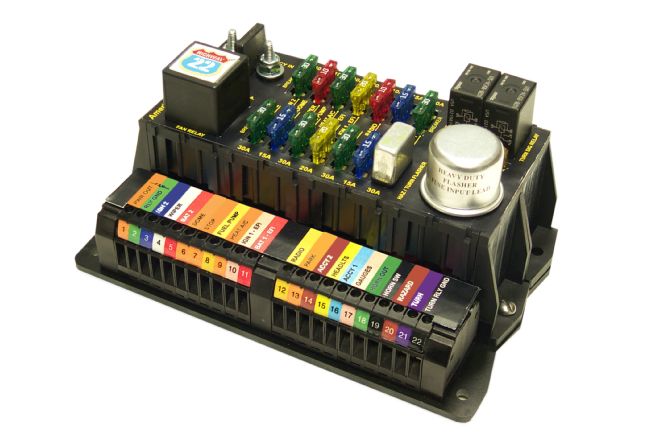
3 This is American Autowire's Highway 22 panel. It has 22 circuits and relays for an electric engine cooling fan and horn, along with turn signal and four-way flashers.
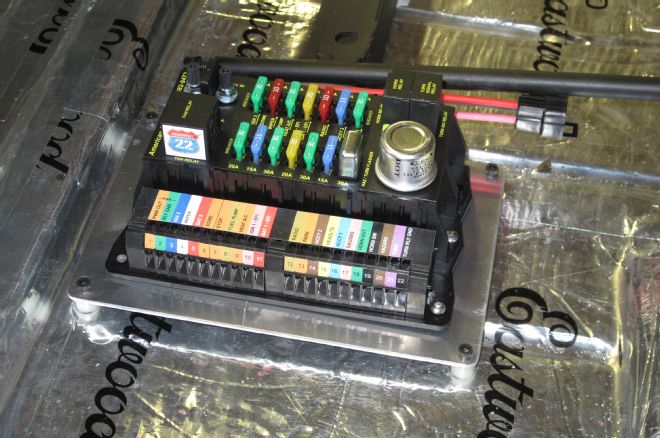
4 Jason Scudellari mounted the fuse panel under the seat on an aluminum plate. The use of spacers allows the wiring to run under the panel.
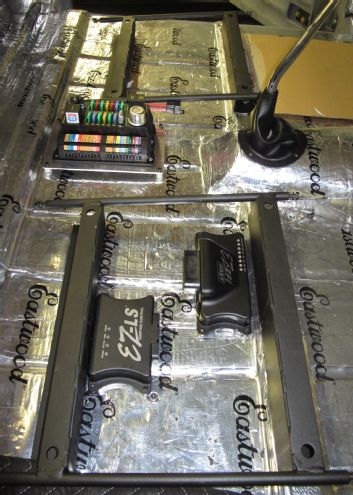
5 The space under the seat is also home for the FAST computers that run the electronic fuel injection and the LS ignition system.
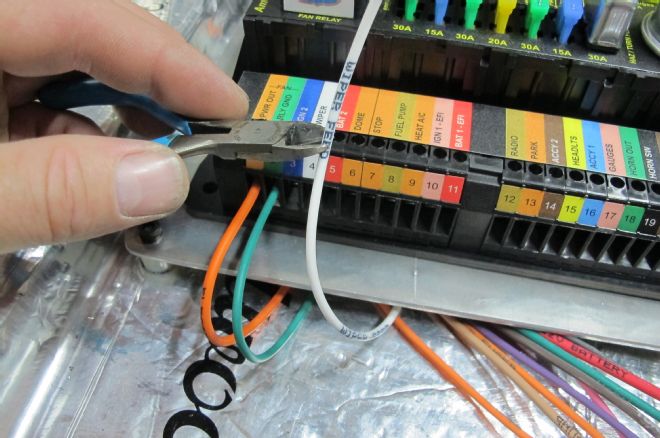
6 Wires to the loads are cut to length and attached to the fuse block. The wires are labeled and color-coded.
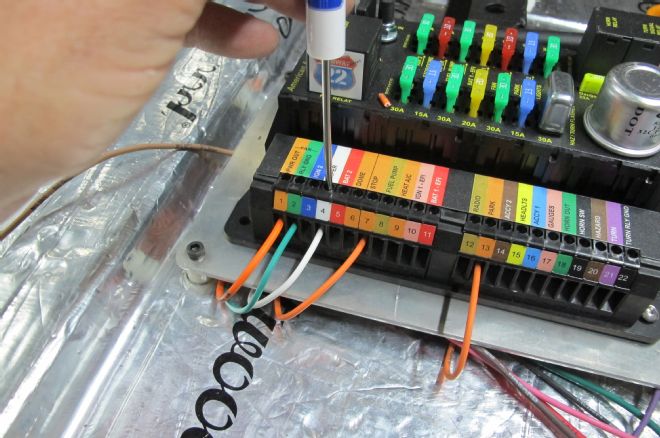
7 The wires are secured to the fuse block terminals with screws. The terminals are labeled, color-coded and numbered.
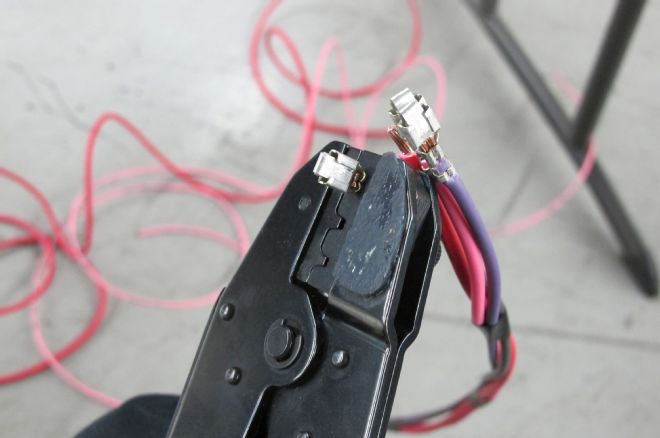
8 Some wires will have to be cut to length and the ends crimped on, American Autowire has the tools to do that properly.
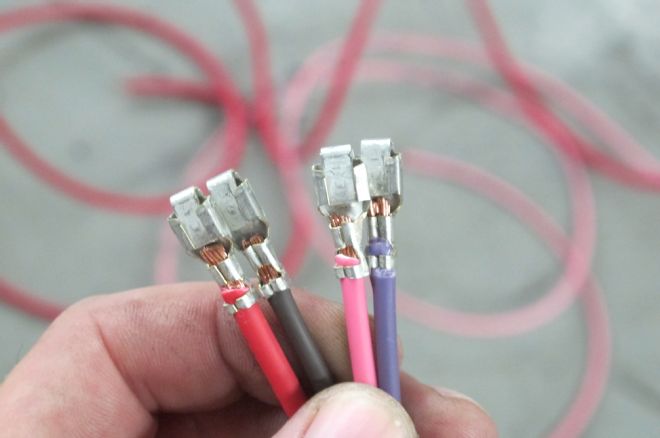
9 A good crimp captures the conductor and the insulation; the latter provides strain relief that helps the conductor from being pulled out of the terminal.
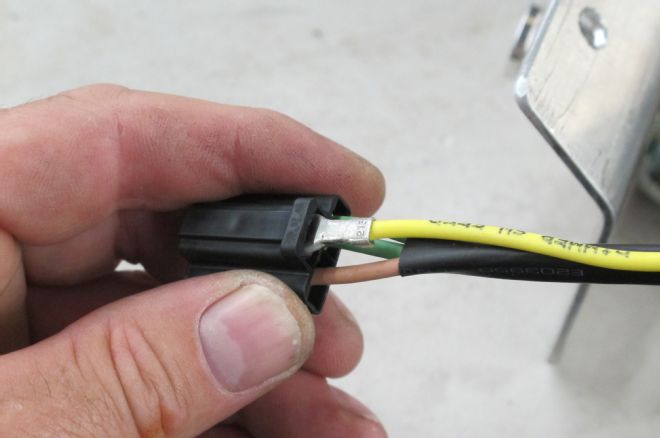
10 The newly crimped connector is pushed into the plug until it snaps in place. This connector is for the dimmer switch.
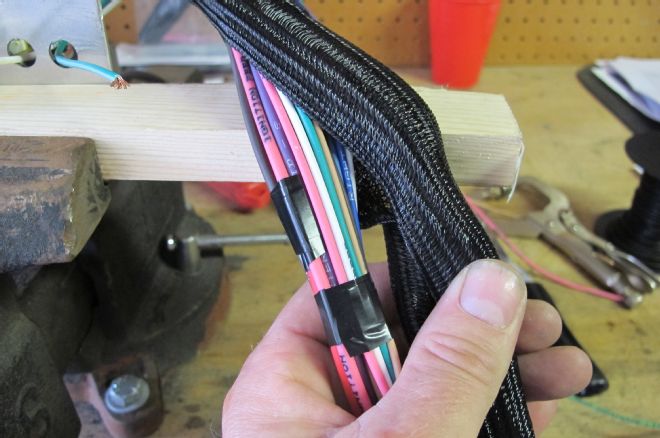
11 To keep the wires bundled and give the harness a vintage look, Jason used braided wrap from American Autowire.
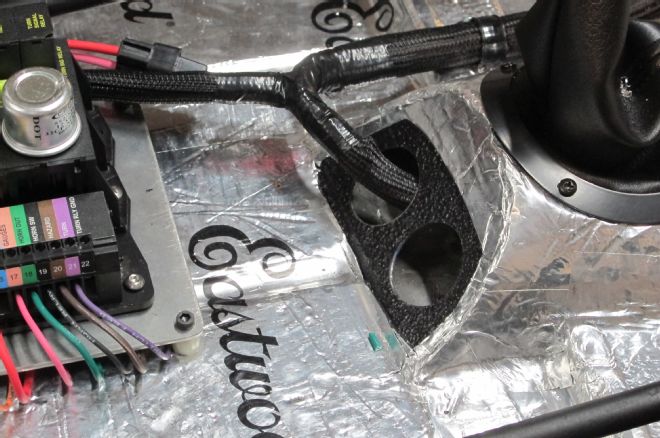
12 This is called planning ahead; Jason provided passages in the transmission tunnel to run the necessary wires to the front of the truck.

13 The turn signal switch is plug and play. Note the American Autowire color code matches that found on the GM column's plug.
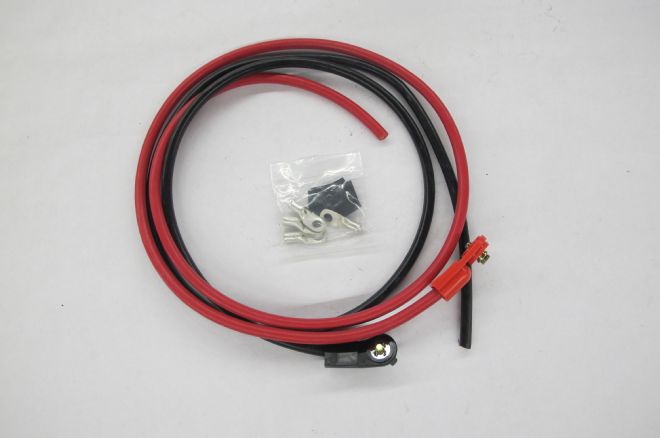
14 Battery cables from American Autowire came with the side terminals in place, they would be cut to length and the included ends attached.
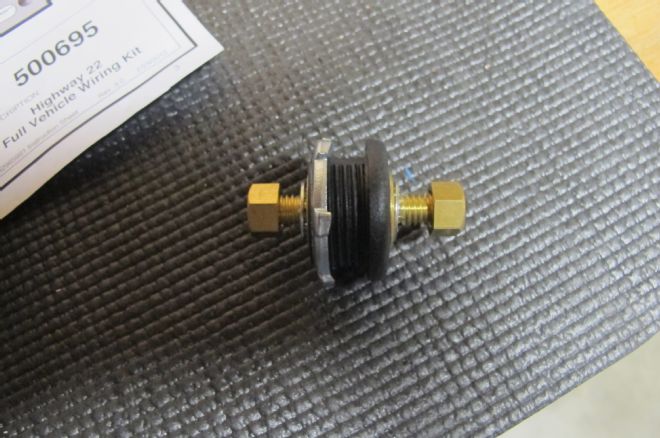
15 To get the battery cables into the cab "pass-through" terminals were used.
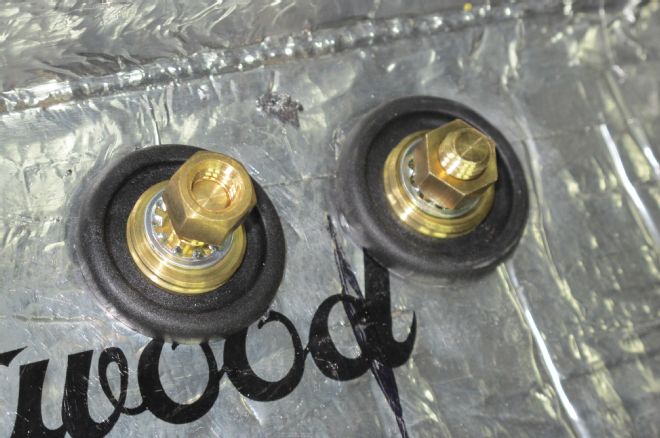
16 Two terminals were installed, one for the positive cable, the other for the ground.
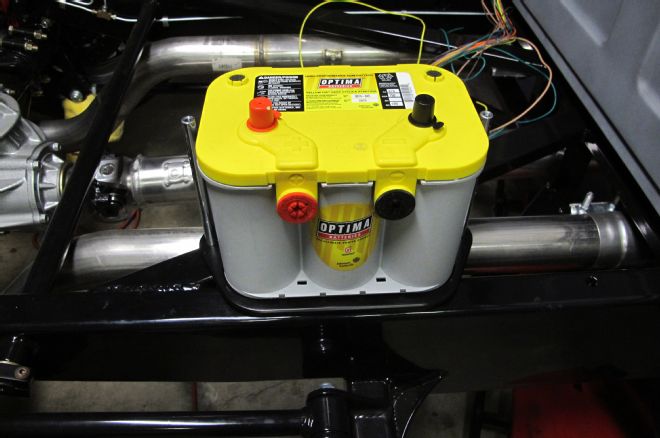
17 An Optima yellow top, deep-discharge battery provides the cranking power. Note the battery has top and side posts.
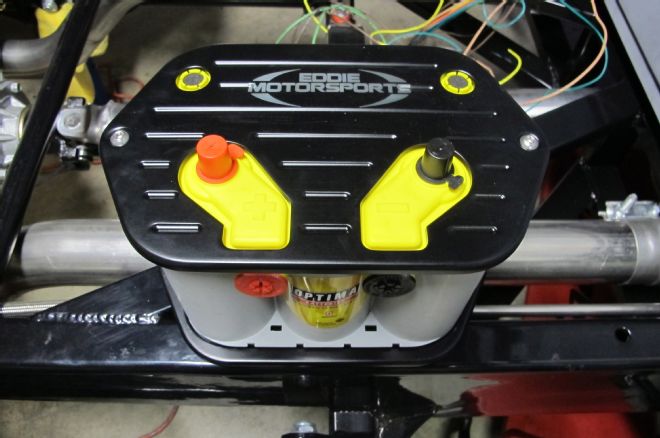
18 To secure the battery and Eddie Motorsports hold down mounts to the chassis behind the cab.
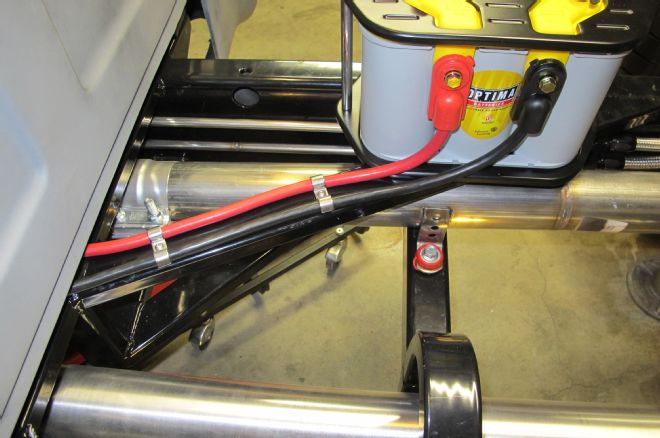
19 To keep them from moving around and chaffing the color-coded battery cables (red for positive, black for negative) were secured to the X-member with aluminum clamps.
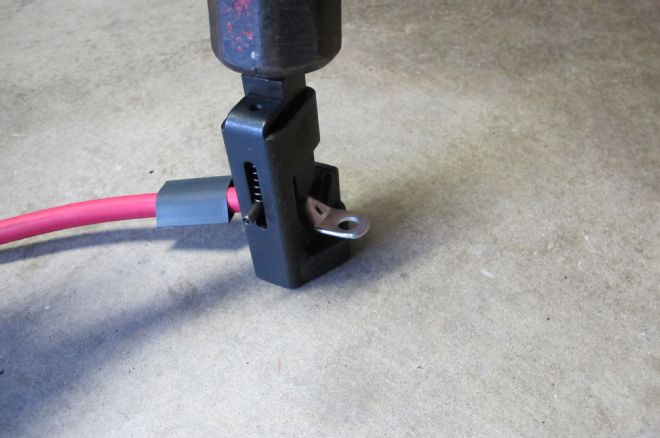
20 To attach the ends on the battery cables a terminal tool was used—smack it with a hammer and the terminal is crimped in place.
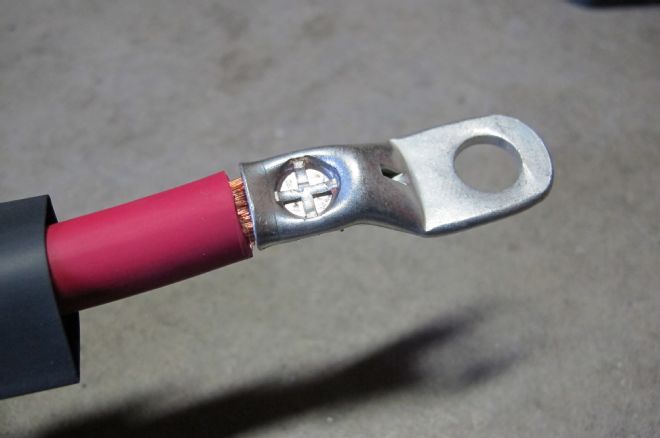
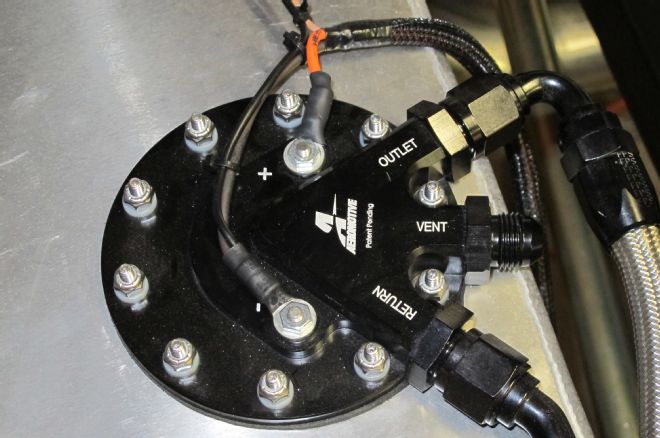
21 This is a properly crimped battery terminal. We prefer this method to soldering.
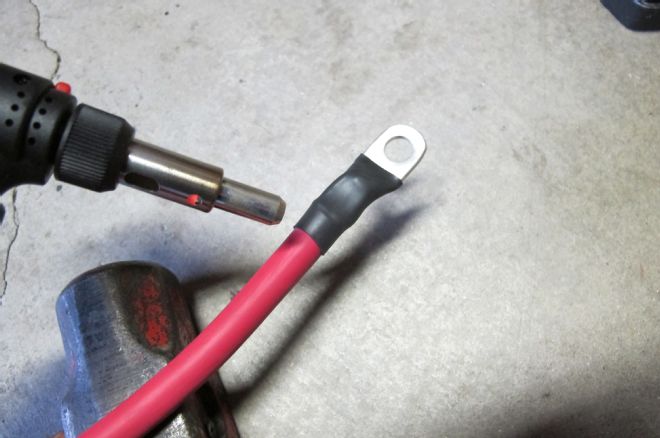
22 To provide a finished look and help prevent corrosion the new end was sealed with shrink tubing.

23 Power to the fuse panel comes from the battery cable terminal—a Megafuse protects the entire electrical system.
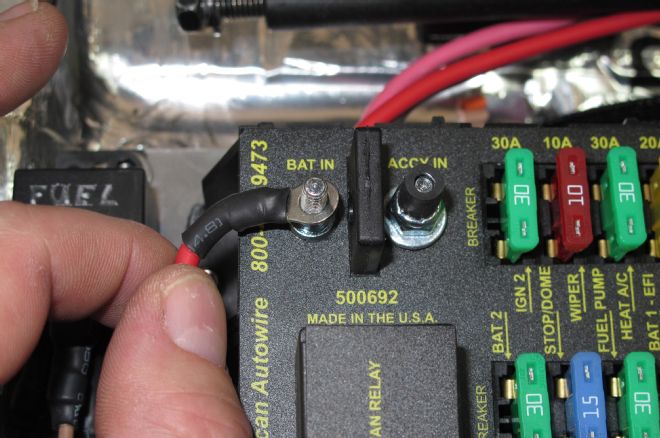
24 The fuse panel receives power from two sources, the battery (for items that are "hot" all the time) and the accessory output on the ignition switch (hot with the key on).
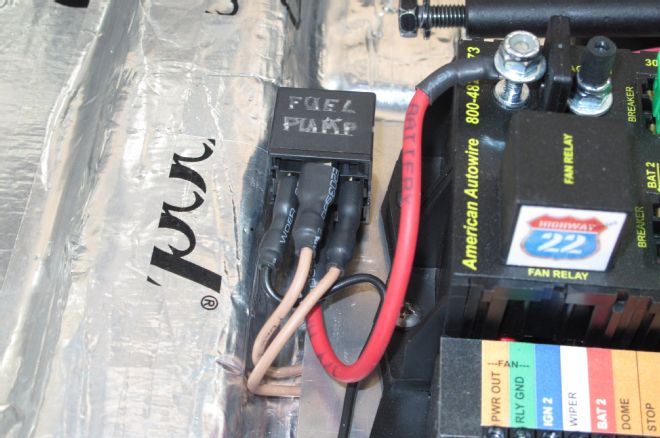
25 Power for the fuel pump relay comes off the battery terminal of the fuse block.
26 The previously shown relay powers the Aeromotive in-tank electric fuel pump.
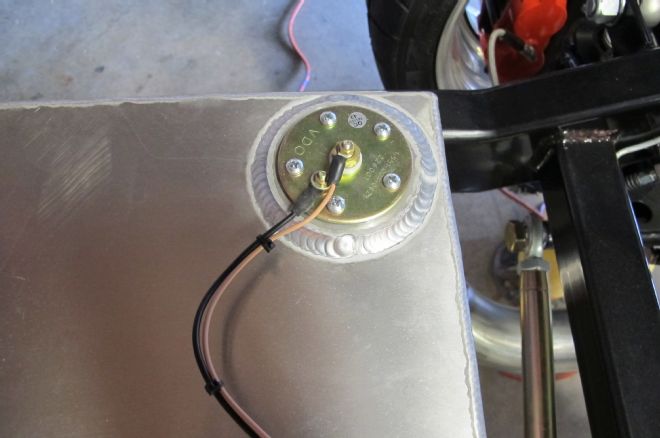
27 Included in the Highway 22 panel are all the wires to connect the senders and gauges (the fuel gauge sender is shown here).
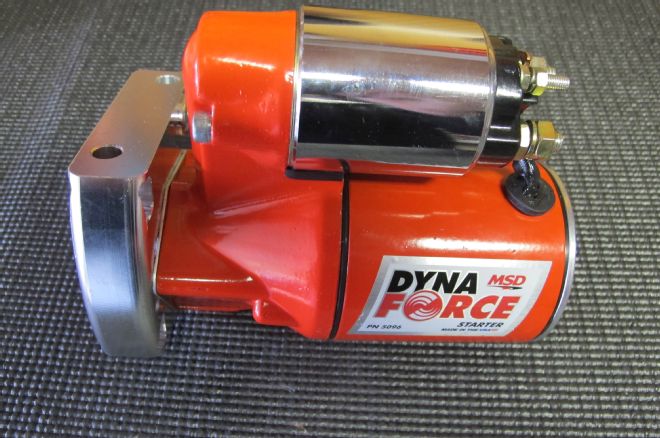
28 Spinning the LS to life is a Dyna Force starter from MSD.
Fabricating an Underdash Switch Panel

1 To keep the dash of his Chevy pickup clean, Jason Scudellari fabricated this panel that mounts the ignition, lights, and accessory switches.
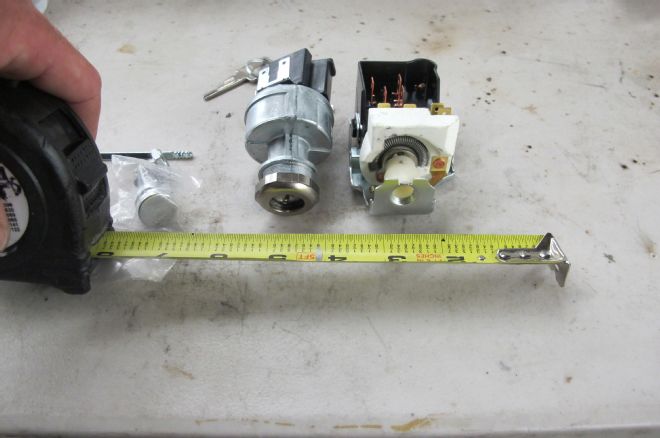
2 Jason made approximate measurements of the switches to be mounted.
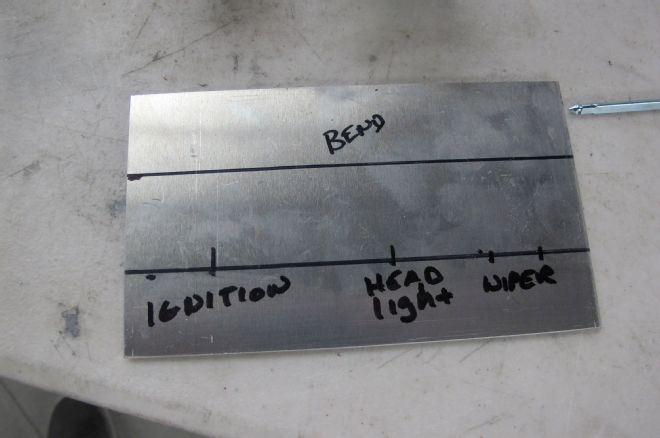
3 Those measurements were then transferred to a chunk of aluminum.
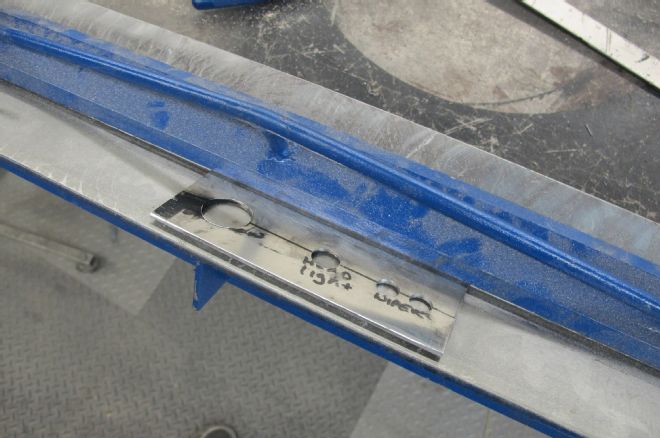
4 An Eastwood brake was used to bend an angled mounting flange on the panel.
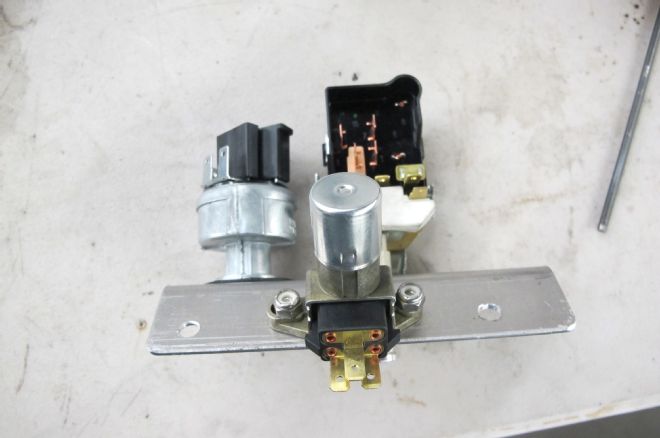
5 Jason chose to mount the dimmer switch to the back of the panel rather than the floor. The switch will be operated by hand.
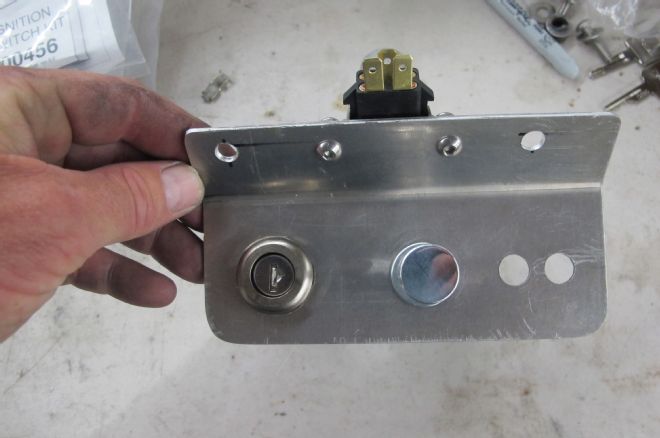
6 The finished panel will attach to the bottom flange of the dashboard with button head screws.
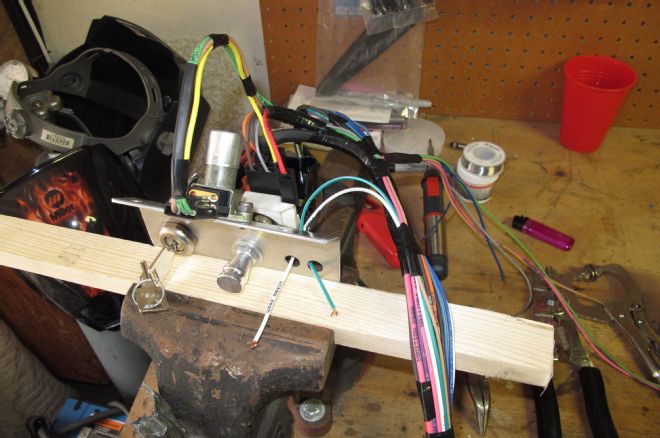
7 To avoid working upside down under the dash the panel was pre-wired before installation.