
Gauges are more than just a fashion accessory for your Chevy. They’re also how you track your engine’s vital signs and keep from collecting speeding tickets from the local constabulary. But there’s no reason you can’t have both form and function in one package.
Gauges from Classic Instruments have been adorning some of the nation’s top customs for a long time, but recently they decided to make a line designed with the performance driver in mind. Their new Auto Cross series of gauges features a clean, easy-to-read design that gets you the information you need in as simple a way as possible.
But buying a cool set of gauges is the easy part; installing them the right way is a whole other bowl of spaghetti. Classic Instruments gets lots of calls to their tech lines and most of the time bad wiring is the root cause of gauge problems. People tend to have an “out of sight, out of mind” mentality sometimes and cut corners when it comes to wiring. Given this, we thought we would show you the right way to get it done. We also figured it would be nice to have the gauge cluster be modular and easy to remove from the car. So follow along as we detail how to end up with a cleanly wired and trouble-free gauge system.
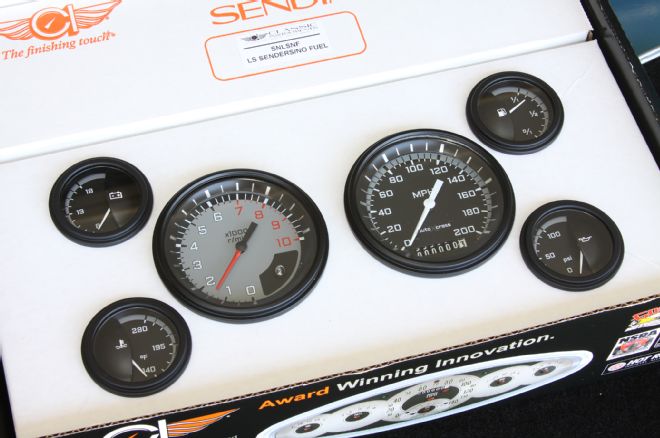
01. Classic Instruments new Auto Cross gauge line (PN AX01GBLF) is all about performance. The gray background and red pointer makes the 7,000-redline tach easy to read, and it features an integrated, programmable shift light. The speedometer is simple and clean with a white pointer and an optimistic 200-mph top reading. Our kit has flat glass, but curved glass is also on the menu. The gauges are available with yellow accents in lieu of gray, and Classic Instruments offers LED lighting upgrades.
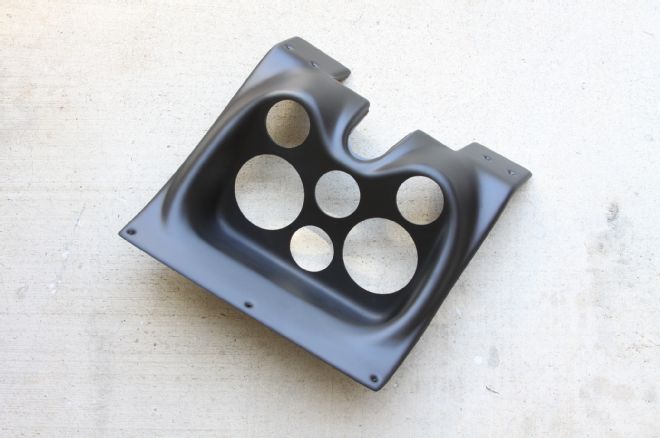
02. What you use to house your gauges depends on what car they are going into. Classic Dash makes all sorts of dash housings, like this one for 1967-’68 Camaros. They can be ordered blank or pre-drilled in popular configurations.
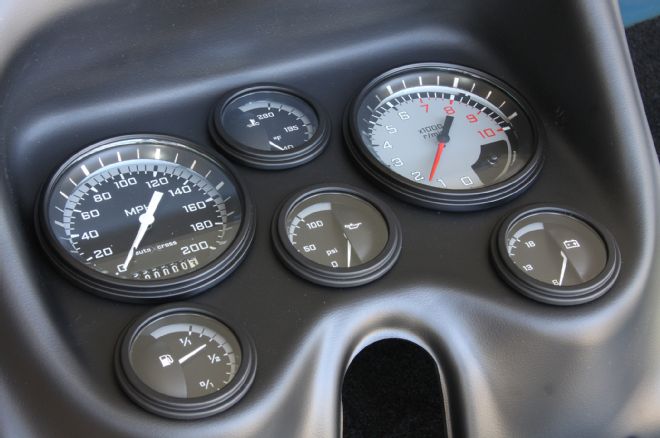
03. How the gauges are arranged comes down to personal preference. We decided oil pressure was the most critical, so it got front and center placement, while positioning the tach on the right should make tracking the red pointer easier.
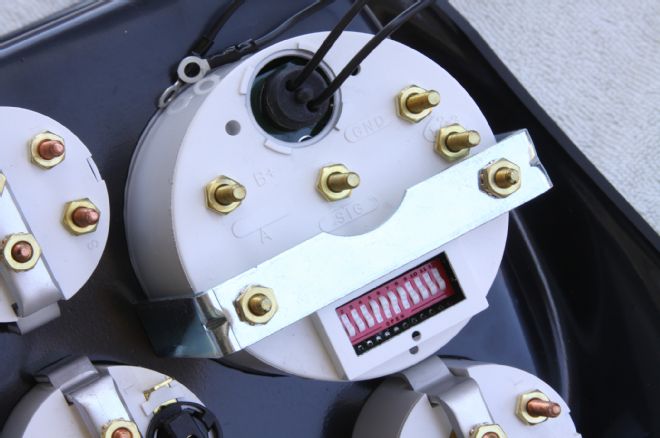
04. The gauges were mounted using the included U-brackets and locking nuts. The backs of the gauges, in this case the speedometer, had all the various contacts clearly marked. We also marked each gauge on the back so we could see what it was without flipping the assembly over.
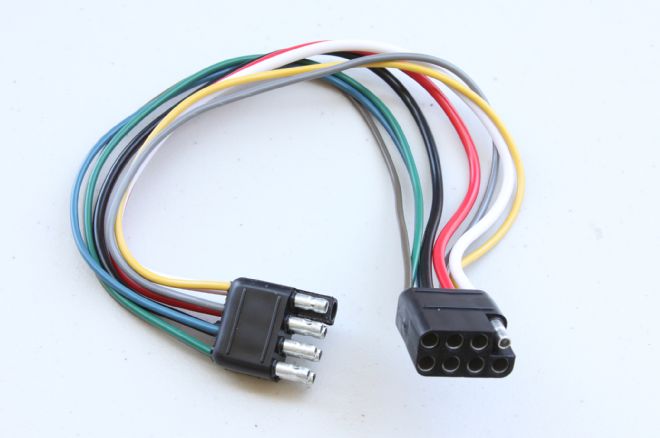
05. We wanted the cluster to be easy to remove and install into the car, so we hit the local wiring store and bought two of these plug-and-play wiring connectors for about $10 each. If you have a phobia about doing your own wiring, then Classic Instruments has you covered with their pre-made wiring looms (PN SN84).
06. We wanted to run some of the wires in series, so we also bought a package of these piggyback twins. This gave us an “in” and “out” on each of the blade connectors for the lights.

07. We also bought several spools of 14-gauge wire in various colors that coordinated with our plug-and-play wiring connectors. A quality pair of wire strippers made this job much easier.
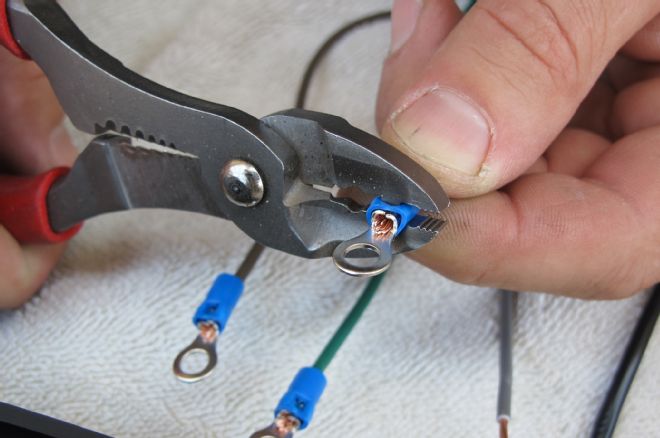
08. We also made sure to fully crimp all the connectors onto the various wires. Having them pull out after installation just leads to unnecessary hassles.
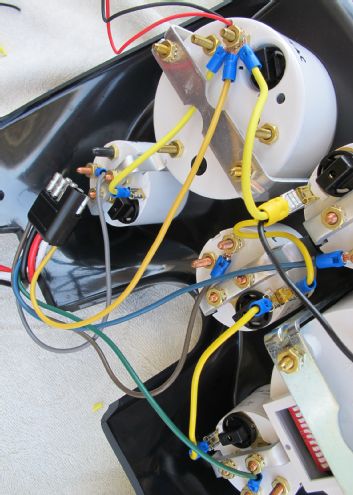
09. Here you see how we chained the yellow wires from each light connector to the next.
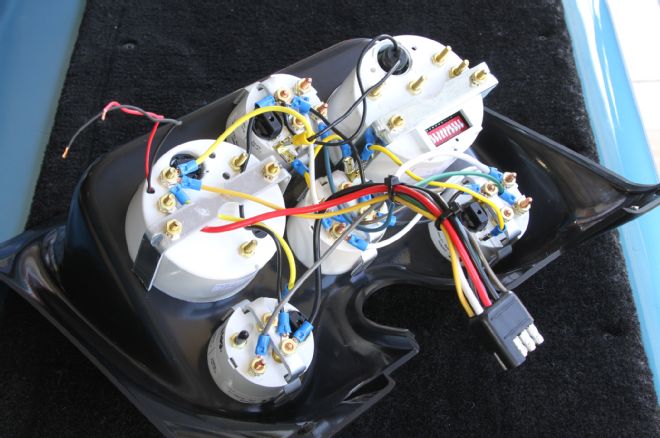
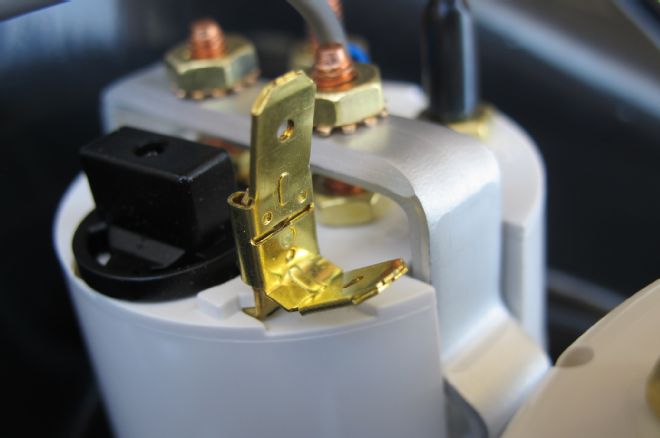
10. We then chained the light grounds (white) and the gauge grounds (black). We also ran the blue wire to the water temp signal, gray to the alternator signal post, and green to the fuel level signal post. Note that on the alternator gauge that the actual signal post is capped and not used. It gets the signal from the gray power wire, which we ran isolated but could be chained to the power post of one of the other gauges. The other end of the connector will be hooked to the various sensor leads off of our American Autowire dash kit, our Chevrolet Performance LS engine loom, and to the sensors included in the Classic Instruments gauge kit. The red wire was run to the isolated power post for the tach. We didn’t have to isolate it like the speedo, but we wanted to ensure clean power and we had an unused wire in our connector.
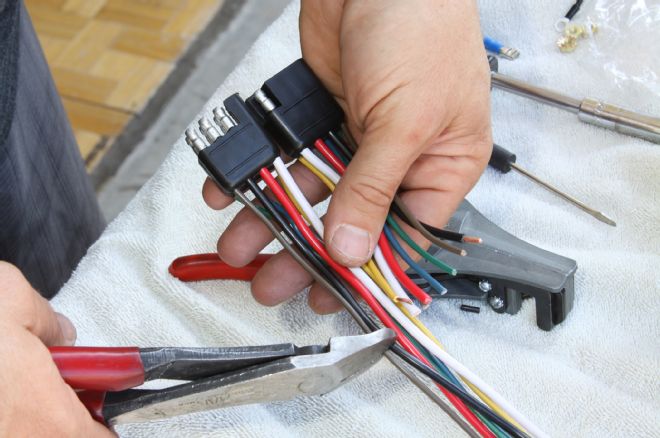
11. We then took our second plug-and-play harness and cut it to match the first. Since the wire colors were the same, we used a permanent marker to make dashes on these wires. We reversed the ends so that the plugs couldn’t get crossed up and plugged in wrong.
12. As for the dash-marked wires; the red went to the isolated power and the white went to the isolated ground on the speedo. The green was used for the speedo signal and the blue was connected to the black wire from the shift light. The gray and yellow wires were unused but will eventually feed LED turn signal indicators.
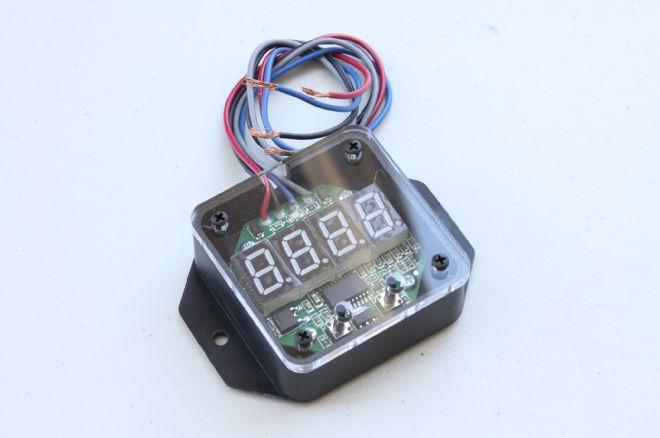
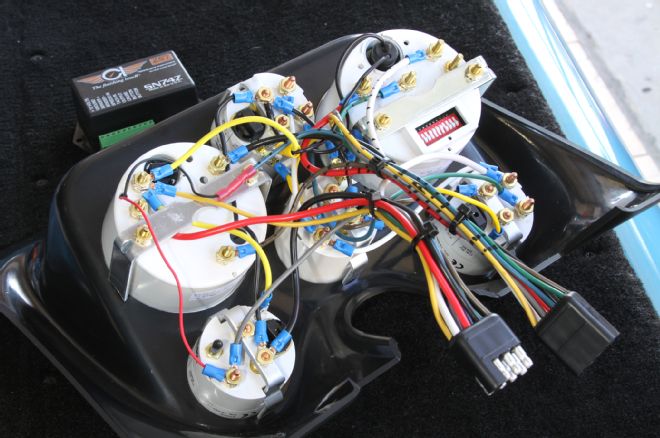
13. This is the device (PN SNLITE) that came in the gauge kit and it will enable us to program the shift light on the tachometer. It will be mounted under the dash, but someplace we can see it for programming.
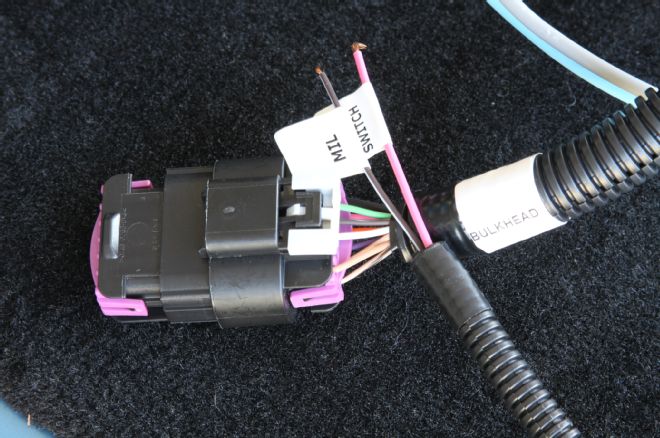
14. According to the instructions that came with our Chevrolet Performance LS engine harness, we can grab a tach signal off of the bulkhead connector (white wire, location B on the connector). The signal is a two-pulse-per-rev output so we will need to set our tach to four-cylinder. The signal is a low-voltage square wave so there’s a 50/50 chance we will need a pull-up resistor (5,000 ohm, 1/4-watt or 10,000 ohm, 1/2-watt) for the tach to function. You can make your own or buy one pre-made, shrink-wrapped, and ready to rock from Classic Instruments (PN SN10K). The MIL wire is a “check engine” signal and will run to a red LED mounted in the Classic Dash housing.
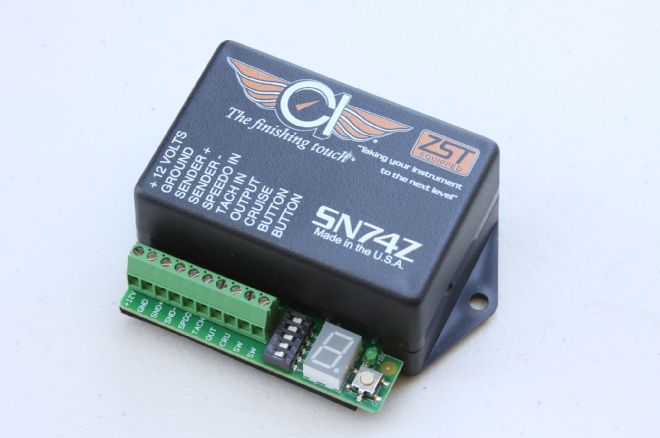
15. The SN74Z module can be used for either the tach or the speedo signal, but not both. Since the tach signal is easy to retrieve from the LS ECU, we decided to use the SN74Z to grab the speed signal from our Tremec Magnum VSS output. We simply have to run the two wires from the VSS on the Magnum to the Sender and Speedo In locations on the module, run a blue wire from the output on the module to the corresponding point on our plug-and-play connector, and connect 12-volt switched power and ground to the first and second connection ports. The last two spots, marked button, are for the programming button included with the gauge kit. The small display will be used for calibrating the speedometer.
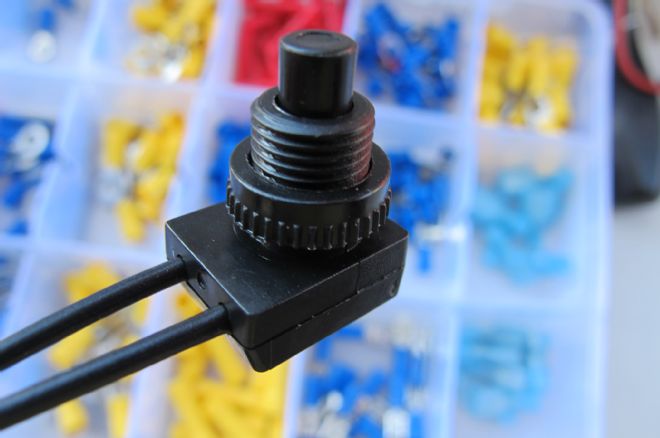
16. And here’s the aforementioned programming button. This is only used for the initial setting up of the SN74Z, so it can be mounted in an out-of-view location.
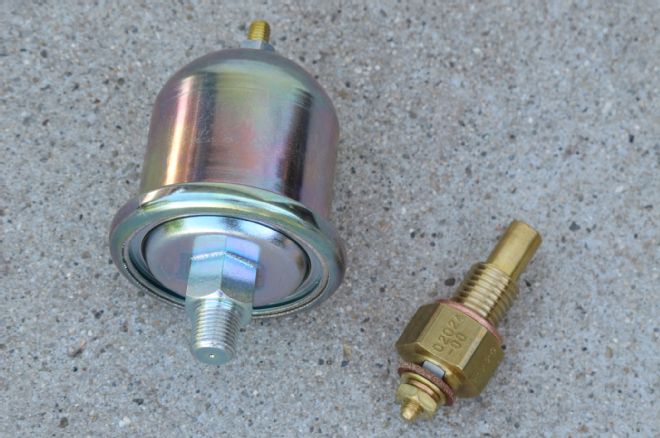
17. Our kit was set up for an LS engine so it came with a 12mm water temperature sender (PN SN12MM), which mounts in the side of the passenger-side cylinder head. The kit also had a 100-psi oil pressure sensor. There’s a couple of places on an LS engine this can mount, but the most common way is to drill and tap a 1/8-inch pipe hole into the small oil bypass housing that’s located just above the oil filter. Classic also sells fuel sending units if you need one, or gauges that read all the common values.