Modern life surrounds us with all kinds cues designed to make us feel safe. Insurance policies, the legal system, hospitals, alarm systems, courts, police and fire, a gun in the nightstand, extended warranties, national defense, yellow warning signs, contracts, anti-spy software, you name it. We're made to feel coddled and cuddled as we stumble through life, yet in spite of it all, we don't actually know how much danger we're legitimately exposed to. The story is always the same—hand over some cash, and you'll feel safer, whether it's tax dollars for more cops and prisons, or an extended warranty for your refrigerator.
All the life insurance in the world isn't going to stop a broken driveshaft from vaulting your face into the concrete...
The worst part is that some of the protections that make us feel snug as a bug in a rug don't do jack squat to actually protect us. All the life insurance in the world isn't going to stop a broken driveshaft from vaulting your face into the concrete at 130 mph—but a $25 driveshaft kit from Summit Racing might do the trick. And a new three-point safety harness from Juliano's may just keep you alive long enough for the ambulance to get you safely to an emergency room. Like we always say, driving a fast hot rod is fun, unless it kills you.
...driving a fast hot rod is fun, unless it kills you.
So how much danger are you legitimately exposed to in a classic car? In 2009, the Insurance Institute for Highway Safety (IIHS), an independent non-profit organization for vehicle safety, bought a restored 1959 Chevy Bel Air and a 2009 Chevy Malibu (good thing they weren't Mopars!), rigged up 859 high-speed cameras, and crashed these babies into each other in an offset high-speed collision test. Look up the video on YouTube if you haven't seen it. There was so much damage to the Bel Air, it would've been curtains for a real driver. And the test dummy in the '09 Malibu? Minor foot damage—no joke. He would've lived to crash another day. So who in the hell is going to drive head-on into a mint '59 Bel Air, you ask? A kid on Facebook. A drunk. A tired worker coming off third-shift. Who knows—anything can happen.
The point is, you can't be too careful with safety in an older car. We can't easily re-engineer the underlying structure of a vintage car, but we can do plenty in other areas, such as disc brake conversions, modern rubber, sharper steering, road-hugging suspension, and of course, better seatbelts. Three-point belts with fresh webbing, inertial take-up reels that lock upon impact, and shoulder harnesses optimized for maximum retention are all low-hanging fruit, and nobody who loves driving their classic should turn all that down.
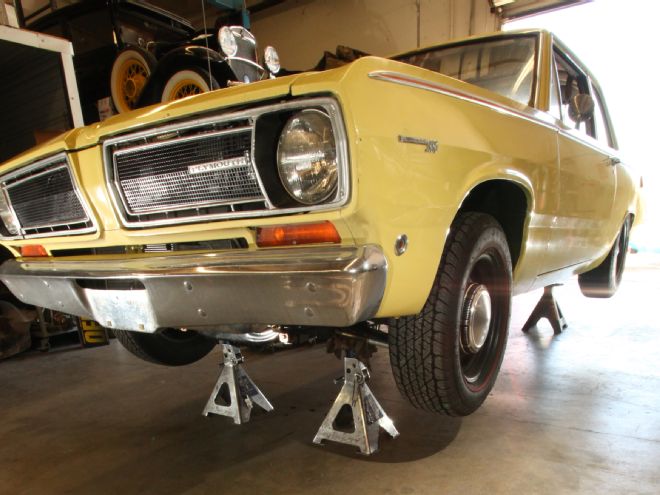
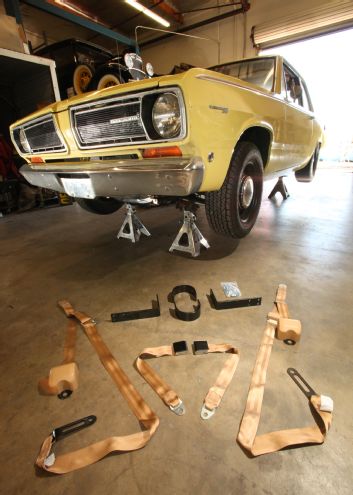
So here we are with our '68 Valiant, and vintage seat belts that were woven and sewn in the waning days of the Johnson administration. Cinching them up produced a cloud of dust from deterioration in the webbing—not a good sign. Even worse, those old shoulder harnesses were designed before manufacturers knew where to safely place them across the torso, resulting in asphyxiation or decapitation in the event of an accident. Since we like driving the Valiant on the street where it just happens to be exposed to plenty of texting kids and drunken fools, we looked into a set of modern three-point harnesses from Juliano's ($119.95 per seat, anchor plates $15 per pair). These belts significantly improve the odds of survival in a crash, and Juliano's even has them in nine different colors. (We got tan to match our interior, and not-stock yet cool-looking period-correct lift latches).
...those old shoulder harnesses were designed before manufacturers knew where to safely place them across the torso...
Next on the list: we plan to drag race the Valiant using slicks. Doing so means the NHRA mandates a fully encircled steel loop within six inches of the front yoke, so we looked at Summit Racing for the necessary hardware. Mopar guys take note: most driveshaft safety loop kits are generic, which means they're designed for Chevy and Ford. As such, some fabrication may be required, so no sense paying for something super fancy. We found just the right thing when we snagged Summit's Street & Strip kit, P/N SUM-G7900 for $24.97. This kit has most of the tricky bits you'll need—minus some short pieces of 1x1 steel square tubing and a MIG welder.
Hardware stowed in the trunk of the Valiant, we burned rubber over to RRC Fabrication & Speed in Upland, CA, where we employed the fabrication services of shop owner Bill Richman, and his trusty fabricator, Scott Ethridge. We met Bill and the RRC crew several years ago while attending the Chryslers Performance West Spring Fling Mopar show in the LA area. RRC works on all types of hot rods, but they hold Mopars in special regard, preferring them to all others. We were impressed with RRC's work, so we knew they would treat our Valiant right. As you can see from the accompanying photos, RRC didn't let us down! If you have the need for a solid Mopar shop in SoCal, RRC is one you'll want to check out.
Now it's time to show you what you'll need, why you need it, and how to do the job right.
RRC works on all types of hot rods, but they hold Mopars in special regard, preferring them to all others.
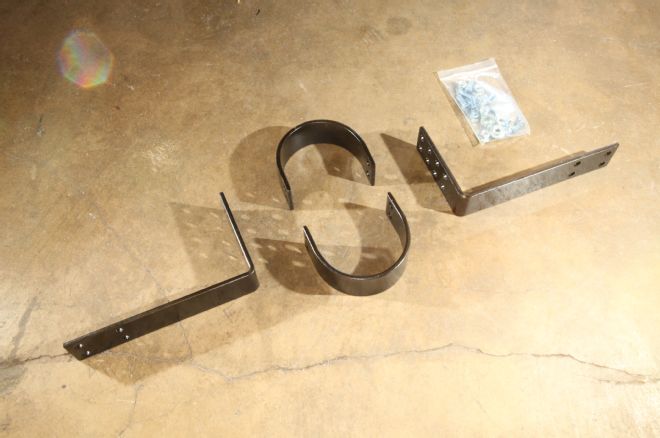
1. Long before automakers gave a shake about safety, the NHRA was on the case. For the NHRA, every racing accident was an opportunity to make racing safer. Noticed early on: put sticky tires on a racecar and the driveshaft can break catastrophically. Usually (and most spectacularly) it would let loose at the front yoke at high speed. Thus was born the edict for a driveshaft safety loop with slicks. Ours is from Summit ($25).
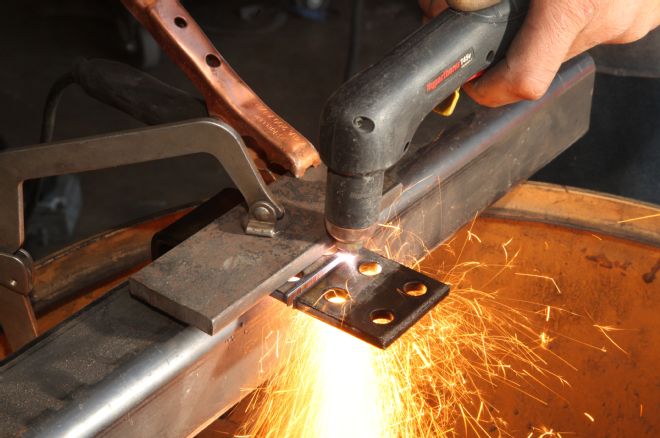
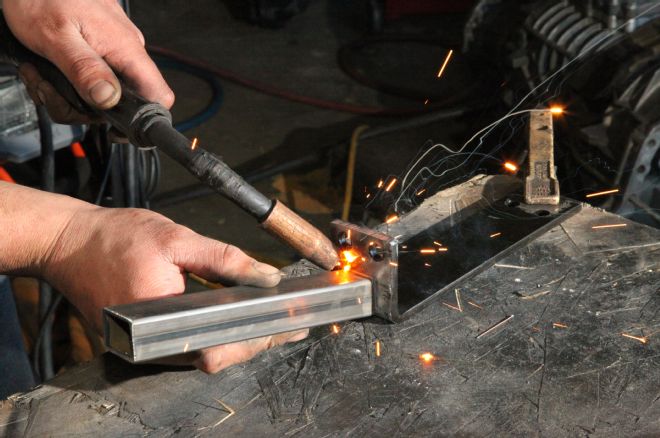
2. RRC's Scott Ethridge mocked up our Summit kit on the Valiant chassis and after some head scratching and pencil math on pieces of steel, cut the two Summit L brackets with a plasma cutter. This shortened the L's, and provided two squares with four holes to use as connecting straps for the driveshaft clamshells. Note the straight, clean plasma cut, thanks to a guide bar.
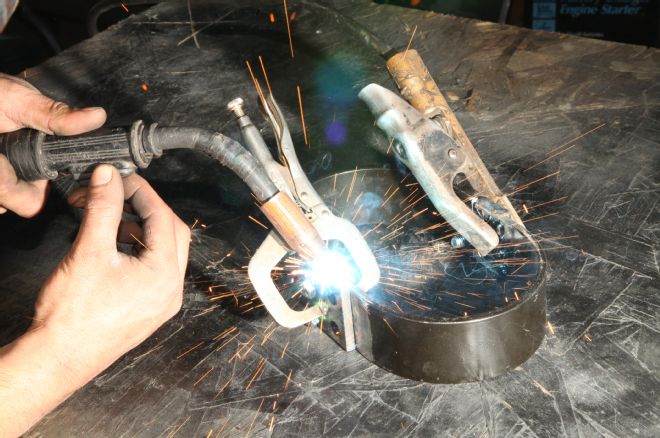
3. The square straps cut from the L's are MIG welded to one of the driveshaft clamshells—the other clamshell half will be bolted to the connecting strap to make removal or maintenance easier.
4. Most fabrication is about mocking-up before making any moves. Here, Ethridge checks the driveshaft loop for clearance. He's contemplating driveline movement, exhaust clearance, future ease of removal, and strength.
5. The L's from the Summit kit have been cut once, but they'll need to be shortened further on their long sides. The safety loop assembly will eventually run to both sides, tying in with our US Cartool subframe connectors.
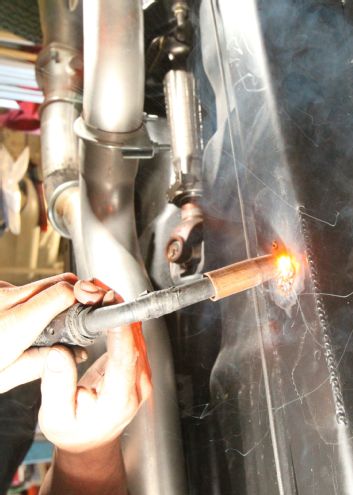
6. After much measurement and calculation, RRC decided to attach the driveshaft loop to the subframe connectors using bolts that tighten into half-inch nuts recessed and welded into the subframe connectors. For these, Ethridge drilled a hole, tacked a nut in place, filled the gap with weld, ground the weld flat, and painted the area with Eastwood's Extreme Chassis Black. Four nuts were installed this way—two on each connector.
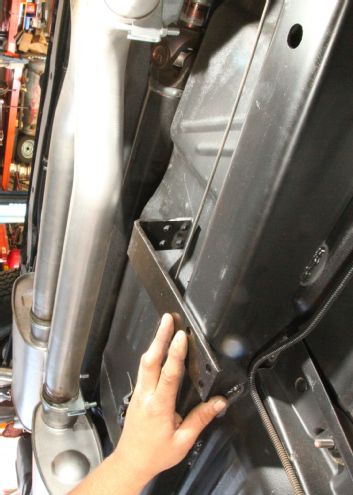
7. The recessed nuts allowed the L brackets to be mocked up without being held—simplifying the process of calculating and cutting two pieces of 1x1 mild steel tube that connect the L brackets to the loop. Here, Ethridge tacks the square tube in place before mocking it up again on the Valiant. Getting the angle and length just right took several tries.
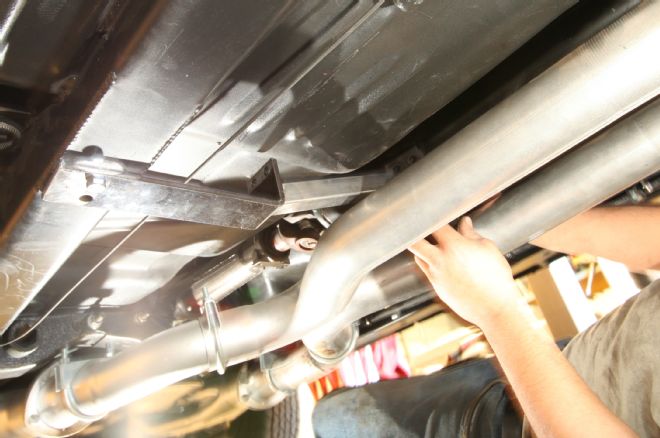
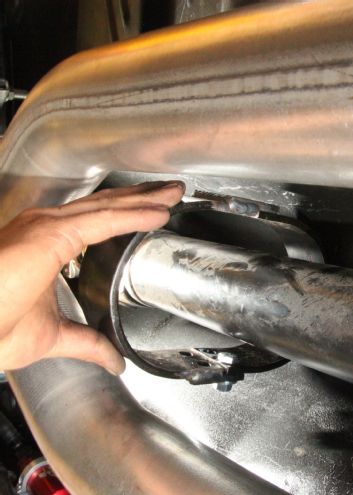
8. Mocked up on the Valiant, you can see how challenging the geometry is. The L bracket is bolted to the subframe connector, the 1x1 support tube passes neatly between the floor and the TTI dual exhaust, and holds the safety loop in a place where it doesn't contact the driveshaft, the tunnel, or the exhaust. Once the driver's side was done, the passenger side was easy.

9. A healthy coat of Eastwood Extreme Chassis Black and our driveshaft safety loop was done. There was no way a generic Chevy driveshaft loop was going to easily bolt up to this Mopar!
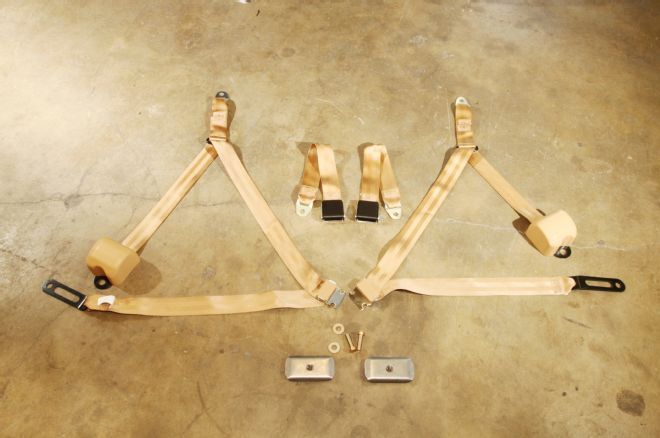
10. Focusing their safety goggles on the top-side of the Valiant, the RRC crew began tackling the installation of the three-point harnesses from Juliano's. A set of two belts plus the anchor plates ran us $246.90. While three-point harnesses for Chevy and Ford combine the inertial reel attachment point with the outboard lap point, there is no room between the seat and the rocker channel for the reel on an A-Body. It needs to be mounted separately at the base of the B-pillar via an anchor plate. We'll show ya...
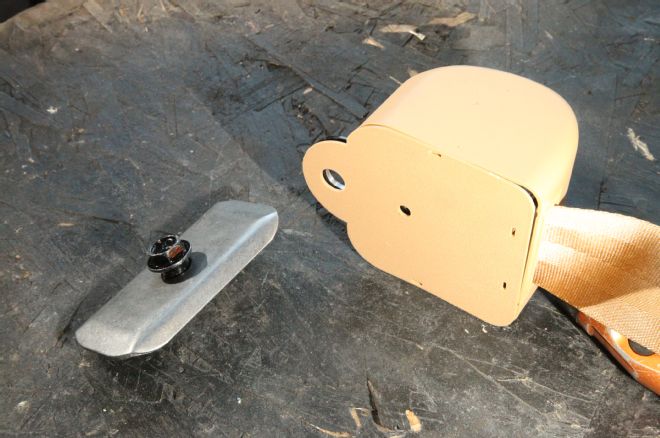
11. The inertial reel and anchor plate. Note that the included bolt is a very high grade, and that it has a shoulder under the head so that once tightened, it leaves ample room for the inertial reel to pivot and pull safely at slight angles. Like a modern OE belt, the reel is spring loaded to keep the belt tight but not too tight. It locks in place immediately when the webbing is paid out rapidly, such as in a crash.
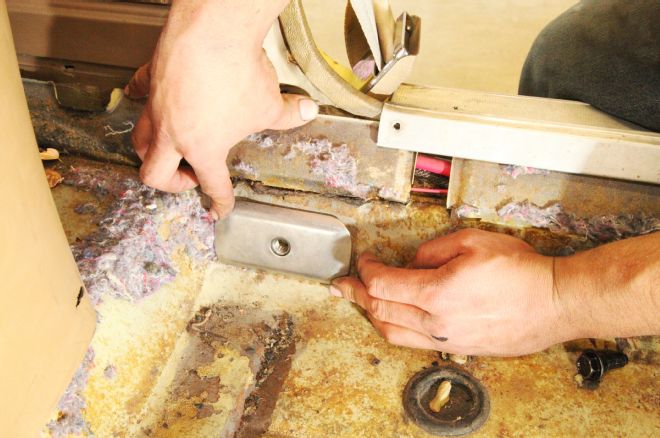
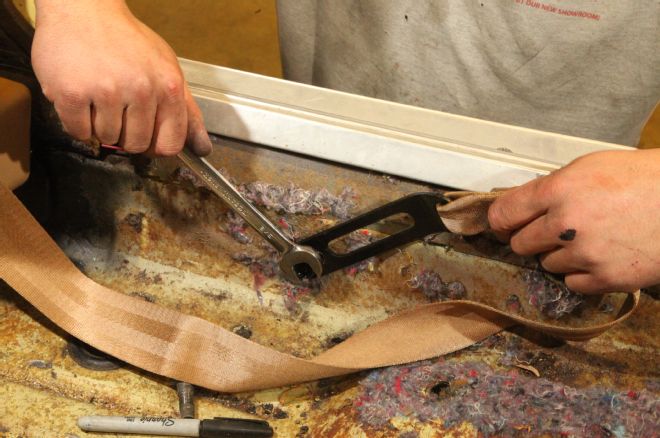
12. Here, Ethridge establishes the position of the anchor plate, looking for maximum strength in the boxed area of the rocker/rear footwell. It's also very close to vertical to reduce the angle, and thus the shear load on the fastener.
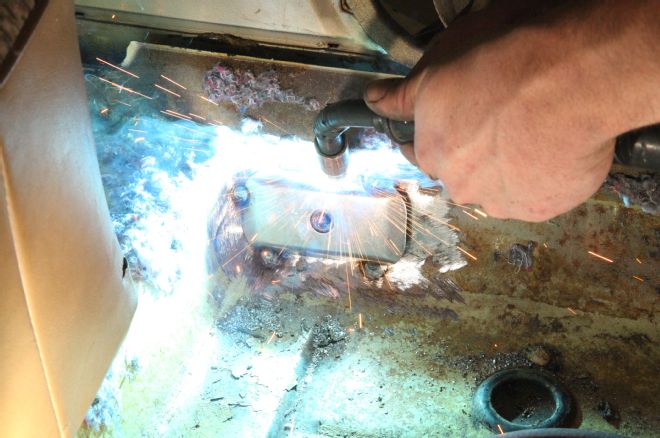
13. After using a grinder and wire brush to clean the area of paint and surface rust, Ethridge MIG welds the anchor plate in place, first with tack welds, then with short stitches—the idea being to not burn through the thinner sheetmetal.
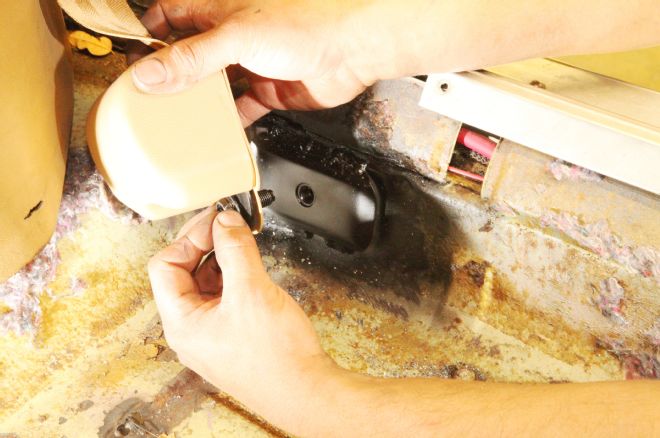
14. Before bolting the inertial wheel to the anchor plate, a small hole needs to be drilled in the sheetmetal behind the anchor nut. This allows the anchor bolt to pass through and fit snugly against the anchor plate. Here, the area has been painted, again with Eastwood Extreme Chassis Black.
15. All '68-model Mopars had shoulder harnesses except convertibles. We've removed the factory belt and attached the drop sash from the Juliano's harness using the factory bolt in the factory attachment point. The beauty of the drop sash is that it places the shoulder harness perfectly across the center of the chest, not over the collar bone and neck like the factory set-up. What good is a shoulder harness if it saves your life only to choke you to death?
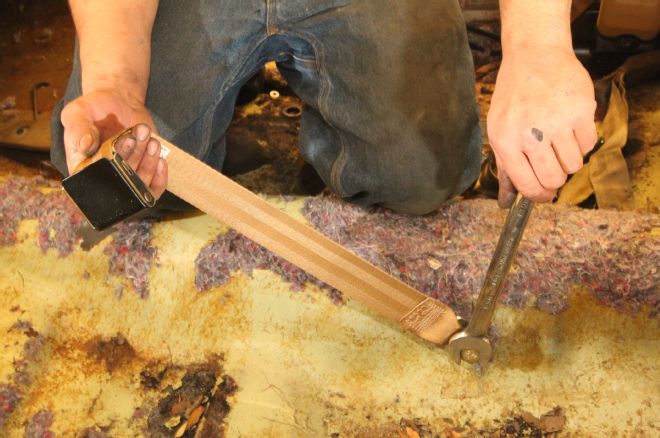
16. The outboard lap attachment point is the same as stock, only you're eliminating the take-up reel. Before bolting this end to the rocker channel, take your time figuring out how the belt turns and folds. You should end up with the slight bend in the metal swivel aiming slightly toward the occupant. Aiming the other way, it will hit the door.
17. The three-point harnesses from Juliano's can be used on both bench or bucket seats, and our latch had a no-cost optional lift latch with optional satin-black crinkle-coat finish. Once the bench seat is bolted back in, fish the latch strap between the seat and chair back, and you're ready to drive.
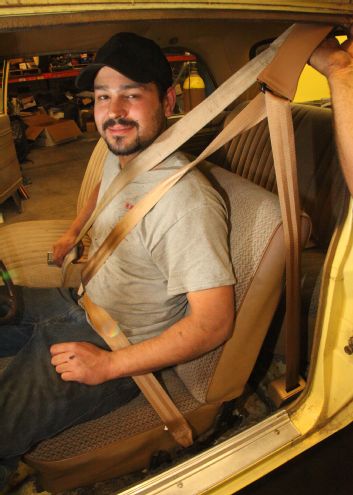
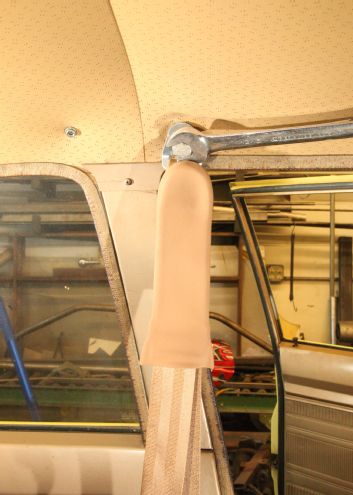
18. RRC's Scott Ethridge demonstrates the new Juliano's three-point harness while Bill Richman holds the stock shoulder harness in place for comparison. Note the difference between where the stock shoulder harness passes, and where the Juliano's version sits. The new belts are easier to use, they're safer, and a ton more comfortable. Next up: It's time to get some M&H slicks and rims from Coker for our track date!