We can come up with a long list of excuses about life getting in the way of project cars, but you've heard it, and many of you have experienced it all before. The good news is that we never gave up on the old '51 Chevy for $15,000 and it is getting wrapped up in the next two issues.
A brief recap: This is our eighth installment on the DeLuxe Coupe build, which started with a body that had been neglected in the desert and then dragged behind a number of shops. In fact, the last registration decal on the car was from 1977! The plan was to build a car that would be reliable, fun, and safe to cart the family around for under $15,000, including the cost of the car itself. Thanks to careful product selection, some swap meet scores, and a few lucky trades made years ago, we're sitting well under budget at this juncture. In fact, we're under $9,000 as we prepare to finish some wiring and strive to fire up the car for the first time. That nine-large includes the car itself, our Chassis Engineering bolt-in frontend kit and leaf spring conversion, Painless wiring harness, used 350/350 drivetrain, along with the fresh Coker American Classics.
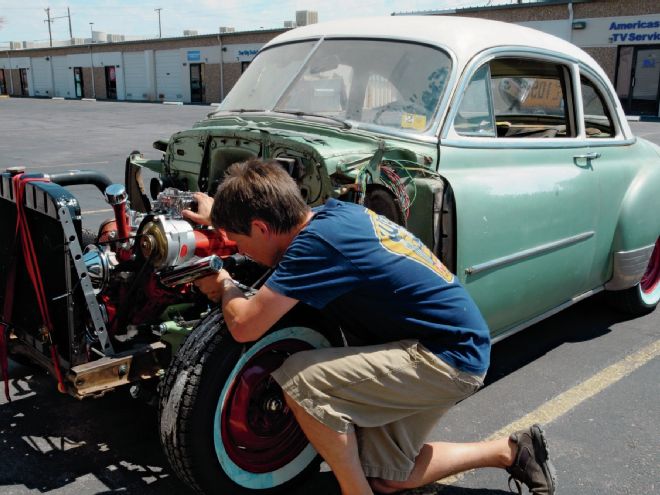
We left the project off with the driveline in place, brakes functioning, and most of the wiring from the firewall back complete. The next goal was to wire and plumb the engine and basically get the car to fire up and run before installing the front sheetmetal. This meant installing a battery, shifter, trans lines, fuel lines, and a cooling system.
Since we were on a bit of a wiring kick, we went under the dash to install some new switches from Painless. This included an ignition switch, light switch, and high/low beam floor button. We had also opted to mount the battery in the trunk, right behind the passenger side seat so new battery cables were made from welding cable sourced from a local shop. This cable is durable and very flexible and we routed the cable to a large junction stud just below the passenger foot board. This provided easy access to the starter motor, the alternator, and the fuel panel.
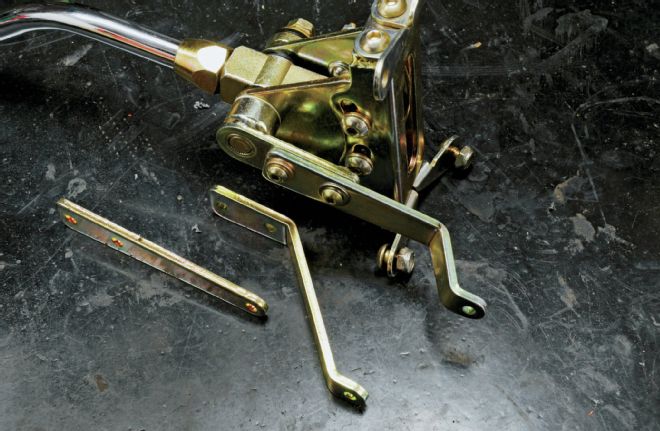
To shift the used 350 Turbo-Hydramatic, we selected a Lokar floor-mount shifter designed to clear the factory bench seat. The shifter ended up fitting nicely on the removable trans tunnel of the '51, which eased mounting the unit. With young kids riding and hanging out in the car at events, the Lokar lockout button and neutral safety switch are nice features. Also, before mounting the shifter for good, we decided to treat the old Chevy floorboards with Boom Mat from DEI. Since carpet wasn't in our plan, we thought the spray-on Boom Mat material would be a nice way to quell the road noise and heat, plus we could paint it to suit our interior direction.
When it came time for the fuel system, we tried to clean and use the original fuel tank. This plan was questioned right from the start due to a few uncertain spots identified from a visual inspection of the old tank. Once we poured in some fluid, our suspicions were confirmed as several leaks commenced. The solution was a new unit from Tanks Inc. This was the right way to go from the beginning, plus the sending unit was going to jive with our updated fuel gauge. Also, since this was a direct-fit unit, we were able to incorporate the factory fuel line, which was removed, pressure tested, and cleaned.
One area that we did have luck, or at least we'll see, is with the radiator. We happened to be talking with a friend who recently had a radiator re-cored at an old local shop with great results. We decided to take a chance and dropped off the original version we had and $60 later we were told it was ready and set for a good long life of cruising. We were just hoping this wasn't going to be like the gas tank debacle.
We were getting close to firing up the drivetrain but first we had to address the exhaust. We've never been a fan of starting an engine for the first time with open exhaust so we pushed the '51 down a few doors to have a set of FlowTech mufflers installed with the tailpipes exiting behind the rear tires. With the bare minimum of wiring and plumbing done, we strapped the radiator in place and installed a couple temporary hoses. Before cranking the engine over we primed the oil pump and were happy to see good oil pressure (remember this was a used engine). We turned the crank 90 degrees at a time until oil topped each push rod to ensure everything was lubed. Next up, we hit the key and the engine cranked over for the first time in years. Once our rebuilt Edelbrock filled with fuel the '51 came to life!
We kept an eye out for smoke and leaks and grew cautiously optimistic as each minute passed. After a timing adjustment and a little tinker with the idle rpm, we sat on a milk crate, pumped the brakes, and moved the shifter into gear—we had forward and even Reverse! Things were really looking up! We let the engine run for a bit, turned it off to hot soak, and fired it back up a few times. Before the day was done, we even made a couple parade laps around the parking lot to the bewilderment of a few onlookers.
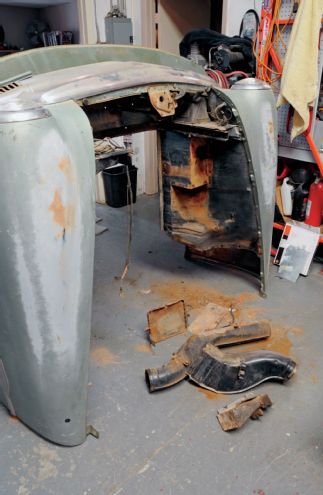
Now we were getting excited. The engine and trans worked, at least around the shop. We had no leaks or surprises. The radiator was holding pressure and keeping the engine cool. The plan was coming together. With all of the additions, including fluids and a battery, we wrapped up this installment at about $11,000. Next on the list will be installing the sheetmetal, new glass, gauges, seatbelts, and some more wiring work. We're almost there!
Project '51 for $15K Parts Source Cost Part 8 Expenses Battery/cables O'Reilly/Local Welding Supply $195.00 Alternator/brackets Powermaster/Swap Meet $175.00 Radiator, coolant Recore/Rebuild $78.00 Gas tank Tanks Inc. $235.00 Ignition, light switches Painless/Lens/Bulbs $90.00 Oil, filter, coolant, belt Local Parts $96.00 Boom Mat spray and paint DEI $45.00 Shifter Lokar $290.00 Alignment Local Alignment Shop $75.00 Trans cooler/fluid Local Parts $98.00 Fuel line, filter, rebuild kit Edelbrock/Local Parts $58.00 Coil and plug wires Street Fire by MSD $78.00 Total $1,513.00 Parts Source Cost 1951 Chevy Business Coupe $2,750.00 Front suspension Chassis Engineering $2,052.00 Rear suspension $602.00 Brake lines, valve, etc. Local Parts $137.00 Trans crossmember Walton Fabrication $169.95 MC brake bracket Engineered Components $130.00 Master cylinder Engineered Components $75.00 Engine and trans Traded for a Duster $250.00 Transmission mount Energy Suspension $40.00 SB engine mounts Chassis Engineering $86.00 Oil pan, intake, timing Gaskets for Engine $90.00 Trans seal and inspect Local Parts $125.00 Intake and valve covers Swap Meet $60.00 Wiring harness Painless Performance $335.95 Bulbs and sockets Local Parts $13.00 Tires Coker $970.00 Mount/balance Local Tire Shop $45.00 Paint/primer for wheels Rust Oleum $36.00 Steering and components Borgenson, CPP $367.60 Exhaust FlowTech/Local Exhaust $200.00 Driveshaft, hardware Local Shop $138.00 Previous Total $8,672.50 Part 8 $1,513.00 Grand Total $10,185.50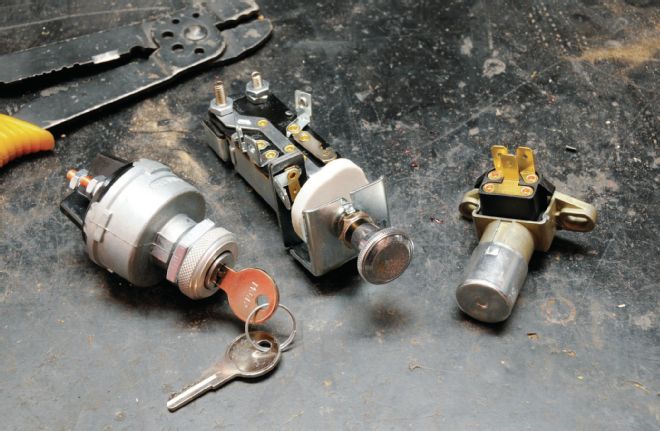
1. The wiring work continued under the dash of the '51 with new switches from Painless Performance Products to control the ignition, lights, and dimmer.
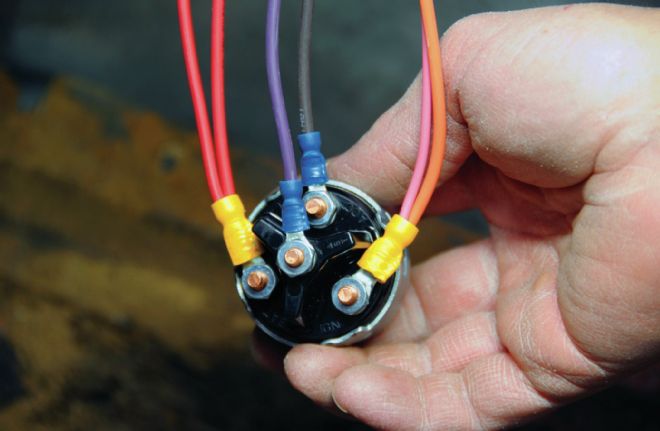
2. The new ignition switch fit directly into the stock location and was simple to install, thanks to the connections listed on each wire combined with clear illustrations in the installation guide.
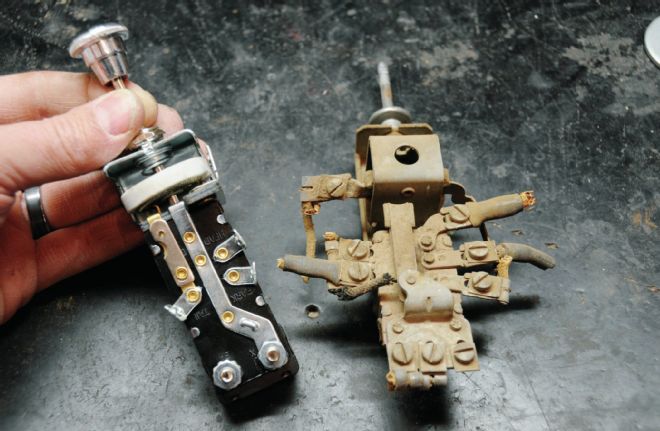
3. A look at the original headlight switch and the new unit. The two designs were very similar in their connections, but it is best to update for the higher pull of modern electrical components than the 64-year-old original 6V version.
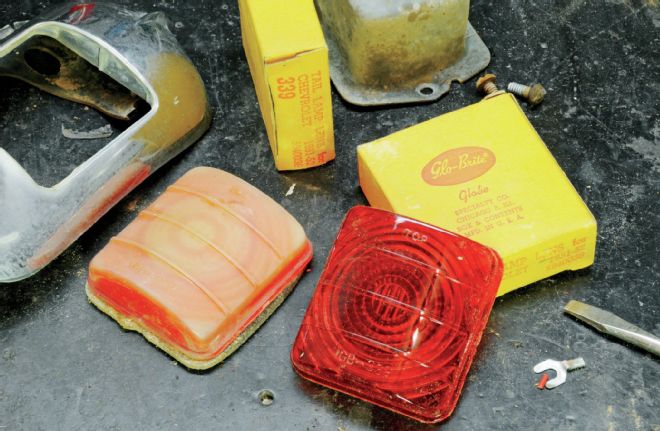
4. We were geeked to have found a set of N.O.S. replacement taillamp lenses at a swap meet for $25. The license plate lamp assembly was updated with a common replacement assembly found in the electrical help aisle of the local big box auto store.
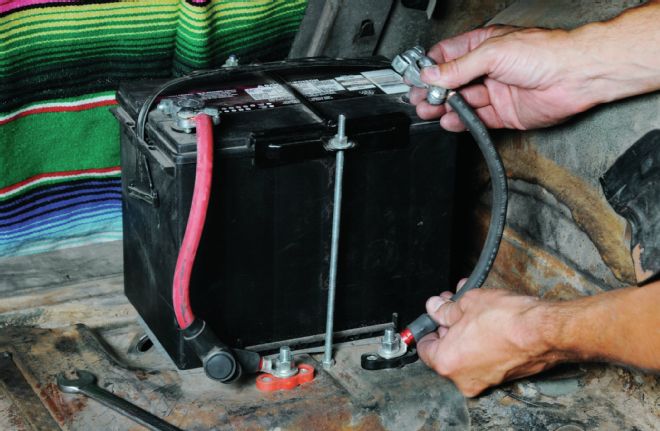
5. To clean up the engine compartment, we mounted the battery in the trunk right behind the rear seat back. We picked up welding cable and used threaded stock to build a battery hold down. Secure, effective, and out of sight!
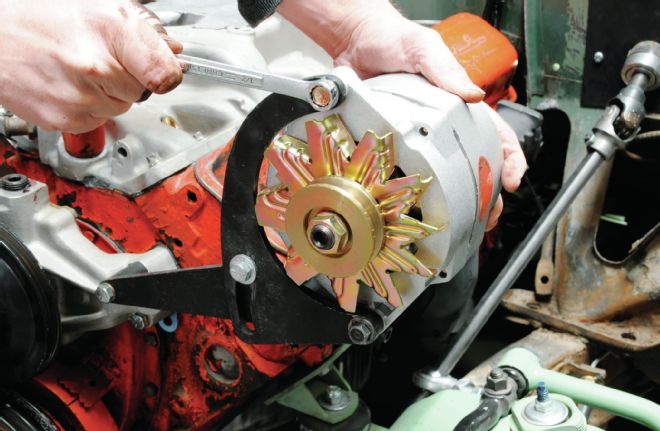
6. To keep the electrical juices flowing a Powermaster alternator was called into action along with a set of swap meet brackets. We went with a 100-amp, one-wire model since we had very few power draws in the '51. One hundred amps is overkill for our headlights, single fan, and electronic distributor, but we figured we would be prepared for a radio and maybe even a blower motor for heat someday.
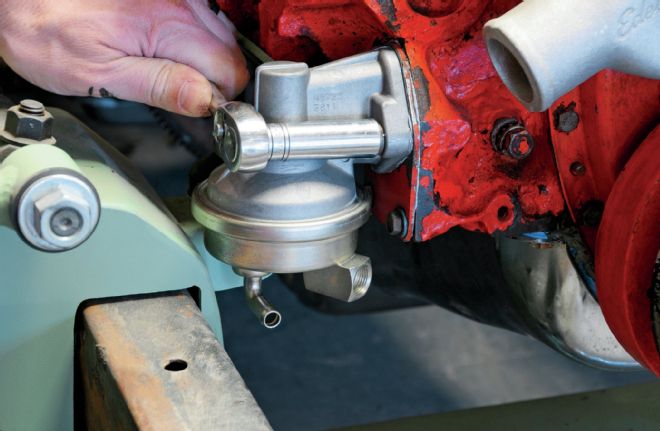
7. It was tight, but the mechanical fuel pump slid into place just barely missing the bolt-in Chassis Engineering kit. Don't forget to put a short bolt in the front of the block to prevent an oil leak.
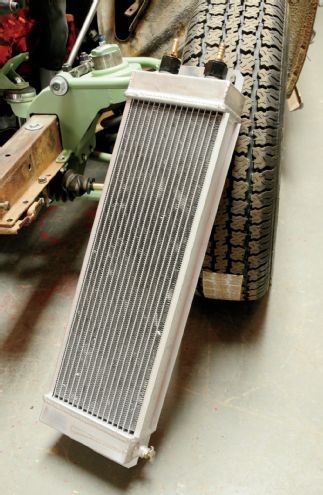
8-9. Since we took a chance and had the original radiator re-cored, we needed a transmission cooler. A friend had this intercooler from a small turbo system laying on the floor of his shop and judging by the size, we felt it would hold plenty of fluid and do a good job keeping the trans cool. We modified the AN plugs that were supplied with hose nipples and mounted it on the bottom of the passenger floorpan.
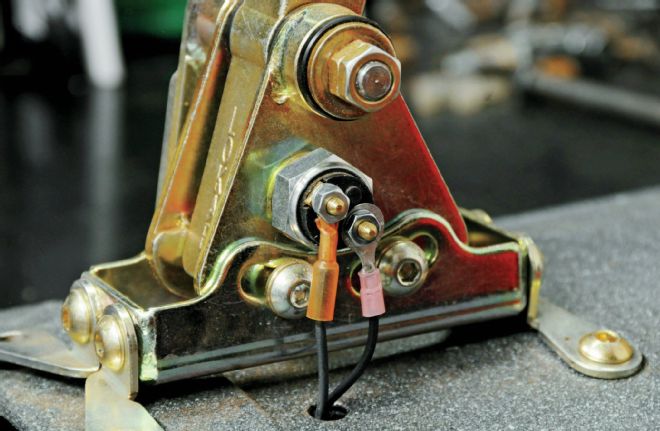
10. To shift our used Turbo 350 transmission a Lokar shifter was called into action. We went with their floor-mount shifter designed for a bench seat (with an eight ball, of course). Lokar supplies three different intermediate arms to select for your application. Once a suitable location was met that cleared the bench seat and the dash while in Park, the mounting holes and lever location were marked and drilled. We really like the built-in Park/Neutral switch of the Lokar shifters. An adjustment plug is supplied that makes setting up the switch a simple task.
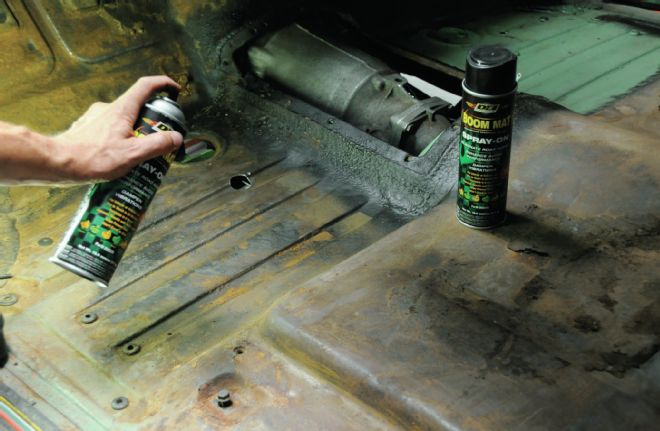
11. We thought we would try something different on the floor and coated it with DEI's spray-on Boom Mat. The material will cut down road noise and heat plus we can finish it off with paint to match the interior rather than carpet. After it dried we painted the floor with spatter paint for GM trunks.
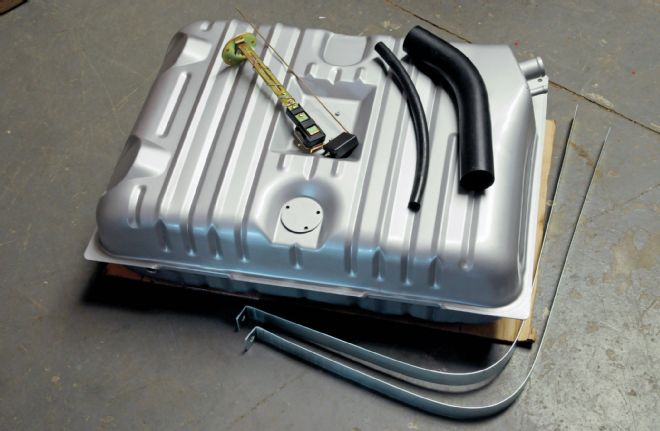
12. We inspected our original tank and considered a cleaning and reseal from the inside, but after reviewing the offerings from Tanks Inc. we felt a new tank and sending unit would be a wise investment. The tank was supplied with new hangers, filler hoses, and sending unit.
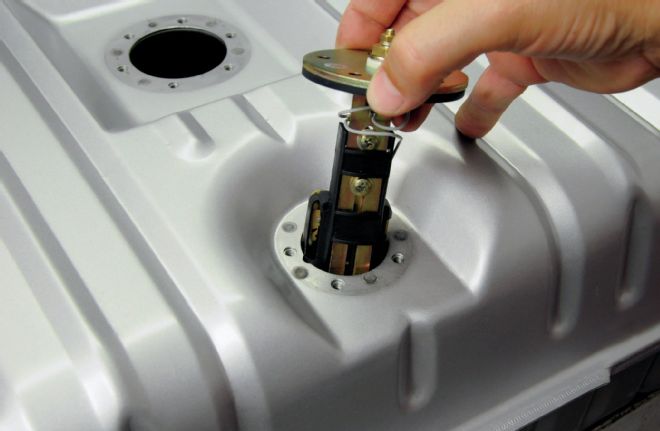
13. The sending unit of the new tank drops right in place and is secured with screws rather than a slip ring and O-ring. We also like the idea that if an EFI upgrade were to ever materialize, Tanks offers different sending units for in-tank pumps.
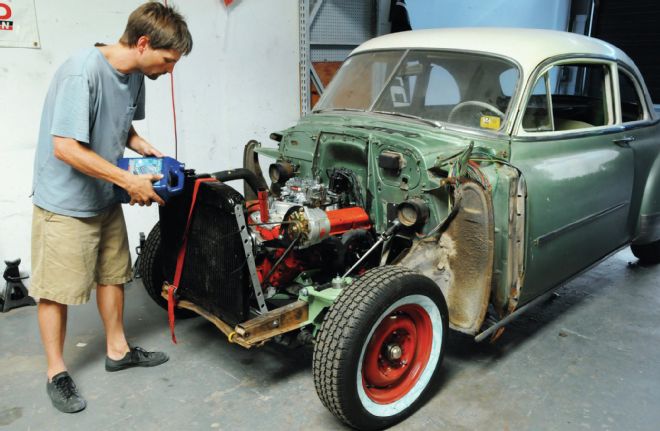
14. We connected everything we could think of and strapped our re-cored radiator to the frame to prepare to fire up the engine for the first time.
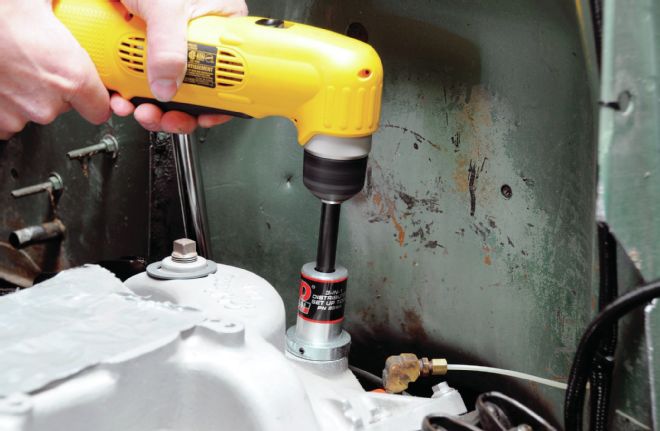
15. Before cranking the system, we figured it would be beneficial to pre-lube the engine. It had been sitting for a couple years in our shop, not to mention however long prior to that. We turned the pump for a bit then cranked the engine over a quarter to half turn and repeated the process until the crank rotated 720 degrees. This ensures oil gets to the top of the pushrods and pre-lubes the entire valvetrain.
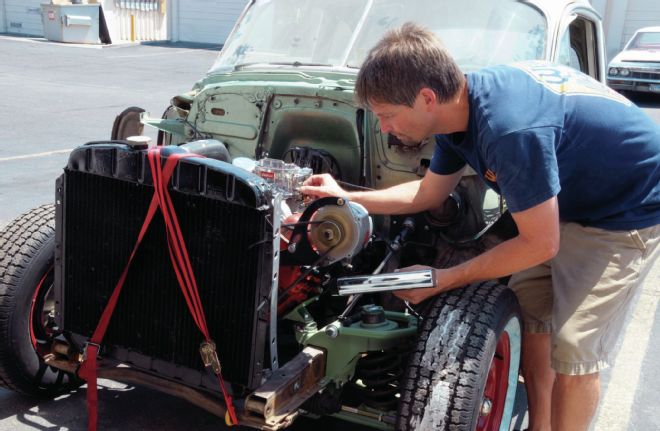
16. We cranked the engine over a few times with the ignition disconnected, to make sure there were no obvious engine or connection issues. All was good and the used small-block came to life! A quick look at the timing necessitated a little adjustment but then the engine settled down to a smooth idle. No coolant or oil on the ground and no engine noises—a success!
17. We're running and ready to drive, which leaves the frontend sheetmetal and wiring along with a handful of other items to wrap up our project and start having some cruising fun!