While you were under the dash did you notice a common theme? Rats' nests and hack jobs are usually the common theme of any vehicle over 30 years old. Try tracking a down a wire from one end to the other and you might as well try to hunt for a gopher on a golf course. Then cross your fingers before you move said wires because these crack from age. We all know what happens when the power and ground touch each other – sparks!
Let's talk about rewiring your truck. I start by looking at what I should keep and or replace with something new. I don't recommend ripping out all the wire because some things require attention, like taillights, front running lights, dash, wipers, radio, and wire routing. Instead, take a look at the individual systems and carefully remove the connectors to them. Things like the front running lights may require you to remove the wiring, but keep a pigtail of 4-6 inches from the original socket. So before tossing everything away, keep it around because you might realize that you need it.
What to Look For in a Wiring Kit?
Well, since my truck has the basics plus a lot of extra goodies, I needed a fuse panel to handle the load. I decided that a Ron Francis Express wiring kit would benefit the overall wiring of the truck, rather than trying to piece together a kit from parts-store wire. I also wanted to find a kit that would have adequate room for things like power windows, high-output radio, amps, touch-start, cooling fans, electronic fuel injection, electric fuel pump, A/C, heater, etc. A simple fuse panel would not work in my situation.
Mount All of the Accessories Including the Fuse Panel
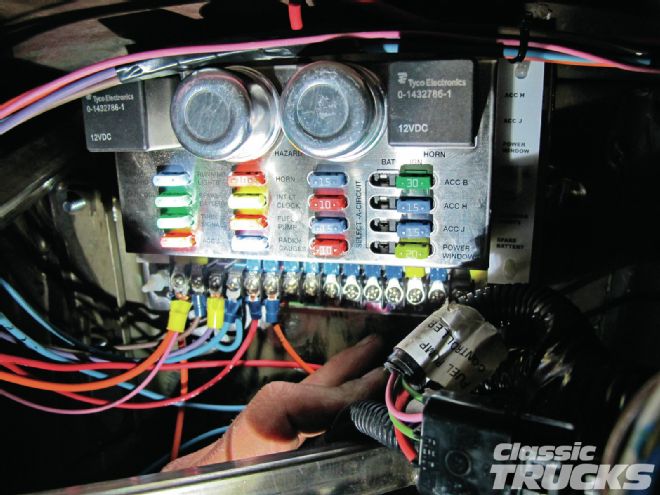
Where to start, where to start? After removing all the stock wire from the truck, start by installing all the parts you need to run wire to. This could be as simple as mounting a horn or removing the fuel tank to gain access to the fuel pump and sender. The fuse panel location also takes consideration. Make sure you can run the wires and connectors so that you have access to the fuses and screw connectors. I ran the fuse panel on the driver-side upper left of the clutch pedal, so that I could easily check fuses and wire it.
Firewall Holes? Wire Routing? Help!
One of my biggest fears when running wire is where to put the wire. Do I hide everything, or do I make it easy to get to? Is it a show truck or are you going to drive it like a mad man? I ask because some trucks hide everything to a point where it's hard to see and access the wiring.
Start with a game plan on where the wires will go and the task of running wire becomes less complicated. Since I smoothed the firewall on my truck, it was easy to pick a spot where the wire comes into the cab. If you have a firewall-mounted brake pedal then a good spot to come through with wire is below and right of the booster or brake master cylinder.
If you want to hide the wiring then you have to get a little more creative, but it's not that hard to do if you look carefully. Take a look inside your driver-side inner fender and notice the tons of room to run headlights, turn signals, and running light wiring. Engine wiring can be hidden under the intake plenum of an Edelbrock Air-Gap intake and come in the cab near the trans tunnel. Regardless of how you want to run the wire, you need to run the wire somewhere right? Let's get started.
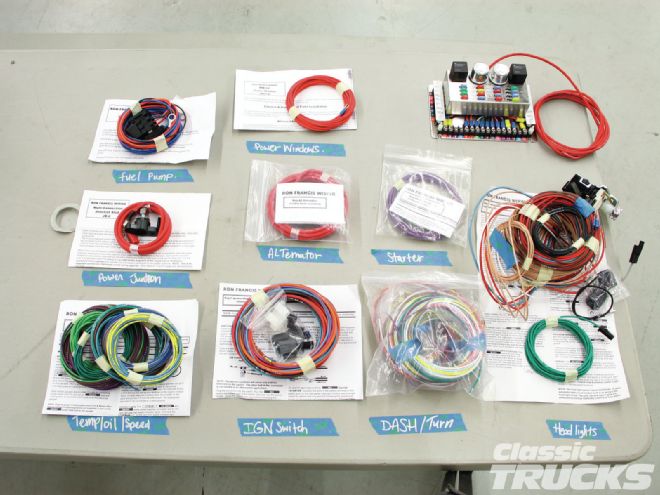 01. Here's a quick look at the Ron Francis Express kit and an easy way to lay things out. When you receive the kit, it has the main fuse panel and several well-labeled bags of wiring in the box. Upon opening a bag, I found detailed instructions inside to help with wiring. The needed connecters for headlights, headlight switch, etc., are also included with the appropriate wiring bag along with other connectors. Each individual wire is labeled with its corresponding part name which runs the length of the wire for ease of identification.
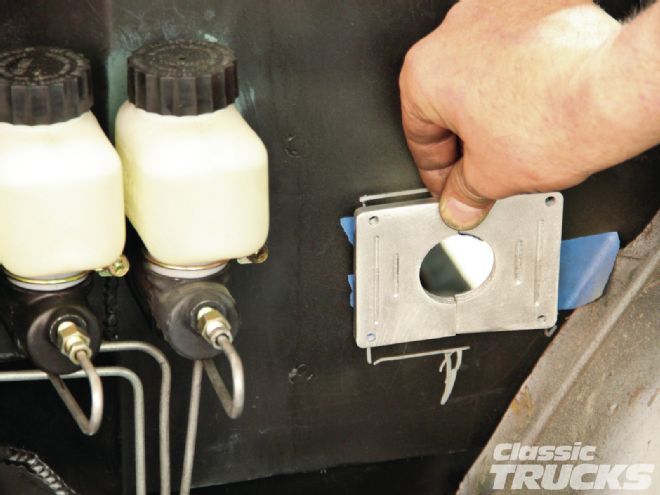 02. RJ Plent from Deuces Wild Hotrods made this cool aluminum panel to cover the large hole needed for the FAST EZ-EFI fuel-injection connector. It really helped clean up the look of the wiring coming in the cab.
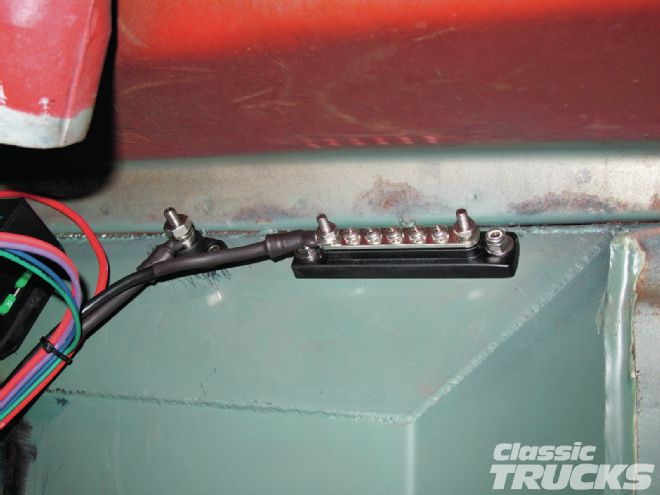 03. Right below the wiper motor I mounted a small ground panel and a positive power terminal. Using the ground panel makes it easy to supply a clean ground to the gauges.
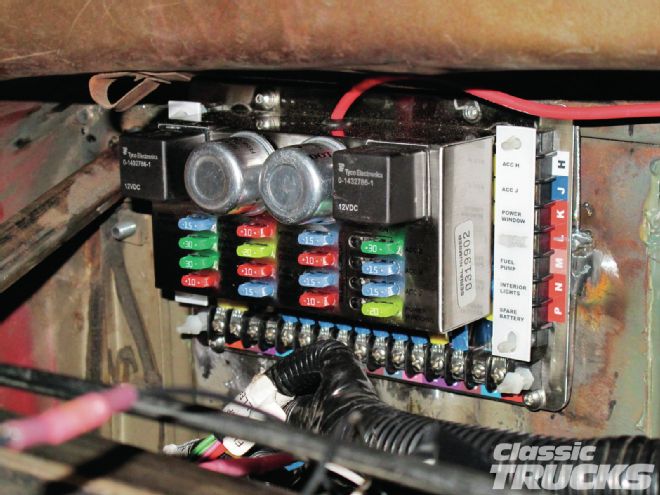 04. Fuse panel location was mounted high left of the steering column. I made sure that the wiring coming into the firewall would have room to snake into the cab and not get in the way of the fuse panel wiring.
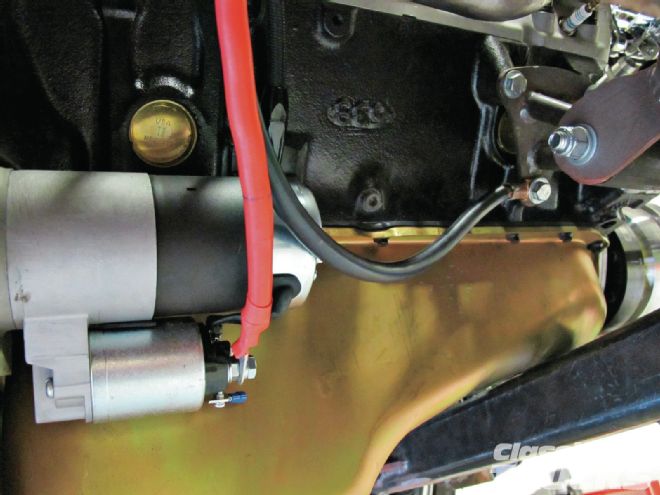
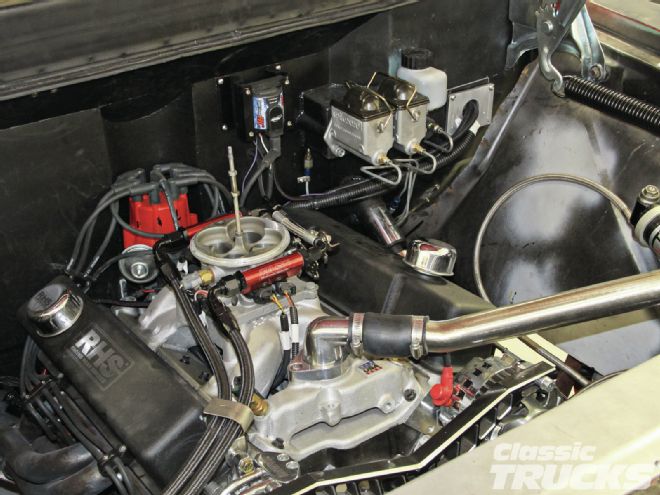 05. RJ and I started wiring the truck by running the engine wire harness inside the cab. Don't forget the to run the alternator, coolant sensors, oil pressure, fans, horn, coil, distributor, and A/C compressor wires at the same time. Otherwise you end up cutting zip ties and adding the forgotten wires. It will happen so be prepared to undo or add some wiring as needed.
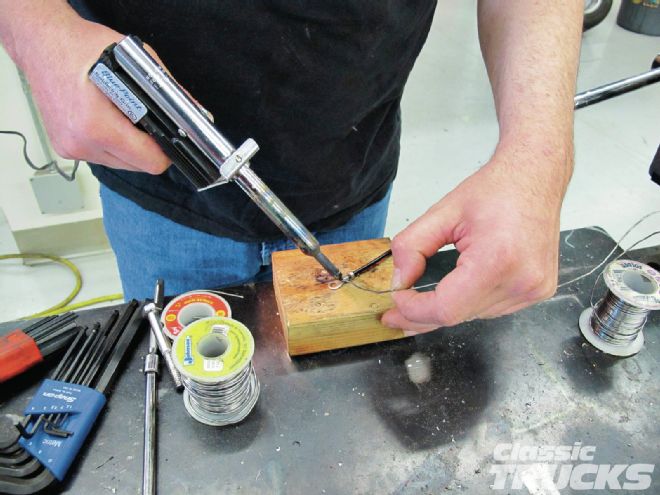 06. RJ has crimped this wire and now is soldering the connection to make the connector part of the wire. This also helps to resist oxidation in between the connection and wire. Even though it is a ground wire we made sure to heat shrink the connection for uniformity and added protection.
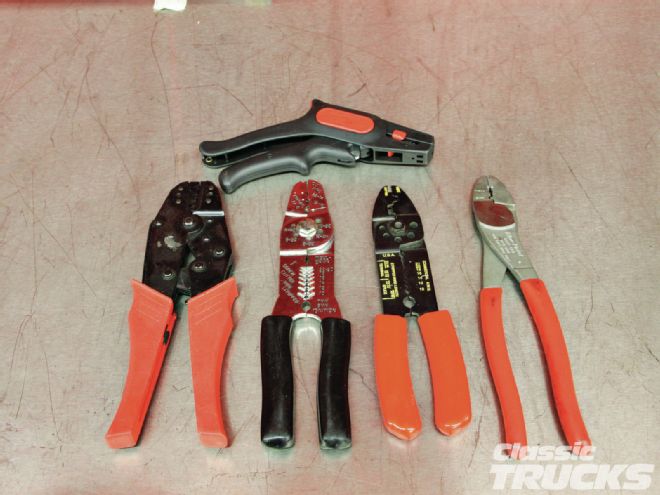 07. Quality wire crimpers, strippers, and cutters are a must when wiring a truck. If you have crappy connections everywhere, then it is harder to trace down possible wire issues.
 08. Grounds are more important! Did I get your attention? Most problems with gauges come from poor grounds. A good ground starts with the battery and the ground wire location. Make sure the ground wire is clean and goes to the engine block with a heavy-gauge wire directly from the battery. Then branch out from the engine block to the frame and to the body.
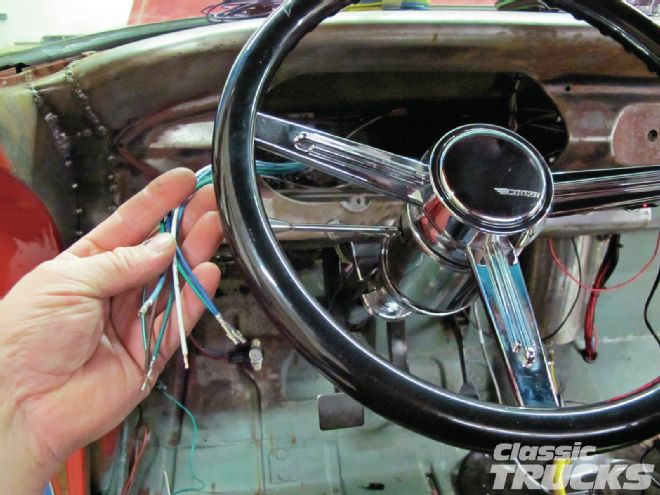 09. I removed the instrument cluster and ran all wire for the gauges through the hole. This way when wiring the instrument cluster I could have all the wires in a general location.
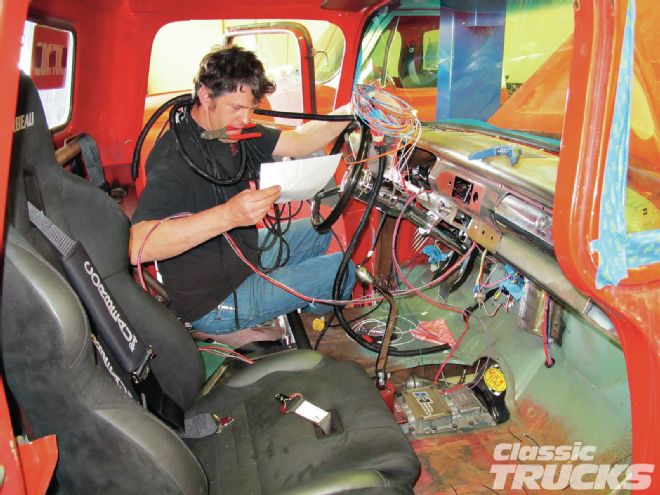
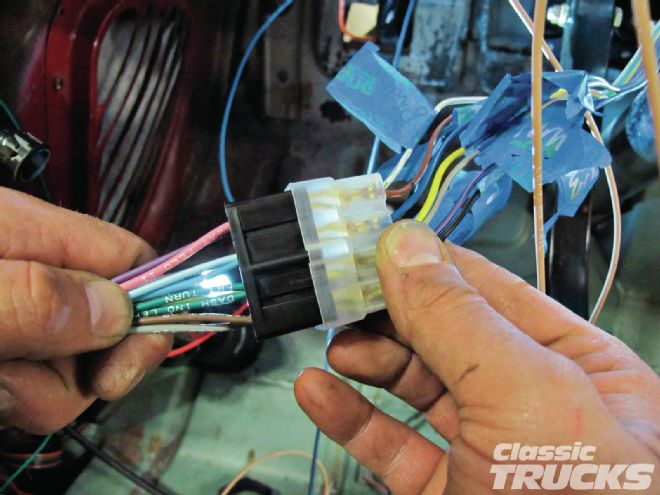 10. Here is where it can be confusing, but don't get flustered. It is simple if you do it one wire at a time. I printed the CPP column wire diagram and used blue tape to identify the wires. Then I matched the wire to the corresponding wire on the Ron Francis harness.
 11. A good starting point is at the fuse panel, then run the wires out to the accessory.
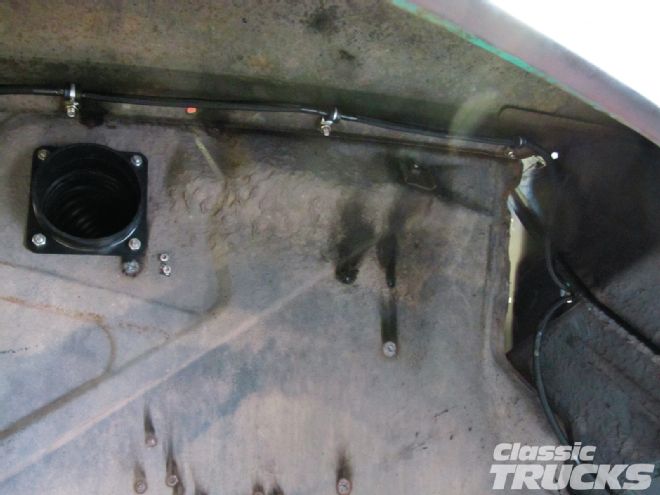 12. This photo shows the front headlight, running lights, horn, and turn signal wires running out to the front. To the right, the taillights, running lights, brake lights, license plate light, and fuel sender gauge wire all run to the rear. Ron Francis also has protective wrap to go around the wiring. The protective wrap comes in different sizes and is split down the middle for easy wire covering.
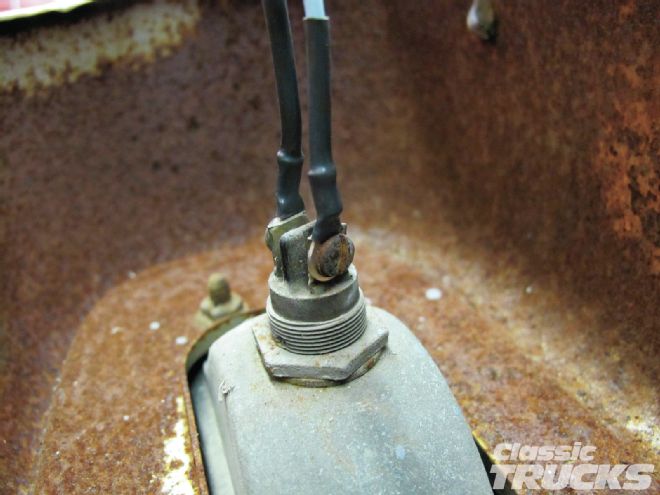 13. Front turn signal wires needed to be redone because the old wiring was cracked. I used an ohm tester to verify I had 0 ohms between the connector and socket ball. If you have high resistance between the connector and turn signal socket, then the light will be dim or not work at all. Clean any rust off the connector and retest as necessary.
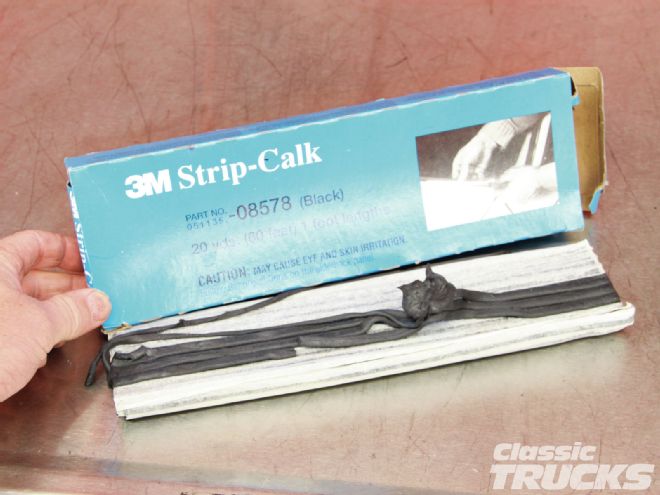 14 This stuff works really well to seal in between wires on the firewall This also helps keep exhaust fumes out of the cab because of the seal it forms around the wiring through the firewall
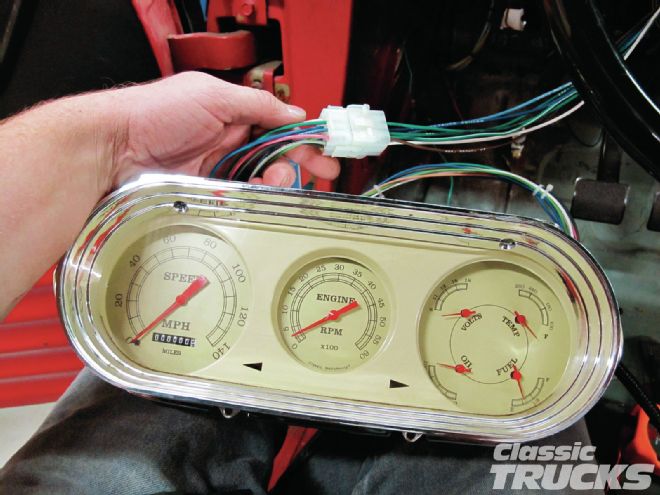 15. One of the last things I wired in was my Classic Instruments gauge. Since RJ and I planned out where the wires were going it was really easy to adapt the new Ron Francis harness to the instrument cluster. In fact, RJ and I were able to mount the fuse panel and the other parts such as the ididit touch-start, wipers, ground panel, power stud, and wire the truck in about four days. RJ and I were taking our time wiring the truck, plus the truck has some extras like power windows, electric fans, fuel pump, etc., that took a little bit more time to wire. With the wire job completed, I am happy with how the Ron Francis Express harness turned out and have not run into any issues yet.