
Slide behind the wheel of any contemporary car and more than likely you’ll be faced with an instrument panel full of warning lights to indicate what catastrophe has already happened, or a great big gas gauge and an assortment of dials that seem to always be in the middle of the scale no matter what. Most modern cars supply the driver with more information about the climate control system and stereo than the engine.

To keep tabs on the operation of our blown Chrysler-powered Gasser, we wanted to have all the pertinent read-outs readily available. To do that we chose gauges from Auto Meter. One of the best-known names in the industry, Auto Meter has been in business for over 50 years, producing quality instruments that are second to none. They offer an unmatched variety of designs and styles, and if you’re looking for something that is one of a kind, Auto Meter’s Custom Shop can provide that as well.
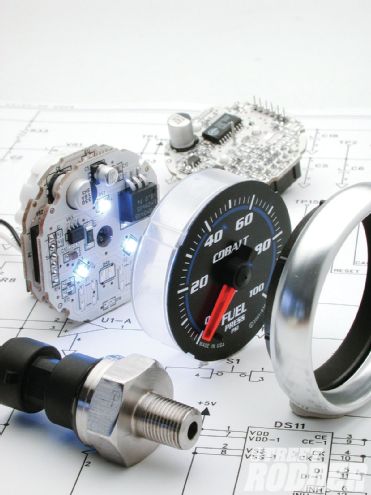 Auto Meter’s full sweep electric gauges incorporate the latest high-tech internals that provide full sweep indicators and unmatched accuracy. Note the LEDs used for illumination.
For the race car vibe we were after we stopped looking at Auto Meter’s options online when we found the Ultra-Lite II line of gauges. They have a no-nonsense look with a silver face, black numbers, and red pointers—at night the colors reverse, and as a result of “through the dial” LED lighting, the faces turn black with white numbers with glowing red pointers.
Our Plymouth’s original dashboard was modified by covering all the original openings with sheetmetal. The new flat panel was then punched to place the speedometer, temperature, and oil pressure gauges positioned directly in front of the driver. The other instruments: vacuum/boost, volts, fuel level, fuel pressure, and an air/fuel ratio mounted to the right. Of course the tachometer is mounted in the classic spot up top.
 Mechanical gauges, like this 0- to 100-psi Auto Meter oil pressure gauge, have full sweep face, which makes them easy to read.
Types of Gauges
While instruments are often chosen on the basis of their appearance, there are a number of differences in the way they operate as well.
Mechanical Gauges
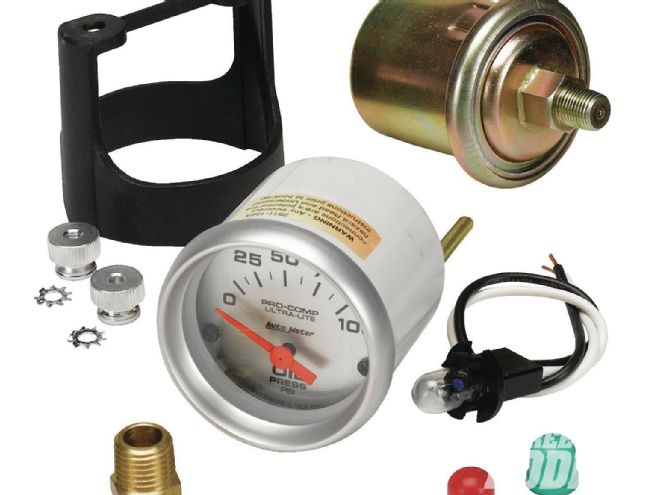 This is a 0- to 100-psi short sweep electric oil pressure gauge. It’s critical that the correct senders are used with electric instruments.
The operation of mechanical gauges hasn’t changed much over the years. Inside there is what’s called a bourdon tube—patented in France in 1849 by Eugene Bourdon, it’s a flattened tube shaped like a C. Pressure, which may be oil from the engine, ether in a bulb, and tubing in the case of a temperature gauge, causes the tube to straighten slightly (vacuum gauges work in a similar way). The tip of the tube is hooked to a link and gears that are calibrated to move the needle to provide a reading.
Auto Meter’s mechanical gauges use a bronze bourdon tube for precisely calibrated 270-degree sweep movements. These mechanical gauges require no electrical power for operation, making them an ideal choice for vehicles with no- or low-powered electrical systems.
Liquid Filled
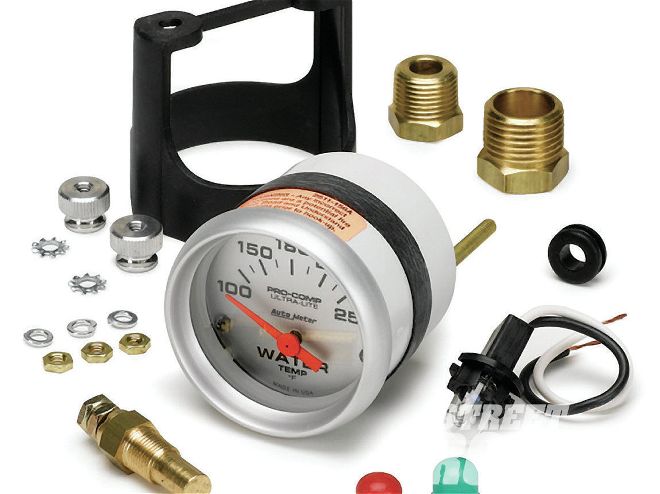 Here is an Auto Meter short sweep temperature gauge. Note the sender (arrow) has a single connection.
Designed for durability, Auto Meter’s liquid filled mechanical gauges use 270-degree sweep Pro-Comp mechanical gauge movements filled with a liquid silicone compound for extreme vibration dampening and smooth pointer movement. These gauges are proven to give steady and accurate readings in the harshest of competition environments, including NHRA Top Fuel Funny Car, Baja 1000, Off-Shore Marine, and on the Bonneville Salt Flats.
Short Sweep Electric
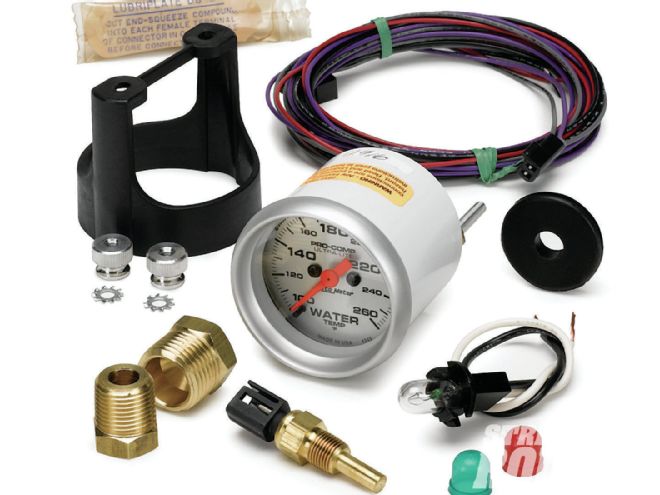 Full sweep electric instruments, such as this temperature gauge, use a microprocessor to control the stepper motors that mount the indicator needle. Senders for these gauges can be identified by their two electrical leads.
Auto Meter’s Kris Carlson describes these gauges as calibrated ohmmeters. There are two components to an electric instrument: the gauge and the sender. Housed in the gauge is an indicator needle that is attached to an armature that turns inside coils of wire. When current is supplied to the instrument it flows through a series of windings and then to what’s called a sender (it may be pressure, temperature, or fuel level) that is grounded. As the current flows through the windings it creates a magnetic field that causes the armature to turn (which moves the needle). How far the needle moves is dependent on current flow through the coils, which is controlled by the sender.
Electric gauges have a number of advantages. The sending units keep hazardous fluids out of the passenger compartment. As electric gauges and senders are calibrated to work together they must be matched.
Full Sweep Electric
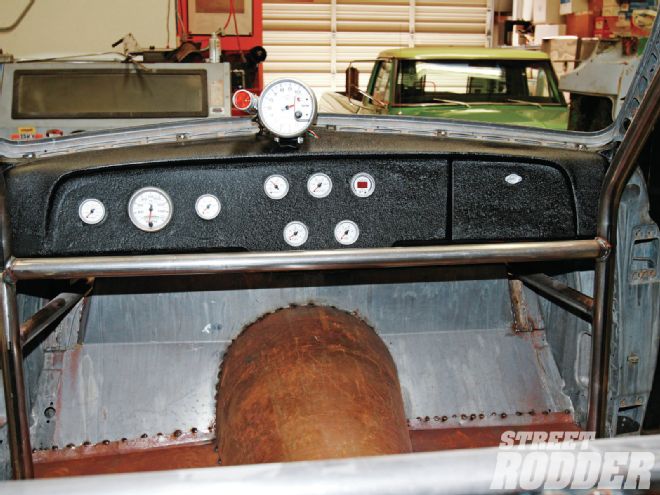 To monitor the goings on, RamRodder received a dashboard full of Auto Meter Ultra-Lite II gauges. The gauges deemed critical, speed, oil pressure, and temperature are in front of the driver. The Playback tachometer can’t be missed.
The obvious advantage to these gauges is the easy-to-read 270-degree movement, but there is a considerable amount of technology hidden inside. Auto Meter’s full sweep electric gauges use stepper motor drives controlled by a micro-processor and very precise senders.
A stepper motor is a device with a shaft that moves a precise number of degrees based on electrical input. When used in an instrument the indicator needle is attached to the shaft, then based on information from the sender, the micro-processor updates input to the motor and the needle deflects accordingly.
Digital
These LED illuminated gauges use microprocessors to control the displays. Very precise with a high-tech look, these gauges are for those who want exact numeric readings.
Speedometers
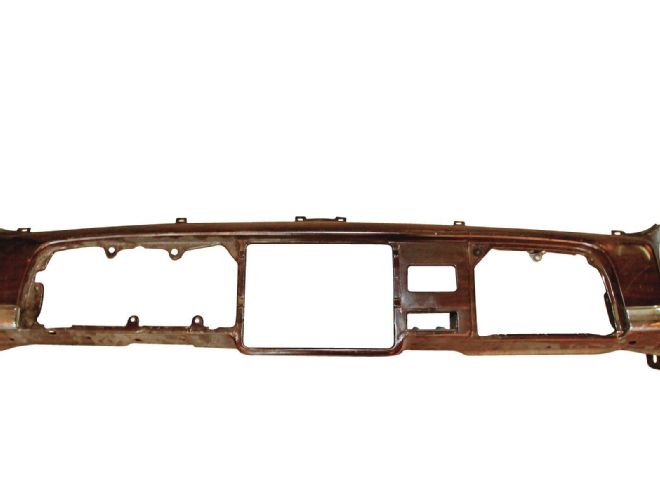 Our instrument panel started as the stripped stocker from our ’50 Plymouth. Obviously there were massive holes to fill.
There are three types of speedometers: cable drive, electronic, and the latest GPS driven.
A big disadvantage to cable drives is calibrating the speedometer can be difficult, not to mention the fact that most contemporary transmissions don’t have the drive to operate them. Electronic speedometers are easy to dial in and can be adapted to early transmission. The most common complaint is that the odometers usually have digital readouts, which some feel are out of place in a traditional car.
Auto Meter now offers their Universal GPS Speedometer Interface Module (PN 5289). This unit allows nearly any electric speedometer to use free GPS signals to drive the speedo. For Auto Meter speedometers, installation is a plug-and-play. Calibration, with non–Auto Meter speedometers, is simple and doesn’t require driving.
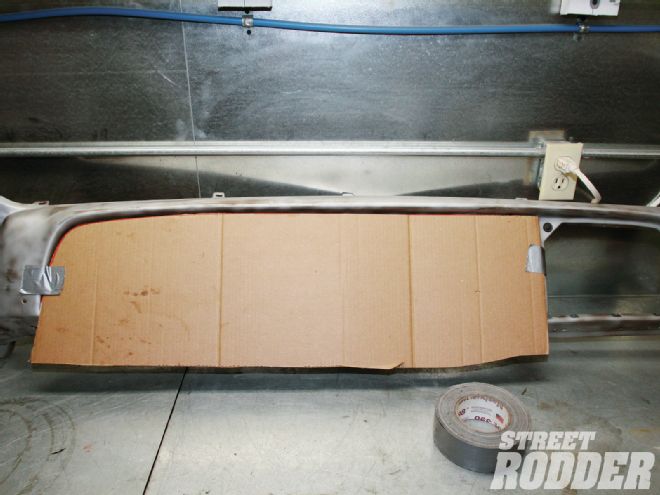 We cut a cardboard template to fit the upper portion of the dash. It was taped in place then the contour of the lower edge was traced on the back side.
Gauge Installation Tips
Installing mechanical gauges is simple enough. The important factors are using the proper fittings and tubing and routing lines safely to prevent damage of any kinks. When using rigid tubing a vibration loop may prevent cracking.
When it comes to electrical instruments the most common problems are proper grounding and poor connections. Poor connections will add to the resistance in the circuit, which may result in erroneous gauge readings. Grounding-type sensors should never be wrapped in Teflon tape for the same reason (paste that won’t interfere with grounding should be used).
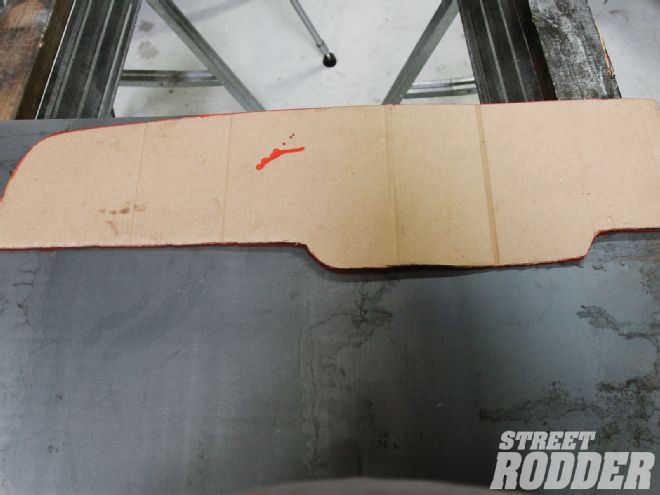 The shape of the template was traced onto 16-gauge sheetmetal.
Another sure way to ensure an electric gauge won’t function correctly is to use the wrong sender. The gauge and sender must be compatible to provide accurate readings.