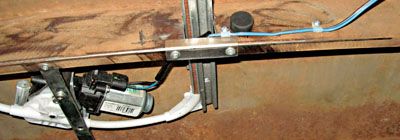
 Here's where we left off last month with the Electric-Life EL1000 power window kit. All installed and ready to go, now the glass, switches, and wiring can be handled.
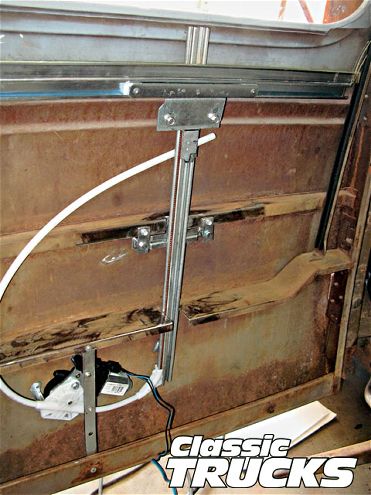
Though the task of not only fitting, but functionally utilizing a power window system in an antiquated truck has been successfully completed, there's still the matter of providing a means of activation for said components. Furthermore, there are two pieces of fresh-cut laminated glass just waiting to replace the old cracked, de-laminating windows used to initially get the Electric-Life EL1000 power window kit up and running. While some of you may have gotten a bit perturbed that this wasn't covered last month, seeing as there's more than just simply installing glass and hooking up a couple switches, it made more sense to devote an entire article rather than condense to what would have likely been nothing more than a couple photos. Hopefully this final chapter will appease the agitated!
Now on to the subject at hand: supplying power to the Electric-Life power window motors via AutoLoc crank switches, and installing new door glass and channel felt from Chevs of the 40's. Unlike later-model applications where inner door space isn't really restrictive, the glass and switches are dependent upon each other's placement in order for each to operate and perform as intended, especially in a '39 Chevy. In short, the windows and switch housings need to be installed so that there's no interference during operation, but because you're dealing within very tight confines, it's easier said than done. Fortunately, with the adjustability of the EL1000 kit and the compact design of the AutoLoc switches, there was just enough room to avoid any issues--but it was tight! (Additionally, Electric-Life manufactures its own line of power window switches, but not wanting to weld up any holes in the Chevy's stamped metal door panels--not to mention deviate that much from the original look--the decision was made to go the crank-style route instead.)
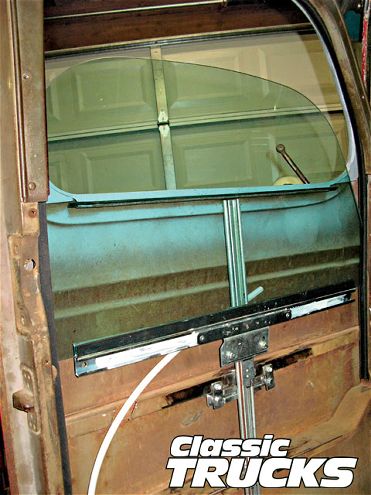
On top of having to ensure sufficient room for the new glass to move up and down free of any obstruction, there's also the chore of making certain it's securely installed in the sash channel. While some may suggest the use of a silicone-type sealer, whenever possible, it's best to use the proper setting or glazier's tape; however, if you've never installed new glass as such, seriously consider having an auto-glass shop perform the job. Since you're not able to re-use the stock sashes anyway, avoid the headaches and potential expense of having to replace glass by having this done professionally (preferably a shop that caters to older cars). In the event you decide to do it yourself with a sealer, at the very least make sure you use a marine-grade, flexible type, not the average RTV you find at all the auto parts stores.
With the glass-to-sash chore handled, the controls configured, and new felt/sweeper channels in place, there was just one minor detail left: getting power to the switches. Obviously, there was no reason for GM to provide additional access through the forward door jamb back in the "mechanical age", so in order to activate the electric window motors, you must do so yourself. This can be as simple as drilling a couple holes and installing rubber grommets; or it can get a bit more involved if you want something fancier--like Electric-Life's billet wire loom. Regardless your take on the "billet" aspect, when you see how these work and how easy they install, you'll quickly see past that silly hang-up. Word of caution, though: you'll be making rather large holes in the door and A-pillar--that must line up perfectly together--so take as much time as you need before poking that bit in the wrong place. But once it's done, you'll never have to worry about your wiring getting pinched in the jamb.
Hopefully that covers the gist of it. Combined with the previous installment, there's been quite a lot of bases to cover, but it looks like we were able to address all the major topics. Nevertheless, don't hesitate to contact AutoLoc, Chevs of the 40's, or Electric-Life--they all have great technical support if you have any questions or concerns.