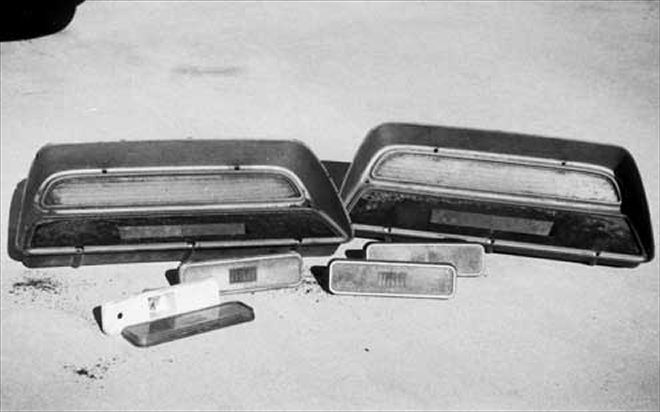
 Here's what we started with--a pair of '72 Road Runner taillights that were chipped, cracked, and otherwise neglected. But the lenses were intact, so the rest of the repair was just cosmetic. Only one of the marker lights was salvageable.
When I was a kid, my introduction to the automotive hobby was building model cars. Like most of us, as my interests in the real thing developed, model building took a back seat. A few years ago, I got interested in them again, broke out the old tools, and started building. Fifteen additional years worth of patience paid off, with results far better than I ever got as a child.
When we got these taillights from our Road Kill Road Runner, they looked pretty rough, but I decided to see if they could be returned to at least acceptable condition for a driver vehicle. We weren’t aiming for NOS or concours quality, but we didn’t want ratty-looking pieces of junk, either.
In this article, our goal is to show you some basic plastic-working techniques that you can employ to save a trim piece for which you otherwise spend a bunch of money to replace. Let’s face it—for the majority of us, a $200 set of swap-meet taillights just isn’t in the budget for our daily driver. You can buy brand-new marker lights for around $12 each, but if you save your existing pieces, that’s $50 you can spend elsewhere. How about that plastic gauge housing?
We were quite happy with our results, the only unsatisfactory mend being a large missing piece we spliced in (see accompanying photos), but we expected that particular repair to end up looking that way when we began this endeavor.
For good plastic repair, you’ll need to visit your local hobby shop. Avoid shopping mall toy stores and find the best hobby shop you can, because they’ll have the specialized tools and the glue you’ll need. The most critical element of repairing plastic pieces is the glue. Use a quality, quick-drying cement that comes in a bottle with a precision applicator. Also, ask the store personnel if the glue you’ve chosen is sandable. Most model airplane glues are not sandable with satisfactory results. This will allow you to fill seams and cracks in the plastic, and make the repair undetectable. Also, model airplane glue can craze and warp plastic, and the fumes can haze the clear and tinted lenses, permanently discoloring them.
A good guideline to quick-dry cements is whether it will stick your fingers together on contact. You can also get glue accelerators, which make the cement dry even quicker, but we recommend against that kind of unforgiving speed for these types of repairs. To get these super-cements off your skin, nail polish remover works best.
We used a Craftsman rotary toolkit for this project, which made the job much quicker. These tools are great for cutting, polishing, and a host of other automotive applications. An assortment of small files and emery cloth for final sanding of the repaired areas is necessary. A small “Snap Saw” was used to trim the large patch piece for final fitment. You’ll also need some sort of donor lens as a source for the small chips of filler plastic. We thought using the same type of plastic material for our patches was better than using styrene (model car plastic) for the repairs, and used a trashed yellow marker lens.
For paint, we found that Plasti-Kote Medium Gray was a perfect match to our Road Runner taillights, and a Testors silver paint pen (available at most quality hobby/craft retailers) worked perfectly for the trim line on the marker lights. Good hobby shops also carry plastic polishing kits designed to buff model car paint and remove scratches from model car windshields, but will work on instrument lenses and scratched exterior lenses as well.
Follow along as we show you how we saved a pair of taillights and a marker light that were otherwise junk, and see if a couple of these tips can’t find their way onto your Mopar project.