The '49-51 Ford shoebox derives its nickname from the somewhat slab-sided appearance that gives the car that iconic boxy look. These were the first new bodies from Ford after World War II and the rear fenders had melted into the quarter-panels, the front fenders had risen to meet the hood, and they too were now flush with the doors. There wasn't so much as a hint of a running board and grille openings were lower and wider than ever before. By 1949 standards it was quite a modern approach to the automobile and that style would endure for three years.
All this modern sleekness made a perfect palette for customizers, and not long after these cars arrived at the local Ford dealer hot rodders and customizers were modifying these smooth new automobiles. Terms like chop, channel, and section were applied to these new cars and suddenly a sleek car became downright slippery.
And so 64 years later we're still reshaping the shoebox. Eric Black provided the team at Honest Charley Garage with a rendering that employs all of the time-tested modifications but still has managed to create a look that is traditional, fresh, and restrained. In the last issue we channeled and now we're about to chop the car 2 inches up front and 3-1/2 in the back, and in a coming issue we'll pancake the hood-all very traditional modifications to produce a custom of perfect proportions.
One of the more interesting features on the 2013 AMSOIL/STREET RODDER Road Tour car is while it has the look of a radical custom none of the modifications required to achieve that profile would be considered radical. Chopping a shoebox Ford 2 inches is conservative by any measure and likewise channeling the car was also limited to a few inches. And yet, in combination the profile is somehow radically lowered without putting painful restrictions on the interior space, something Jerry Dixey will be pleased to hear. (Editor's note: It's Jerry's lot in life if he must suffer a bit for vanity! To look cool in a hot rod comes first, assuming a mullet-wearing chauffeur leftover from the '60s could ever look cool!) As a matter of fact, when the Wise Guy seats are installed the view out of the chopped windshield will be straightforward, with no need for hunching over for a clear view of the road.
Chopping any post-war car brings challenges that require excellent and advanced sheetmetal forming skills. The compound curves, the overall size of the panels, and the curved rear glass all present challenges to overcome. If chopping a Model T coupe is a one, lowering the lid on a shoebox would come in around an eight.
However, the principles remain the same: Think before you cut; measure, mark, and then measure again before you make that first cut. Taking a side, front, and rear photograph and doing a "paper chop" is a good way to anticipate problem areas. Finally, always try to make each cut precise and clean: you'll be glad you did later when it comes time to fit those panels back together.
One problem area on any top chop is the rear corner of the quarter window. In stock form the lower rear corner of the quarter glass incorporates a pleasing radius and it is important to maintain a radius and avoid the dreaded "pinched corner" seen on poorly executed chops. Another major decision involves dealing with the rain gutter or driprail. On most cars the driprail not only channels water away from the top of the door, it is also a feature line of the car. Removing the driprail can make a roof look all-together too round and will also allow water to freely enter the top of the doors. Once again if removing the driprail is part of your plan, try doing it on a photograph first and remember you will also have to seal the doors properly. Finally there is the vent window issue. While it is popular to remove the vent window bear in mind it can make the door glass look excessively long, and possibly more importantly it can make fitting roll-up glass a real problem.
As it turns out our Eric Black illustration included both a pleasant rear radius, driprail retention, and maintaining the vent wing window at the A-pillar. All three of these decisions by the artist keep the car flowing and traditional in appearance.
After spending hours measuring, marking, taping, and pondering Delton Scott and Richard Marter of Honest Charley's Garage plugged in the Sawzall and connected the cut-off wheels. The relatively mild 2-inch chop will minimize misalignment of the top and bottom but there is still plenty of work to do. Bear in mind that the more you remove the greater the disparity in panel alignment. The amount of work in a 2-inch chop is dramatically less than the work encountered for a 4- or 5-inch chop, something to remember when you are contemplating lowering any lid.
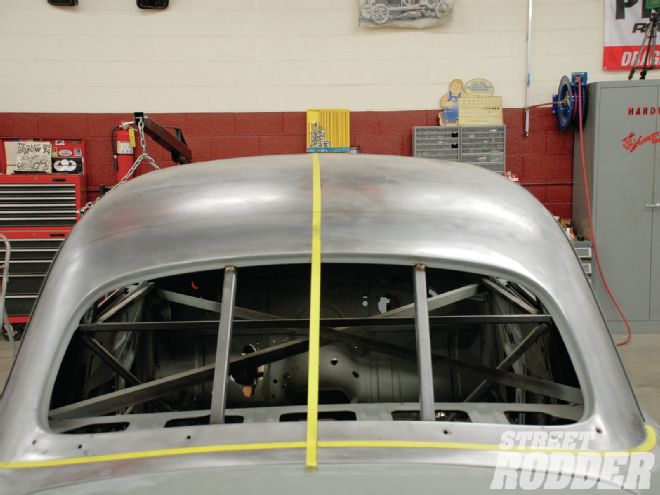
Prior to beginning the chop, the entire interior of the car must be crossbraced. That means door openings and across the B-pillars and even putting a couple of braces in the rear window opening to preserve that shape. When installing your bracing you must make it substantial enough to hold the body in shape but also allow enough room to crawl inside because there will be some inside work during the top chopping process.
Key measurements and marks include a perfect centerline on the roof with a corresponding center line on the cowl and the rear panel in front of the decklid. If any cuts are at all confusing, simple notes and arrows written on the top with a Sharpie will help avoid cutting "on the wrong side of the line". In short, take your time and think things through.
After removing all paint from the roof, any trace of a headliner, and all interior moldings, we were ready to begin the top chop. Cutting began at the A-pillars, and then we moved to the rear roof area, followed by the final cuts at the B-pillar. From here it is easier to illustrate the process through the accompanied photos and captions, so follow along as we drop the top on our 2013 AMSOIL/STREET RODDER Road Tour '51 Ford.
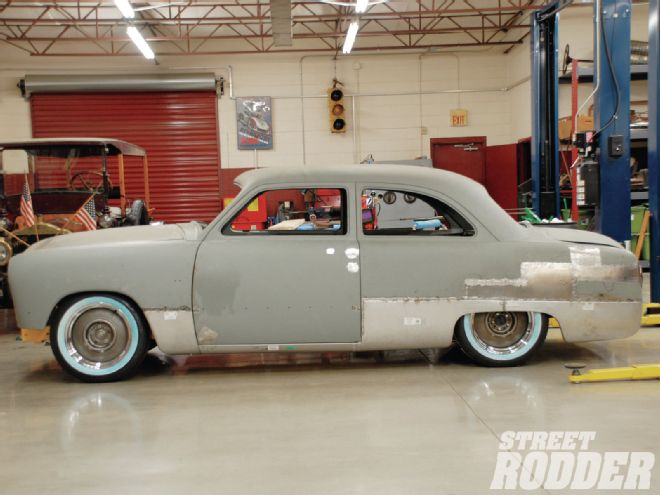
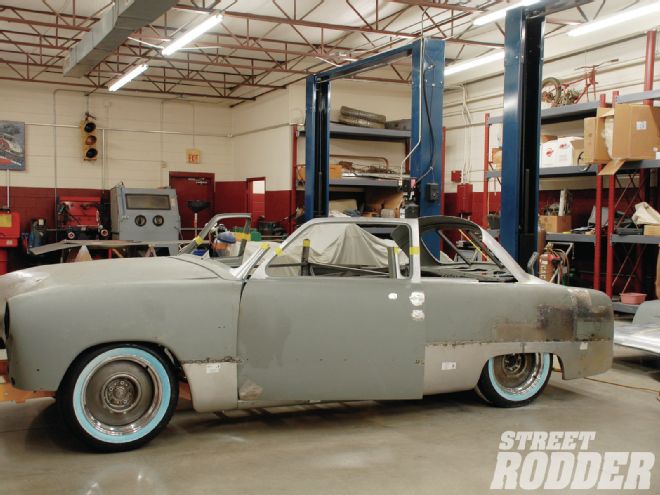
1. Our '51 Ford has been channeled on a slight angle to the rear, with no channeling at the firewall and 3 inches in the rear; this gives it that slight tail dragger look. Our top chop will be 2 inches at the A-pillar and 3-1/2 inches at the rear window to continue the angular stance.

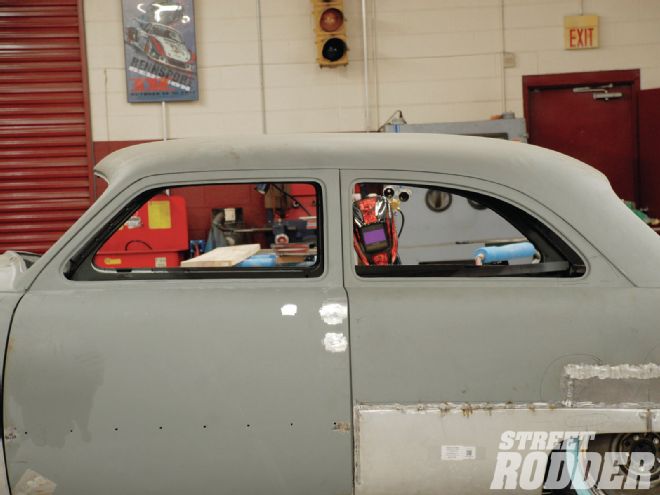
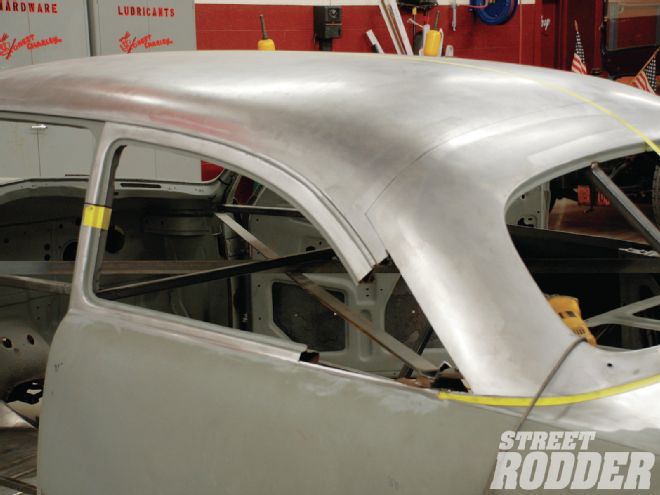
2. The side windows on a '51 Ford sedan are nearly the same size and it gives the car a certain old, stodgy sedan attitude. Dropping the top will shorten the rear window a bit and give it a more interesting shape.
3. With the roof down to bare metal it's time to start measuring, marking, and thinking about where to cut the top for the best results. Best results always involve minimal cutting.
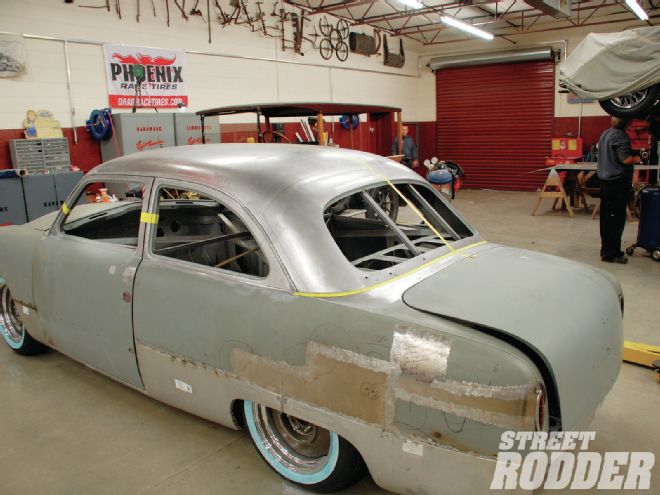
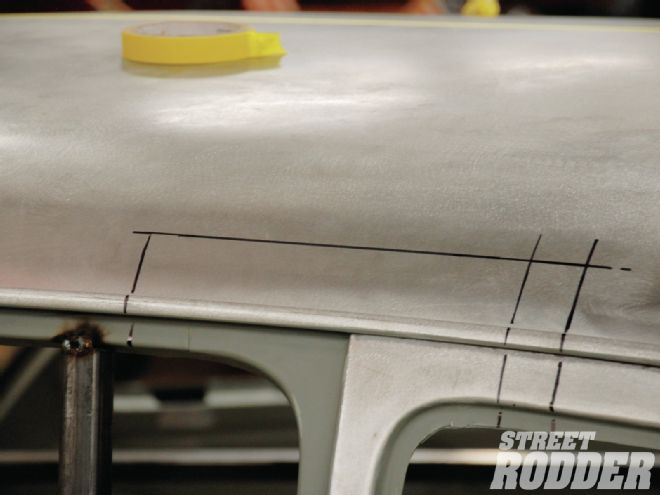
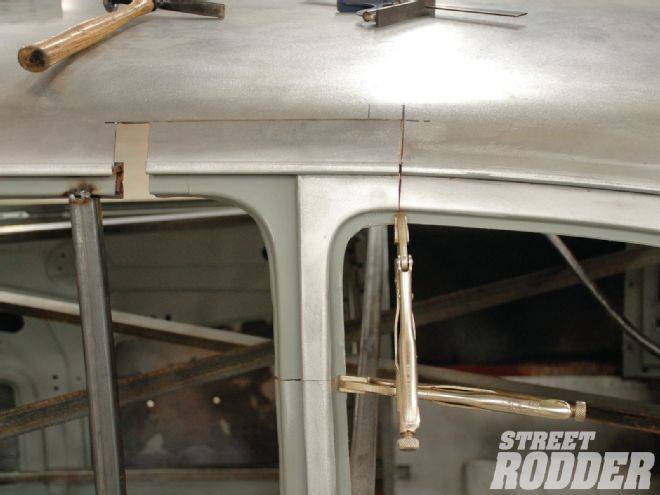
4. The team at Honest Charley Garage has laid out the centerline on the roof, the cut line on the panel in front of the decklid, and the cut lines on the A- and B-pillars.
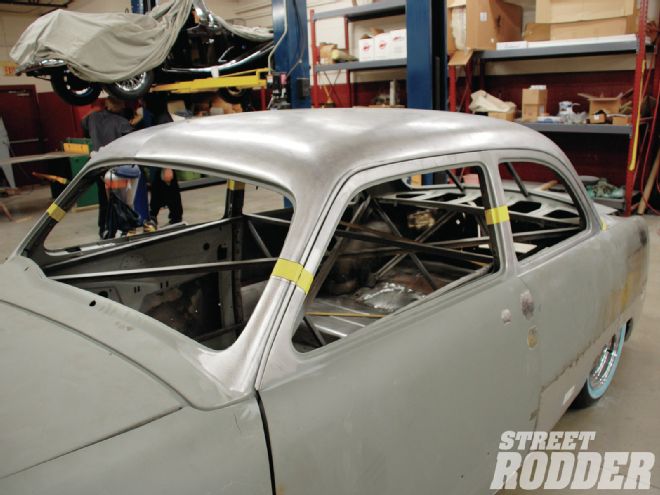
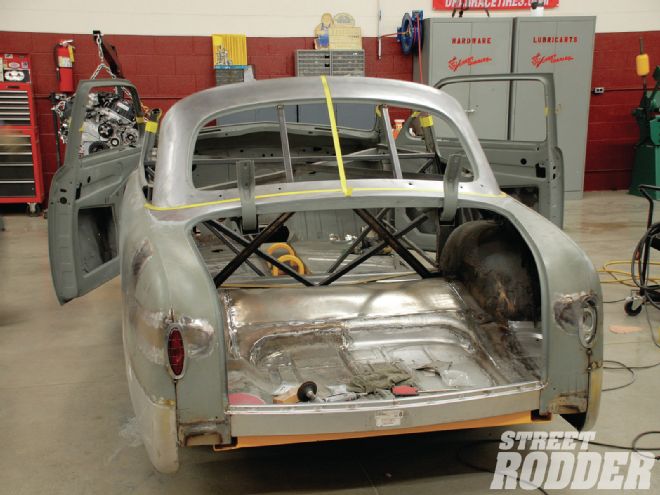
5. The centerline is marked on the roof and also on the panel in front of the decklid. The lower band of yellow tape is the cut line to free the rear window from the body. Note braces in the rear window.
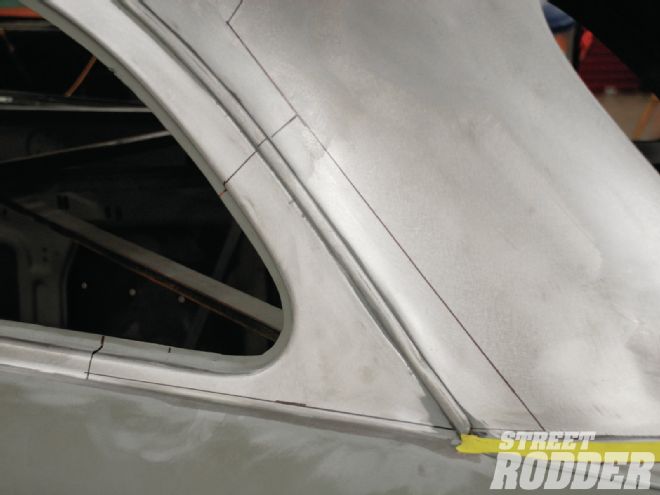
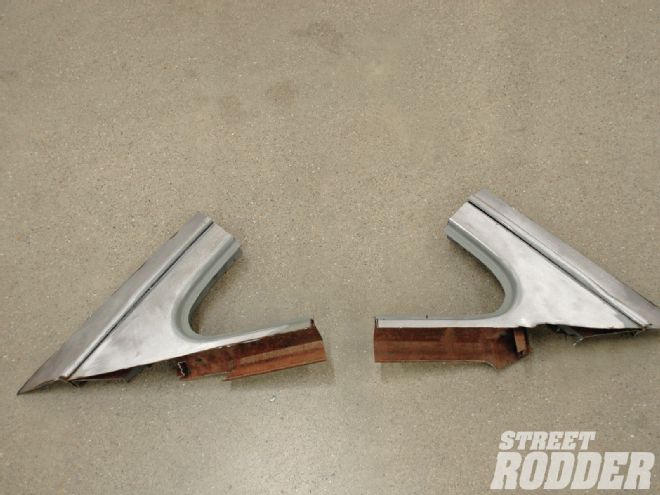
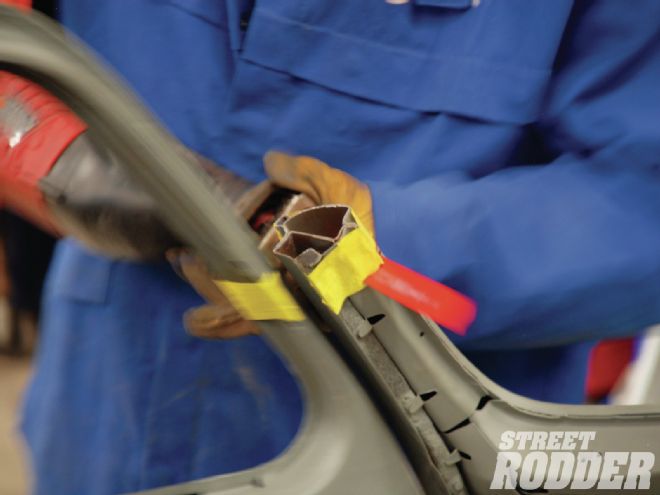
6. The first cut and most import piece to preserve is the lower rear corner of the rear side glass. This panel will be removed to save the curved rear corner.
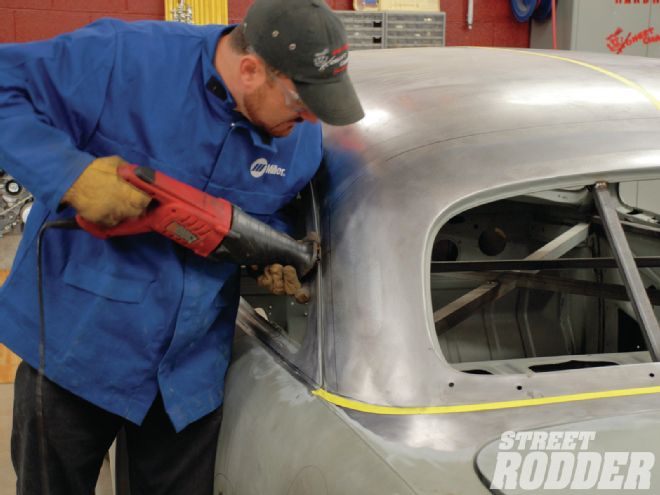
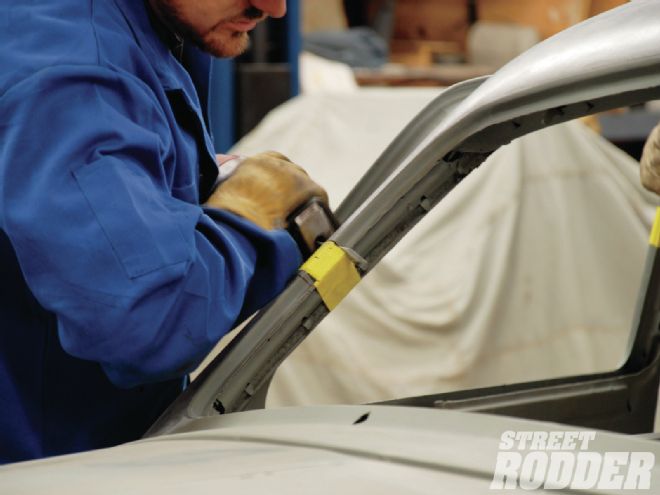
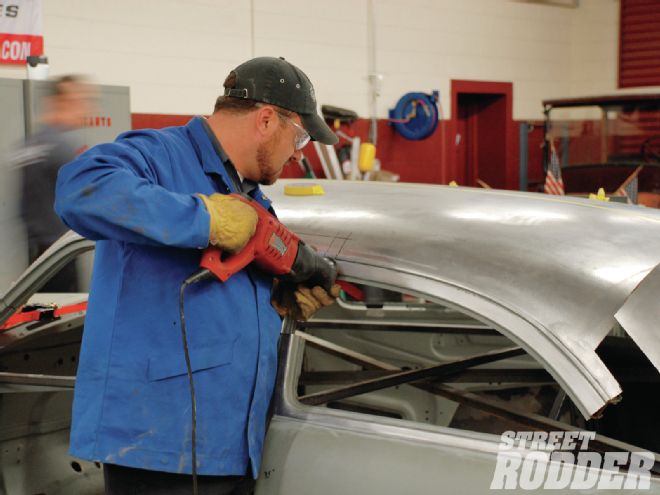
7. A Sawzall is best for cutting through the multiple layers of steel that make up the window frame area. Work slowly and make your cuts clean and on the mark.
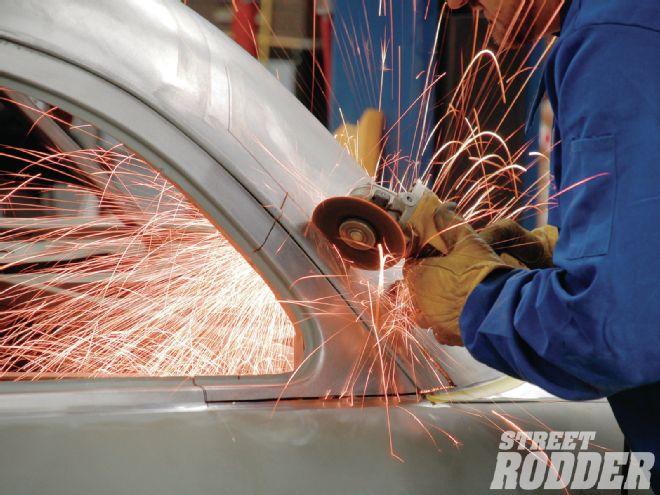
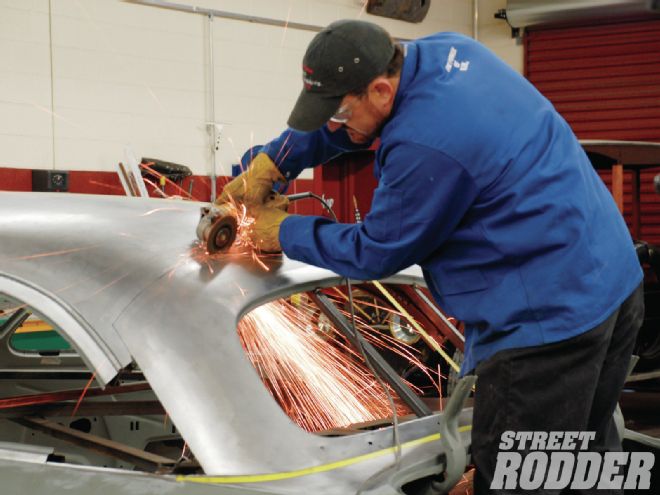
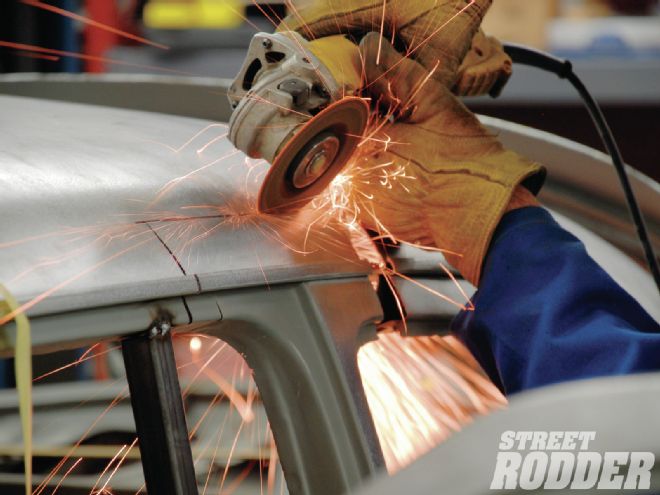
8. A cutoff wheel is used to cut through the single-layer steel roof. This cut will free the window corner from the body.
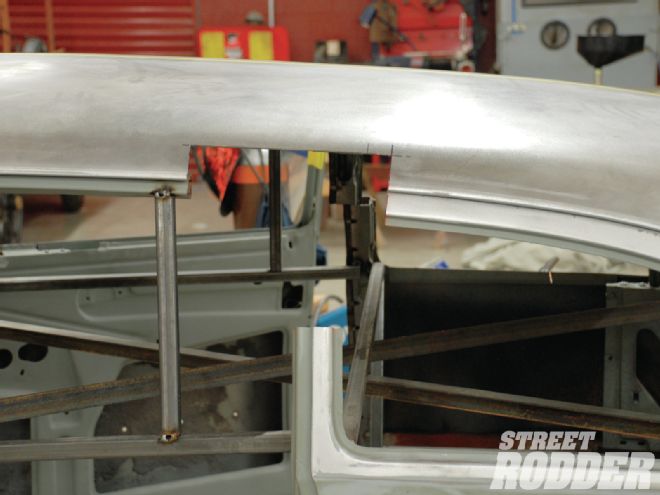
9. After removing the lower corner of the window opening you have a gaping hole, but you will be glad you cut this piece out later in the process.
10. After doing both sides you should have a couple of pieces that look like this. Measuring and making cuts the exact same on each side will help to ensure perfect window symmetry when lowering the top.
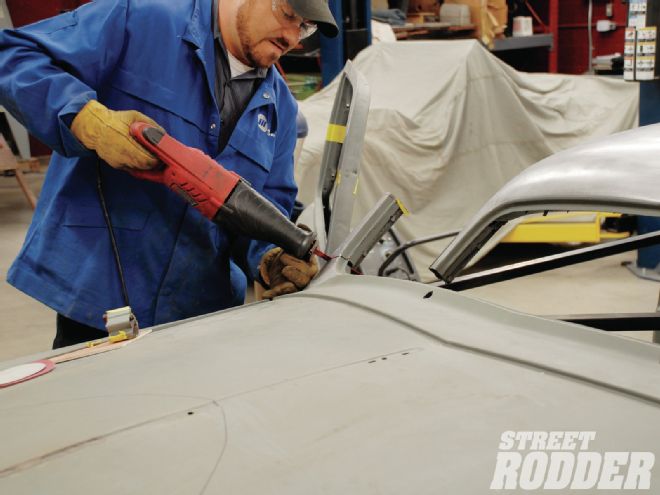
11. Next, Richard Marter uses a cut-off wheel to slice through the upper portion of the roof. Be careful not to get too close to the bracing around the rear window as roof material will be removed later and you will be doing hammer and dolly work in this area.
12. With the rear roof portion cut we move up front to the A-pillar. Once again the Sawzall makes quick work of cutting the pillar and once again work carefully to make a square cut.
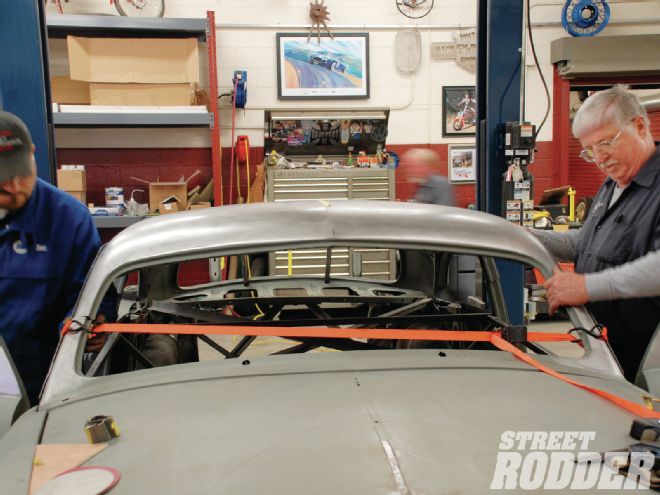
13. Now is a good time to buy a pizza and have a bunch of friends over to the house, lifting the roof off is a four-man job. If Editor Brennan is one of the guys doing the lifting better order an extra pizza. (OK that was mean, but true! -Editor Brennan)
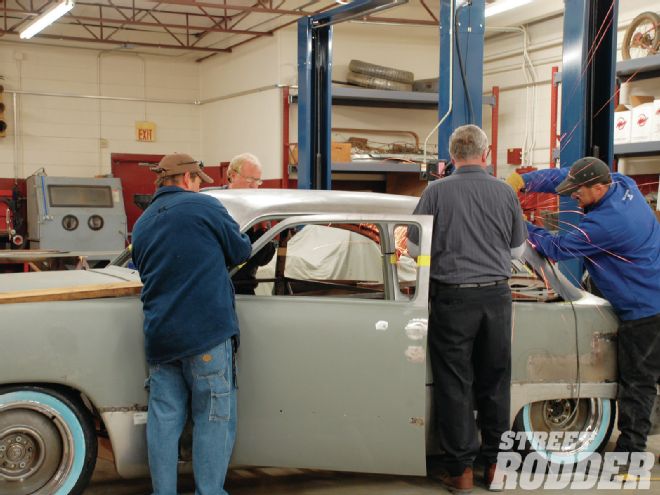
14. At this point you are experiencing pride and fear at the same instance. Sure you're a real man who just cut the roof off a perfectly good car, now are you man enough to put it back on?
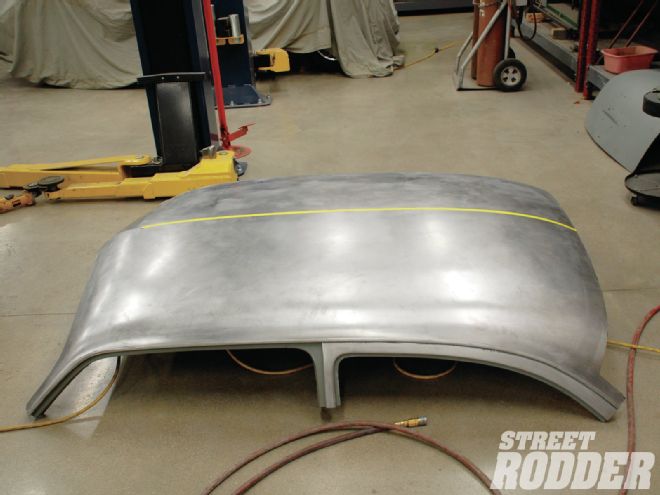
15. The door tops, rear roof section, and posts sure look strange sticking up in the air.
16. The original rear window is curved glass and for that reason it will remain uncut. While that big window looks huge now, when it is laid forward it will appear dramatically smaller.
17. Now all of the pillars can be cut. Always cut the roof free first, then make the secondary cuts on the pillar stubs as that is much easier than trying to hold the roof and cut the posts.
18. The front A-pillars had minimal misalignment. Since the cuts were made in the straightest area of the posts it will be a simple job of pulling the lower posts inward for alignment.
19. As the top moves forward to meet the new, lower A-pillar the B-pillar will also misalign. This misalignment is pretty minimal as top chops go and will be simple to remedy.
20. The top is lifted off and the Sawzall makes an angle cut at the bottom radius of the A-pillar. Required cut was just 1/8-inch.
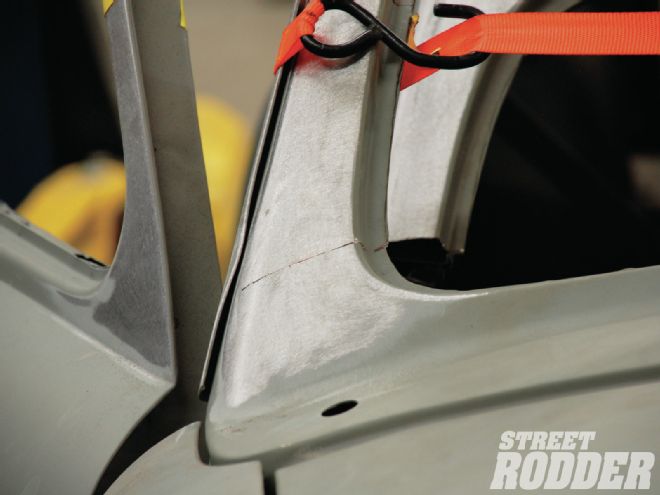
21. After cutting both A-pillars a cargo strap was used to pull the two posts together to align them with the top, if the posts don't align more material may need to be removed from the A-pillar cut.
22. After pulling the bottom posts together with the cargo strap the angle cuts in the A-pillar are perfectly closed when the lower posts and roof posts are aligned.
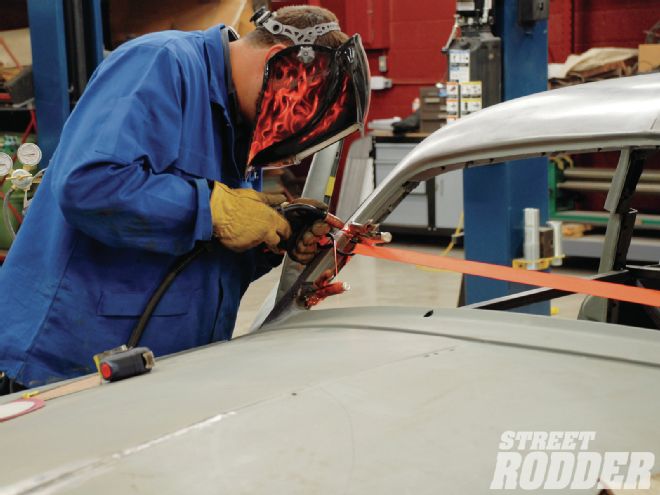
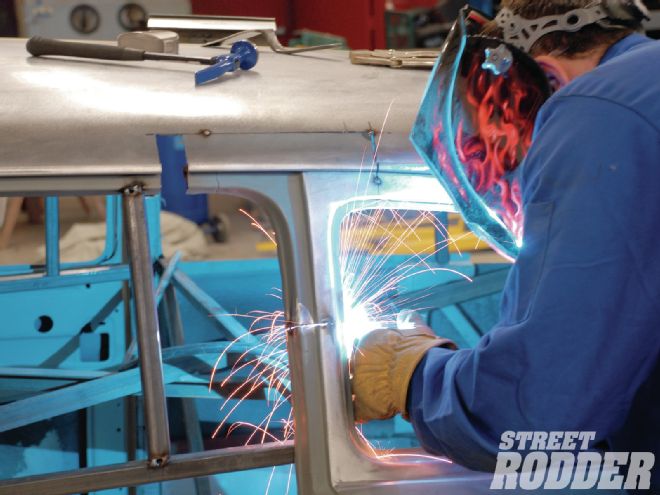
23. Satisfied with the post alignment we gave them several good tack welds using our Millermatic MIG welder.
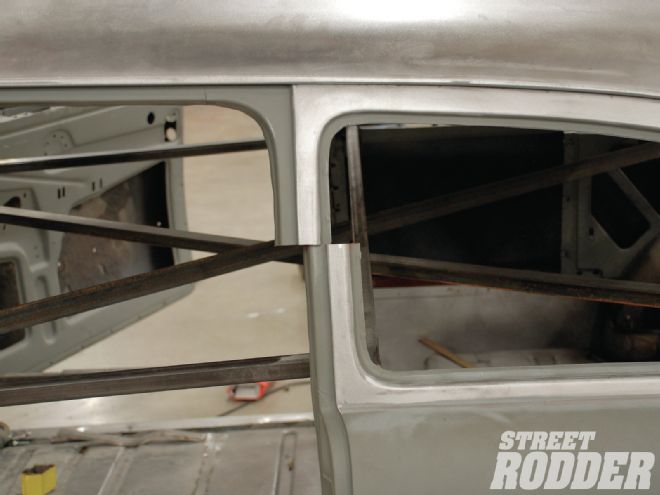
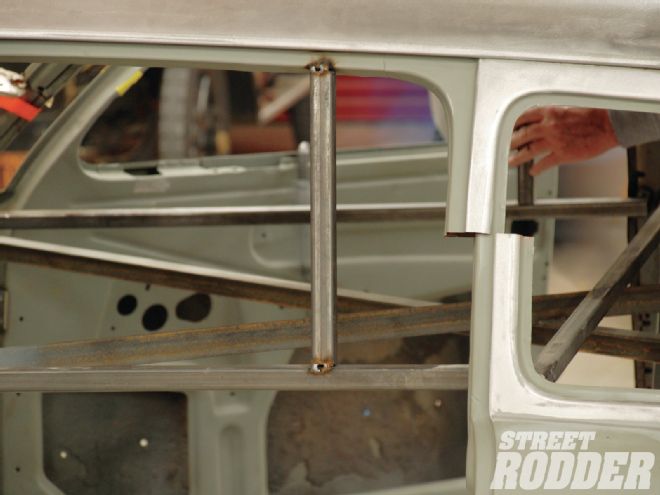
24. Since the B-pillar is actually holding the top in place a brace was fabricated from box tubing to hold the top in position while we align the two posts.
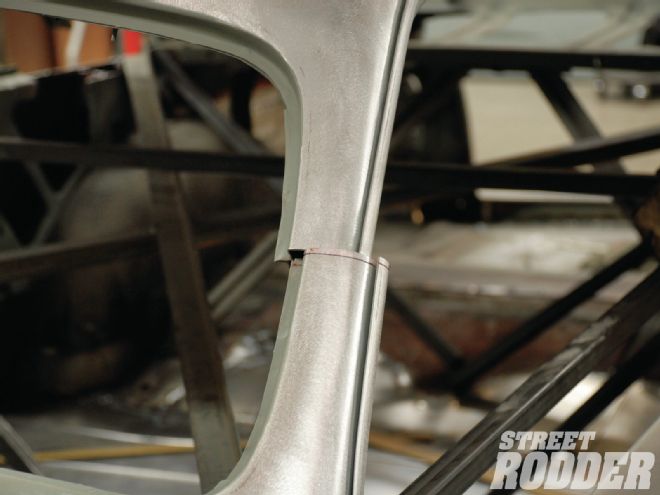
25. We carefully marked out the cut on the roof. Basically we are cutting the B-pillar free from the roof and moving it rearward. The small box marked at the rear of the cut lines is the amount that the post must be moved to the rear.
26. Once again the Sawzall is used to cut through any areas where there are multi layers and again work slowly to keep your cuts perfectly straight on the line.
27. The cut-off wheel makes a clean cut through the roof skin to free the B-pillar from the roof.
28. With the B-pillar free from the roof we will remove a section off the back of the piece we cut out so it can move to the rear. The piece we cut off the back will be used to fill the void in the front.
29. After cutting the proper amount of the rear of the upper B-pillar piece we clamped the shortened piece in place to align it with the lower B-pillar stub.
30. Satisfied with the B-pillar alignment we tack-welded the pillars together and tack-welded the roof skin back together, too.
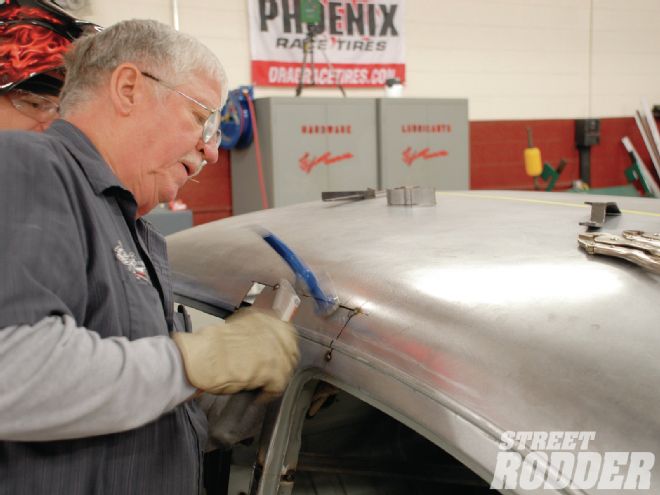
31. After tack welding the piece in place Delton Scott used the Eastwood hammer and dolly to massage the metal into perfect alignment.
32. The B-pillars are aligned, now we must fill the void in front of the relocated piece. The piece that was removed from the rear of the upper B-pillar will fill the void perfectly.
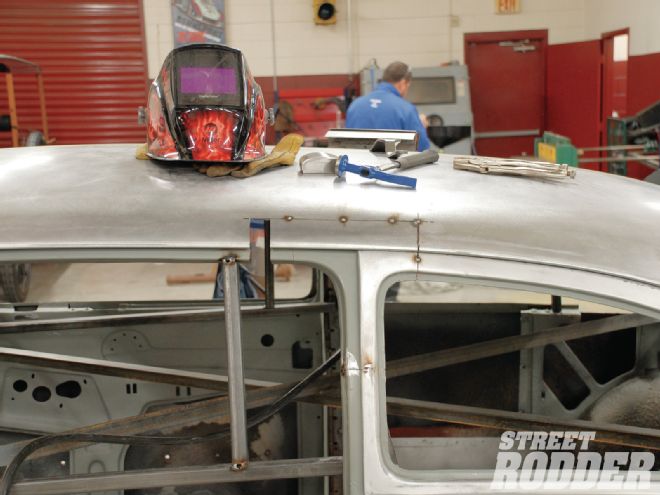
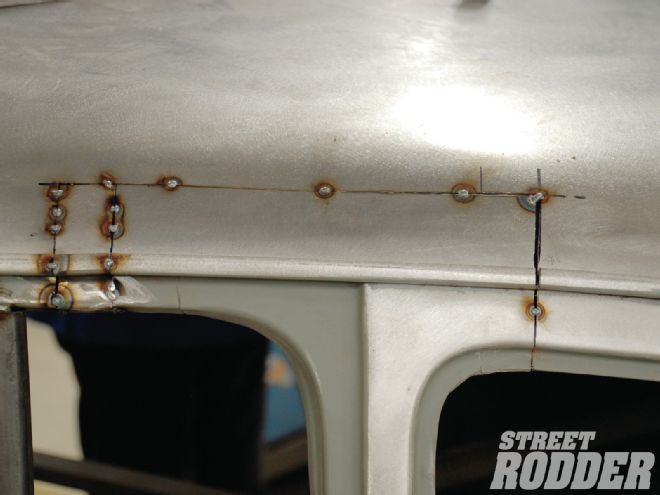
33. Here we can see the piece that was removed from the rear of the upper pillar is now tack-welded in place on the roof. Notice the driprails are also tack-welded and aligned at this time.
34. Check your work as you go and check it from all angles to be certain all the sheetmetal is flowing smoothly and is devoid of any unwanted bumps, lumps, or waves.

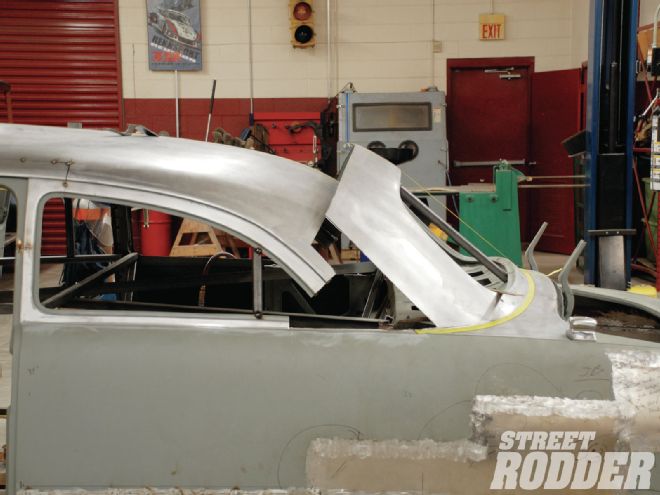
35. Now for the scary part, aligning the rear window area with the roof. While this looks pretty daunting, laying the window down and moving it forward will close the gap, but due to space limitations you'll have to wait until next month see how perfectly it all goes together.
To see videos covering the build of the 2013 AMSOIL/STREET RODDER Road Tour car, click here.