Ask nearly any classic Pontiac owner about the effort required to actuate the factory-installed clutch. Back in the day I remember being stuck in traffic in my original 1965 four-speed GTO, and the resulting knee pains the next day. We lived with that gargantuan clutch pressure back then because there was no alternative, and we didn't know any better! Not so anymore. After replacing the factory-style unit in a friend's Firebird, we were shocked by the difference a modern clutch can actually make. The reduction in pedal pressure is unbelievable and makes driving a stick shift a genuine pleasure! Plus, since it's not visible to the judges, a restored vehicle still looks stock!
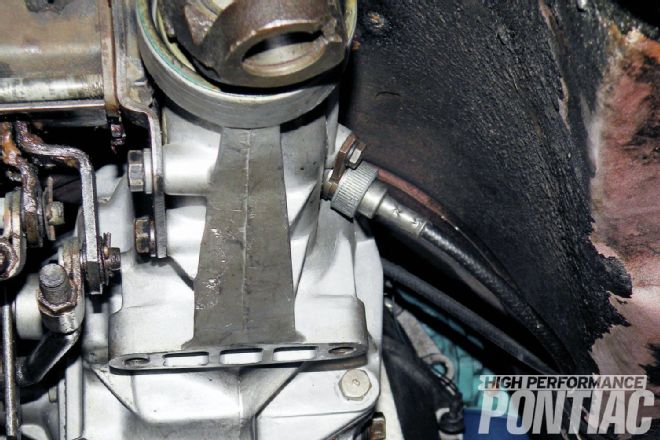
We installed a Centerforce Dual Friction 11-inch clutch: pressure plate and disc assembly (PN CF361675), a self-aligning throwout bearing (PN N1716), and set it all up for the trans input shaft using a 26-spline alignment tool (PN 53026). The transmission is a Muncie M21 (26-spline input shaft) transferring power to a 3.55-geared, GM 10-bolt Posi.
The Dual Friction design distributes pressure evenly, completely around one side of the clutch disc, while the opposite side uses a friction facing to concentrate clamping pressure on the flywheel, maximizing holding capacity. The two friction facings, combined with the pressure plate, create a smoothly activated and awesome gripping clutch. Hence, Dual Friction!
The weights perform a complementing task. As rpm increases, so does the centrifugal force created by the weights. This force pulls up and out, increasing the diaphragm pressure, creating more clamping force through the pressure plate and disc to the flywheel. It's certainly a unique setup that works as well as it looks.
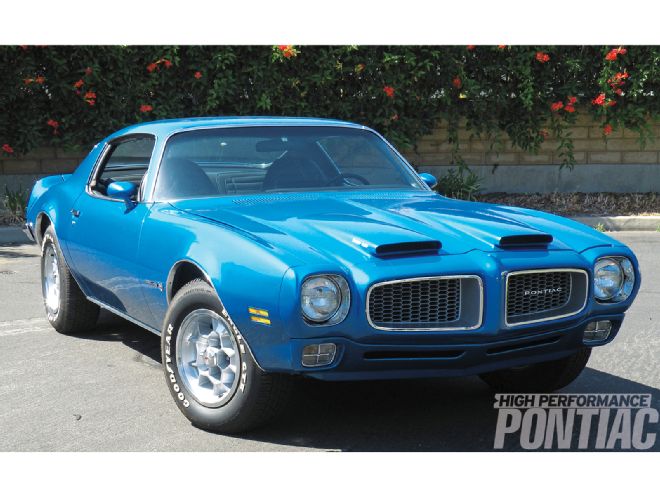
The lucky recipient of this clutch is a 1971 Firebird Formula that has been upgraded with a street/strip 455-cid engine. The clutch that was in the car is an antique finger style that had seen too many stoplights. It was starting to chatter, and that, combined with the leg pressure required, brought about its removal and the installation of the Centerforce unit. A new flywheel to accommodate the larger clutch was also installed. (Always have your existing flywheel surface machined, or install a new flywheel when replacing a clutch.)
Also, always check the height and diameter of the new throwout bearing against the one you removed. They must be identical in height and diameter, or you might wind up with a serious clutch-adjustment problem. The Centerforce bearing is a GM factory replacement style to be used with a stamped steel fork.
Follow along and we'll show you the basics of replacing the clutch in your Pontiac. It can be done with an array of normal car-guy tools, plus a torque wrench and trans jack to support the engine. If you are doing it on the garage floor, always use four heavy-duty jackstands and a dependable floor jack. It's obvious we did the install on a lift, which makes it a lot easier to take the photos.
Having a friend along to help (remove the trans) will also make the job go smoother. You can remove and replace the clutch in several hours, providing you don't run into any unexpected problems. We'll stop the process after replacing the new parts and the bellhousing. You can reinstall the trans, linkage, crossmember, driveshaft, and so on, as you removed them.
Should you choose to make friends with your left leg, contact Centerforce first to discuss which clutch will be right for your driving and leg-muscle needs. Having a factory assembly manual might be a good idea, along with a digital camera during the disassembly, both for photographic reference and for proper clutch adjustment information.
Having a friend along to help will also make the job go smoother
We lived with that gargantuan clutch pressure back then because there was no alternative, and we didn't know any better!
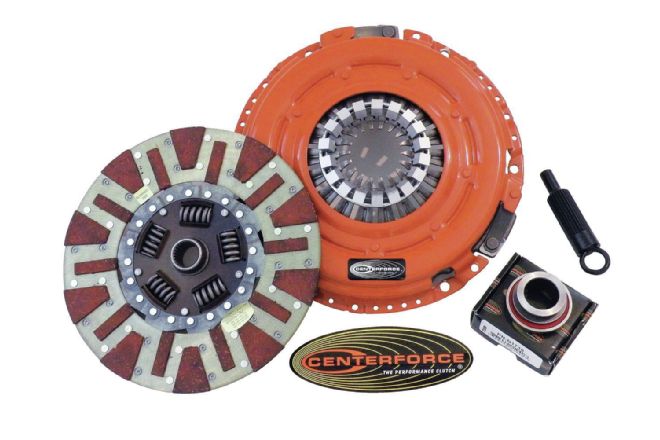 1. These are all the new parts you need to make driving your manual-shift muscle Pontiac a pleasure—the Dual Friction pressure plate and disc, along with the self-centering throwout bearing and alignment tool.
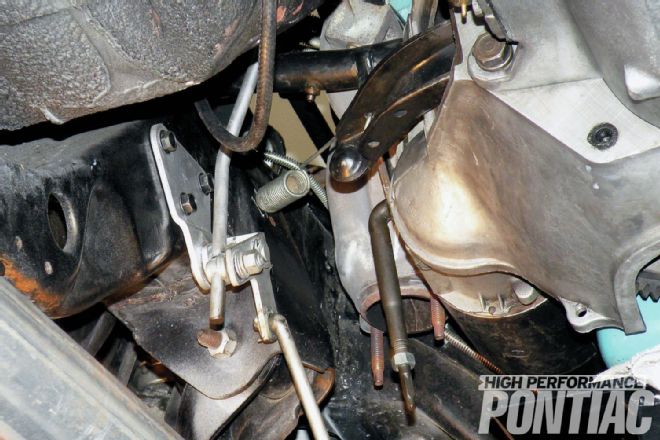
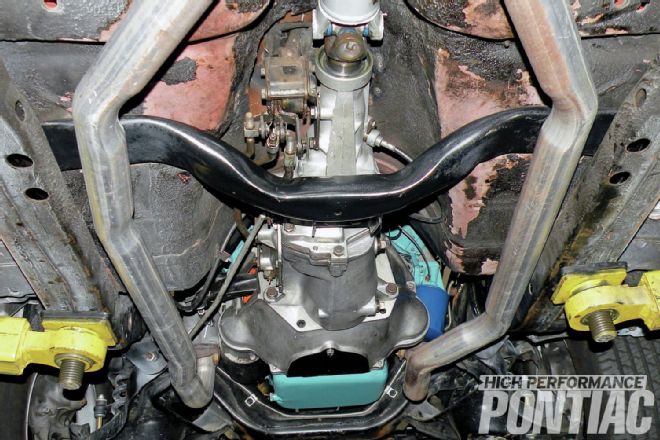 2. Here’s the setup before we started. More time is spent disconnecting and removing stuff than actually installing the new clutch. It’s nice to be able to work on clean parts, so you might want to steam-clean the trans and area first.
 3. We begin by supporting the engine using a trans jack and several towels. The engine must be slightly lifted and lowered during the change-out process. The towels prevent paint damage.
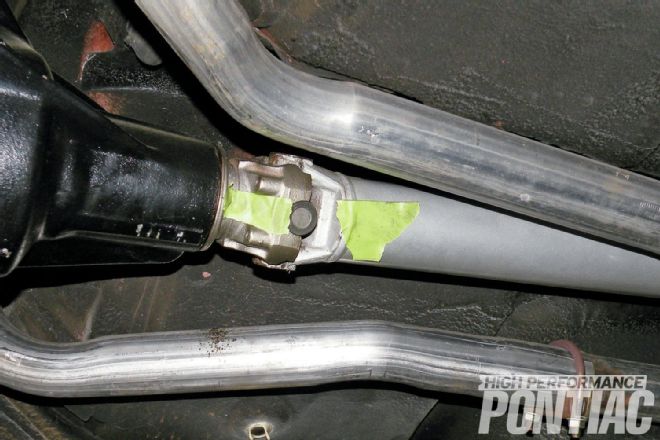 4. We used tape to clock the original position of the driveshaft. This will allow us to replace it in the same position, as the rearend yoke will not be turned.
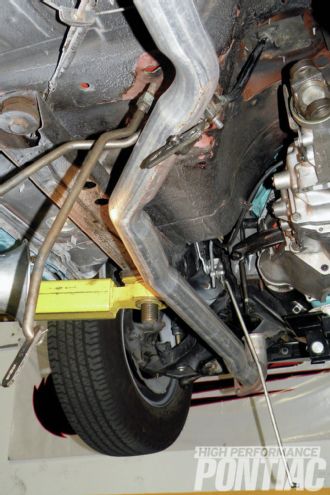
 5. Remove the two U-clamps securing the driveshaft to the rear-end yoke. Support the shaft while removing the clamps so it doesn’t fall. Then remove the shaft and get it safely out of the work area.
 6. We used a spare driveshaft yoke to plug the rear of the trans. Trans plugs are available from most automotive suppliers and will help prevent leakage once the trans is removed.
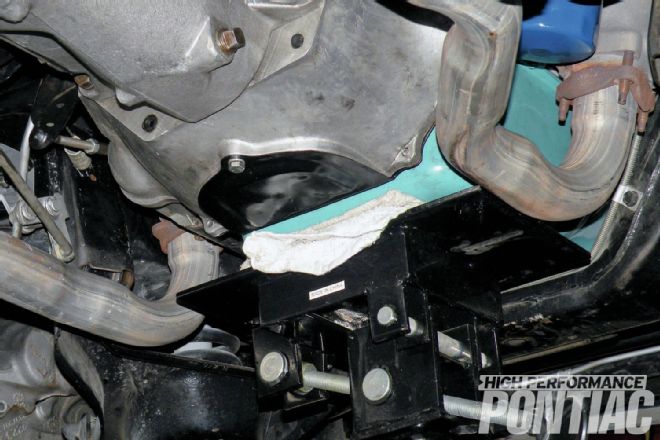
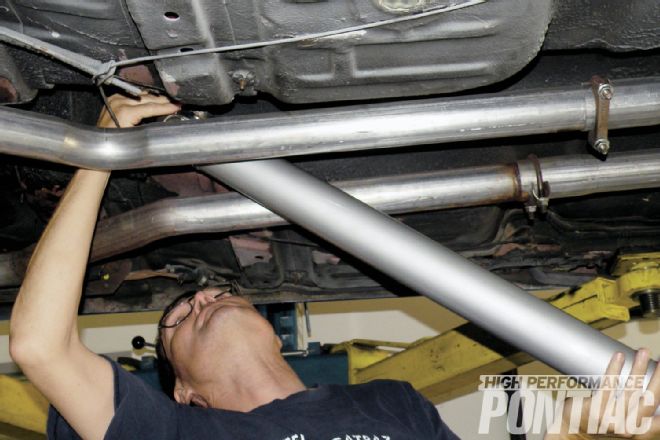
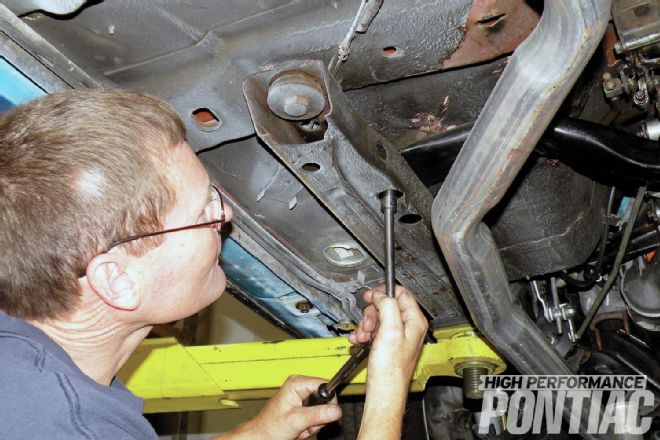
 7. Next remove the two bolts securing the trans to the crossmember and trans mount. Always inspect the trans mount for cracking or missing rubber and replace if necessary.
 8. Here we’re removing the flywheel inspection cover. Taking out three bolts will get it free. Keep the bolts with the parts you remove for quicker installation later on.
 9. We loosened up one of the frame bushings to make removing the crossmember easier. The space to slide it out is limited. Then we removed the four bolts holding the crossmember in place.
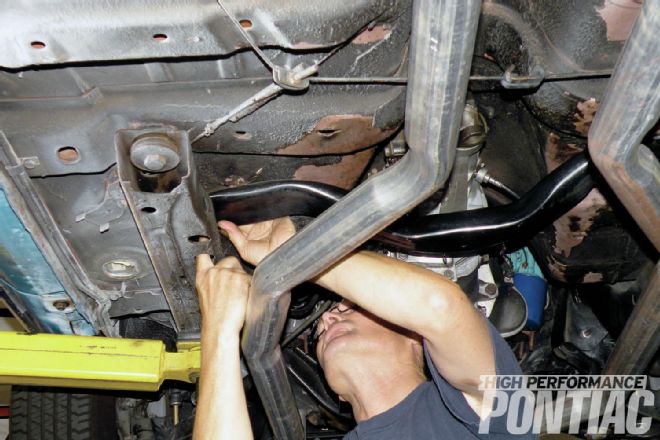 10. The crossmember needed a little persuasion, but eventually we pried it free and removed it. Again keep the bolts with the part.
 11. Before you attack the trans linkage, take a digital photo of exactly how it is connected and what goes where. It’s easy to make a mistake at reassembly without a reference. Here we’re removing the reverse-lockout rod.
 12. Around the other side of the trans is the speedometer cable. Disconnect it and move it to the driver side of the trans and out of the way.
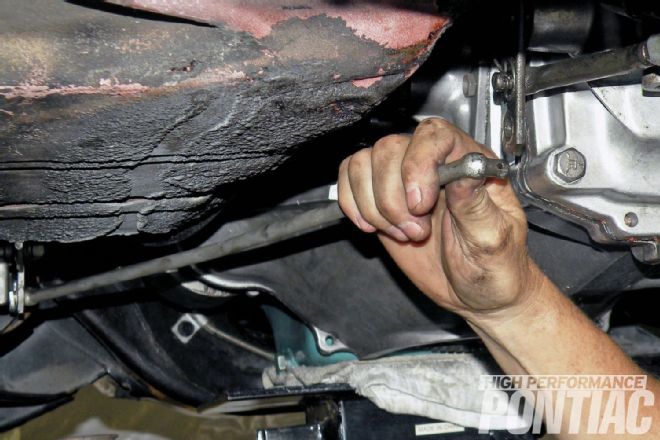
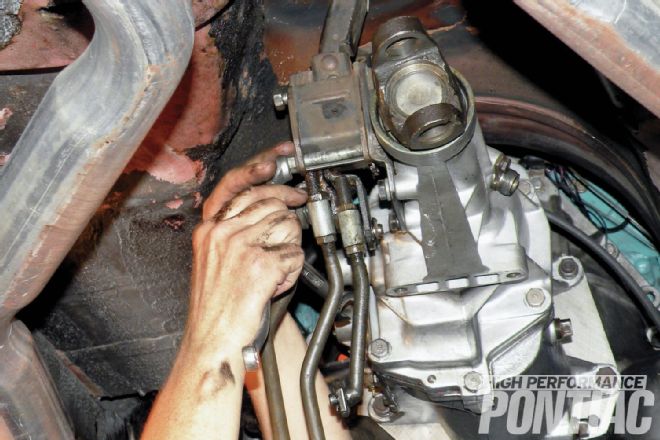
 13. Here we’ve disconnected the clutch-adjustment rod from the throwout-bearing fork. Next comes the clutch spring, which is attached to the fork as well. This might need a little muscle to remove, as it’s a stiff spring.
 14. Now take that digital photo of how the linkage is connected before you start to disconnect everything. Then disconnect the shift linkage at the transmission and let the rod hang from the shifter body. We’ll leave them connected to the Hurst shifter.
 15. Remove the mounting bolts securing the shifter from the plate on the transmission. Then lift the rods over the driver-side exhaust tube and let it hang there out of the work area.
 16. Here’s the shifter moved with the rods hanging. We simply left the shifter ball on the shaft up inside the car, and that is holding the shifter from falling out. It’s just one more thing to not have to completely remove.
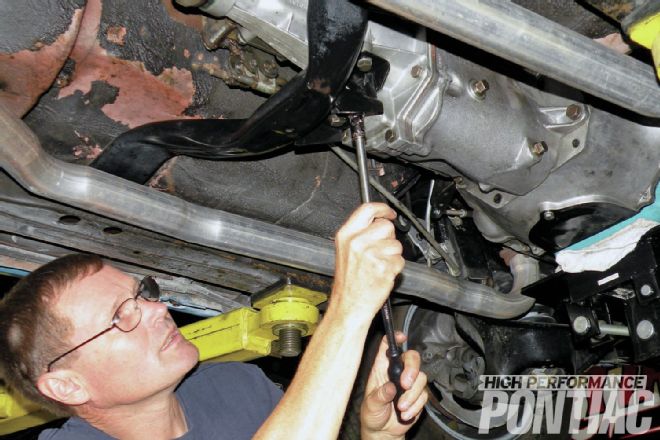
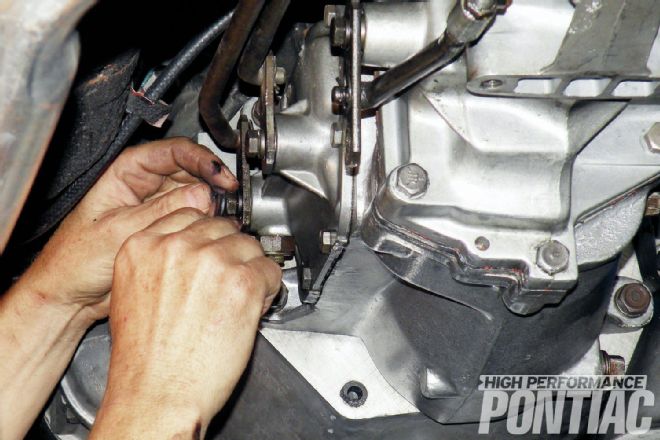
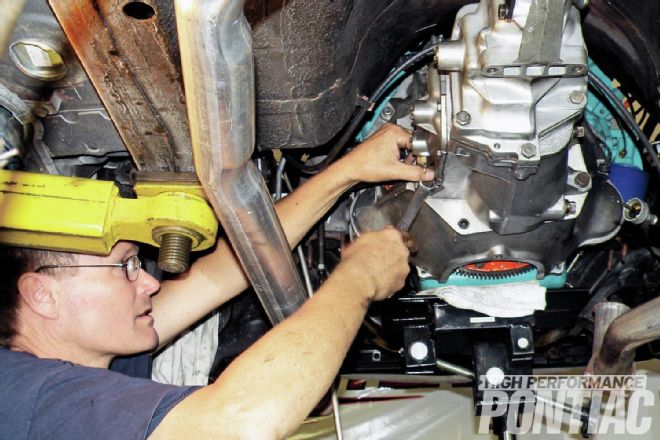 17. Four bolts secure the trans to the bellhousing. Loosen them up and remove the bottom two. If you’re using a lift, get a friend to help you support the trans while you take out the top two bolts; then both of you can pull out the unit and remove it. It’s heavier than it looks. If you’re working on the floor, use your floor jack to help support the weight.
 18. The bellhousing can now be removed, and your digging for the clutch is finally over. If your trans and bellhousing are greasy and oily, use a can of Justice Brothers brake cleaner to remove the crud. It will come out looking like new aluminum.
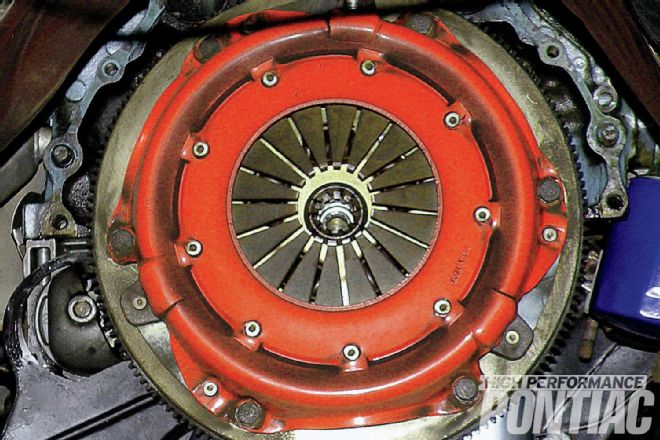 19. This is the well-used clutch that we are removing. It’s the traditional finger style, which was on its last fingers. We removed the flywheel and replaced it with a new one from Summit Racing. We crisscross torqued the bolts to 100 ft-lb. This flywheel will accommodate a 10.5 or 11-inch clutch, with holes provided for mounting each size.
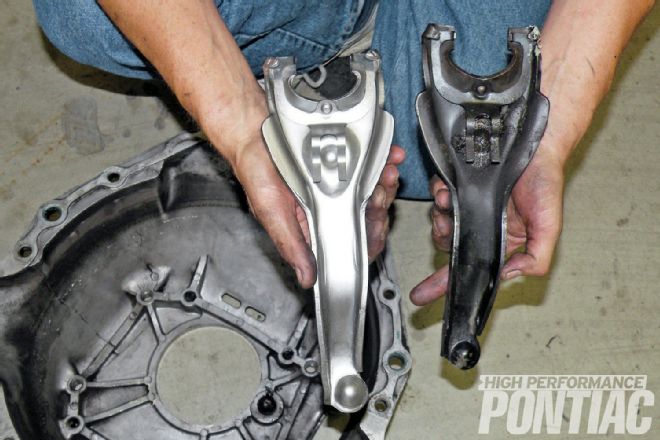 20. The mounting spring clip on the back of the original fork was mangled from lots of use, so a new replacement was obtained from National Parts Depot. They are identical.
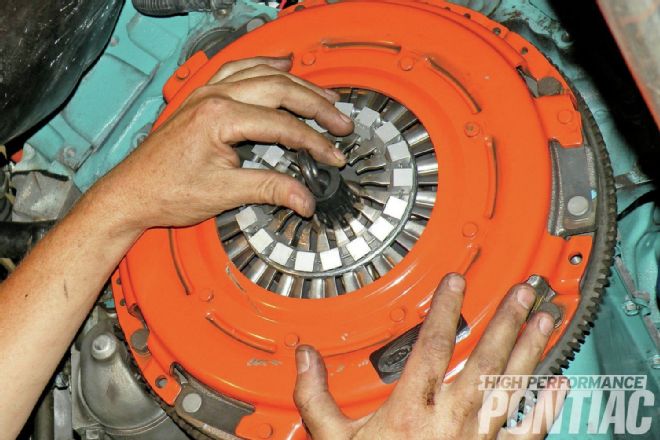 21. The new Centerforce disc- and pressure-plate assembly was loosely installed with two bolts at the top to secure it, and then the 26-spline alignment tool was inserted to get the assembly positioned.
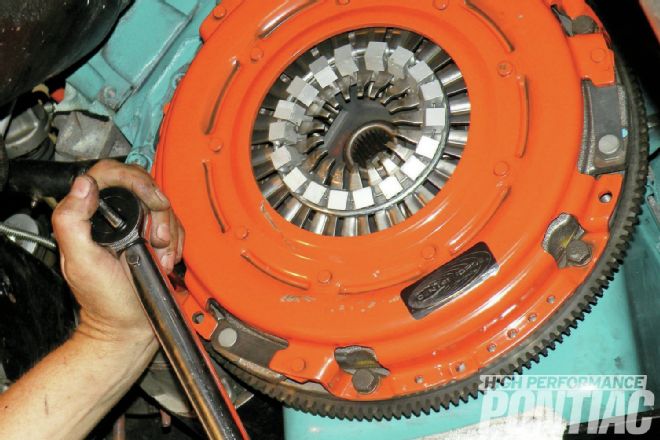 22. Then the remaining bolts were inserted and torqued to 35-38 ft-lb. Once the pressure plate is securely tightened, the alignment tool can be removed and you can install the bell housing.
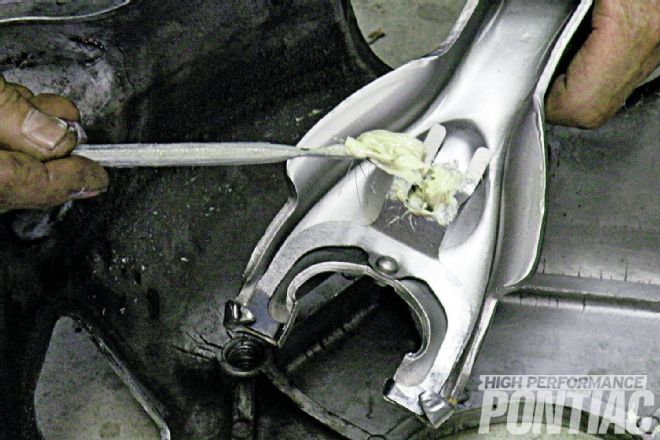 23. The clutch fork is lubricated with Justice Brothers white-lithium grease applied with a brush. The fork pivot ball in the bellhousing received a good coat of lube as well.
 24. The bellhousing is now reinstalled and the clutch fork and self-centering throwout bearing installed in the forks. Care must be taken here to make sure the fork spring clips are installed between the throwout bearing collar flanges. If the clips are incorrectly installed, you will not be able to adjust the clutch.
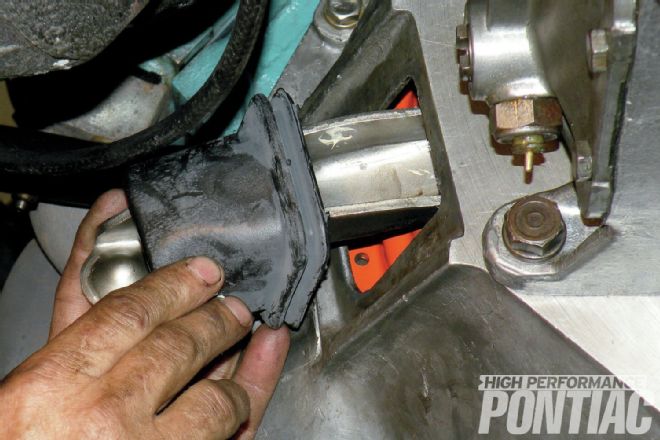 25. Next reinstall the transmission and the final touch could be treating your clutch to a new fork boot to keep everything clean. At this point the installation is complete, so reinstall the crossmember, linkage, exhaust, and driveshaft as you removed them. That linkage-reconnection photo will come in handy now!