
One of the liberties many people take when it comes to classic trucks is the treatment of the front and rear bumpers. It's common to find an old truck with a "farm fix" bumper made from 3-inch C-channel or galvanized pipe. Oftentimes these "upgrades" are stout enough to push a locomotive and, more often than not, isn't that good looking. There are many reasons for this, from pure necessity to the fact that many truck manufacturers offered bumpers as an optional upgrade. Whatever the reason, it should come as no surprise that when I originally bought my '52 F-1 project, it was sans both bumpers. Back in the February 2010 issue, we tackled the problem up front by installing a pair of one-off stainless nerf bars. But I wasn't so sure what to do out back. I didn't care for the stock F-1 rear bumper and wanted to continue with the custom truck theme and knew it was simply a matter of getting out in the shop and having a good stare at the back end of my truck.
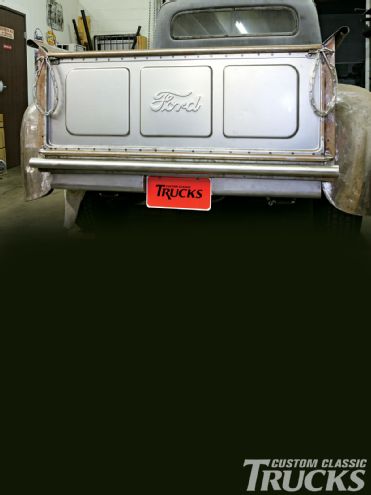
Thankfully, the tailgate and rear stake posts in my bed had already been fixed a few years back, so the view from the rear was already looking pretty good. What wasn't looking good was the rear crossmember and leaf-spring shackles that hung down from underneath, in plain view. This would need to be remedied while I tackled the bumper situation.
What I came up with was a 2-inch stainless tube bumper slightly wider than the bed that would mount nice and tight against the rear cross sill, just below the tailgate. I decided to go with stainless since it will match the front nerf bars when they're polished and I don't have to deal with the headache of finding a good chrome shop and all the ills that come with chrome finishes (peeling, flaking, discoloration, rust, etc.). It also allows me to removes the parts and repolish them if the need arises, something that isn't so easy or cheap to do with a chromed part.
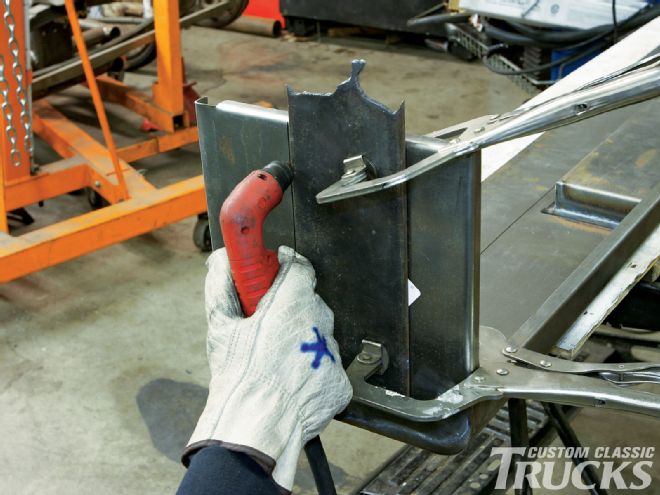
Fabricating and mounting the bumper was fairly straightforward. Once it was cut to length using a chop saw, I ensured that the ends were nice and square using my Harbor Freight combo belt / disc sander. From there, it was just a matter of drilling the mounting holes in the rear cross sill and welding the two stainless studs in the correct location on the backside of the bumper and bolting it up.
Once the bumper was in place, it was glaringly obvious that something needed to be done to the area directly below the backside of the bed. For that, I called up the guys at National Parts Depot (NPD) and ordered up a smooth roll pan with license box recess (PN F-40544-1B). The roll pan showed up with plenty of extra sheetmetal that allowed for it to be installed in a number of ways, yielding it to a wide variety of applications. For my F-1, I wanted to keep the back end nice and streamlined, so a bit of trimming using my HTP MicroCut 301 was in order to allow the roll pan to install high and tight against the bottom side of the bed. It took a few tries to get it just right, but when everything was said and done, I was quite pleased and the back end of the old Ford was looking way better.