If you’re a racer, you know that the clutch is the vital linkage between the engine and the transmission. If you don’t have it installed or adjusted correctly, you can lose horsepower and wear out the clutch prematurely. To help you get it right, Circle Track magazine installed a clutch in a racing car to show you how it’s done. With some help from Quarter Master Industries, let’s get to it.
The first step in installing our clutch is to attach the 7¼-inch button flywheel to the flexplate on the back of the crankshaft and torque it into place.
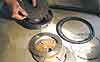
Next, the clutch assembly is put together. This particular clutch assembly is a 7-¼-inch, three-disc pac Pro Series set from Quarter Master. The inside contains three separate clutch discs and their attendant floater discs that are sandwiched together inside the housing and a clutch cover (same as a pressure plate) that is on the front. The three clutch discs are designed with two end discs that go on each side of the assembly with a center disc in the middle. The end discs need to be installed so the splined center extends outward from the middle. The center disc can face either direction.
The assembled clutch is then placed onto the bolts extending from the button flywheel. Before the assembly is bolted in place, the starter ring is also slipped onto the studs.
The end of an input shaft from an old transmission can be cut off and used as an alignment tool. We insert this alignment tool through the clutch assembly into the pilot bearing on the end of the crankshaft and hold it centered while the bolts holding the clutch assembly are torqued down.
With the clutch assembly in place the clearance between the throw-out bearing and the front of the transmission needs to be checked. If there isn’t enough clearance when the bellhousing is bolted on, it will push on the clutch cover and partially release the clutch. To check this clearance, the bellhousing first needs to be bolted in place.
Next, we take a measurement from the outside edge of the bellhousing to the throw-out bearing. In order to get an accurate measurement, the throw-out bearing needs to be held in the normal operating position against the clutch cover. Second, a measurement from the front surface of the transmission housing to the outside (front) of the bearing retainer is taken. The bellhousing-to-throw-out-bearing measurement needs to be greater than the retainer on the front of the transmission. If it isn’t, then the retainer will push on the throw-out bearing, partially releasing the clutch and creating slippage. This results in a horsepower loss.
In our case, the clearance is off by an eighth of an inch. The clearance should be between .063 and .125 inches.
To correct the clearance, we needed to remove three shims (at a sixteenth-of-an-inch each) between the throw-out bearing and the hydraulic release housing. The three-sixteenths inch we gained by removing the shims gave us one sixteenth-of-an-inch clearance.
The bellhousing is then bolted back on the engine and the measurements are retaken to verify the proper clearance.
Now, your new clutch is installed and adjusted with plenty of clearance so there is no chance of slippage. No slippage means no loss of horsepower. Follow the guidelines we stressed here, and you’ll never have problems with your clutch.