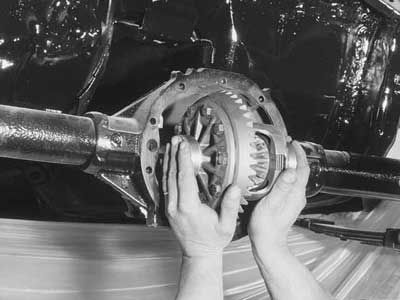
After all of the disassembly, the cleaning and checking and reassembly of the carrier and the housing, we are finally at the moment of truth. The installation of the ring and pinion, the determination of proper pinion depth, and ring gear backlash and final assembly.
If you have been following this story, you know that we received a Yukon master overhaul kit and ring and pinion gears from Randy's Ring & Pinion. Our depth-checking tool was provided by Powerhouse products and axle and axle housing straightening was courtesy of Hartman Driveshaft and Axle.
Without further delay, let's wrap up the re-rearing of our '77 T/A.
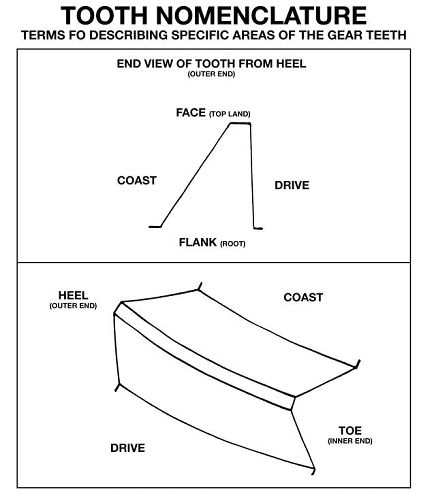
Reading Patterns And Gear Terms
TOE: inside of gear
HEEL: top of the gear
PITCH: halfway point across the tooth
ROOT: bottom of the tooth
FACE: area above pitch line
FLANK: area below pitch line
CONVEX: drive side of tooth
CONCAVE: coast side of tooth
The pattern should be in the middle of the gear, splitting the face and the flank. In theory, it should be even on the drive and coast sides and should be even in width and diameter across the tooth with feathered edges. Backlash affects the pattern. A decrease moves the pattern from heel to toe and an increase does just the opposite. The drive and coast sides move evenly in both cases. Pinion depth affects the pattern. While it will affect toe and heel a bit, mostly it moves the pattern up or down on the pitch line. Increasing pinion depth moves the pattern up on the face; decreasing pinion depth moves the pattern down. The coast and drive sides move opposite each other with changes in pinion depth. A pattern toward the heel is quieter than toward the toe.-T.D.
1. Before being mounted in Hartman's modified lathe for inspection and straightening, the four areas that will be inspected (both sides of the wheel flange, the bearing surface and the outer surface of the flange center) are cleaned of all surface rust and dirt, as are the centering dimples at each end. correctly.">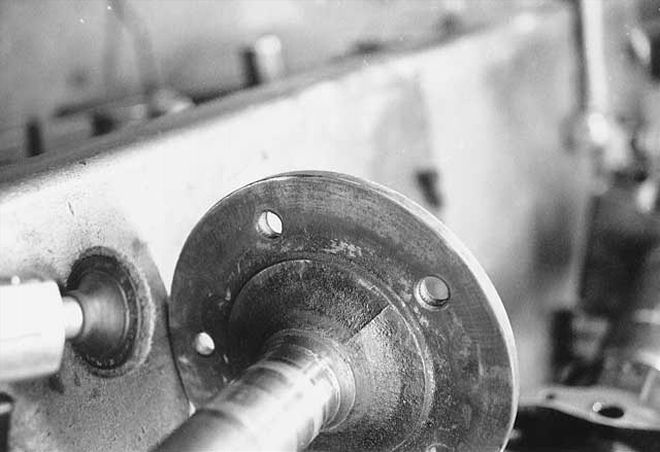 <strong>1.</strong> Before being mounted in Hartman's modified lathe for inspection and straightening, the four areas that will be inspected (both sides of the wheel flange, the bearing surface and the outer surface of the flange center) are cleaned of all surface rust and dirt, as are the centering dimples at each end. correctly.
Straightening Axles
Though most performance enthusiasts are aware of the critical nature of having all rotating and reciprocating components in an engine balanced, few often continue that train of thought all the way through the driveline. Making sure the driveshaft and wheels are balanced is a no-brainer, but there's a pair of important components in between that is often overlooked. When we left off with DeMauro's T/A and my Formula, we'd demonstrated how to precisely align a rear-end's axle tubes in relation to the differential housing's center. Those tweaks ensured that the axles, from where the splines engage in the differential to where the bearings are seated at the ends of the tubes, are as close to being centered as possible, thus reducing stress and more evenly distributing the loading forces on the bearings.
We're back at Jerry Hartman's shop, Hartman Driveshaft & Axle, in Reading, Pa. to demonstrate how to straighten axles for optimal rotational balance. However marginal it may seem, if an axle, and, more importantly, the wheel attached to it, is rotating unevenly through the vertical plane, it will cost you power through a loss of usable rpm and also affect handling and ride quality. Often, those mysterious vibrations that can't be cured through repeated driveshaft and wheel balancing are caused by wobbly axles. Though most serious racers will move up to a set of rifle-drilled hollow or solid, high-quality forged axles; the expense can be a bit much for the average street machine.
A GM forged axle isn't a very pretty sight. There's nothing perfectly round about its cross-section. It may appear oval, and down its length it may even exhibit quite a bit of a curvature. That doesn't mean that it's no good though; often bent-looking axles indicate perfectly true. The areas that matter to the straightness of an axle are the wheel bearing surface and the wheel flange as they relate to each other and the axle's centerline. To determine whether an axle can be salvaged, inspect for cracks and any flaking or stress lines that show that it has been twisted. Jerry notes that axles bent .030-.040-thousandths or more are typically beyond salvage, as they're likely to have been over-stressed to the point that the forging has exceeded its elastic limit. Axles that exhibit upwards of .020-in. runout at the bearing surface can usually be trued. The costs of straightening a pair of axles are labor-based, and Hartman charges in the range of $30 to $60, depending on how much work is involved. Remember, though an axle may look like a warped pool cue, that doesn't necessarily rule it out as a candidate for usage--with a bit of forceful persuasion that is.--Jim Dietzler
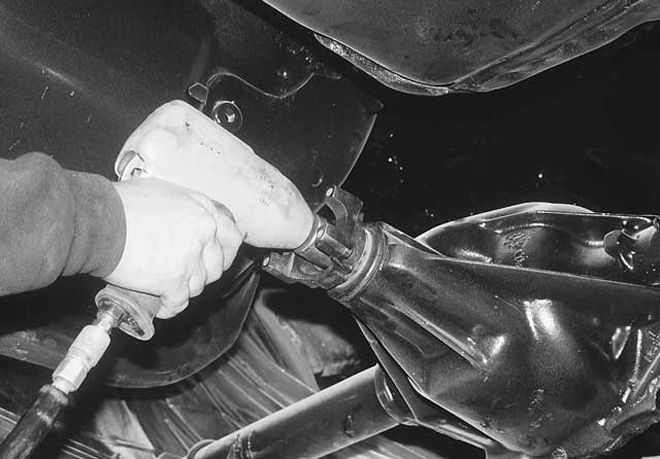
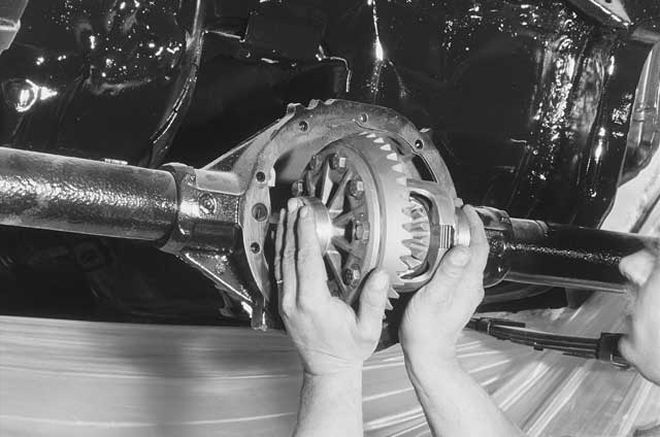
22. To set the preload, the pinion nut has to be tightened until the crush collar compresses enough for the bearings to contact the races. This takes upwards of 300 to 400 lbs.-ft. of torque, which is no easy task. Using an impact gun with a maximum torque of 300 lbs.-ft., we crushed the collar to set the preload. Once done, the yoke should have 14-19 lbs.-in. of drag on it as measured with an inch-pound torque wrench. We simply turned the yoke to feel for smooth operation while making sure that it was tight enough so that we could turn it smoothly but not spin it freely by hand. Now the carrier can be reinstalled as previously discussed and the pattern should be checked once again to ensure that the rear is still set up correctly.
Conclusion
The axle bearings and seals can be installed next using the correct tool for the job or appropriately sized sockets and a hammer. At this point, the brake backing plates and the axles, C-clips and the pinion shaft and bolt, as well as the housing gasket and cover, would be installed but our project is destined for a rear disc brake swap, so we will stop here for now.
However, if you have installed your new ring and pinion set and are ready to hit the road, don't! First the gears must be broken in. With the rear full of the proper lube, drive the car 15-20 miles and then cooll the rear down. Run below 60 mph for the first 100 miles and don't tow before 500 miles.
Hopefully, this story provided some insight into how to rebuild your Pontiac's rear as well as offer varying opinions on the subject so that you can decidewhat's best for you and your Pontiac.