 | The Underdog, A Detour - Honda Civic Rear Disc Brake Conversion
In the April issue, we introduced you to John Rodriguez of Auto Innovations in Orange, Calif., a local wrencher who sold us on an interesting project build. Rodriguez has set out to convert his otherwise humdrum seventh generation Civic four-door into a beast of a big-power street car, and he's keeping the stock D17 engine to do it with. To make that power he plans to go forced induction and build up the bottom end, but as we showed you last time, there are a handful of obstacles inherent to the D-series that have made reaching the goal a tough proposition.
The story also alluded to the shortcomings of the '01 EM chassis Rodriguez will be using. Burdened with forward McPherson struts, dinky little front and rear sway bars, rear drum brakes and four doors, the platform isn't the most obvious choice when you think of kick-ass street vehicles. However, as we've already said, Rodriguez is all about the challenge, and for this side story, he addresses at least one of those other concerns, the brakes. (For the record, this Civic is actually an ES2 chassis; the seventh-gen. came in EM, ES, and most famously, EP iterations, but the designation EM has become a generic name for the entire chassis line.)
On the agenda is swapping the drum brake assembly that is factory on the sedan with a pair of rear disc brakes from an '02 to '03 Civic Si that he sourced from Import Auto Salvage in North Carolina. The reason we want parts from only the first two model years of the EP3 is because in '04, Honda went to a five-lug bolt pattern on the hatchback. Rodriguez would prefer to keep everything four-lug, just to make it simple, hence the strict requirement. The parts ostensibly will work on other seventh-gen. sedans and coupes, too, which were made from 2001 to '05.
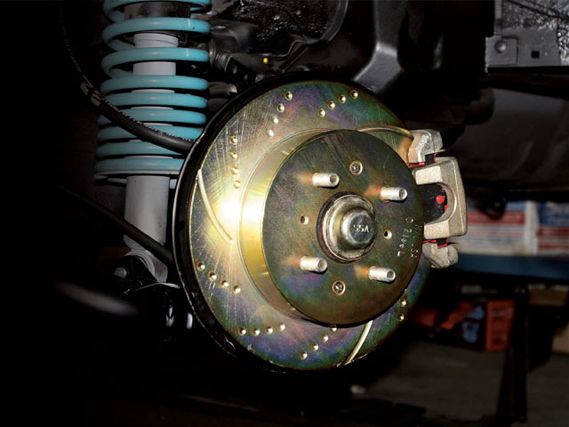
In truth, Rodriguez will be swapping a lot more than just the brakes, though. We've illustrated before how easy it is to do a rear brake upgrade with stock parts by simply replacing the entire knuckle and trailing arm assembly. Rodriguez will do the same here, taking the EP3 knuckle, where the actual brake is mounted, and the trailing and lower control arms and plugging them in as a unit. The assembly employs the same pickup points, and all the supplemental parts, like fluid lines and parking brake cables, are compatible with the sedan chassis. Last but not least, Rodriguez picked up EBC pads and rotors, and the entire process took about four hours from start to finish.
Since we have discs at all four corners now, the master cylinder and proportioning valve will need to be replaced to match the new configuration. In a four-disc setup, a different amount of fluid needs to be pushed to the brakes, and a four-disc master has different valving to accomplish this.
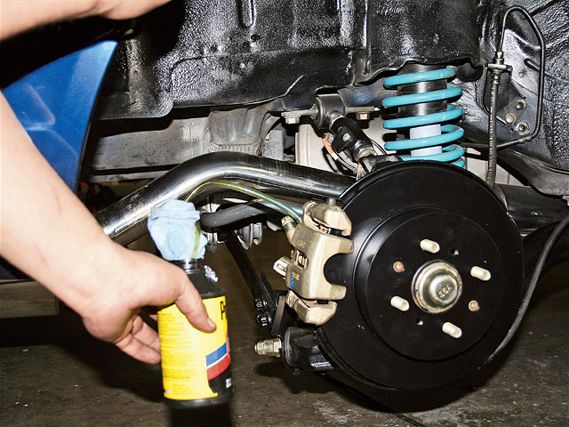
With all the parts in place, the brakes MUST be bled before being used. Anytime the brake system's fluid is exposed to the atmosphere, you have to bleed the system to purge the air from it. The procedure goes something like this: first, Rodriguez removes any residual vacuum from the brake power booster by applying the brake several times with the engine off. He then fills the master with fluid and checks it often throughout the process-this step is CRITICAL.
 | The Underdog, A Detour - Honda Civic Rear Disc Brake Conversion
Starting at the right rear caliper, essentially the brake furthest from the driver's position, he loosens the bleed screw slightly and places the end of a length of 3/16-inch hose over the bleed screw. The other end of the clear hose is connected to a container that will catch the fluid; the clear hose revealing any air bubbles in the fluid stream.
We pump the brake slowly a few times to get pressure in the system, then hold the pedal down while Rodriguez bleeds the brake, opening the screw just enough to allow fluid to exit. Once no bubbles are escaping through the hose, he tightens the valve and moves on to the next caliper, repeating the procedure. When he's all done, he makes sure the master is filled with fluid. We should note that there are vacuum bleeders available on the market that would make this a one-person job, but in general, two people are necessary to bleed, one to pump the pedal and one to open and close the screws.


