 | building Chassis For Our 1967 Chevy C10 truck
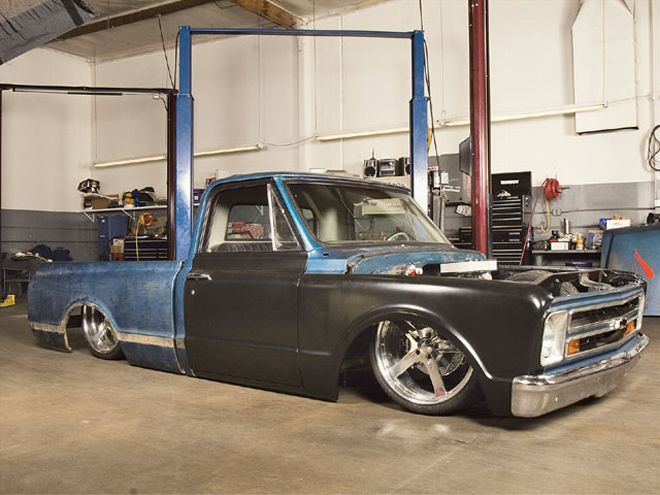
In the February issue, we showed the genesis of our '67 Chevy C10 project truck buildup. The goal for this truck is to build a fast, low, and stylish show truck that we can still comfortably hit the highway with. We started out by ripping the truck apart, selling the stock chassis, then repairing the rusted portions of the cab. Now, it's time to get down to business and put a new chassis together. The goal here is to fabricate a tube frame and suspension with enough travel to set the rocker panels on the ground whenever we park the truck and release the air from the airbags.
We began by ordering an independent front suspension from Scott's Hot Rods in Oxnard, California. We went with Scott's frontend because the company was able to build it to our specs. We chose the track width and what type of spindle we wanted, and we also ordered our power rack-and-pinion steering along with it. We were able to visit the company and watch the suspension being crafted.
| building Chassis For Our 1967 Chevy C10 truck
In the February issue, we showed the genesis of our '67 Chevy C10 project truck buildup. The goal for this truck is to build a fast, low, and stylish show truck that we can still comfortably hit the highway with. We started out by ripping the truck apart, selling the stock chassis, then repairing the rusted portions of the cab. Now, it's time to get down to business and put a new chassis together. The goal here is to fabricate a tube frame and suspension with enough travel to set the rocker panels on the ground whenever we park the truck and release the air from the airbags.
We began by ordering an independent front suspension from Scott's Hot Rods in Oxnard, California. We went with Scott's frontend because the company was able to build it to our specs. We chose the track width and what type of spindle we wanted, and we also ordered our power rack-and-pinion steering along with it. We were able to visit the company and watch the suspension being crafted.
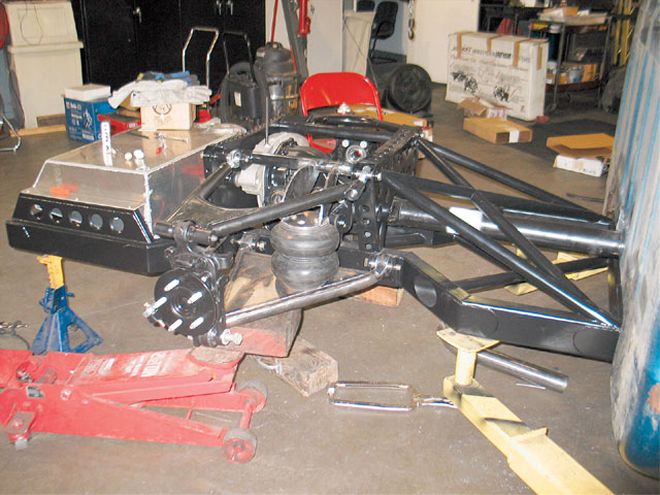 | At left is a sneak peek of our ultimate goal for this article. The rearend is built, everything has been painted, and the fuel cell is in place.
Our project deviates from the norm at the rear half of the frame. We'll be installing an independent rear suspension to aid in the handling department and to keep the driveline from moving up and down with the suspension. This will prevent us from having to modify the transmission tunnel inside the cab, like we would have to if using a solid axle that moved up and down, and will result in a true stock floor body-drop. Having an untouched floor will leave maximum legroom within the cab and keep things nice and comfy on long trips. You've seen trucks with traditional body-drops, right? Well, open the doors of those trucks and you'll notice the huge step up in the floor that is necessary to lower the cab down on the framerails. It eats up a ton of room in the cab, and we wanted to avoid that by using an IRS and by building our own chassis.
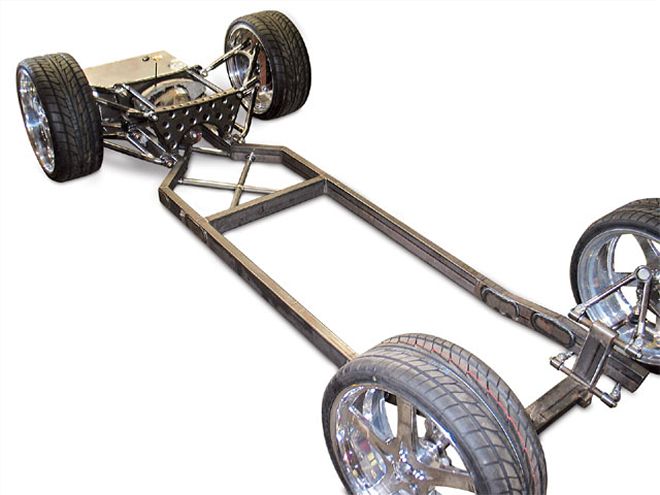
We'll be constructing our chassis out of 2x4x0.120-inch wall rectangular mild steel tubing. The new chassis is shorter in height than the stock GM piece, which means we won't need a big body-drop to bring the rocker panels down level with the bottom of the frame. We picked up the complete IRS from a local wrecking yard for $800. It was taken from an '03 Ford Expedition and features a durable 8.8-inch ring gear (think Mustang Cobra parts), 13-inch disc brakes, and a 70-inch track width.
We'll be able to adjust the ride height of our truck by installing Slam Specialties airbags between the suspension control arms and framerails. With an onboard air supply, we'll literally be able to adjust not only the height but ride quality of our truck from inside the cab. We'll get into the finer points of suspension control later on. For now, here's a look at the suspension and frame construction. This isn't a step-by-step guide on how to achieve our goal, but it will give you some insight into some awesome parts and build techniques that you can use on your own project. Let's go!
| At left is a sneak peek of our ultimate goal for this article. The rearend is built, everything has been painted, and the fuel cell is in place.
Our project deviates from the norm at the rear half of the frame. We'll be installing an independent rear suspension to aid in the handling department and to keep the driveline from moving up and down with the suspension. This will prevent us from having to modify the transmission tunnel inside the cab, like we would have to if using a solid axle that moved up and down, and will result in a true stock floor body-drop. Having an untouched floor will leave maximum legroom within the cab and keep things nice and comfy on long trips. You've seen trucks with traditional body-drops, right? Well, open the doors of those trucks and you'll notice the huge step up in the floor that is necessary to lower the cab down on the framerails. It eats up a ton of room in the cab, and we wanted to avoid that by using an IRS and by building our own chassis.
We'll be constructing our chassis out of 2x4x0.120-inch wall rectangular mild steel tubing. The new chassis is shorter in height than the stock GM piece, which means we won't need a big body-drop to bring the rocker panels down level with the bottom of the frame. We picked up the complete IRS from a local wrecking yard for $800. It was taken from an '03 Ford Expedition and features a durable 8.8-inch ring gear (think Mustang Cobra parts), 13-inch disc brakes, and a 70-inch track width.
We'll be able to adjust the ride height of our truck by installing Slam Specialties airbags between the suspension control arms and framerails. With an onboard air supply, we'll literally be able to adjust not only the height but ride quality of our truck from inside the cab. We'll get into the finer points of suspension control later on. For now, here's a look at the suspension and frame construction. This isn't a step-by-step guide on how to achieve our goal, but it will give you some insight into some awesome parts and build techniques that you can use on your own project. Let's go!


 | building Chassis For Our 1967 Chevy C10 chassis
The Final Word
| building Chassis For Our 1967 Chevy C10 chassis
The Final Word