When Alpine introduced their next-level 9-inch universal head units a while back, we took notice. Like the title implies, they upped the game by offering a 9-inch touch screen AVN unit in universal form as well as a few select applications, including late-model GM trucks and F-150s, but only for the lower trim levels on the Fords. Our Project F-150 has the high-end Sync system offered by Ford. And while we’re not one to complain about a nicely outfitted truck, the Ford interface leaves a lot to be desired in our opinion. So imagine our surprise when Alpine informed us that their second wave of 9-inch applications were being debuted at the CES show, and that we were on the very short list to get one into our truck (we got the first one)!
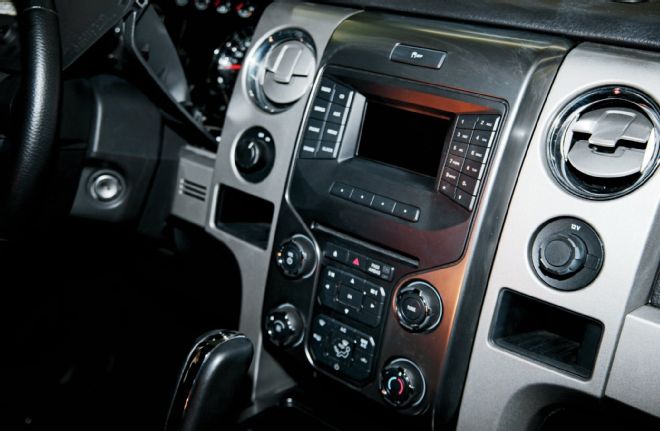
| Before Our stock F-150 head unit was full of features, but we just never fell in love with the interface. Plus the 4.2-inch screen wasn’t blowing anyone’s minds.
The official name for this unit is the Alpine X009-FD2 9-inch AVN system, and fits ’13-’14 F-150s with the MyFord 4.2-inch screen. Besides the largest full-system screen in the U.S. aftermarket, the X009 is paired with vehicle-specific Alpine Restyle dash kits. Each kit is Alpine engineered for use with a specific vehicle platform with color, finish and shape that matches the factory dash. The kits feature hard keys that fully replace the factory radio knobs and match the lighting in the factory instrument cluster. The Alpine Restyle dash systems consists of the X009, matching dash kit and all necessary accessories for plug-and-play installation, including an Alpine/vehicle-specific harness, antenna adapter (if necessary) and a two-way, data-driven vehicle interface module. From there the list is endless. Built-ins include programmable shortcut keys, HD Radio receiver, SiriusXM compatibility, Bluetooth wireless technology with audio streaming, free lifetime HERE Traffic RDS, HDMI input, Dual Zone video control for separate front and rear video sources, all while retaining select factory features like steering wheel controls and the voice activated Sync media. This unit also lets you monitor just about everything on the vehicle right on the screen, like climate display and control, tire pressure, battery voltage, door status, and the ability to read and reset check engine codes.
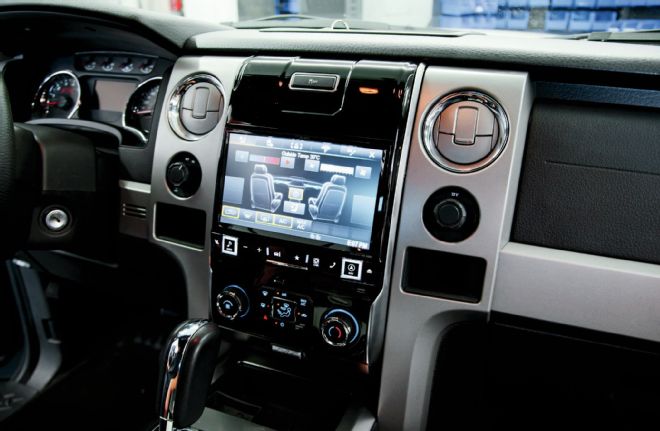
| After Bam! The X009 is a pricey piece at over $3K, but if you weigh in the fact that it comes with new HVAC controls and hard buttons and is compatible with all factory systems, along with a through-the-roof cool factor of the 9-inch screen, it’ll be money well spent. It’s worth noting that other X009 applications that don’t require as many components to be fully compatible are priced accordingly.
With a résumé like that we didn’t waste any time lining up an install at Alpine headquarters. While we were there, we also replaced the four separates with Alpine SPR 60C 6.5-inch components. Under the rear seat we added a PDR V75 5 channel amp, as well as a custom-made prototype box by Alpine’s own Steve Brown that holds a pair of shallow mount SWT 10S4 10-inch subwoofers. Finally, we upgraded our power source under the hood with a Kinetik HC1800S Pro power cell. Follow the install below and check out the Alpine website to see if an X009 is available for your truck.
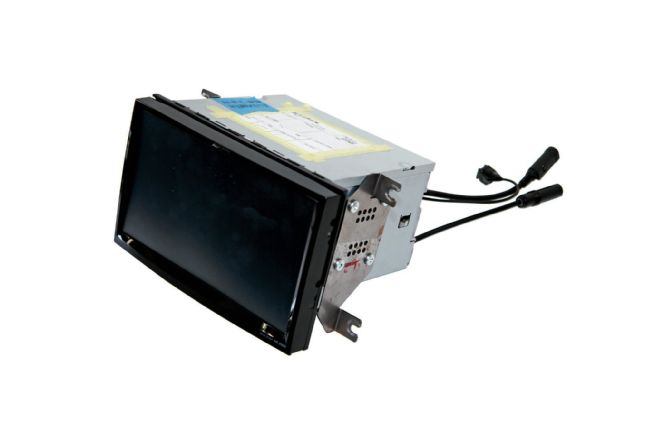
| Alpine X009 Headunit
The basic head unit looks like a standard piece, but there’s a lot going on behind the scenes. Part of what you pay for is having all of the guesswork of having everything integrate done for you.
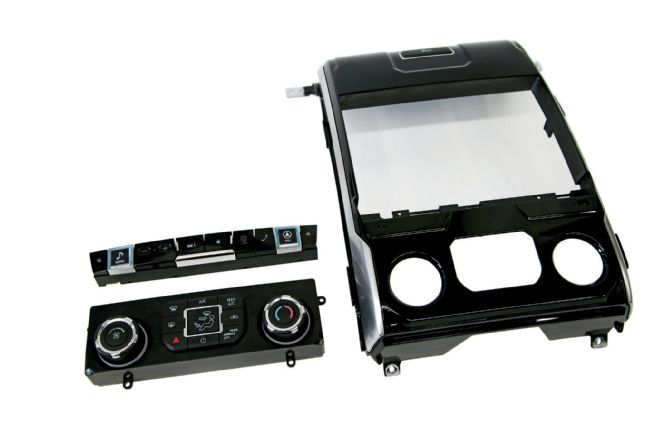
| Alpine Hvac Control Unit
Case in point: What you’re looking at are not factory Ford pieces; the hard buttons, HVAC controls, and bezel are all custom-made pieces for your specific vehicle.
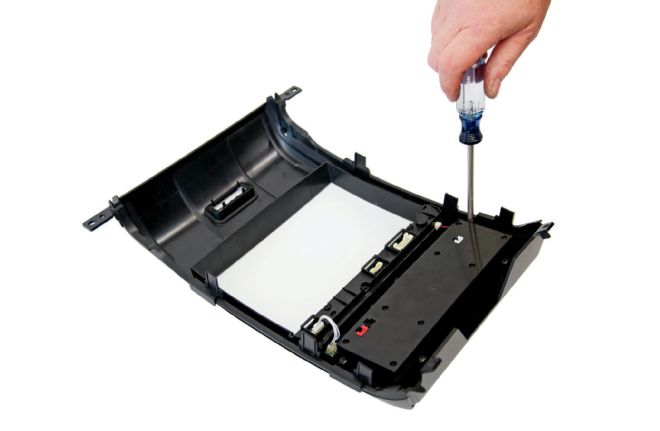
| Hvac Control Unit Install
Of course, yours will come pre-assembled from Alpine.
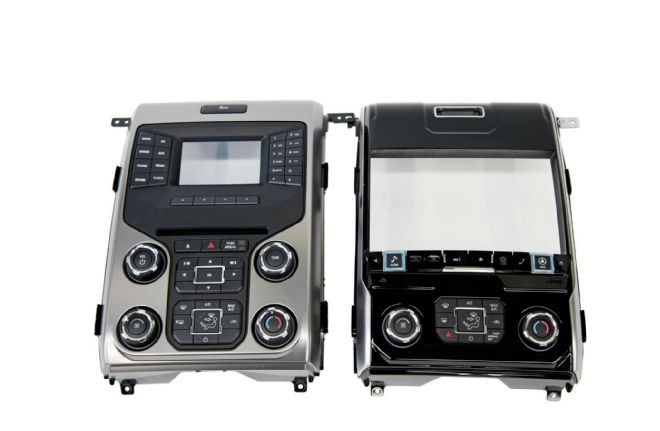
| Stock Vs Alpine Hvac And Trim Panel
A comparison of the complete bezel, minus the head unit. It’s clear that an enormous amount of engineering goes into making a 9-inch screen fit into this space.
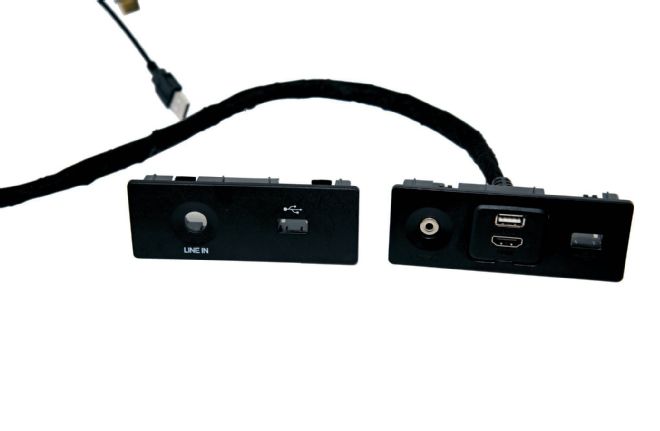
| Accessory Jack Panel
Another comparison of the accessory jacks in the center console versus the Alpine replacement. We’ll now have an extra USB port and a HDMI port to play with.
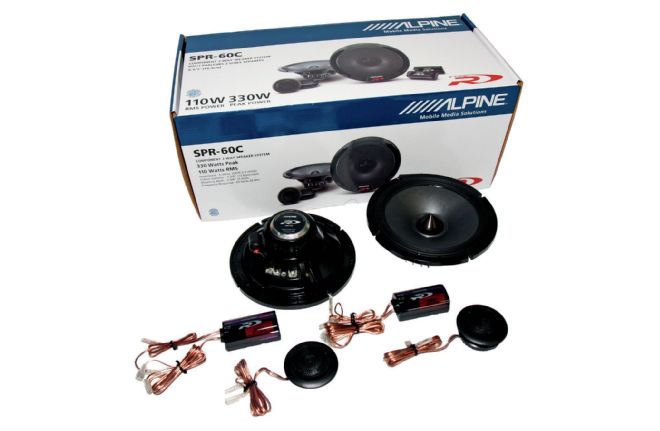
| Alpine Spr 60c Speaker Kit
We decided to go with a complete Alpine system, which included changing out our four door speakers with SPR 60C 6.5-inch components. Like all of the Alpine products they are installing, they were designed to pack a serious punch into a small space.

| Alpine Pdr V75 Amp
The PDR V75 5-channel amp was just what we needed to power the components while still delivering a punch to the subs. With this amp we will be running 75W RMS x 4 + 250W RMS x 1.
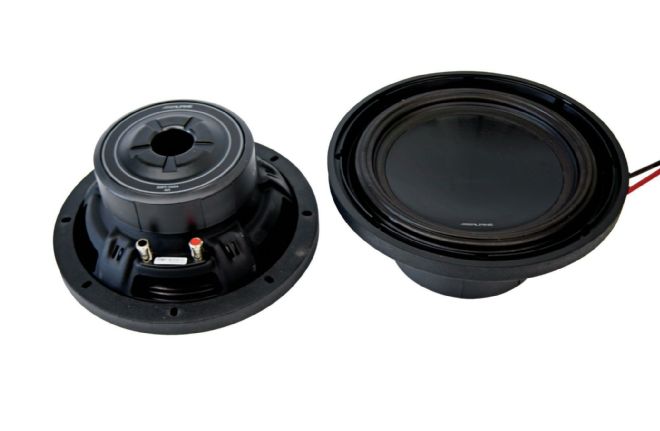
| Alpine Swt 10s4 Sub
With a depth of 4⅛ inches, the SWT 10S4 10-inch subwoofers were designed for exactly what we are using them for—fitment under the back seat of a truck. They are good for 350W RMS and 1,000W peak.
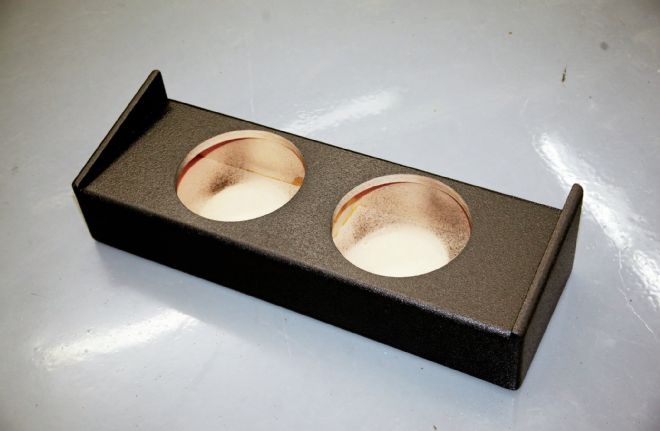
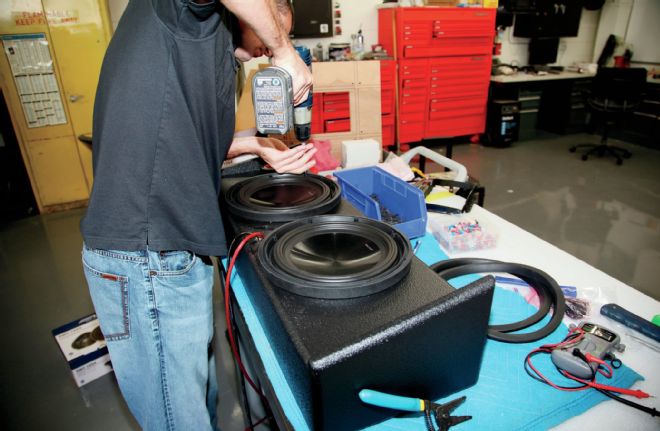
| Alpine F 150 Sub Box
Alpine’s own Steve Brown designed and built a sub enclosure specifically for our F-150. It was constructed with MDF and sprayed with urethane for a stealth look. We’re told that if there is enough demand it could become a production item.

| Kinetik Hc1800s Battery
The final piece of the puzzle was to upgrade our power source with this a Kinetik HC1800S Pro power cell. It’s the competition battery that the pros use, so it should do great with this setup.
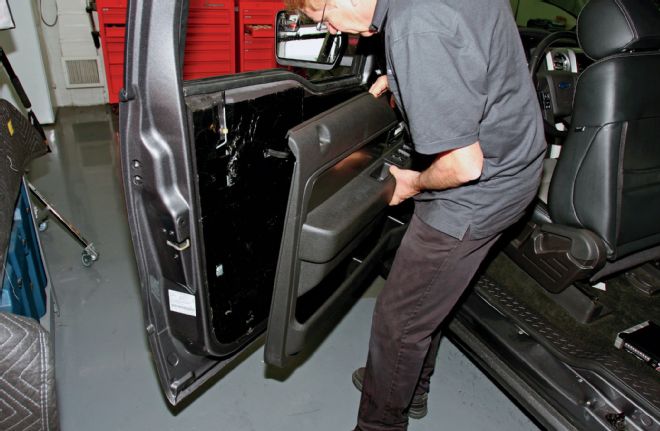
| Ford F 150 Door Panel Removal
At the install bay of Alpine HQ in Torrance, California, and with a refrigerator stocked with caffeinated beverages, the crew dove right in to the component swap by removing all four door panels.
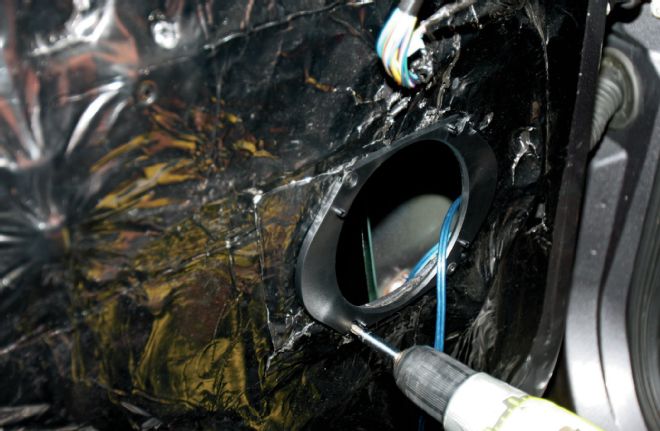
| Speaker Adapter
Our panels had been previously treated to a whole lot of sound deadener, but adapters to fit a 6½-inch component were never installed. We added them on all four corners and even sealed them up with a little more sound deadener.
| Mounting Crossover
The beauty of the small, lightweight crossovers is that they can be mounted with double-sided tape. We took it a step further and used more sound deadener.
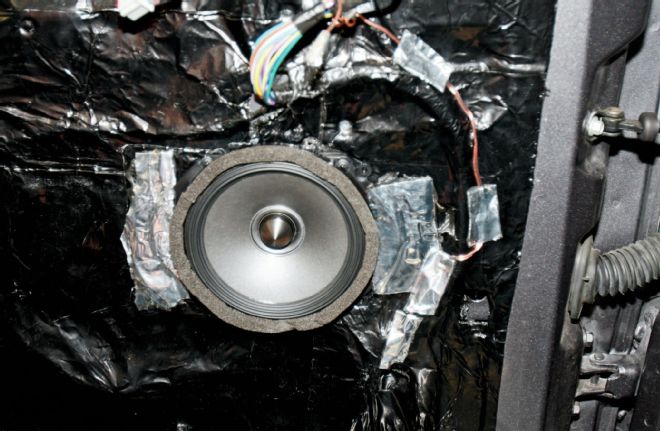
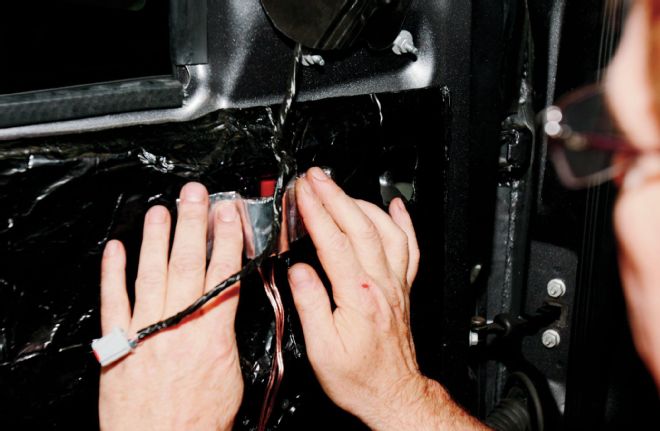
| Alpine Speaker Installed
Once everything was wired up, including the pigtail for the tweeter, we taped the wiring down with, you guessed it, more sound deadener. There will be no rattles in these doors.
| Drilling Hole For Tweeter
We decided to locate the tweeters in front of the door handles since a hole was already drilled there from the last set. A properly sized hole saw did the trick.

| Tweeter Mounted In Door
The tweeter cup simply screwed into place, and the tweeter popped in. Finally, the tweeter wires were connected and the panel was reinstalled.
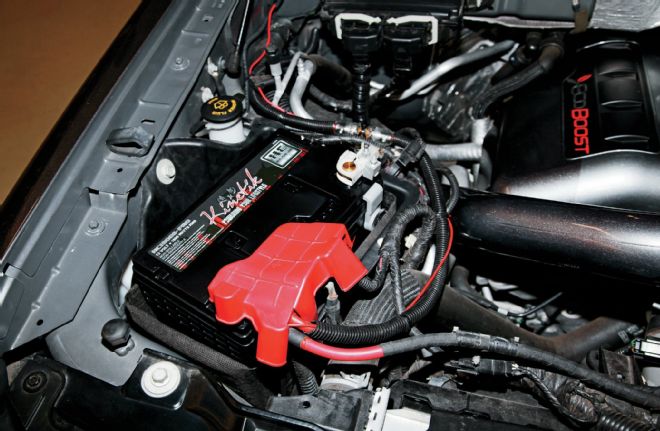
| Kinetik Battery Installed
Before we began to run wires for the amp, we swapped out our stock battery for the Kinetik unit. From there, we ran the power wire, complete with an auxiliary fuse and wire loom to keep the engine compartment looking clean.
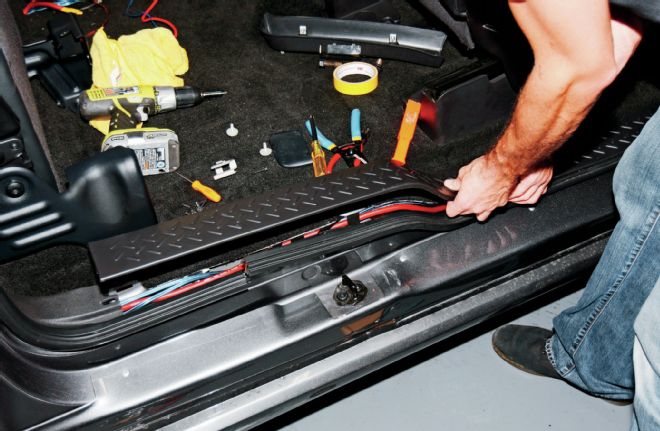
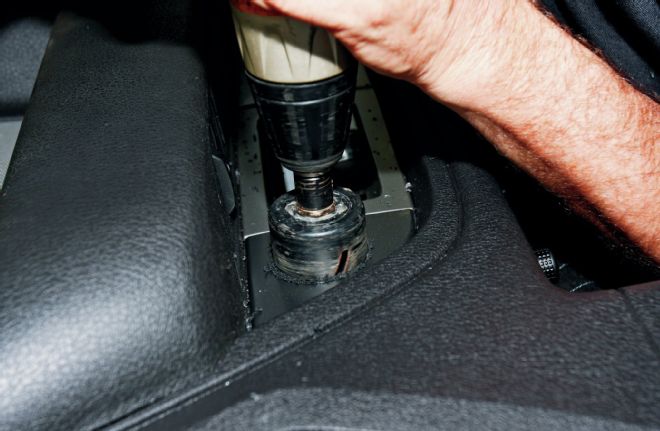
| Running Wires Under Kick Panel
The passenger kick panel and sill plate were removed, and the crew began to run the wires from front to back.
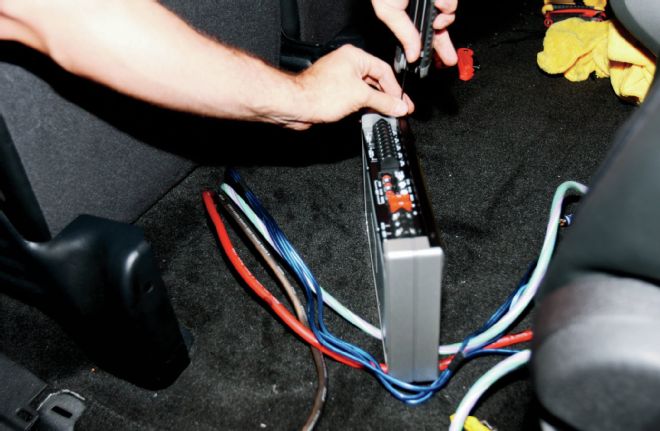
| Wiring Alpine Amp
After a ground wire was bolted down under the carpet behind the seat, it was met up with the power wire, inputs and sub wires, and 9-wire harness coming out of the carpet where the amp was to be mounted.
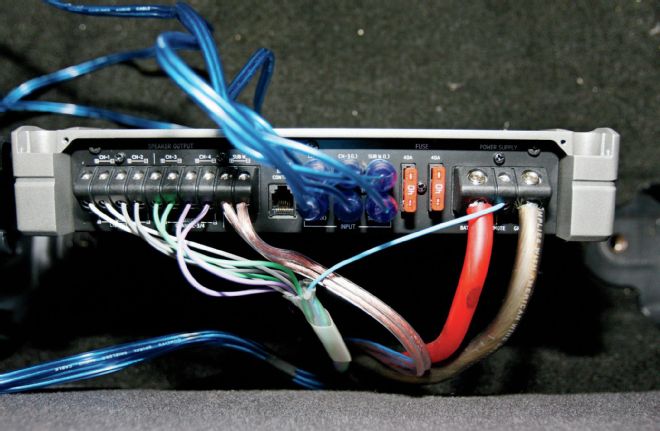
| Amp Wired
The amp is your basic plug-and-play, and all of our wiring was connected accordingly.
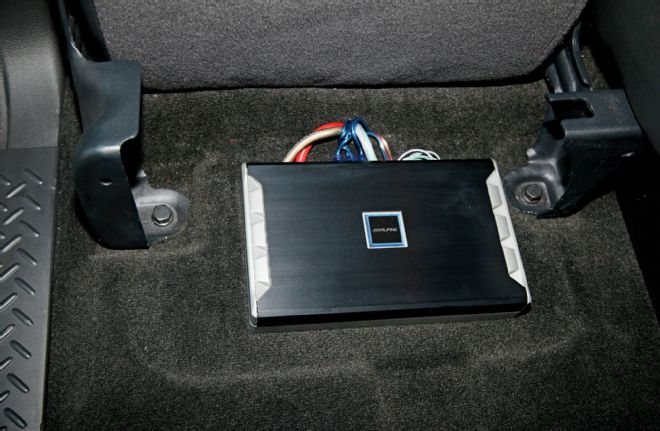
| Alpine Amp Installed
This spot under the passenger rear seat looks like it was made for our Alpine amp. Now it was time to tear apart the dash to terminate the other end of those wires.
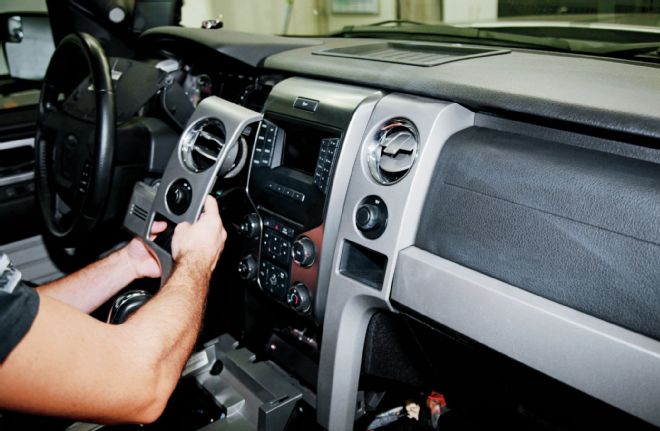
| Stock Bezel Removal
A lot of steps are involved to remove the stock head unit. For starters, the gauge cluster bezel has to come out to the left side AC bezel.
| Center Console Cover Removal
Down below, there are several screws that need to need to be removed from the center console so that it can slide out a few inches.
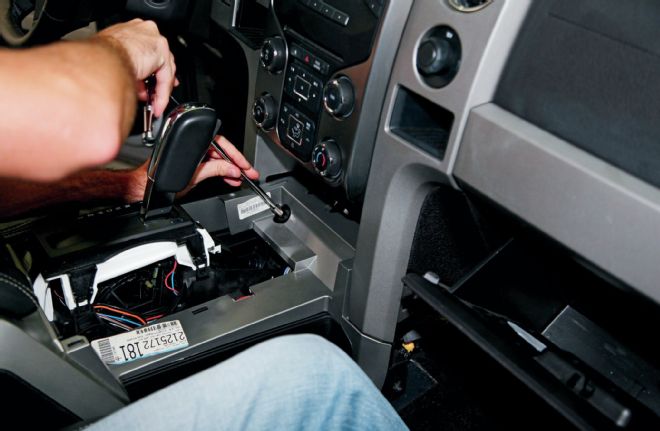
| Glove Box Removal
On the passenger side, the glove box needs to be dropped to access the airbag panel, all so the right side AC bezel can be removed.
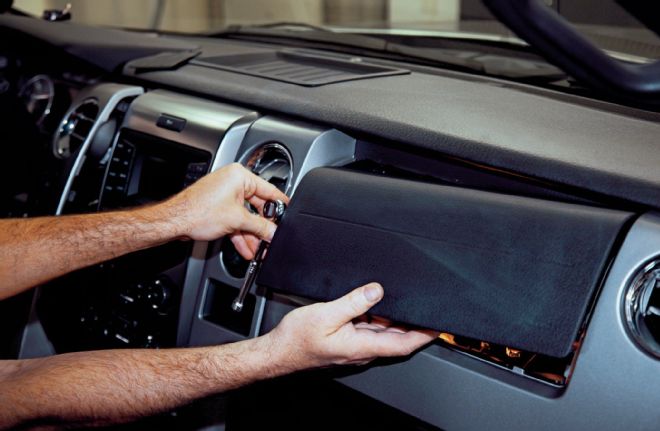
| Stock Bezel Removal
Finally, all of the main bezel screws were accessible and ready to be removed. The bezel was lifted off and set aside.
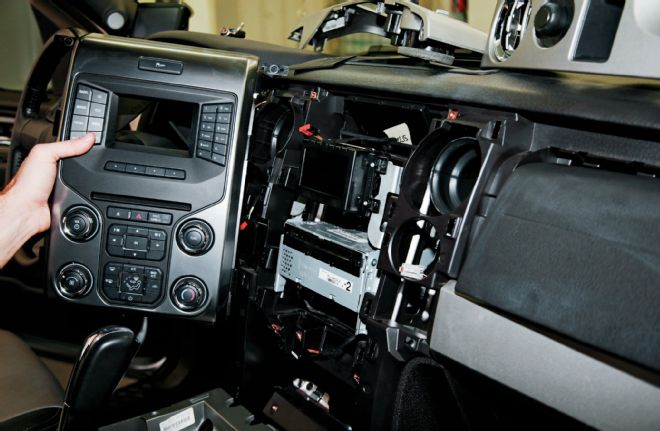
| Factory Head Unit Removal
The factory head unit was now unscrewed, unplugged, and removed from the truck.
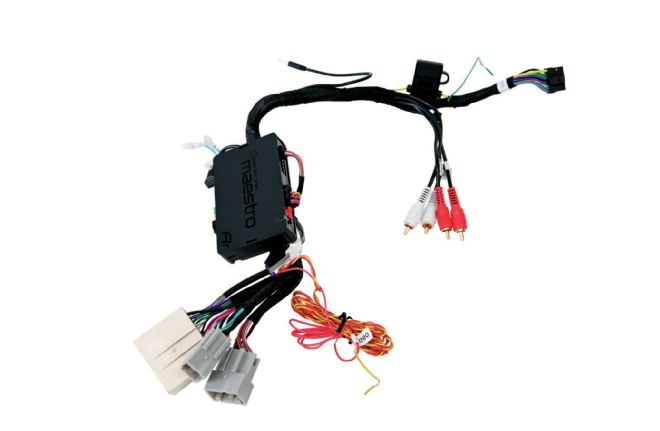
| X009 Wiring Harness
No matter what application you’re installing your X009 into, it will come with a custom wiring harness to make the installation as painless as possible.
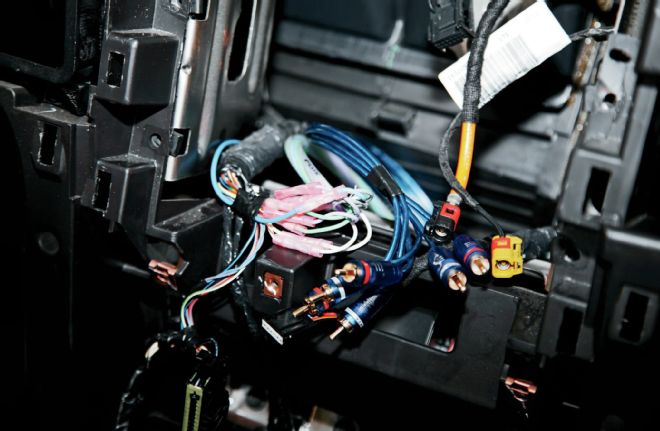
| Speaker Wires Rcas And Harness
Once we routed our inputs and speaker wire into place and connected the speakers, we simply made all the connections to the harness and the Alpine head unit.
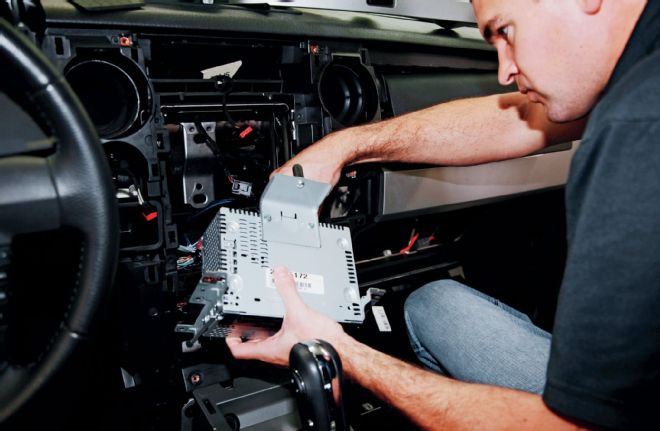
| X009 Head Unit Install
We set the X009 into place and screwed it down.
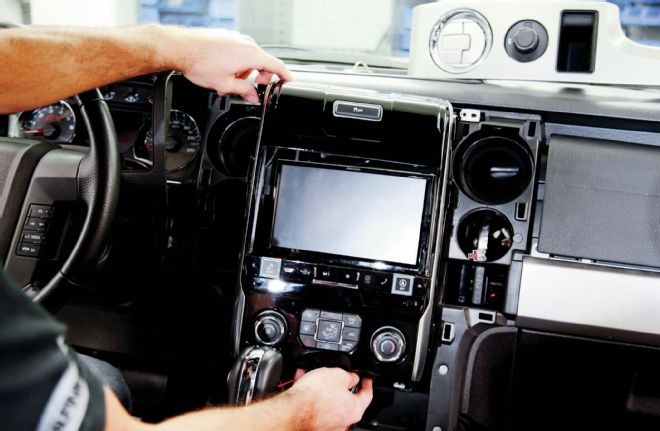
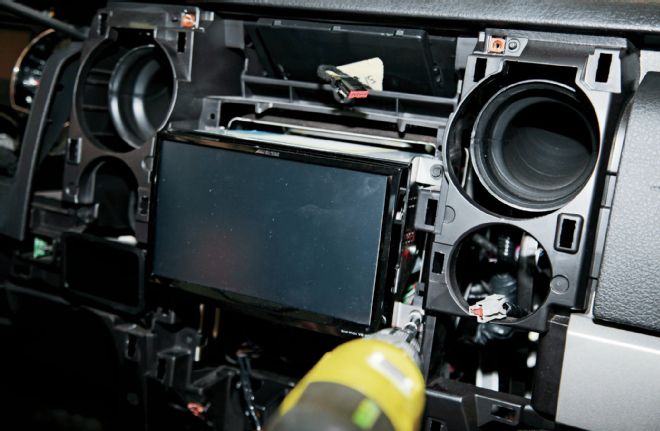
| Alpine Bezel Install
Now the HVAC and hard button harnesses were connected and the Alpine bezel was installed.
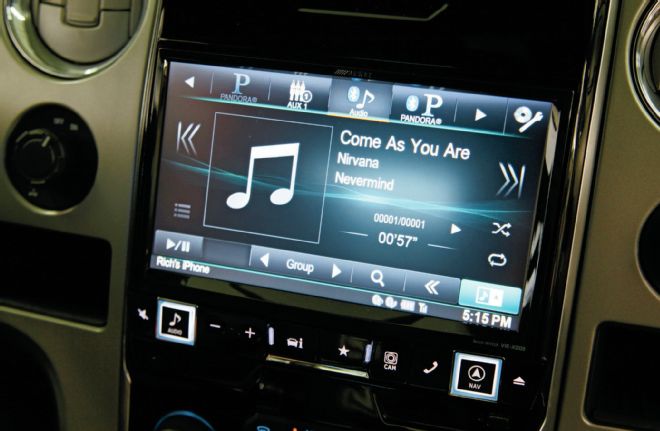
| Alpine X009 Head Unit Working
At this point we did a quick test, but soon there would be lots of fine-tuning to be done.
| Alpine Sub Install
The subs wires were connected before they were screwed into the sub enclosure.
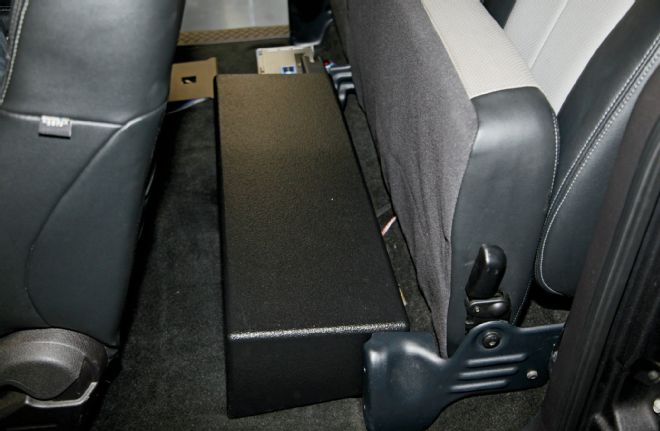
| Alpine Sub Box Installed
We connected the sub wires and slid the enclosure into its permanent home under the driver-side rear seat. After a long day the fun was finally about to begin!
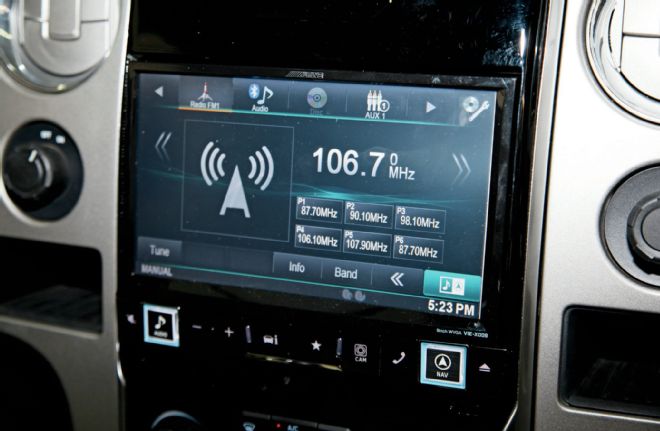
| Alpine X009 Head Unit Installed
The tuning process began with adjusting the amp with various music for an overall crisp sound. We were simply amazed at the amount of bass the small single amp and shallow 10s. Then we started playing with the X009 itself. Within about 10 minutes, we were connected to our phones through Bluetooth, we adjusted the AC with the touch screen, checked for DTC codes, monitored the engine, and fine-tuned the audio. With well-thought-out products like the X009, we can’t wait to see what Alpine comes up with next!