Changing the rear brakes on your Camry can be done in one hour with a few simple tools. Damage to the rear brakes often happens when you consistently overload the back seat or trunk. Other signs of rear brake damage include grinding, squealing or the car jerking forward when you apply the brakes. When attempting your own auto repairs, always use proper safety procedures. Dispose of your old brake pads at your local recycling center.
Pop the center cap off of the rim, and set it safely to the side. Loosen each of the lug nuts on the rim. Don’t remove them; only slightly loosen them with your lug wrench.
Raise the car with the car jack. The bottom of the tire should be at least 8 inches off the ground. Slide the jack stand into position on the left side of the car jack. Raise the jack stand to the same height as the car jack, and return the locking pin to secure its position.
Remove each of the lug nuts from the tire’s rim, and place them with the center cap. Before removing the final lug nut, hold the tire in its position to support it. Carefully slide the tire off the hub assembly, and move it to the side of your work area.
Remove the two caliper bolts securing the caliper unit with the socket wrench. The bolts are on the inner left and right sides of the caliper unit.
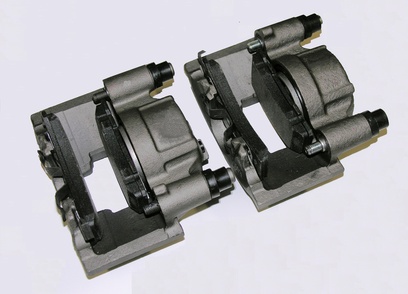
Slide the 5-gallon bucket near your work area, just outside of the wheel well. Using both hands, slowly remove the caliper unit, and set it down on the bucket.
Remove the support plates, anti-squeal shims and brakes by sliding them out of the caliper unit on both sides. Keep the shims and support plates for each side of the caliper unit together. This will help you remember which is for the inner and outer brakes.
Check the new brakes to make sure they aren’t damaged in any way. Inspect the rear rotor as well for any signs of damage while you have the caliper unit off.
Lift the hood of the Camry, and remove the top on the brake-fluid master cylinder. Use the piston driver to slowly rotate the caliper unit’s piston clockwise until it is completely down. You should feel it lock in place when it has reached the bottom of the bore.
Slide the brakes, anti-squeal shims and support plates back into position on both sides of the caliper unit.
Slowly ease the caliper unit back on the rotor. Start each of the caliper bolts by hand to ensure proper threading. Set the torque wrench to 14 pounds-feet, and completely tighten both caliper bolts.
Slide the tire back into position on the hub. Start each lug nut by hand, then tighten them in a star pattern until secured. Remove the jack stand, and lower the Camry to the ground. Check each lug nut to make sure they are all completely secured. Put the center cap back on the car’s rim. Check the brake-fluid level before returning the top to the brake-fluid master cylinder. Start the car, and pump the brakes a few times. When you feel the brake pedal stiffen, stop pumping. This procedure works for changing both passenger-side and driver's side rear brakes on a 1998 Toyota Camry.