Resetting a rear caliper piston will require two separate procedures depending on the type of make and model vehicle you're working on. Because caliper pistons sit close to the pads and rotors, providing brake pedal response, when you replace pads and/or rotors (both thicker than the old ones), you need to make room for them. To do this, the caliper piston needs to be reset. Once compressed, the pistons then need to expand again in order to provide an accurate braking response on demand with brake pedal depression.
Refer to the vehicle-specific repair manual before attempting to compress the rear caliper piston. Many vehicles employ a screw-in piston on rear calipers; however, there are some that can be compressed with a C-clamp or channel locks. Using the wrong tool can damage the pistons of the rear caliper.
Use the rear brake caliper piston tool with a 3/8-inch ratchet and 6-inch extension to screw the rear caliper in a clockwise fashion if applicable. This six-sided tool offers six different piston applications and covers most popular vehicles that use screw-in pistons. With a ratchet and extension, hold the caliper firmly, insert the cubed tool into the grooves in the piston and drive the piston fully into the bore.
Compress the rear caliper piston with a caliper piston reset tool kit. Although much more expensive than the tool used in Step 2, this kit will cover more vehicle applications and can also act as a C-clamp device for rear calipers that do not require a screw-in piston motion. Match the adapter up, if applicable, to the piston, then attach it to the driving bore of the tool. Insert the anchor inside the outer caliper housing and slowly turn the drive to compress the piston.
Use the same kit to compress a non-screw-in caliper piston in the same manner. Instead of inserting an adapter, place an old pad or type of brace between the drive of the tool and the piston and slowly tighten the bore drive of the tool.
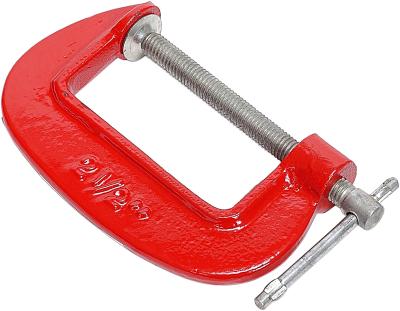
Use a 12-inch pair of channel locks or a 6-inch C-clamp if the caliper piston is hollow. Place an old pad against the piston and slowly compress the piston inward using the selected tool.
Pump the brake pedal once the rear brakes have been reassembled, the wheels replaced and the vehicle is back on the ground. Pumping the pedal will extend the pistons to contact the pads to the rotors and eliminate any sponginess in the brake pedal. Five to six times should suffice, but pump the pedal until it feels firm. On some import vehicles, the repair manual may specify to apply and disengage the parking brake while pumping the brake pedal. This is to help adjust the parking brake and rear piston.
Check the level of the brake fluid in the master cylinder once your brake pedal is firm. Add only new brake fluid which is specific for your vehicle. The repair manual will indicate (or the cover/cap of your master cylinder brake fluid reservoir) which type of fluid to use. The most common is DOT 3 brake fluid.