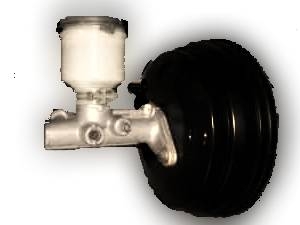
A brake booster is a device that provides extra braking power using either an electric or hydraulic mechanism to "boost" the brake power you get from stepping on the brake pedal. Brake boosters often work on vacuum pressure, but they also work in tandem with your master cylinder--which holds your brake fluid--to push brake fluid through your brake system. Over time, your booster may develop a vacuum leak or fail completely. If this happens, you'll need to know how to install a new one.
Open the hood and locate the brake booster. This is usually a round-shaped disc about 3 to 4 inches in thickness, but may be larger depending on your vehicle. It will be attached to the brake master cylinder on the firewall, usually on the driver's side.
Loosen and remove the tube nuts holding the brake line to the master cylinder with the open-ended wrench. There are four of these (four brake lines) that you will have to remove. Make sure you make note of where the lines are being disconnected from because they will have to be reconnected to the same area you removed them from. You may want to use masking tape and a permanent marker to mark the location of where the brake lines came from. You'll have to turn each tube nut counterclockwise to loosen and be especially careful that you do not damage the end of the nut while you are loosening it. These nuts, which damage easily, are a critical component that secures your brake line to the master cylinder.
Unbolt the two bolts holding the master cylinder to the brake booster and remove the master cylinder. Be sure to catch the brake fluid that drips and do not get any on your vehicle's paint.
Some brake boosters have bolts that you will be able to remove from the firewall. If your brake booster has these, unbolt them.
Unbolt the five or six--depending on your vehicle--nuts holding the brake booster in place under the dash behind your vehicle's brake pedal. Some of these may be difficult to reach, but you should be able to get them all with a regular socket wrench. You may have to use a socket extender to reach these nuts on some vehicles.
Pull the retaining clip or pin holding the brake booster to the brake pedal. To do this, pull the clip holding the pin in place using pliers. Then tap the pin out with the end of the pliers. The brake pedal should now be free of the brake booster.
Pull the brake booster out of the firewall and out of the engine bay.
Lower the new brake booster into the engine bay where the old brake booster used to be. Align the mounting bolts with the holes in the firewall and slide the new brake booster into place so that it sits tight against the firewall.
Align the mounting bracket on the back of the brake pedal with the bracket on the brake booster (inside the vehicle). Slide the retaining pin through both brackets, connecting them together. Replace the clip holding the retaining pin in place. There is a small hole in one end of the pin. Push the retaining clip into this hole.
Replace the bolts you removed from the back of the brake booster underneath the dash and behind the brake pedal, and re-tighten them (clockwise). You may need to use a socket extension to reach these bolts.
Replace the bolts on the firewall (if your vehicle had them), and re-tighten (clockwise).
Slide the back of the master cylinder (there is a hole in the back) over the end of the brake booster piston and slide the master cylinder back until it sits flush against the brake booster.
Replace the master cylinder mounting bolts and re-tighten them (clockwise).
Replace the tube nuts into the areas where you initially removed them and re-tighten. When tightening tube nuts, turn them counterclockwise until you feel resistance. Then give them an additional one-quarter turn.