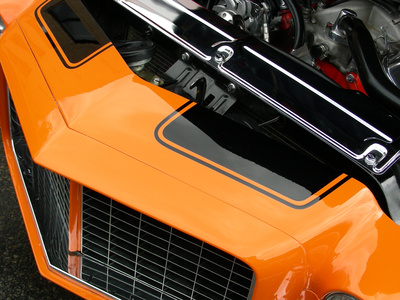
Chevy Impala engines can stall or refuse to run for any number of reasons. An engine diagnosis does not involve guesswork, but a methodical series of steps and checks to narrow the problem down. Starting with the most simple or obvious disorders can usually find the culprit, since they are often the most over-looked problems. You can perform your own diagnostic procedure by following some simple techniques that involve the main functions of the engine--spark and fuel delivery, being the most common fault systems. Finding out which system causes the problem can narrow the field down considerably.
Hook up a code reader to the wiring harness, per instructions. Start the engine--hopefully it will run long enough for a code indication to appear on the gauge. Write down any code warning indicator on a piece of paper. This procedure can narrow down or point to an exact malfunction in the fuel or electrical systems. Use a code book to decipher the problem description and the procedure for repair. This procedure works best at an auto repair facility. The repair facility will also have an oscilloscope that shows a raster pattern on its screen that will indicate any electrical abnormality, fuel or vacuum problem.
Check the gas level on the dash gauge. The gauge indicator might be defective or shorting out. Put at least two gallons of gas in the tank, using portable plastic containers. See if the engine will continue running after the gas has been added.
Remove the air cleaner element (on a standard carburetor engine) or the element that sits in the cold air filter box (on newer vehicles). Inspect the element for clogs by holding it up against a bright light. No light seen through the fiber element indicates a clogged air filter. A vehicle will not run if starved for air. Replace the element if it is dirty.
Open the hood and inspect all of the plug wire connections to the spark plugs. All wire connections should be tight. Check for any burnt wires near the exhaust manifold. Replace scuffed or melted wires. Reconnect any wires that have slipped from the connectors. Use pliers to tighten any plug connectors.
Make sure the high-tension coil wire seats firmly into its socket. If the vehicle is equipped with a High Energy Ignition (HEI), check the coil pack wire, making sure its connection to the coil pack remains tight and undamaged.
Hook the fuel pump pressure tester up to the fuel line that enters the throttle body (base of the carburetor). Turn the engine on and read the pressure in pounds. The pressure should read somewhere between 45 and 55 pounds per square inch (psi). Anything less than that indicates a problem with the fuel pump or fuel pump regulator. Replace as needed.
Clean the PVC valve that plugs into the valve cover. It is a small tube-like valve that contains a check ball inside that opens and closes, controlling vacuum to the engine. Spray carburetor cleaner inside the valve and shake it vigorously. When you hear the ball clacking inside the valve, place it back onto the valve cover and connect the vacuum hose to it.
Check for any other loose of disconnected vacuum lines at the carburetor or throttle body base (lower part of the carburetor). Make sure the connections have tight fittings and the hoses have no crimps or burn holes in them. Inspect and listen for vacuum leaks at the carburetor base or intake manifold gasket. Replace as needed.
Hook up a voltmeter with the engine running. The positive and negative leads on the voltmeter will connect to the positive and negative leads on the battery terminals. Make note of the charging volts. Proper charging volts for an Impala will register between 13.2 and 14.2 volts of charge. Any number significantly less than this indicates a discharge condition, depriving the engine of firing and charging voltage. Replace or repair the alternator as needed.
Check all carburetor linkage levers and the choke setting, if the vehicle has a standard bowl carburetor. Activate the throttle leakage by pumping it several times while looking down the throat of the carburetor. You should see fuel spurting down the throat with each pump. No fuel means the bowl setting or accelerator pump plunger has become defective. Rebuild the carburetor. Reattach any linkage that has become dislodged or disconnected.
Check fuel pump injectors (fuel injected engines) for adequate injection pressure at the injector tip. Dirty lines and injectors will cause a lean, starving condition and starve the engine once the rpm has been raised. Clean the fuel rail (fuel line assembly) with carburetor cleaner or replace any malfunctioning injector.
Use a timing light to check the ignition timing on your engine. Refer to your owner's manual for the proper degree setting. Hook the timing light up to the battery, and the wire clip to the number one plug wire (the first plug wire on the right side when you face the engine). Point the timing light at the crankshaft pulley and the timing tab on the engine block. If no reading can be seen, the engine may have skipped time on the timing chain or belt. This will cause a no-start or stalling engine. A timing chain or belt replacement will be required with this condition.
Check the catalytic converter for excessive backpressure and clogging. Stuff a rag over the tailpipe while the engine runs. A mild or no exhaust pressure condition can indicate a burnt-out or saturated catalytic converter--which chokes off the exhaust completely. Such defective converters will have to be replaced.