The universal joint, or U-joint, on the Chevy truck serves the very important function of transferring the torque and rotational speed of the engine to the rear drive wheels. The U-joint couples both ends of the main drive line, from the end of the transmission output shaft to the rear differential. The U-joint's unique design allows it to turn with the drive line, while flexing up and down and absorbing torque stress. The Chevy truck U-joint has finely machined needle bearings encased in a cap. Grease keeps the needle bearings rotating, lessening heat and friction. U-joints can wear out due to corrosion and age. Do-it-yourself repair persons can install their own new U-joints with some basic tools and simple steps.
Set the transmission selector in park or neutral, depending upon which transmission type you have. Apply the emergency brake. Lift the front of the truck chassis with a floor jack and place two jack stands under the frame. Lift the rear of the chassis and place two jack stands under the rear frame. Slide under the rear part of the vehicle near the differential. Use a scratch awl to scribe a line over the U-joint flange and the differential housing so you will know its proper orientation for reinstallation.
Remove the stud nuts on the U-joint flange with an end wrench. To access the uppermost nuts, release your emergency brake and turn the drive line so you can remove the other nuts. Reapply the emergency brake and remove the nuts with the end wrench. Gently lower the drive line on the pavement. Move to the tail shaft of the transmission, then pull the drive line out of the transmission output shaft. Stuff a rag in the end of the transmission seal.
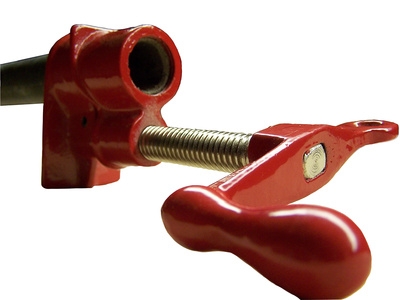
Place the drive line on a level surface. Use C-ring pliers to remove all of the C-ring retainer clips. Position a C-clamp around the end bearing caps. Place a small socket on one bearing cap and a larger socket over the other bearing cap. You need to secure the C-clamp ends over both sockets, so when you turn the threaded C-clamp handle, you will push one bearing cap through the yoke while the other cap exits from the other side.
Twist the C-clamp handle and remove the caps. Flip the drive line over and place the C-clamp on the other bearing caps using the same sockets. Twist the C-clamp handle and pop the caps free. Remove the bearing caps from the new U-joint. Apply some extra grease inside the new caps to hold the bearings in place. Gently tap a cap into the inner yoke with a hammer. Insert the new U joint cross-shaft into the yoke, pushing the shaft inside the bearing cap.
Insert the other bearing cap in the yoke and gently tap it with the hammer far enough in until the U-joint shaft slides inside the bearing cap. Place the sockets in position between the C-clamp, then twist the C-clamp threaded bolt clockwise to compress the caps in their yoke seats. Place the other two bearing caps on the end of the yoke and tap them in with a hammer. Use the sockets and C-clamp to compress both caps into their yoke seats.
Use the C-ring pliers to compress the C-ring retainers into their grooved seats on top of each bearing cap. If the U-joint has "zerk" fittings, place a lube gun hose nozzle on the zerk fitting and pump the grease gun handle to fill the U-joint. No zerk fitting indicates a nonserviceable, factory-packed U-joint.
Align the drive line with the rear differential mount, lining up the scribe mark that you etched in the flange and the different housing. Pull the rag from the transmission tail shaft. Place the drive line into the splined transmission tail shaft. Move to the rear of the drive line and lift it up into position against the differential housing. Screw the stud nuts on by hand.
Tighten two of the stud nuts with an end wrench. Release the emergency brake and set the shifter in neutral. Rotate the drive line, then set the vehicle in park and apply the emergency brake. Tighten the other two stud nuts with an end wrench. Lift the truck with the floor jack to remove the front and rear jack stands. Test drive the truck.