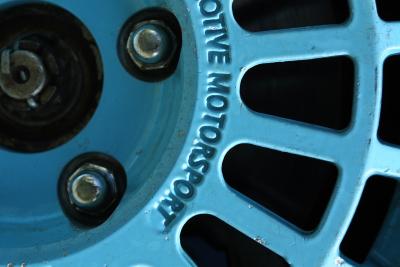
The lug nut studs are the main components that the lug nuts screw on to to connect the wheel to the wheel hub. Once the wheel is put onto the wheel hub, the lug nuts are screwed onto the lug nut studs. As the lug nuts are tightened with the lug wrench, the lug nuts pull the wheel tight to the wheel hub assembly. If the lug nuts are over tightened, they can cause the lug nut studs to break. Replace the lug nut studs immediately if the studs are cracked or broke.
Drive the vehicle to a safe area with a level surface.
Locate the wheel in which the lug nut studs will be replaced. Then, loosen all of the lug nuts from the wheel with a lug nut tool such as a lug wrench or a tire tool.
Jack the vehicle up where the lug nut studs will be replaced. Then, place a safety stand or jack stand under the designated jacking point for that corner of the vehicle. Slowly lower the vehicle onto the top of the stand. Once the full weight of the vehicle is on the stand, stop the jack and leave it in the up position as a extra safety measure.
Unscrew and remove all of the lug nuts from the wheel with the lug nut tool. Then, pull the wheel off and set it down.
Locate the brake caliper that is mounted on the side of the brake rotor. Remove the two mounting bolts from the back of the caliper with a ratchet and a socket. Slide the flat head screwdriver between the brake rotor and the outer brake pad that is located inside of the caliper. Pry the outer brake pad toward the back of the caliper until the brake caliper becomes loose enough to remove from the rotor.
Pull the brake caliper off with your hand and hang it to the closest suspension component with the mechanic's wire or a bungee strap. Hanging the caliper with the wire will prevent it from hanging by the brake line.
Look on the front of the brake rotor and see if there are any mounting screws or bolts holding the rotor to the wheel hub assembly. If so, remove the screws or bolts with a screwdriver or a ratchet and socket.
Pull the brake rotor straight off the wheel hub and place it on the ground. Turn the brake rotor and position it so that the lug nut studs can come out the rear of the wheel hub when tapping the stud with the hammer.
Hit the lug nut stud squarely in the center with the hand held sledge hammer until it comes out the back of the wheel hub. Then, reach around the back of the wheel hub and pull the stud out with your hand. Follow the same process for the remaining lug nut studs. Turn the brake rotor after each lug nut stud is removed so that the next lug nut stud can be removed from the back of the wheel hub.
Insert one of the new lug nut studs into one of the lug nut stud holes on the back of the wheel hub. Then, line up the grooves on the stud with the grooves inside of the stud hole. Tap the head of the stud with the sledge hammer until the stud is completely through the hole. Then, turn the rotor and install the remaining studs by following the same process. Once all of the studs are through the holes, screw a lug nut onto one of the studs to completely pull the stud through the hole.
Tighten the lug nut onto the stud until the head of the stud is completely flush with the back side of the wheel hub. Unscrew the lug nut and follow the same process to pull the studs completely through the holes. When finished, unscrew the lug nut and inspect all of the studs to ensure that all of them are completely through each lug nut stud hole.
Reinstall the brake rotor and then remove the wire from the brake caliper. Mount the brake caliper back over the brake rotor. Screw both rear bolts into the rear of the caliper and tighten with the ratchet and socket.
Slide the wheel back on and tighten with the lug nut tool. Jack the vehicle up and remove the safety stand. Lower the vehicle to the surface and finish tightening each lug nut with the lug nut tool until all of the lug nuts are completely tight.
Drive the vehicle for approximately 10minutes. Then, park the vehicle and shut the engine off. Recheck the tightness of the lug nuts with the tire tool to ensure that the lug nuts have completely seated all of the studs.