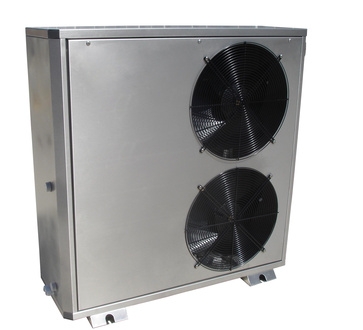
Without a working compressor, an air conditioning system just circulates air and runs up the electric bill. When an AC compressor has an electrical short, the only way to get the air conditioning system cooling again involves tapping into the refrigerant system and replacing the compressor. Before replacing the compressor, a technician will test the compressor with a multimeter. When working, an AC compressor pulls low-pressure vapor refrigerant from the inside coil and compresses it to a hot high-pressure vapor before pushing it to the condensing coil to cool and condense back to a liquid.
Move the condenser fan motor and its containment bracket using the proper size nut driver, usually 5/16-inch or 3/8-inch, to unscrew the mounting screws. Do not disconnect the fan motor wires. The wires will have enough length to move the fan without disconnecting them.
Remove the compressor's electrical-connection cover plate with a flat screwdriver. The wires from the condensing unit's control panel enter the compressor near the bottom. The cover plate has a slot on the side for a screwdriver. Push the screwdriver into the slot and pry the cover plate's locking-tab in to release the cover plate.
Label each wire, using the cover plate's wiring diagram, with masking tape and a pencil. The compressor has three wires connected to it. The diagram will label the wires R, S and C and show their positions.
Remove each wire from the compressor with pliers. The wire connectors pull straight out from the compressor's terminals.
Heat the refrigerant line connections at the compressor with an acetylene/oxygen torch set. The silver based solder used in the solder joints requires more heat to melt than propane based torches can deliver. Pull on the copper refrigerant lines with the pliers while heating them until they break free.
Remove the three compressor mounting bolts with an adjustable wrench. These bolts, found at the bottom of the compressor, connect the compressor to the condensing unit's base.
Lift the old compressor from the condensing unit.
Set the new compressor into the condensing unit. The mounting holes and the refrigerant line connections must line up with the new compressor.
Screw the mounting bolts through the compressor and into the condensing unit's base. Tighten the bolts with an adjustable wrench.
Remove the cap from the compressor's refrigerant line ports with pliers. The caps pull straight off.
Slide the refrigerant lines into their respective ports on the compressor. If any silver solder remains on the refrigerant lines from the old compressor then heating the lines with the torch will soften the solder enough for the lines to slide into the ports.
Solder the refrigerant lines to the compressor using the torch set and silver solder. Use silver solder with 5- to 15-percent silver content. Place the torch's flame on one side of the port. Touch the solder to the other side. The heat from the flame will draw the solder to it and form a leak-free joint.
Cool the solder joints with a wet rag.
Remove the new compressor's electrical-connection cover plate. Inspect the wiring diagram to determine where each wire connects. All compressors use the same three letters for wiring identification.
Push each wire connector onto its respective electrical terminal with pliers. Wiggle the connection with your fingers to verify a solid connection.
Push the compressor's electrical-connection cover plate into place.
Reconnect the fan.