You must bleed the air out of the brake lines anytime you disconnect brake line fluid, or when the master cylinder where you pour in the brake fluid runs too low enabling air to get into the lines. Air in the brake lines can cause a mushy brake pedal, or the pedal may skip and push down low to the floor when you hit the brakes, making for a dangerous situation. Bleeding the air out of the lines is not that difficult and will take very little of your time to do it.
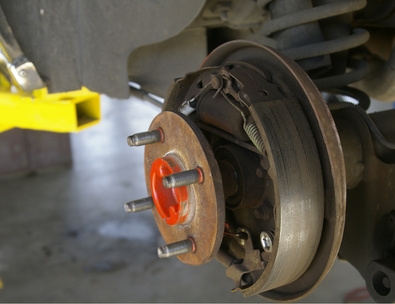
Locate the bleeder valve for the brakes; there is one behind each wheel. The valve will be on a part that has a rubber brake line hose connected to it. In some cases, you will need to remove the wheel for proper access to the valve.
Start at the rear wheels first for bleeding and work your way to the front wheels. If you have only disconnected one brake line, however, you should be able to just bleed that one wheel. If you changed your master cylinder, which feeds all four lines, then you must bleed all wheels.
Loosen the bleeder valve nut just enough to be sure you won't have any issues with it and that it isn't froze stuck. Retighten it right away without allowing any fluid to escape. If you have a frozen nut, spray some rust-buster penetrating oil on the nut and wait a little while and try again. Use a correctly sized wrench so that you do not strip the nut by slipping on it with a pliers or vice grips--or, even worse, break off the nut.
Remove the cover for the master cylinder and be sure the brake fluid is up to the top.
Get your rubber hose and bottle ready at the wheel you will be working on and obtain the right position for the hose and container. The object here is for the brake fluid, when it is under pressure through pumping the brake pedal, to run through the hose from the bleeder valve and into the bottle. The fluid can be reused as long as the container is clean.
Ensure you have your rubber gloves and eye goggles on. Find a helper to get in the car. With the engine running (if you have power brakes). Have your helper in the car pump on the brakes a few times until the pedal gets hard. Have your helper continue to apply pressure to the brake pedal. Now remove the bleeder valve just enough until air and fluid release from the valve. Be sure you have your hose in place for this or the fluid will begin to shoot out. The helpers foot should go to the floor. Tighten the bleeder valve back snug. Continue this process of pumping the brakes, applying pressure to the pedal, releasing the bleeder valve and tightening it back up until only fluid comes out of the bleeder valve and no air. This wheel is done.
Go back to the master cylinder and fill again to the top with more fluid. You may use the fluid you caught in your bottle or put in new fluid. During this process, you never want your master cylinder to run dry or too low because you will only get more air in the lines and you'll have to bleed all the wheels.
Wipe dry the bleeder nut area and any fluid that may have spilled over at the wheel so you can check for any possible leaks later after a test drive.