If the engine is still in the vehicle, look for one with as few miles as possible. Finding cheap small block with less than 100,000 miles may be difficult but not impossible. We own a 350 engine in a 1/2-ton pickup with 100,000 miles that uses very little oil and has acceptable fuel mileage that would make a perfect budget rebuilder.
Last month, we showed you how to diagnose a used engine. It's best to dig a little deeper to pull the heads and check out cylinder wear. If any cylinder exhibits a deep ridge at the top of the ring travel where maximum bore wear occurs, avoid this engine. The ridge indicates excessive cylinder bore taper that will not seal well with just new rings. The fingernail test is a good way to check for bore wear, but be sure what you are feeling isn't just mild carbon buildup. Scrub the carbon from the top of the cylinder and you may find minimal wear. Also look for excessive sludge in the lifter valley and valve covers. Excessive sludge usually indicates that the engine was not well cared for and means you need to keep looking.
Cheap Small Block: The Jerk And Clean
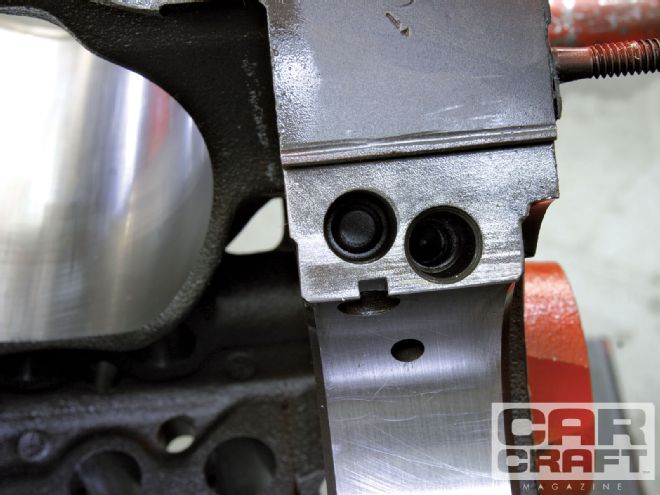
Before you take your cheap small block apart, the best plan is to mark all the rods and caps. The factory usually marks the main caps, but if not, indicate one through five and also note the orientation of the cap to the front of the engine. This is usually marked with an arrow, but if not, you'll need to create something, since this is critically important. Disassemble the engine slowly so you can eyeball any potential problem areas. The smart move is to completely disassemble the engine and have it professionally cleaned by a local machine shop. The only issue here is that this adds cost not just for cleaning but also to install new cam bearings. In our search to minimize cost, we're going to clean the engine ourselves and leave the old cam bearings in place.
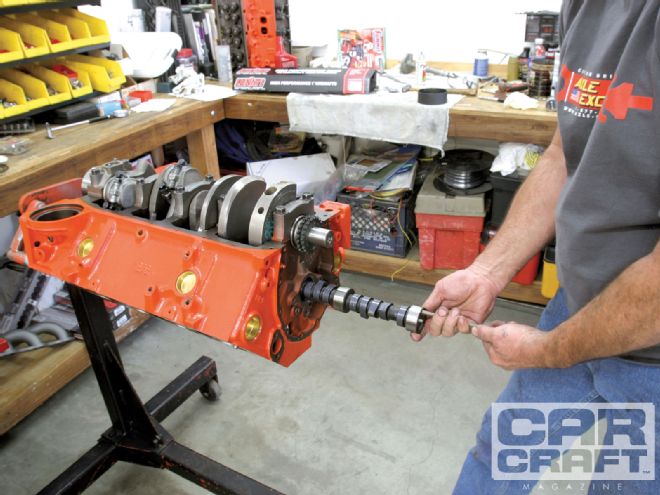
Short-Block Assembly
Most budget engine buildup stories bypass the important measuring stage or just use a Plastigauge. We've tested Plastigauge and found it less than reliable. It does serve a purpose to indicate excessively tight or loose clearances, but as a reliable indicator of specific clearances, we think it falls short. We prefer to measure everything with a micrometer and dial bore gauge. These are not items a budget car crafter will have in his toolbox, so you must either borrow them or-if you intend to build more than one or two engines in your life-consider purchasing the quality tools to invest in your engine-building skills. We prefer to check all the rod and main bearings for clearance as well as crankshaft endplay and rod side clearance. If you are reusing all the pistons and connecting rods, the rod side clearance should not be an issue, but it's worth checking just to make sure. We won't detail this part of the story-instead refer to the accompanying How-to References chart that lists the specific addresses on CarCraft.com with more details on how to perform these tasks.
 Start the assembly with the small oil plugs such as the front and rear main oil gallery plugs that are sometimes overlooked. Also make sure the plug under the rear main cap is in place as well as the plug below the driver side block deck surface.
Heads Up
Our long-block included a set of center-bolt iron heads fitted with the different intake bolt angle for the center four intake manifold bolts. These heads are the typical 76cc chambers that will produce barely more than an 8.0:1 compression ratio when used with dished pistons. Our engine should make around 8.5:1 compression with its flat-top pistons, 0.42-inch head gasket, and 0.020-inch deck height. We could improve compression by milling the heads, but that unfortunately drives up the cost. One trick to increase compression is using a stamped tin set of head gaskets rather than the composition gaskets used in the Fel-Pro kit. The Fel-Pro shim gasket part number is 7733SH1 and measures only 0.015 inch thick. This will increase the compression on a typical small-block by not quite 0.40 point compared with the composition gasket.
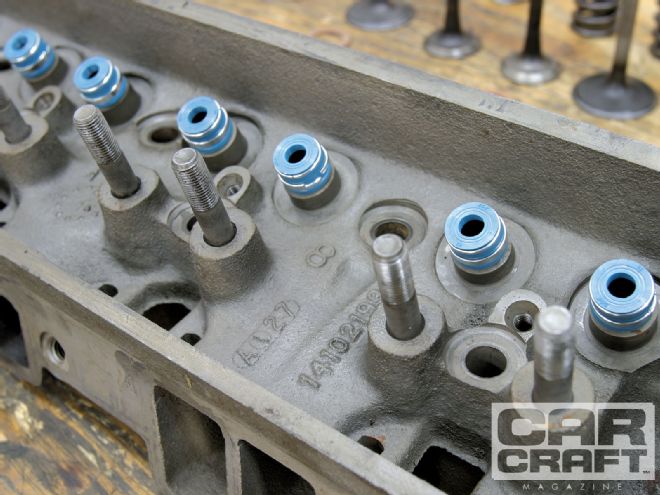 Another advantage of late-model heads is they are already machined for positive-style seals. Earlier heads will have to be machined, but you can purchase a simple tool that will cut for positive-style seals. After lapping the valves, we cleaned the heads and installed the new Viton seals for the intake valves that come in the Fel-Pro gasket set.
Long-Block Assembly
The final assembly is the easiest part with heads, valvetrain, intake, distributor, and the rest of the accessories. Original equipment head bolts offer superior thread engagement over budget high-performance bolts because the cheap bolts use a looser thread that will pull threads out of the block. We also splurged a little with a new Summit intake.
 The small-block Chevy drills the head boltholes into the water jacket, so you will need to apply thread sealer to the bottom four to six threads of each head bolt to prevent seepage. Torque the head bolts in a circular pattern in three steps from 35 to 45 to 65 ft-lb. Make sure to use engine oil under all the bolt heads to ensure a decent clamp load.
Cam Specs
The camshaft we chose was the Lunati Bare Bones flat-tappet cam and lifter kit. Lunati offers two different cams in this budget series. We chose the smaller of the two cams since this is a daily driver-style engine. Both cam and lifter packages are priced the same at less than $100 from Summit.
CAMSHAFT DURATION DURATION LIFT LOBE (ADV.) (0.050) (INCHES) SEPARATION Lunati 10000 LK, intake 270 204 0.420 112 Flat tappet, exhaust 280 214 0.443 Lunati 10001 LK, intake 280 214 0.443 112 Flat tappet, exhaust 290 224 0.465
Small-Block Chevy Spec Chart
The accompanying chart lists both recommended clearances and torque specs for a small-block Chevy. The ranges for some clearances are slightly wider since we are not blueprinting this engine. Factory specs list much tighter acceptable bearing clearances, but we prefer ours. Torque specs were taken from a '60s Chevrolet service manual and may be different for your engine based on the specific components used. This is especially true for aftermarket rod bolts.
COMPONENT CLEARANCE (INCHES) Main bearing 0.002-0.0030 Rod bearing 0.002-0.0030 Connecting rod side 0.009-or more Crankshaft endplay 0.005-0.010 Retainer to seal 0.050 minimum Valvespring coil bind 0.050 minimum
FASTENER TORQUE SPEC (LB-FT) Main cap 80 Connecting rod 45 (3/8-inch bolt) Oil pump 65 Cylinder head 65 Camshaft sprocket 20 Harmonic balancer 60
Chevrolet's published main bearing clearance range for a '66 283 is an amazing 0.0003 to 0.0034 inch.
PARTS LIST DESCRIPTION PN SOURCE PRICE Long-block NA Friend $100.00 Summit main bearings 173000 Summit Racing 12.95 Summit rod bearings 172000 Summit Racing 12.95 Summit piston rings, 4.00 133-139-00 Summit Racing 25.95 Fel-Pro gasket set, 1 piece rear main KS-2666 Summit Racing 99.95 Summit valvespring kit 174001 Summit Racing 63.95 Summit oil pump 121155SV Summit Racing 16.95 Melling oil pump pickup 55-S1 Summit Racing 6.95 Summit intake manifold PC22001 Summit Racing 99.50 Lunati cam and lifter package 10000LK Summit Racing 89.95 Summit carb cleaner, four cans SP1503 Summit Racing 23.80 Summit Chevy orange paint SP1005 Summit Racing 5.95 Brass freeze plug kit G1581 Summit Racing 13.95 Summit nonroller timing set G6501 Summit Racing 13.95 Summit assembly lube LUBE Summit Racing 1.95 Summit spark plug wires 868836 Summit Racing 29.95 Autolite spark plugs FRM-25 Summit Racing 12.00 GM HEI distributor Used Swap meet 5.00 Engine oil 10W-30 Local auto parts 10.00 Oil filter, Wix 51069 Local auto parts 6.75 TOTAL $652.40 GMPP rail-style 1.5 rocker arms 12495490 Summit Racing 59.95
How-to References
Measuring bearing clearance: carcraft.com/techarticles/ccrp_0805_high_performance_engines_bearing_clearance/index.html
How to measure rod bolt stretch: carcraft.com/techarticles/116_0609_using_rod_bolt_stretch_tool/index.html
Plastigauge vs. micrometer: carcraft.com/techfaq/116_0701_plastigage_vs_micrometer/index.html
How to degree a camshaft: carcraft.com/howto/116_0701_how_to_degree_a_camshaft/index.html
How to set valve lash: carcraft.com/howto/ccrp_0702_camshaft/index.html
How to start a new engine: carcraft.com/howto/ccrp_0903_how_to_start_a_new_engine/index.html