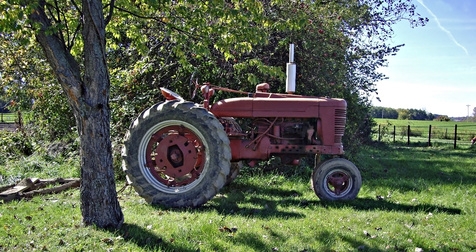
Popular with many collectors, the Farmall Super C tractor's glossy red paint and spartan appearance spark fond memories of the family farm in the young and old alike. Properly servicing these iron relics will prolong their life for the enjoyment of generations to come. Regular engine oil changes can help you achieve this goal.
As with any project, gathering the essential tools makes the job go smoothly. You'll need a correctly sized wrench, a hammer, some rags and a suitable container for collecting the used oil. Placing newspapers underneath the container will help absorb oil spillage. Use safety goggles and some leather or rubber gloves to protect your hands. Find these items at a farm supply store, along with the 30 weight non-detergent oil and filter required to do the job.
The tractor should warm up to operating temperature and parked on a flat gravel or hard dirt surface. After shutting off the engine, placing blocks behind the wheels will prevent accidental rolling of the unit. Fit the correct wrench securely to the plug, lightly tap it counterclockwise with a hammer to loosen it and collect the oil in the pan. If equipped with an oil filter, removing a small drain plug at the bottom of the canister lets the oil drain out. Next comes removal of the bolt holding the canister down and the replaceable cartridge underneath.
You can learn plenty about the tractor engine by examining the oil as it collects in the pan. Extremely black oil may indicate a high amount of hydrocarbons or unburned gasoline becoming a metal damaging soup of acids that attack the close metal tolerances of the motor. Frequent oil changes reduce that damaging buildup.
Discolorations in the oil--such as green globs of liquid representing antifreeze or milky white sludge indicating a buildup of condensation due to the engine not reaching operating temperature on a regular basis--can also appear. A light brown or dark tan shows oil that has done its job and needs changing. Clean the oil filter canister, if equipped, with a rag to remove any residue or sludge before reassembly.
After the oil has drained, replace the drain plug by screwing it in clockwise until finger tight. Use the wrench to continue tightening the plug until snug, tapping the wrench lightly once or twice with the hammer. If equipped with an oil filter, a new gasket should replace the cartridge and the canister housing before you insert the hold-down bolt and tighten in the same manner as the oil plug. You can transport used oil in a milk jug for recycling at an auto store. Of course, the newspapers and soiled rags go into a trash bag, along with the old filter.
The filler cap on top of the motor sits under the engine cowl. Use a funnel to slowly pour the five quarts of oil into the valve cover, making sure not to pour it so fast that it overflows the filler neck of the motor. When finished, you reinstall the filler cap and close the engine cowl. Once completed, you can start the tractor and let it idle until the oil pressure registers on the gauge. For best results, make one last scan of the work site for leaks at the oil plug or filter canister housing.