Transform your XXL Sportster 883cc into a lightning fast power-house with a 1200cc conversion kit. The 1200cc engine outshines little brother 883cc in every way; its outstanding performance is revered among Sportster aficionados. The upgrade may be a rather difficult task depending on your level of wrenching experience; however, the parts are relatively inexpensive, you won't need a lift to perform the conversion, and you may leave the engine in the frame. You will need to use the year-appropriate service manual as a reference throughout this project.
Review the year-appropriate service manual sections about disassembly and assembly of the engine before buying parts. Visit the Sportster homepage for tips to help ensure a successful rebuild. Review engine conversion information on the Internet, and read articles about the conversion in magazines such as HOT XL and Hot Rod Bike magazines. If you know a Harley mechanic, ask questions or for help as needed.
Decide whether to bore the old cylinders or replace with new ones; purchase new cylinders, if required.
Prepare your workspace with all required parts, tools and clean shop rags close at hand.
Move the bike outdoors, close the petcock and leave the engine running until it stalls; this burns most of the gas out of the carburetor.
Remove the gas tank first if the workspace is indoors. Otherwise, first remove the battery and hook up to a charger. Disconnect the fuel line from the carburetor. Hold a plastic cup under the fuel line to catch any last dribbles of gas, then dump back into the tank.
Remove the gas tank. Carefully set it aside.
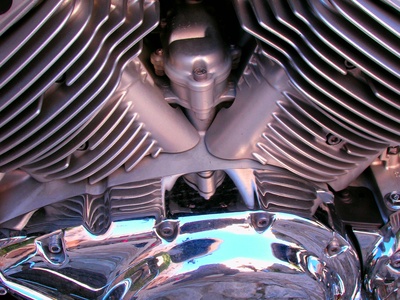
Remove spark plugs. Spread newspaper or other absorbent paper under the engine. Remove the rocker box to expose the rocker box assemblies by taking off the lid and spacers first.
Engage the bike in fourth or fifth gear, and roll it a few inches to enable the push rods to settle at their lowest point. Remove the push rods and label them with self-adhesive labels by location, indicating which end is the top to ensure they go back in the same way.
Remove the rocker box assemblies and, with a rag, sop up oil dribbles, which may accumulate in the exhaust side of the rockers.
Refer to the service manual instructions for removing engine mount bolts, head bolts, carburetor and throttle cables.
Remove the heads. Replace old gaskets and o-rings with new ones.
Clean the work space of dirt and grit before proceeding.
Remove the cylinders by pulling them straight out of the engine several inches and just before they are out, stuff a couple of clean rags into the cylinder bore in the engine case and around the connecting rod. Then remove completely and set aside.
Remove base gasket and clean all surfaces thoroughly with a clean rag. Peel off any material stuck to the case; use a new razor blade.
Remove circlip from one side of piston with awl or screwdriver. Push the wrist pin out with your finger, and lift off the old piston.
Insert the new 1200cc cylinders and heads according to the service manual—it is the most reliable resource available to complete the conversion. If in doubt about anything, refer to a Harley mechanic.