The Chevrolet Silverado is a full-size pickup truck manufactured by GM that features four-wheel disc brakes. Changing the disc brakes involves replacing the brake pads. The Silverado's larger brake pads actually make this task less demanding than it is on smaller cars. The Silverado's big brakes are more easily manipulated than the small parts of an ordinary car. A Saturday mechanic can often replace the Silverado's brakes in an afternoon, if all the pieces are ready to be put together.
Park the Silverado on a flat and solid surface.
Loosen the lug nuts on the wheels. You need to change the brakes on both sides simultaneously to prevent uneven braking, but you don't have to change the pads on the front and back ends at the same time.
Lift the truck off the ground using the floor jack at a frame point. Use the rear differential and the front cross-member.
Place jacks stands under the frame, next to the wheel wells on both sides of the truck.
Lower the truck onto the jack stands.
Remove the lug nuts and then the tires.
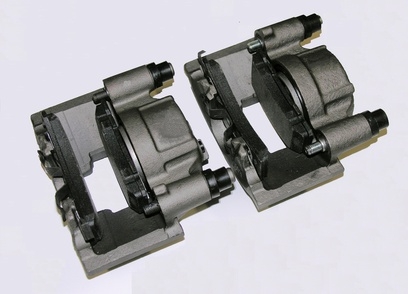
Use the wrench and socket set to loosen the outer set of bolts (caliper pins) on the back side of the brake caliper.
Remove the inner set of bolts on the brake assembly.
Use the screwdriver between the assembly and the rotor to pry the brake assembly off.
Remove the caliper pins and separate the brake caliper from the brake housing.
Place the wooden block over the caliper piston and then hook the C-clamp over the wooden block and the brake caliper.
Tighten the C-clamp until about 1/8-inch of the piston from the caliper housing is exposed.
Knock out the brake pads using the handle of the screwdriver if necessary.
Use the screwdriver to pop out the brake pad clips on the housing assembly. They may come out with the brake pads or may have corroded away.
Use the steel brush or steel wool to clean all of the corrosion and debris off the brake assembly housing.
Pop in the new brake pad clips into the brake pad tracks.
Insert the brake pads into their tracks on the brake assembly housing. The pads should face inwards.
Place the assembly housing over the brake rotor and screw in the bolts to hold it in place.
Remove the C-clamp and wooden block from the brake caliper, then immediately place it over the brake assembly housing.
Insert the caliper pins to hold the brake caliper in place.
Tighten the housing bolts and the caliper pins as much as possible using the wrench and socket set.
Repeat the brake change for the other side of the Silverado.
Set the tires on the axle hubs squarely, then screw on the lug nuts by hand to hold them in place.
Lift the end of the truck at the same point you used previously.
Remove the jack stands, then lower the truck to the ground.
Tighten all of the lug nuts on the Sliverado using the tire iron.